アドベントカレンダー12日目です。
はじめに
今日は Day 5 のコメントで熱い情報をもらったので、Visual Studio 2015 で GStreamer アプリを開発する方法について書きます。
Visual Studio の設定はこのbugzillaのスレッドを元にしています。
このスレッドを見つけてくれた musashi_dog さんに感謝です。ありがとうございました。
ゴール
- Windows 10 (x64)
- Microsoft Visual Studio Community 2015
- GStremaer 1.6.1
こんな感じ
手順
- Microsoft Visual Studio Community 2015 のインストール
- GStreamer のインストール
- Project の作成・設定
- 動作確認
詳細
Microsoft Visual Studio Community 2015 のインストール
Visual Studio のサイトから、Visual Studio Community をダウンロードし、インストールしてください。
いろんな言語の選択がありますが、とりあえずC++が使えれば問題ありません。
GStreamer のインストール
GStreamer のダウンロードページから、GStreamer 1.6.1をダウンロードします。
ちょっとイマドキな見た目ではないので、わかりにくいかも...なので、ダウンロードすべきファイルはスクリーンショットを参照してください。
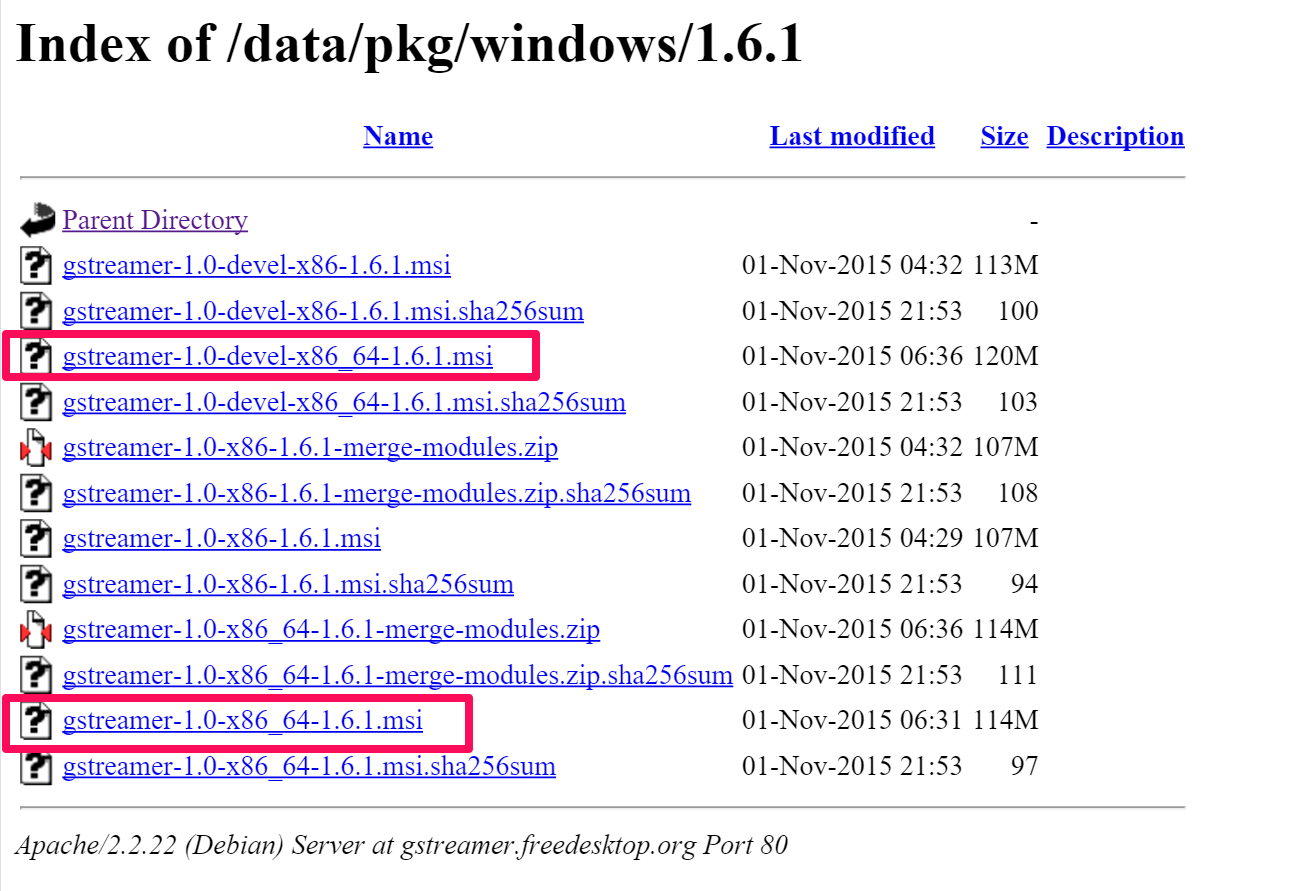
また、インストールの際は Complete を選択してください。
Project の作成・設定
作成
Project は "Win32 Console Application" で作りましょう。
設定1: ターゲットを x64 に

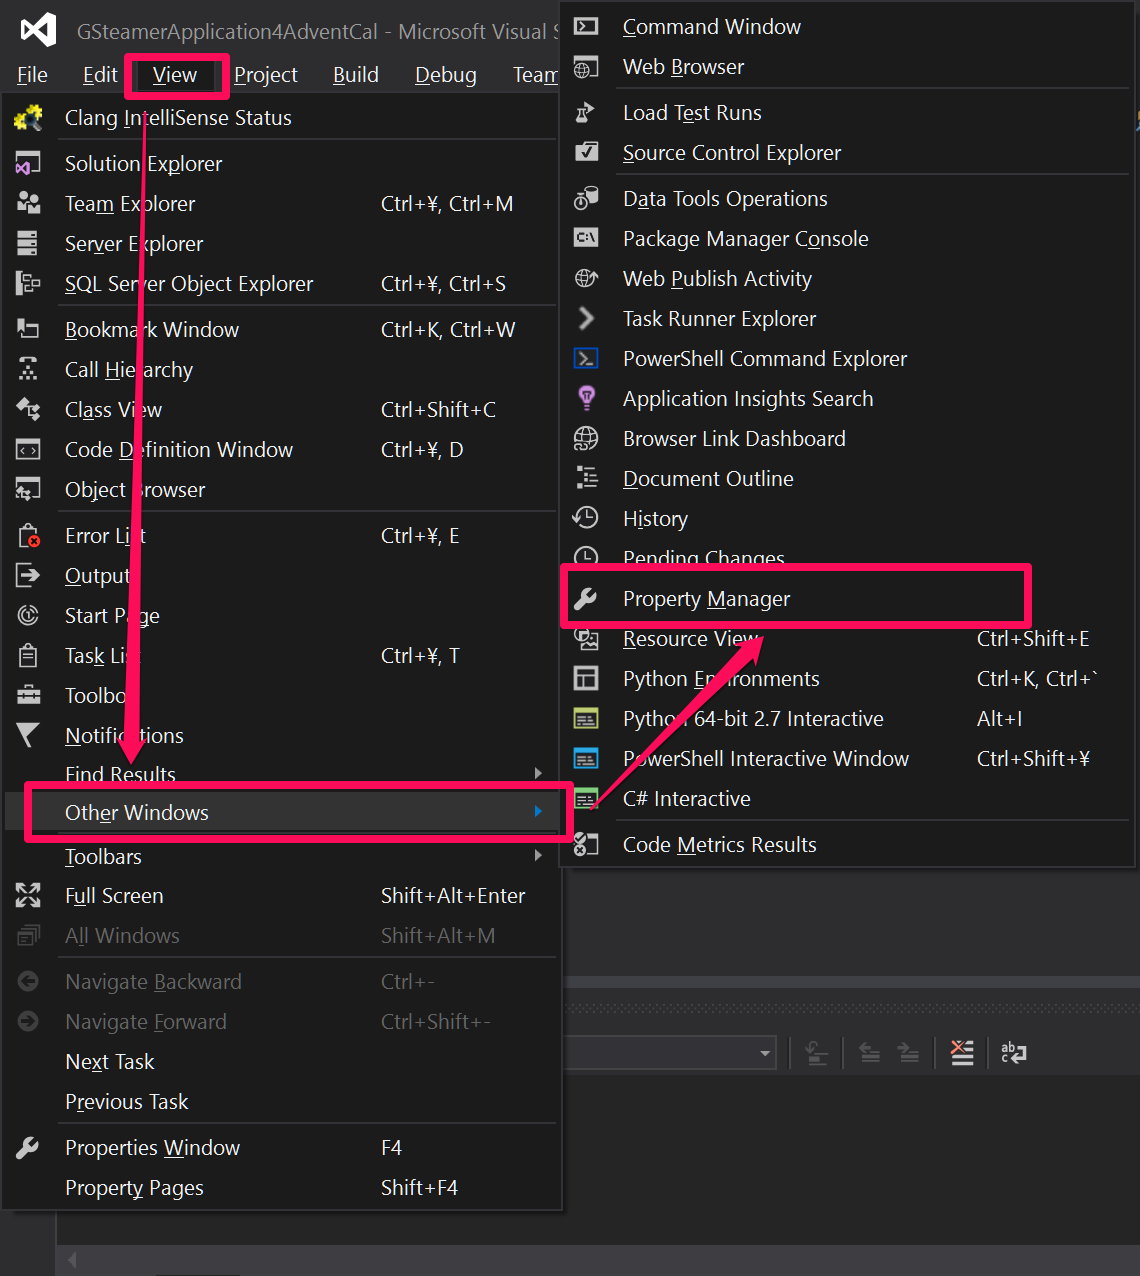
設定2: Property Manager を表示
設定3: GStreamer のプロパティシートを適用
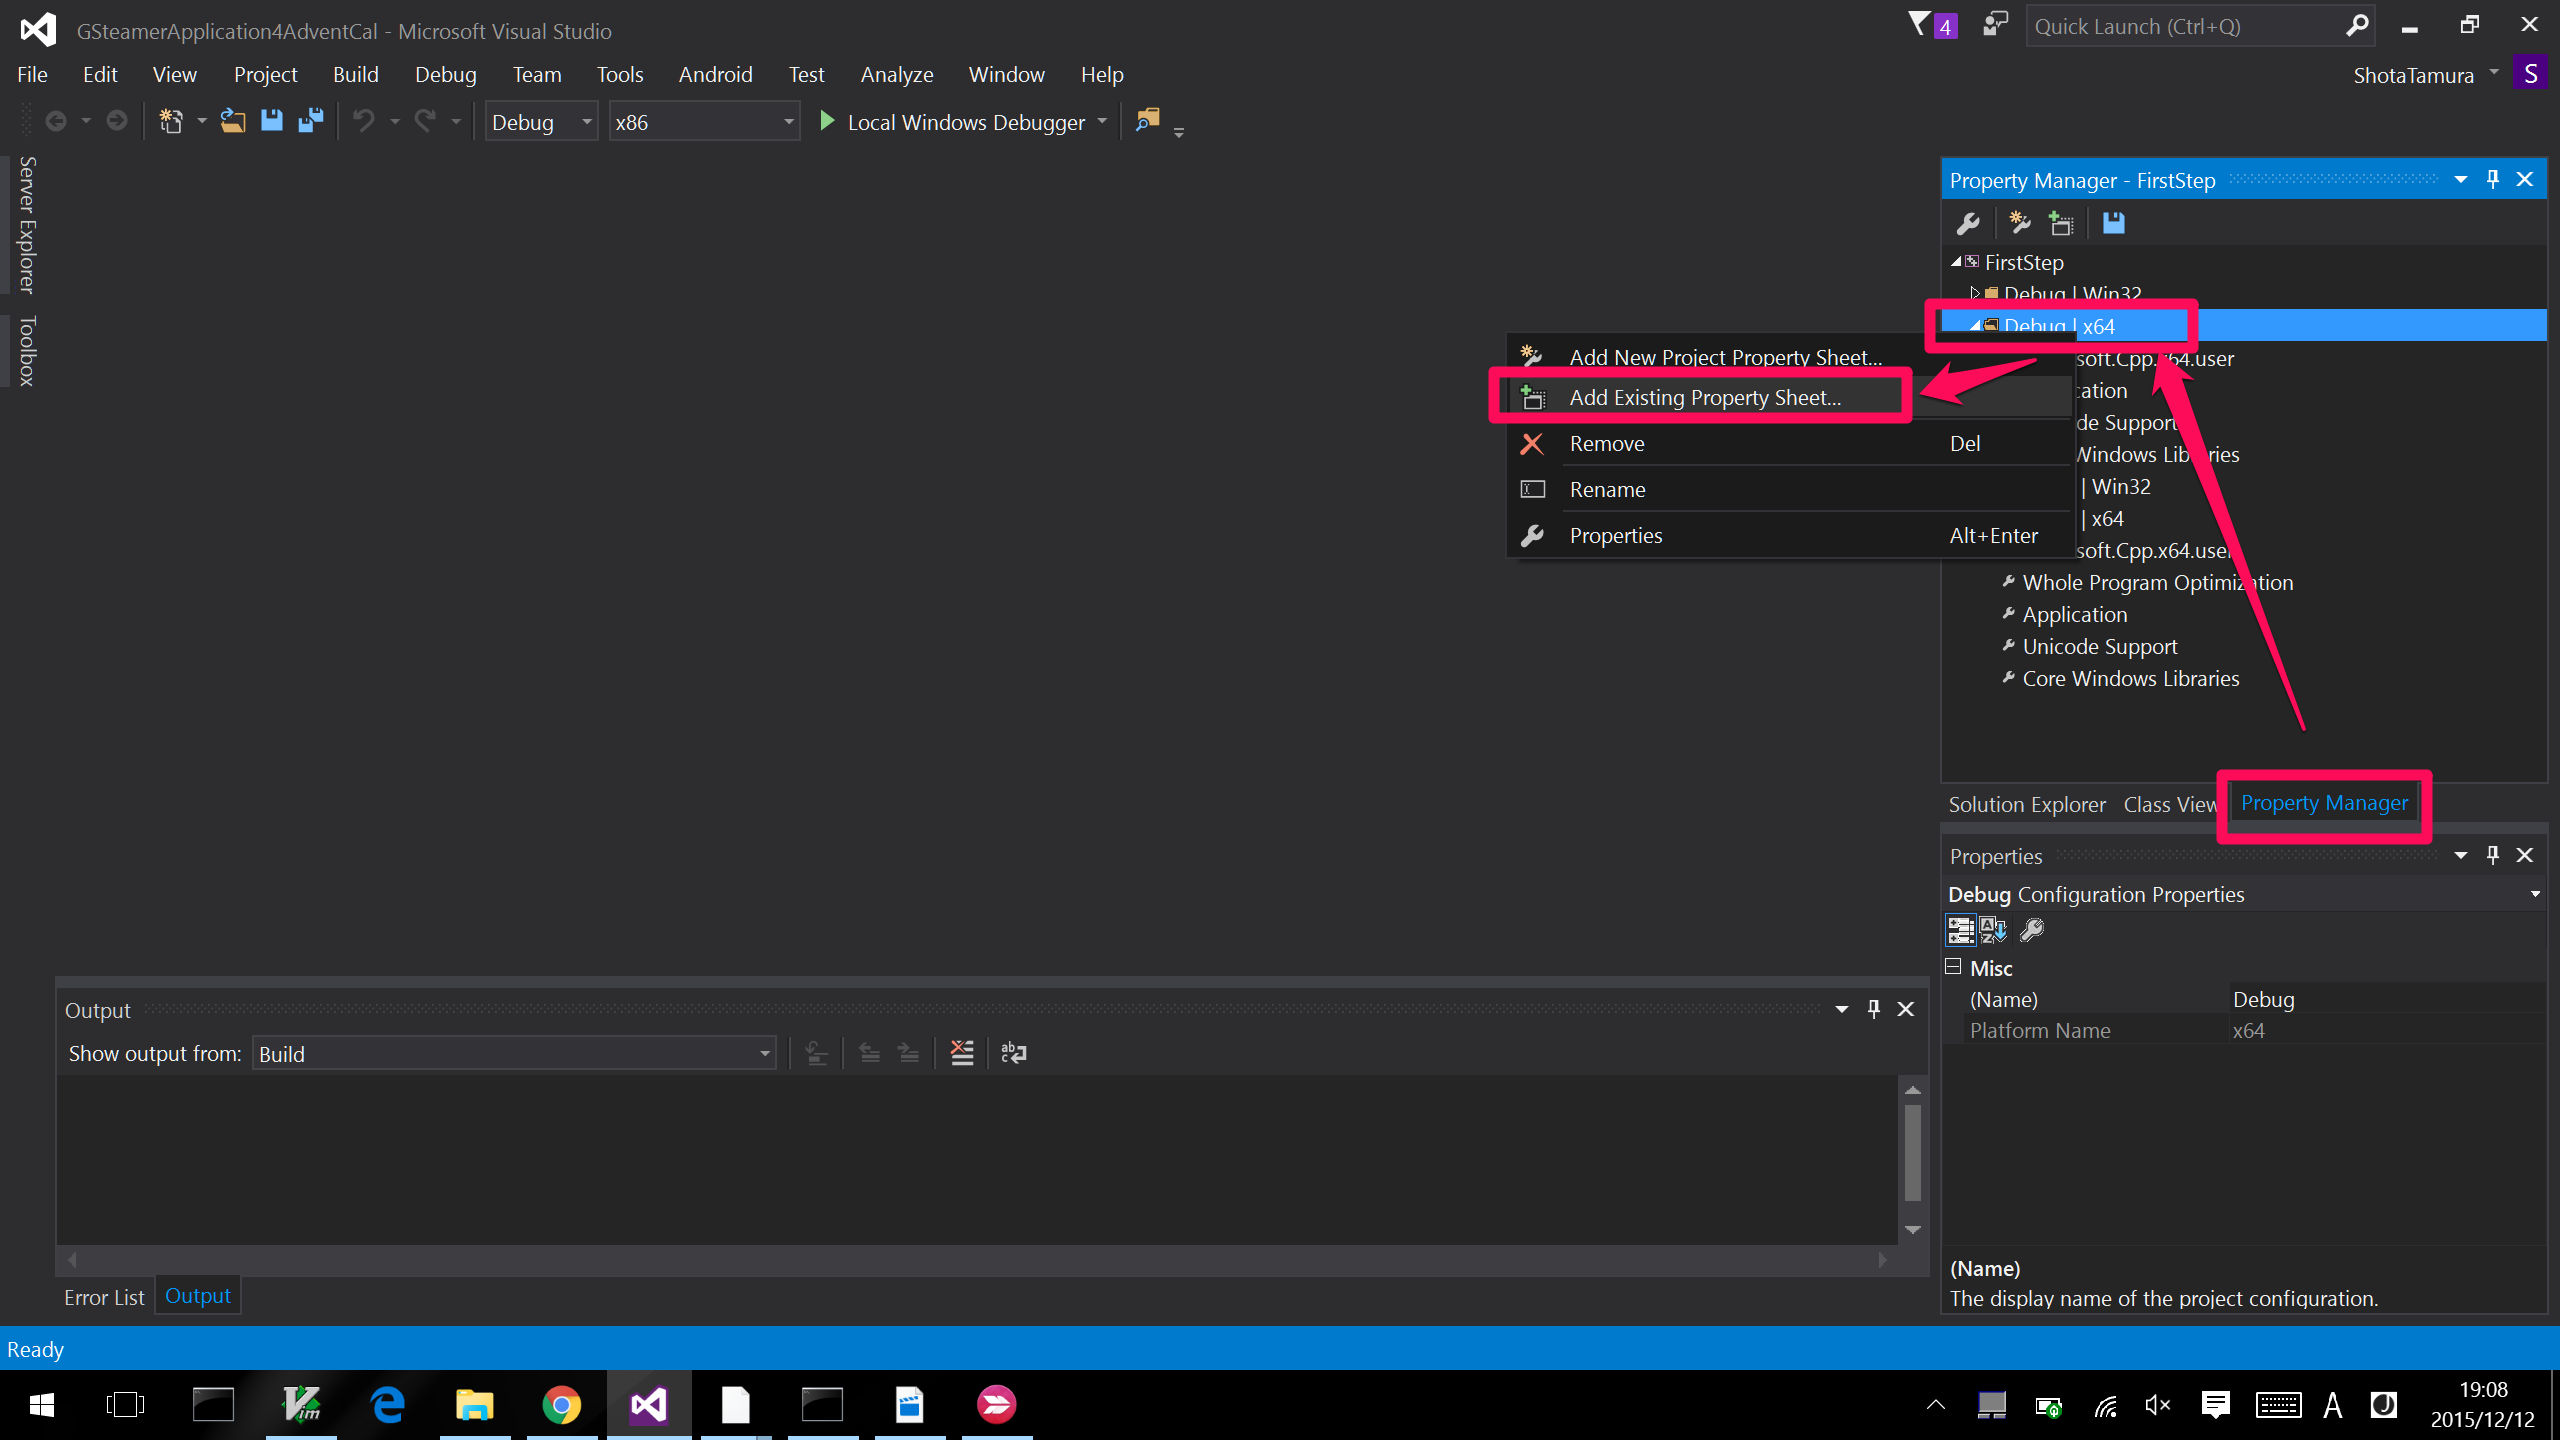
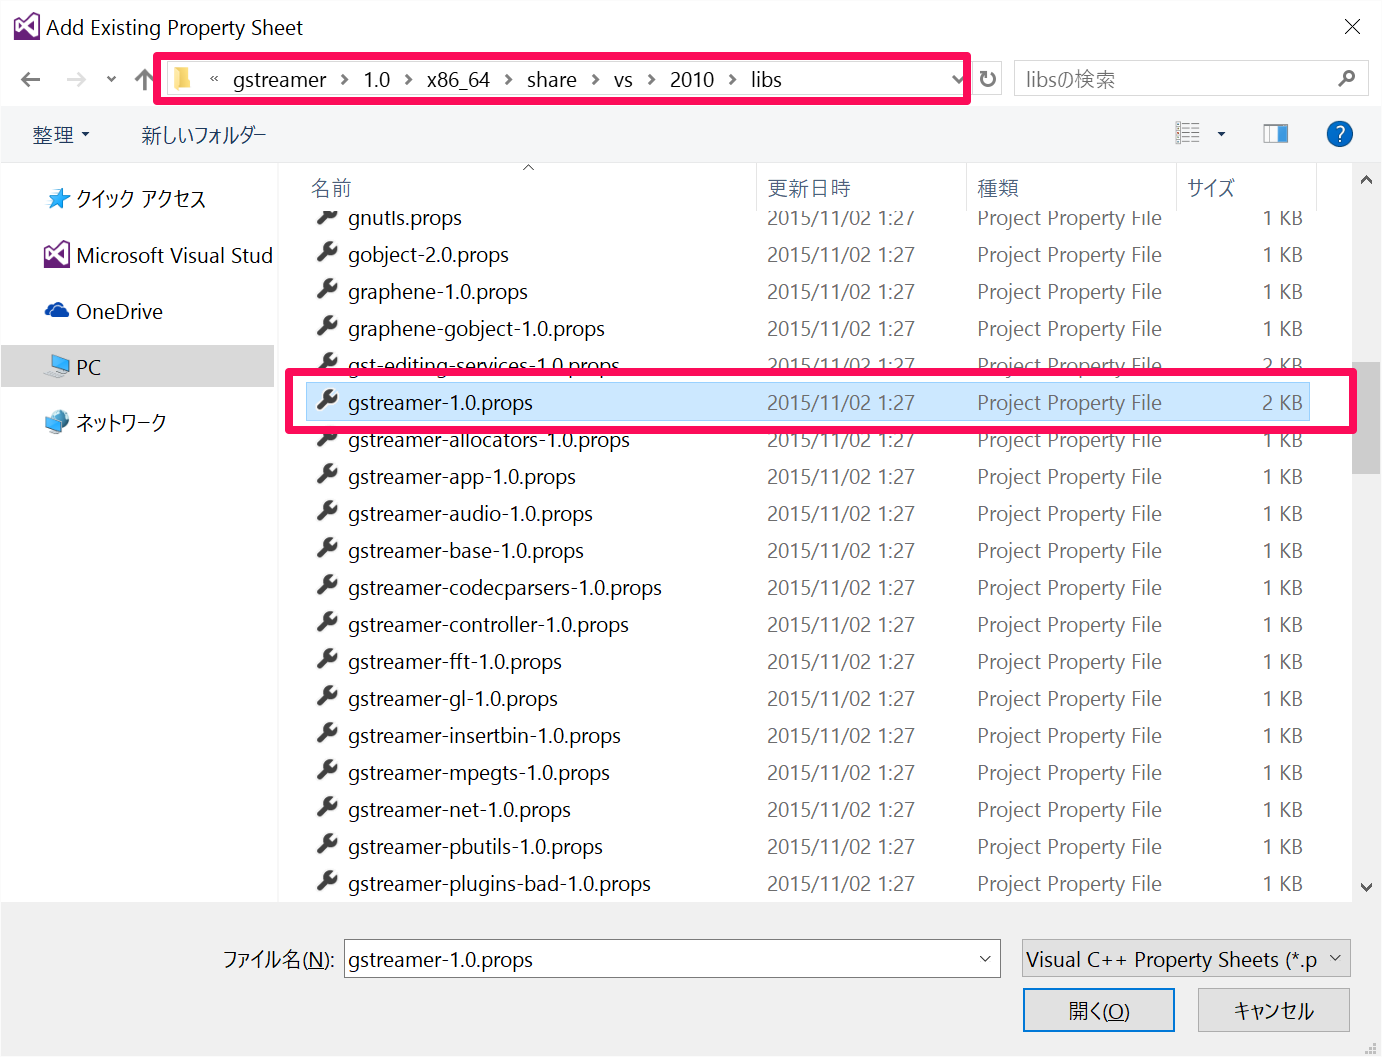
※ gstreamerディレクトリは通常 C: 直下にあります。
ちなみに、このプロパティシート。linux の pkg-confing に対応する分あります。
pkg-config --libs --cflags gstreamer-1.0とか書かなくていいのでちょっと便利 :)
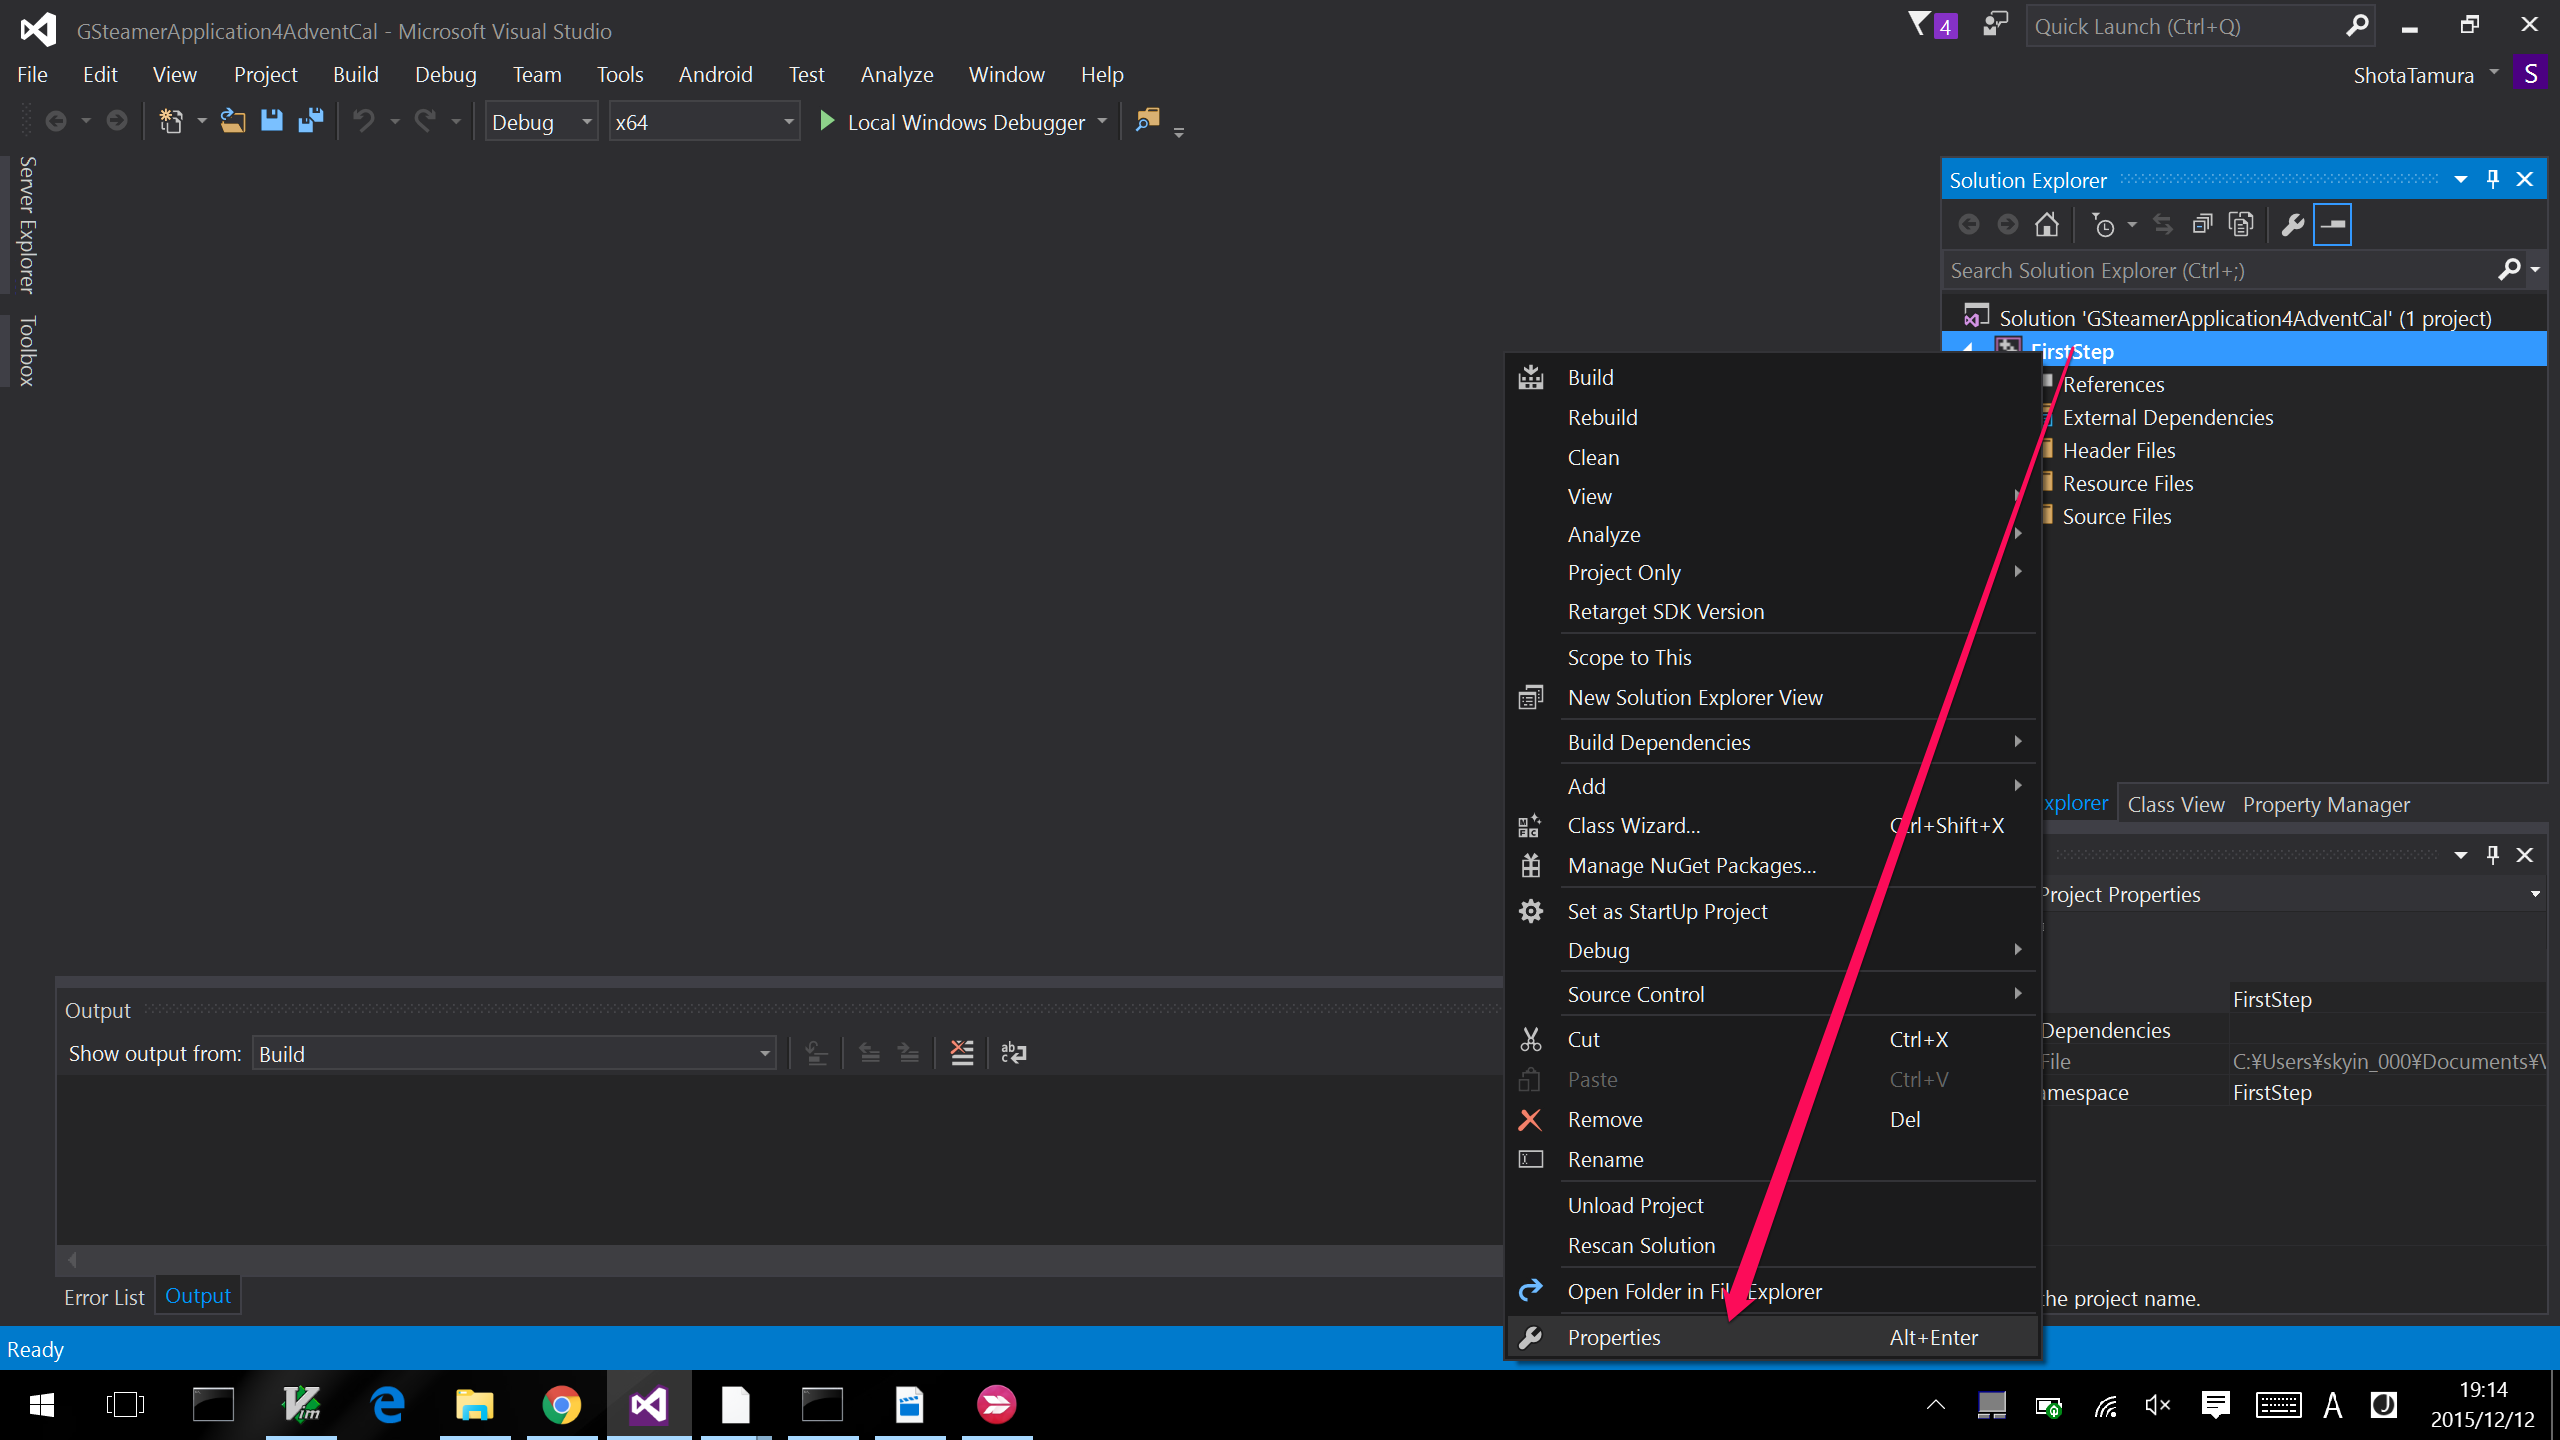
設定4: Randomized Base Address を No に設定
これがとても大切な設定。bugzillaからの情報をもとにしたヤツです。
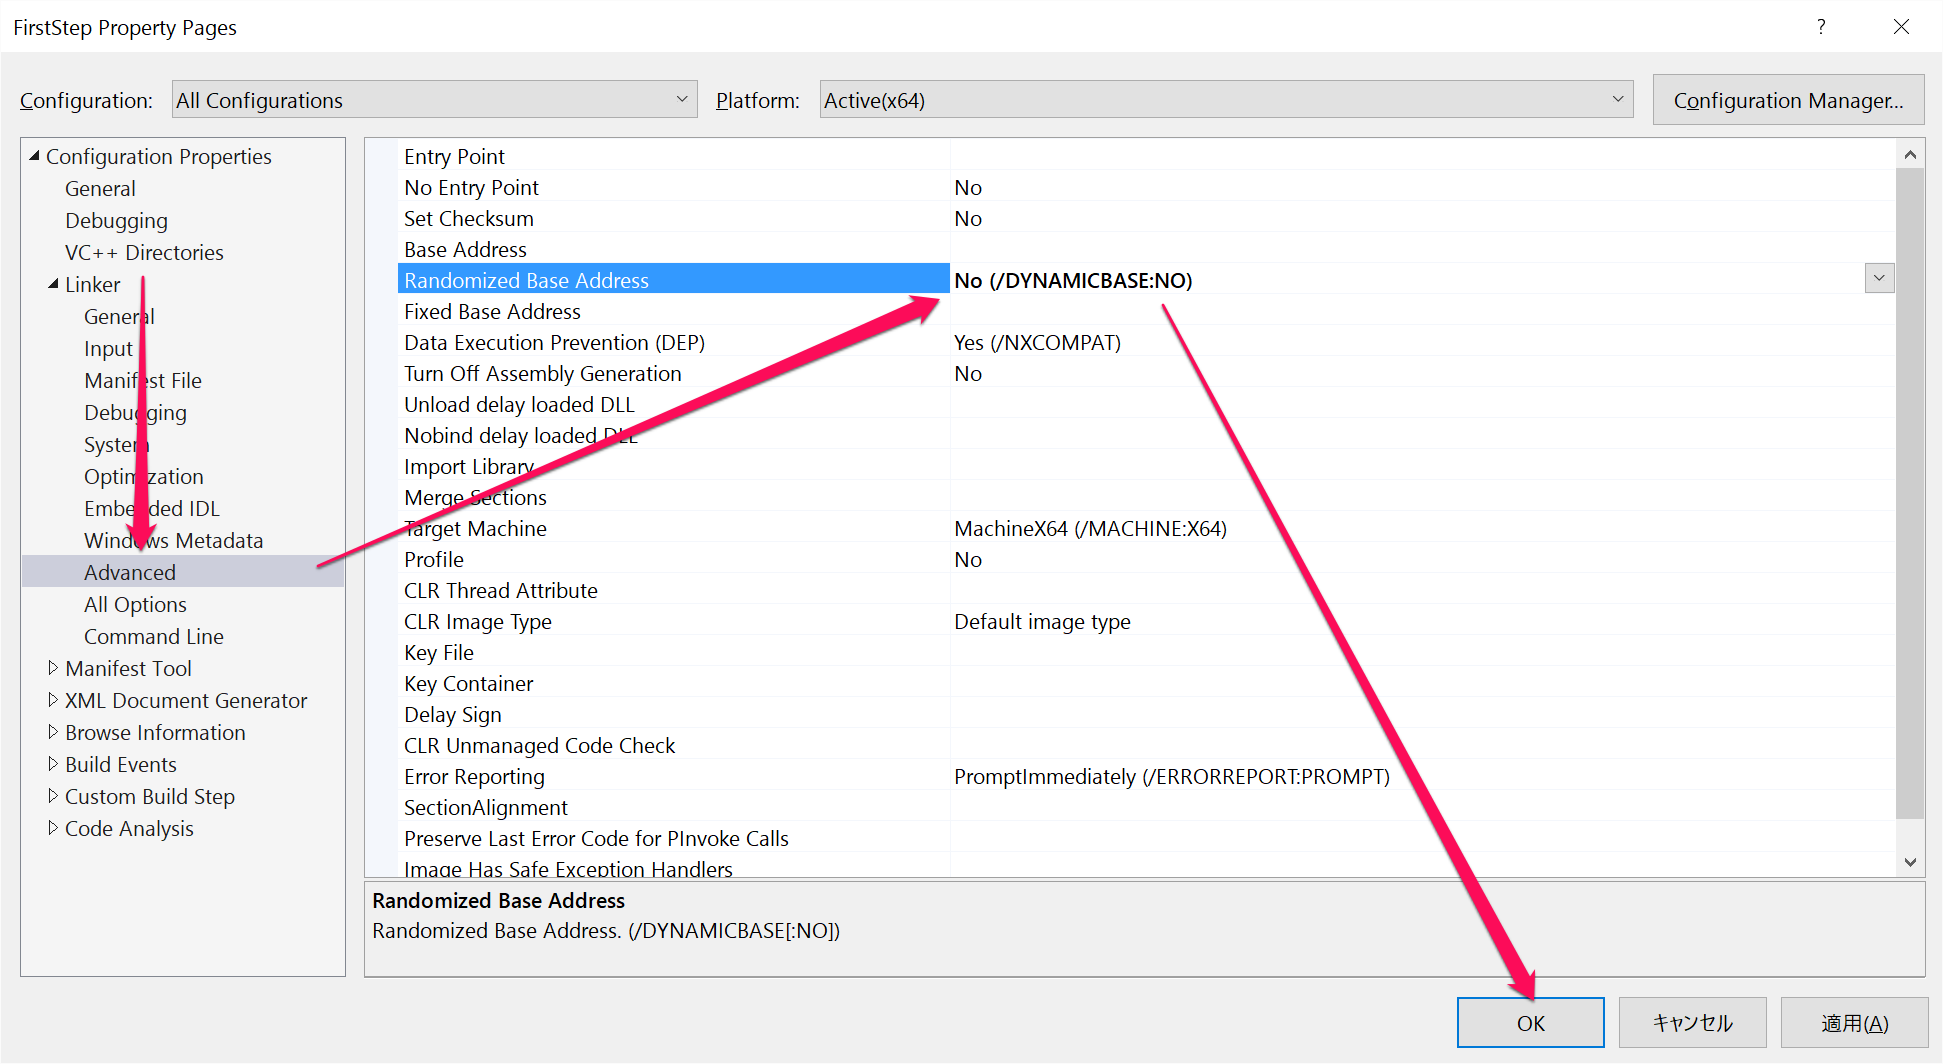
これで設定完了です!
動作確認
とりあえず、動作確認としてvideotestsrc ! autovideosink を動かしてみましょう。
# include <gst/gst.h>

int main(int argc, char *argv[])
{
	GString *launch_str;
	GstElement *pipeline;
	GstBus *bus;
	GstMessage *msg;

	gst_init(&argc, &argv);

	launch_str = g_string_new(NULL);
	g_string_printf(launch_str,
		"videotestsrc ! autovideosink" , NULL);

	pipeline = gst_parse_launch(launch_str->str, NULL);

	if (pipeline == NULL) {
		g_print("parse_launch fail.\n");
		return 1;
	}

	gst_element_set_state(pipeline, GST_STATE_PLAYING);

	bus = gst_element_get_bus(pipeline);
	gint handle_msg;
	handle_msg = GST_MESSAGE_EOS | GST_MESSAGE_ERROR;
	msg = gst_bus_timed_pop_filtered(bus, GST_CLOCK_TIME_NONE, (GstMessageType)handle_msg);

	GError *err;
	gchar *debug_info;
	if (msg != NULL)
		switch (GST_MESSAGE_TYPE(msg)) {
		case GST_MESSAGE_ERROR:
			gst_message_parse_error(msg, &err, &debug_info);
			g_printerr("Error received from element %s: %s\n", GST_OBJECT_NAME(msg->src), err->message);
			g_printerr("Debugging information: %s\n", debug_info ? debug_info : "none");
			g_clear_error(&err);
			g_free(debug_info);
			break;
		case GST_MESSAGE_EOS:
			g_print("End-Of-Stream reached.\n");
			break;
		default:
			/* We should not reach here because we only asked for ERRORs and EOS */
			g_printerr("Unexpected message received.\n");
			break;
		}
	gst_object_unref(bus);
	gst_element_set_state(pipeline, GST_STATE_NULL);
	gst_object_unref(pipeline);

	return 0;
}

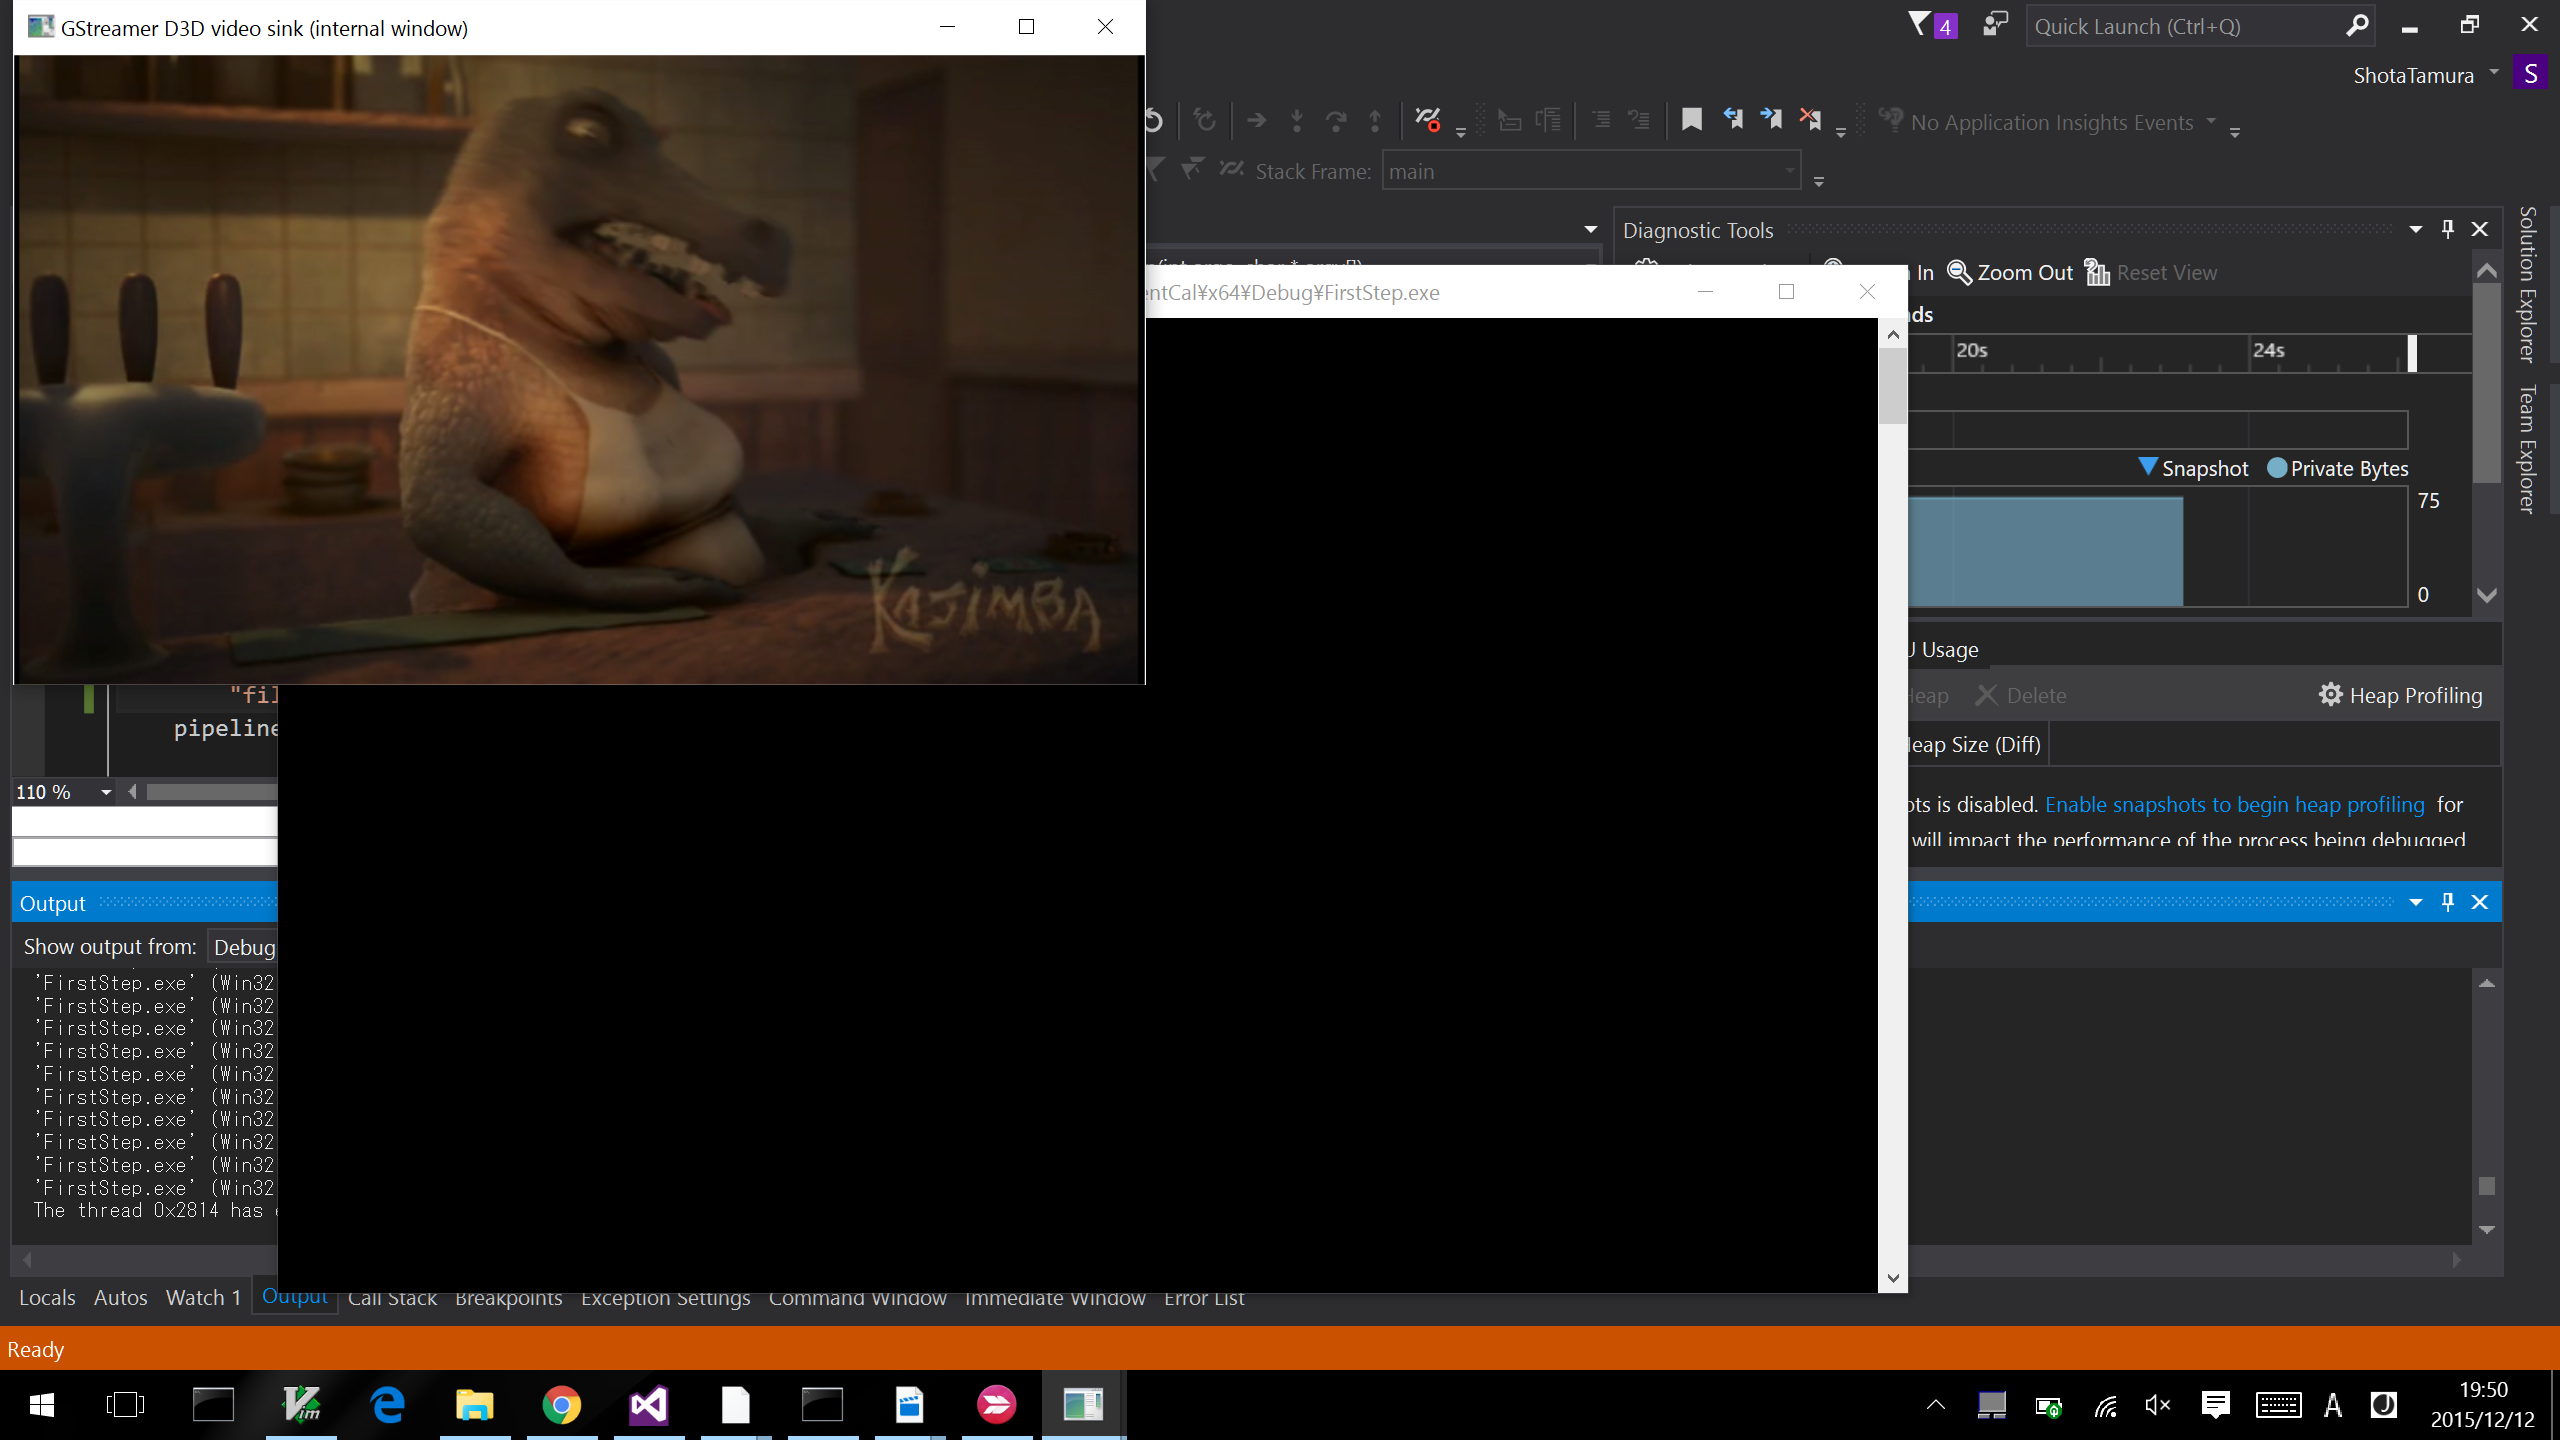
ちょっとものたりませんね...
では、Blender.org から Kajimba-snippets をダウンロードして、これを再生してみましょう。
コードは以下の部分を
	g_string_printf(launch_str,
		"videotestsrc ! autovideosink" , NULL);
このように変更してください
	g_string_printf(launch_str,
		"filesrc location=C:/Users/shocrunch/Downloads/Kajimba-snippets.mp4 ! decodebin ! videoconvert ! autovideosink" , NULL);
location には、ダウンロードしたMP4ファイルのパスを指定してください。
パスは、ファイルを右クリックして見れるものを \ から / に変えるのがポイントです。

再生できたのではないでしょうか!?
これで Visual Studio の Completion を使って GStreamer アプリが書けますね♪