この記事で紹介すること
FlutterのSDKインストールから、Hello Flutterアプリ開発までを紹介
- FlutterSDKインストール
- Android Studio にFlutterプラグインのインストール
- Android Studio にDartプラグインのインストール
- Hello Flutterアプリ起動
※私自身すでに、Xcode、Android Studioはインストール済みでしたので、そちらはインストールを済ませておいてください。
Flutterとは
Flutterは、Googleによって開発されたモバイルアプリケーションSDK
↓↓↓公式サイトから引用↓↓↓
Flutter allows you to build beautiful native apps on iOS and Android from a single codebase.
(Google翻訳: Flutterを使うと、iOSとAndroid上で単一のコードベースから美しいネイティブアプリケーションを構築できます。)
各種インストール
基本的に公式サイトを参考にしてください。
Flutter SDKのインストール
Macの方は、こちら
FlutterのPathを通す
$ export PATH="$PATH:`pwd`/flutter/bin"
Fluuterのプレダウンロード
$ flutter precache
Flutter Doctorで確認
このflutter doctorは環境設定に何が足りないかを教えてくれるのでとても便利
$ flutter doctor
おそらく、この時点では、以下のようになるかと、、
$ flutter doctor
Doctor summary (to see all details, run flutter doctor -v):
[✓] Flutter (Channel stable, v1.9.1+hotfix.6, on Mac OS X 10.14.6 18G95, locale en-US)

[!] Android toolchain - develop for Android devices (Android SDK version 29.0.2)
    ! Some Android licenses not accepted.  To resolve this, run: flutter doctor --android-licenses
[✓] Xcode - develop for iOS and macOS (Xcode 10.2.1)
[!] Android Studio (version 3.5)
    ✗ Flutter plugin not installed; this adds Flutter specific functionality.
    ✗ Dart plugin not installed; this adds Dart specific functionality.
[!] Android Studio (version 3.4)
    ✗ Flutter plugin not installed; this adds Flutter specific functionality.
    ✗ Dart plugin not installed; this adds Dart specific functionality.
[!] Connected device
    ! No devices available
これは、Android StudioにPluginをインストールしていないから発生しているだけですので、気になさらずに、、
Android StudioにFlutterプラグインのインストール
Android Studioを開いて、Config>Pluginsを選択

検索ボックスで、Flutter, Dartと検索してインストールを行ってください。


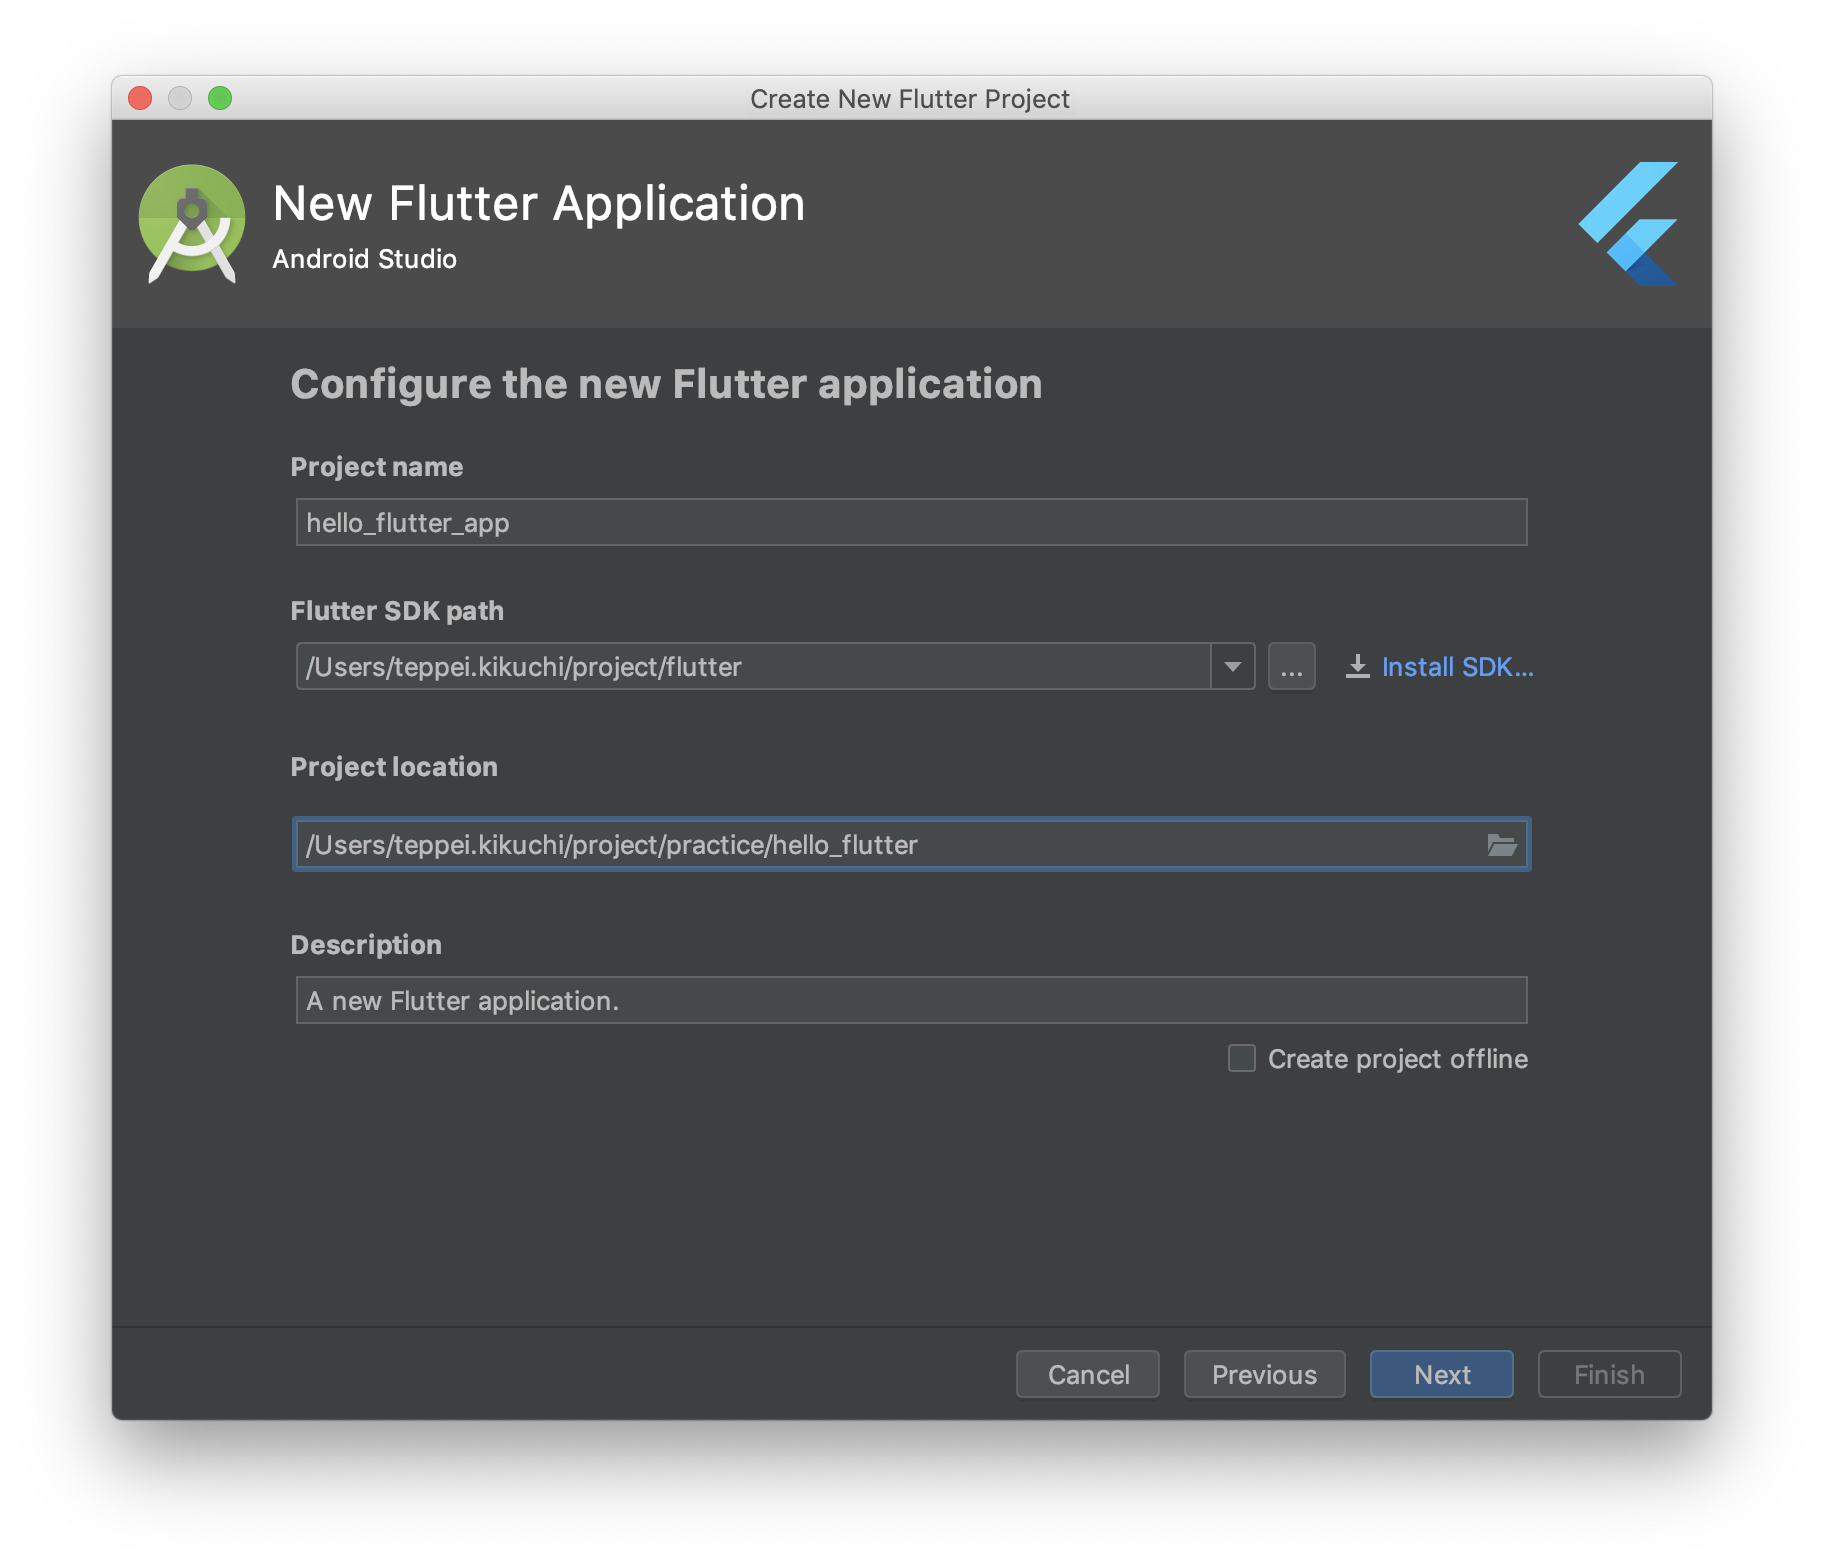
Hello Flutterアプリの作成
Android Studioを開いて、Start new flutter projectを選択

右上の再生ボタンを押して、アプリを実行してください。
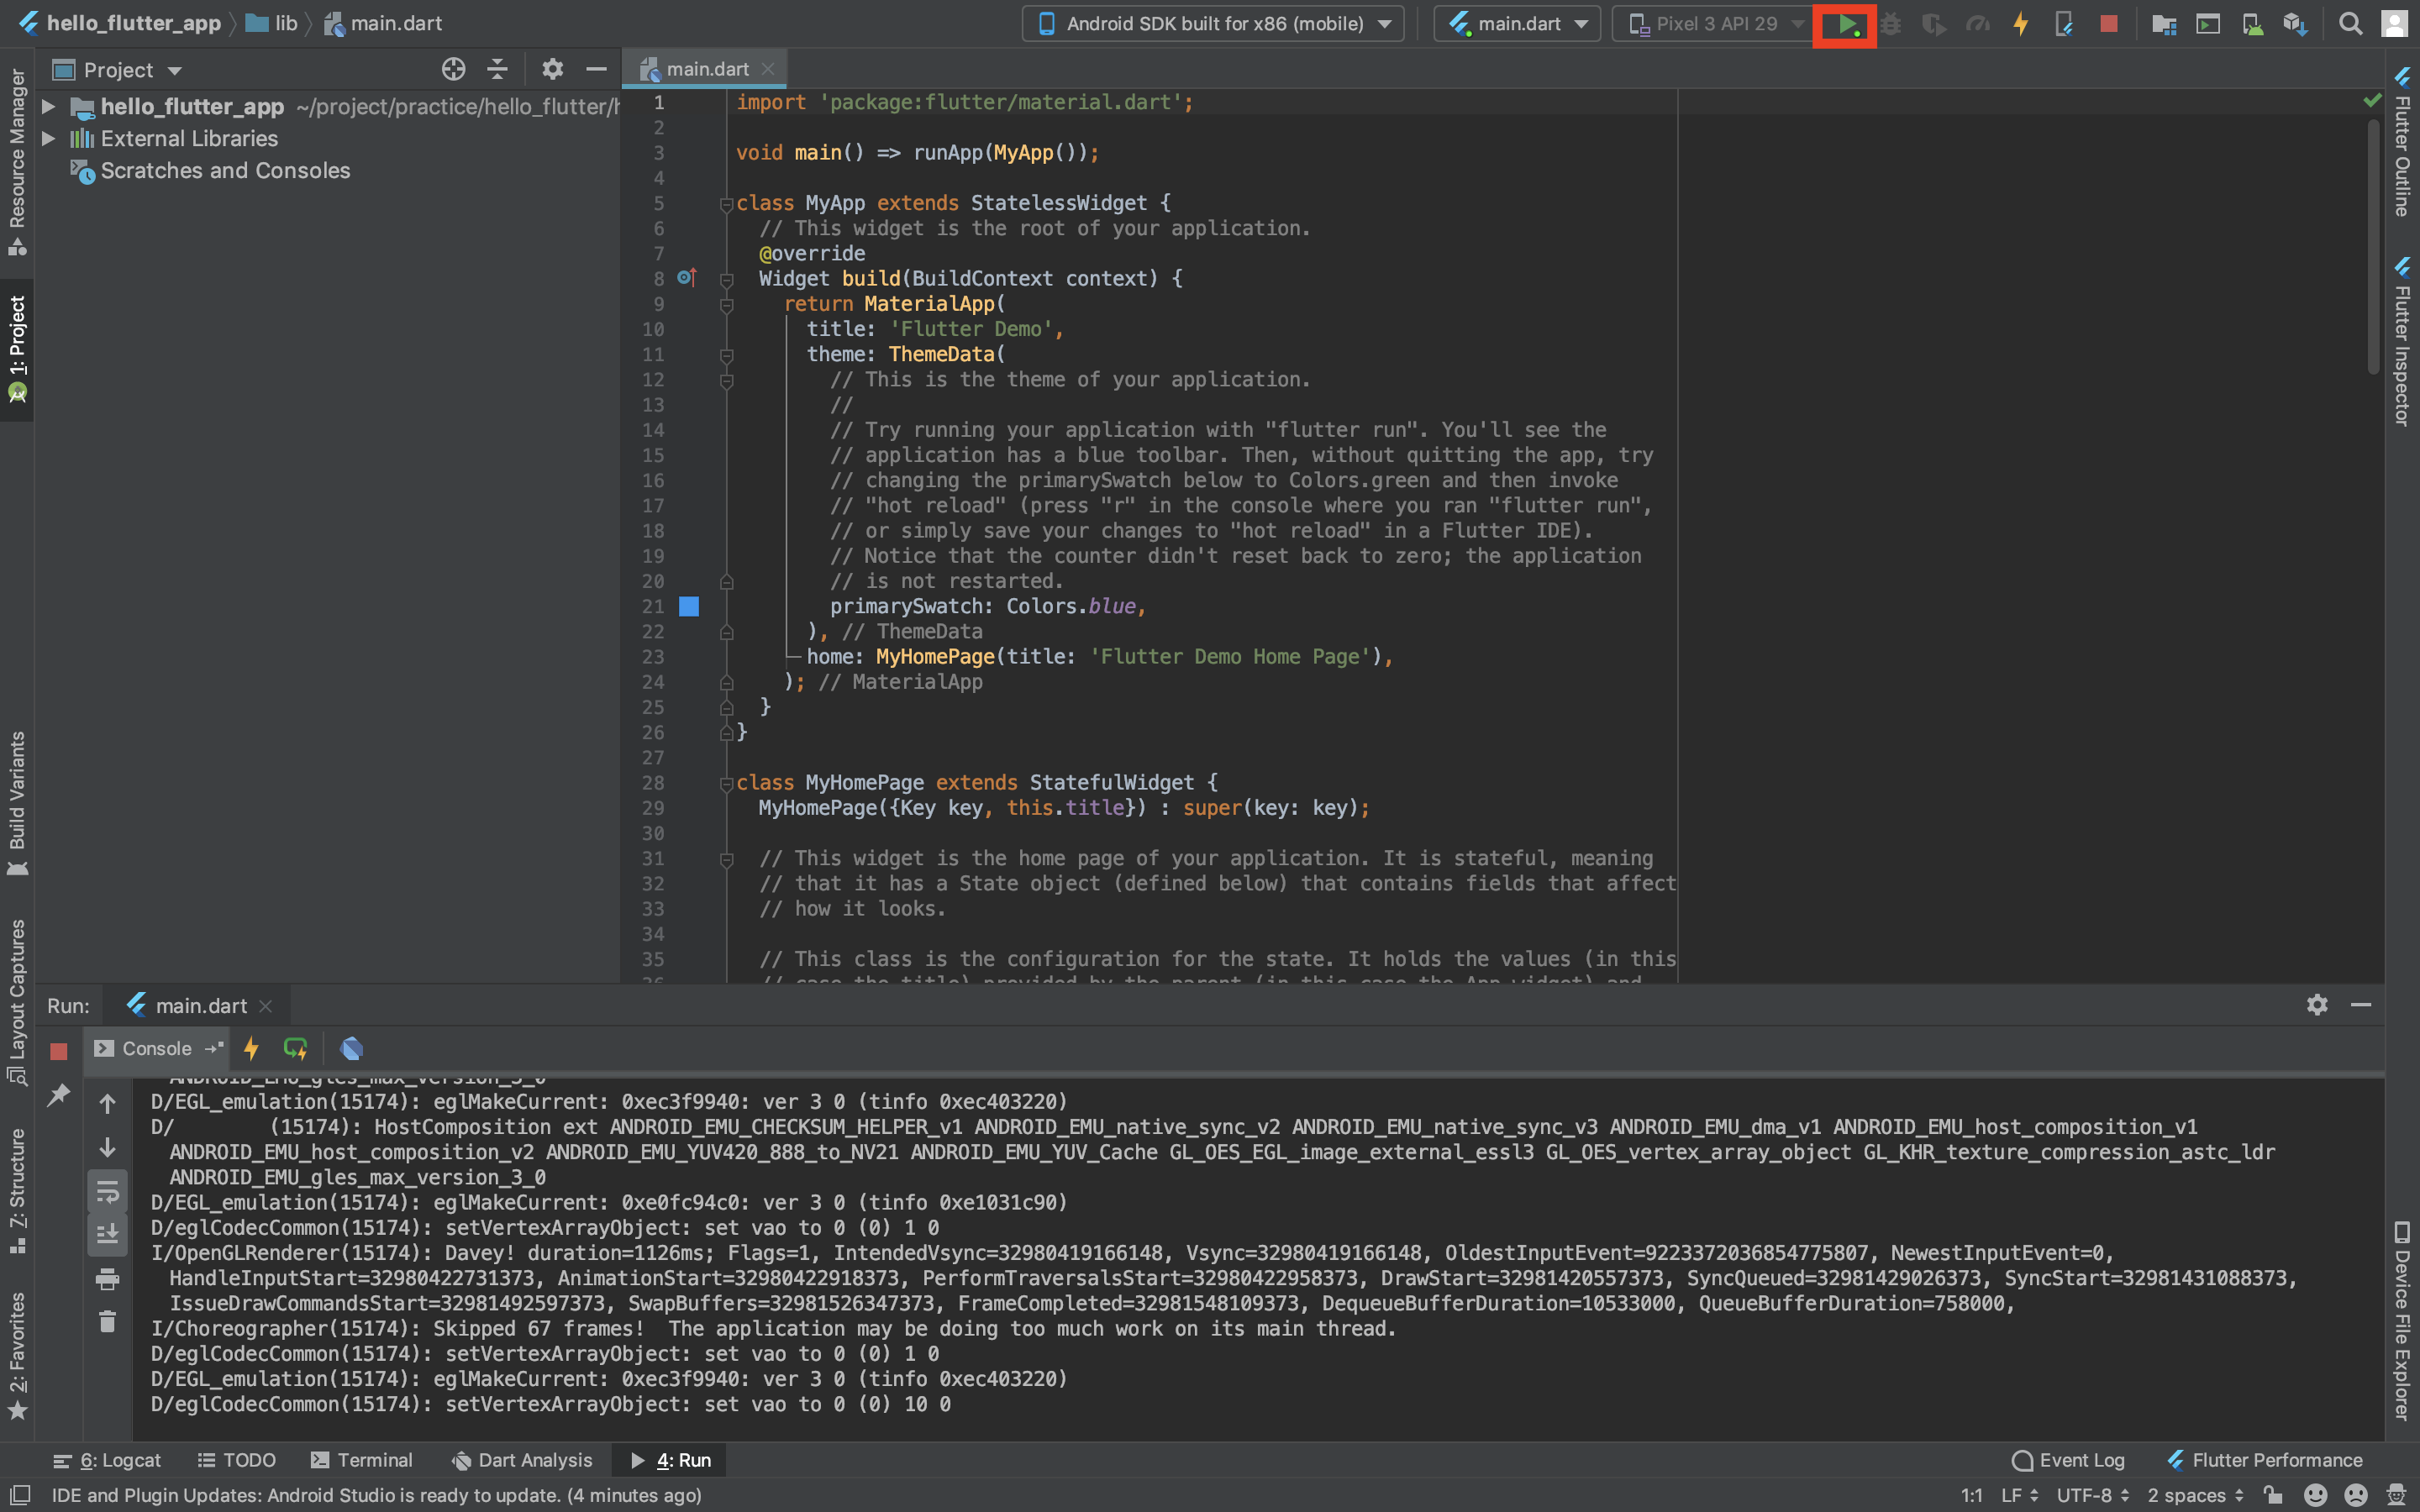
以下のようなデモアプリが起動されます。

では、実際にコードを変更してみましょう。
こちらのファイル(/lib/main.dart)を以下のように変更します。
main.dart
import 'package:flutter/material.dart';

void main() => runApp(MyApp());

class MyApp extends StatelessWidget {
  // This widget is the root of your application.
  @override
  Widget build(BuildContext context) {
    return MaterialApp(
      title: 'Hello Flutter',
      theme: ThemeData(
        // This is the theme of your application.
        //
        // Try running your application with "flutter run". You'll see the
        // application has a blue toolbar. Then, without quitting the app, try
        // changing the primarySwatch below to Colors.green and then invoke
        // "hot reload" (press "r" in the console where you ran "flutter run",
        // or simply save your changes to "hot reload" in a Flutter IDE).
        // Notice that the counter didn't reset back to zero; the application
        // is not restarted.
        primarySwatch: Colors.blue,
      ),
      home: new Scaffold(
        appBar: new AppBar(
          title: new Text('Hello Flutter'),
        ),
        body: new Center(
          child: new Text('Hello Flutter'),
        ),
      ),
    );
  }
}
これで再度アプリをRUNしてみてください。
↓↓↓↓↓↓完成↓↓↓↓↓↓

最後に
巷で話題になっていたFlutterを少しだけ触ってみました!
実際にここまでの開発はインストール含めて、30分程度でした!
引き続きキャッチアップしていきたいと思います!