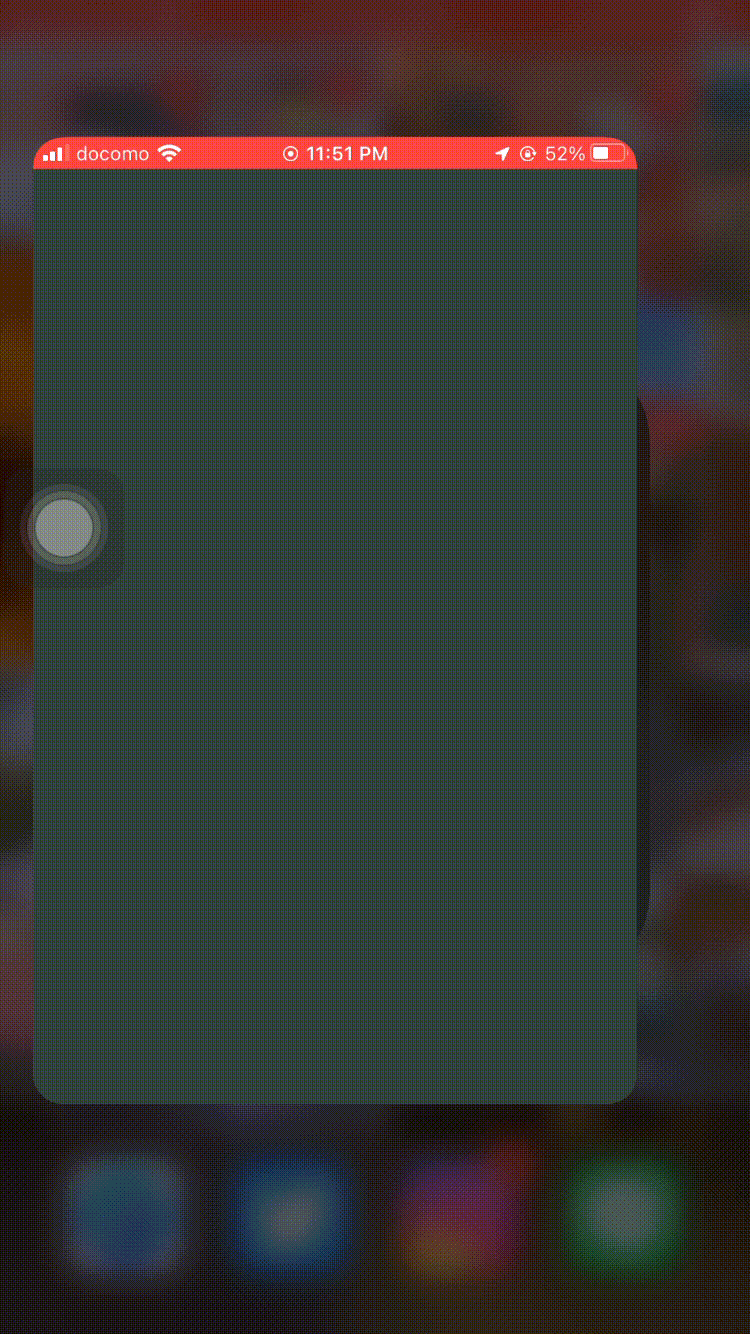
完成物はこちら
Lottieとは
Lottieはオープンソースのアニメーションファイル形式です。
このファイルの特徴は、ファイルサイズの軽量化、高品質、インタラクティブ、実行時に操作が可能な点です。
現在、App Storeのトップ500のアプリケーションは、ユーザーを引き付け、コンバージョンを高めるためにLottieを使用しているそうです。

構築方法
STEP1 パッケージの追加
まず、pubspec.yaml に Lottie パッケージを追加しましょう。
dependencies:
  lottie: ^1.2.1
STEP2 Lottieファイルを取得
公式サイトよりお気に入りのLottieファイルをダウンロード
LottieファイルはJSON形式でダウンロードして、splash_screen.json という名前にしておいてください。
STEP3 Androidでの導入
STEP3-1 build.gradleファイルにLottieの依存関係を追加
dependencies {
   ...
   implementation "com.airbnb.android:lottie:3.5.0"
   implementation "com.android.support.constraint:constraint-layout:2.0.4"
   ...
}
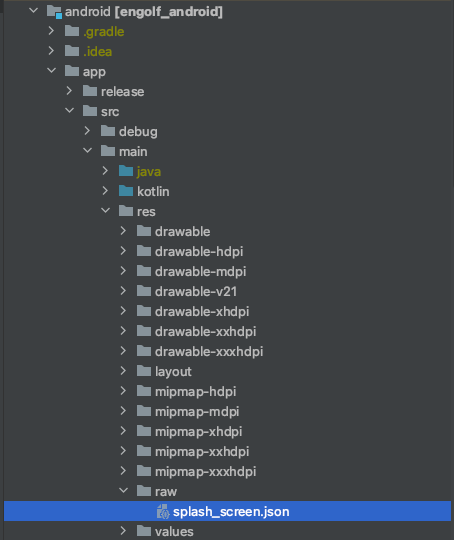
STEP3-2 splash_screen.json ファイルの配置
/android/app/src/main/res/raw/splash_screen.json にSTEP2でダウンロードしたspalash_screen.json を配置
※rawdirectory がない場合はディレクトリを作成してください。
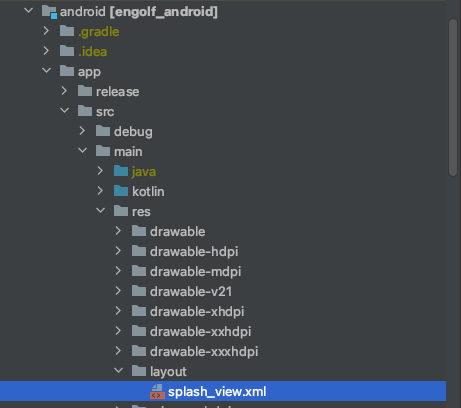
STEP3-3
/android/app/src/main/res/配下に layoutディレクトリを作成
以下の splash_view.xmlをlayoutディレクトリに配置
<androidx.constraintlayout.widget.ConstraintLayout xmlns:android="http://schemas.android.com/apk/res/android"
    xmlns:app="http://schemas.android.com/apk/res-auto"
    android:layout_width="match_parent"
    android:layout_height="match_parent">
    <com.airbnb.lottie.LottieAnimationView
        android:layout_width="match_parent"
        android:layout_height="match_parent"
        app:layout_constraintBottom_toBottomOf="parent"
        app:layout_constraintStart_toStartOf="parent"
        app:layout_constraintTop_toTopOf="parent"
        app:lottie_autoPlay="true"
        app:lottie_rawRes="@raw/splash_screen"
        app:lottie_loop="false"
        app:lottie_speed="1.00" />
</androidx.constraintlayout.widget.ConstraintLayout>
STEP3-4
/android/app/src/main/kotlin/YOUR-PACKAGE-NAME/配下にSplashView.ktファイルを追加
import android.content.Context
import android.os.Bundle
import android.view.LayoutInflater
import android.view.View
import io.flutter.embedding.android.SplashScreen
import com.tetsukick.engolf.R

class SplashView : SplashScreen {
    override fun createSplashView(context: Context, savedInstanceState: Bundle?): View? =
            LayoutInflater.from(context).inflate(R.layout.splash_view, null, false)

    override fun transitionToFlutter(onTransitionComplete: Runnable) {
        onTransitionComplete.run()
    }
}
STEP3-5
/android/app/src/main/kotlin/YOUR-PACKAGE-NAME/' MainActivity.kt` を編集
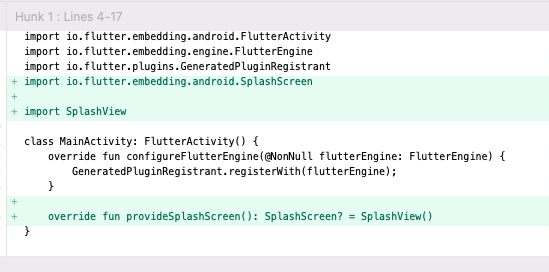
import io.flutter.embedding.android.FlutterActivity
import io.flutter.embedding.engine.FlutterEngine
import io.flutter.plugins.GeneratedPluginRegistrant
import io.flutter.embedding.android.SplashScreen // ←追加

import SplashView // ←追加

class MainActivity: FlutterActivity() {
    override fun configureFlutterEngine(@NonNull flutterEngine: FlutterEngine) {
        GeneratedPluginRegistrant.registerWith(flutterEngine);
    }

    override fun provideSplashScreen(): SplashScreen? = SplashView() // ←追加
}
これでアプリを起動すれば、選択したLottieのアニメーションがスプラッシュスクリーンに反映されます
STEP4 iOSでの構築
STEP4 以降は下記の記事にて公開しております。
本記事はZennで出版しておりますflutter chipsのchapter7の内容の一部になります。
参考サイト