1. はじめに
File Storage for VPCが承認を受けたアカウントに対して利用可能になっているため試してみました。
※本サービスは、まだ全ての利用者に対して公開されていないようなので、もしこの状態でもいいので利用したいという方は、IBM営業にご相談ください。
https://cloud.ibm.com/docs/vpc?topic=vpc-release-notes#april-30-2021&locale=en
https://cloud.ibm.com/docs/vpc?topic=vpc-file-storage-vpc-about&locale=en
2. 特徴
- 2021年12月現在、DAL/WDC/FRA/LON/PAR/SYD/TOKにて承認を受けたアカウントに対してのみ利用可能
- NFSベースの共有ファイルストレージ。VSIからはNFS 4.1以上を利用して接続する必要がある。
- File Storage for VPCは指定したAZ内に構成される。
- IBM管理の暗号化方式(Data at Rest)を利用。
- IOPSは3/5/10 IOPS/GBから選択可能。
- ZoneレベルでAuthorizationを実施。
- File Storage for VPCと同一AZにある複数VSIから共有可能。VPCは異なっていても良く、VPCまたぎでファイル共有が可能。
File shares can be shared with multiple virtual service instances within the same zone across multiple VPCs.
また、現在は以下の制約があるようだ。
-
ストレージサイズを後から変更できない。-> 後から大きくできるようになりました。 - 別Zoneからマウントできない。
- ホストレベルのAuthorizationはできない(Zone内のどのサーバーからもマウント可能)。
- Snapshotを取得できない。
- BYOKはできない。
3. File Storage for VPCの注文
-
メニューから
File Sharesを選択し、Createを押下。

-
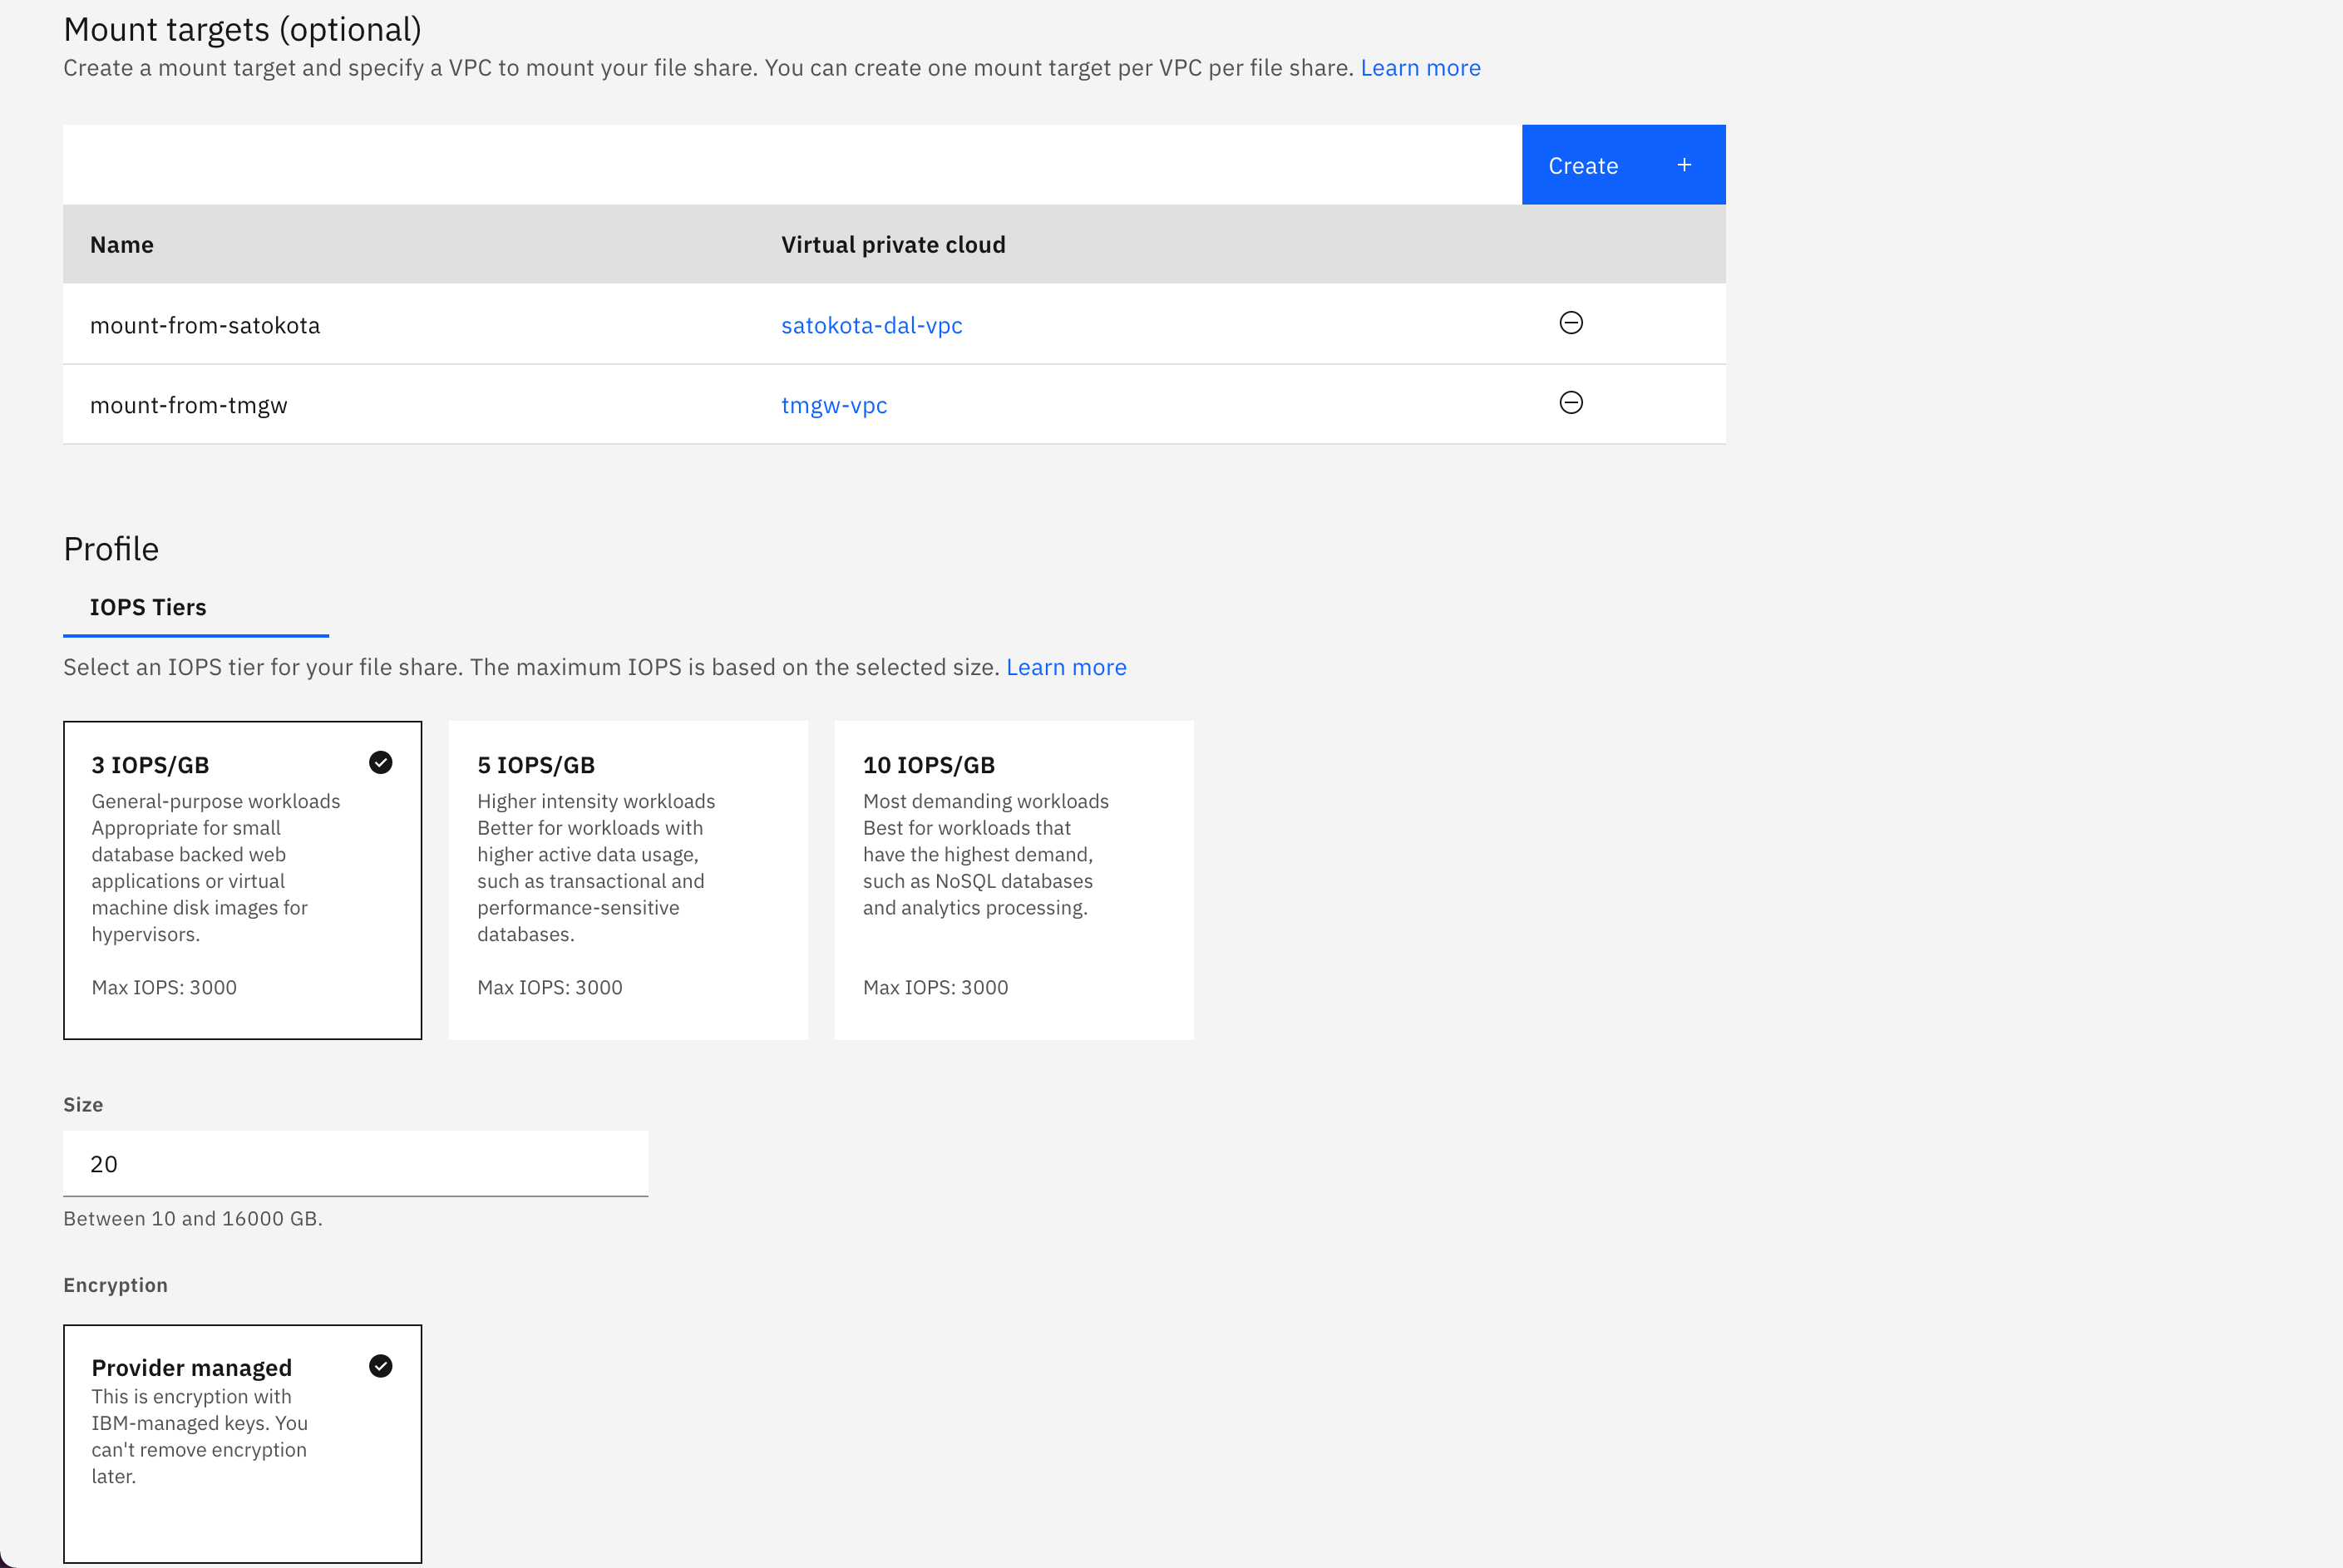
以下のように注文(Mount targetsは後からでも構成可能)
 Mount targetは複数VPCからのアクセス許可を構成することが可能。なお、対象VPCのZoneに、Address prefixが存在しているだけではMount targetsには追加できない。Subnetまで作成されていることがMount targetに追加できる前提。
-
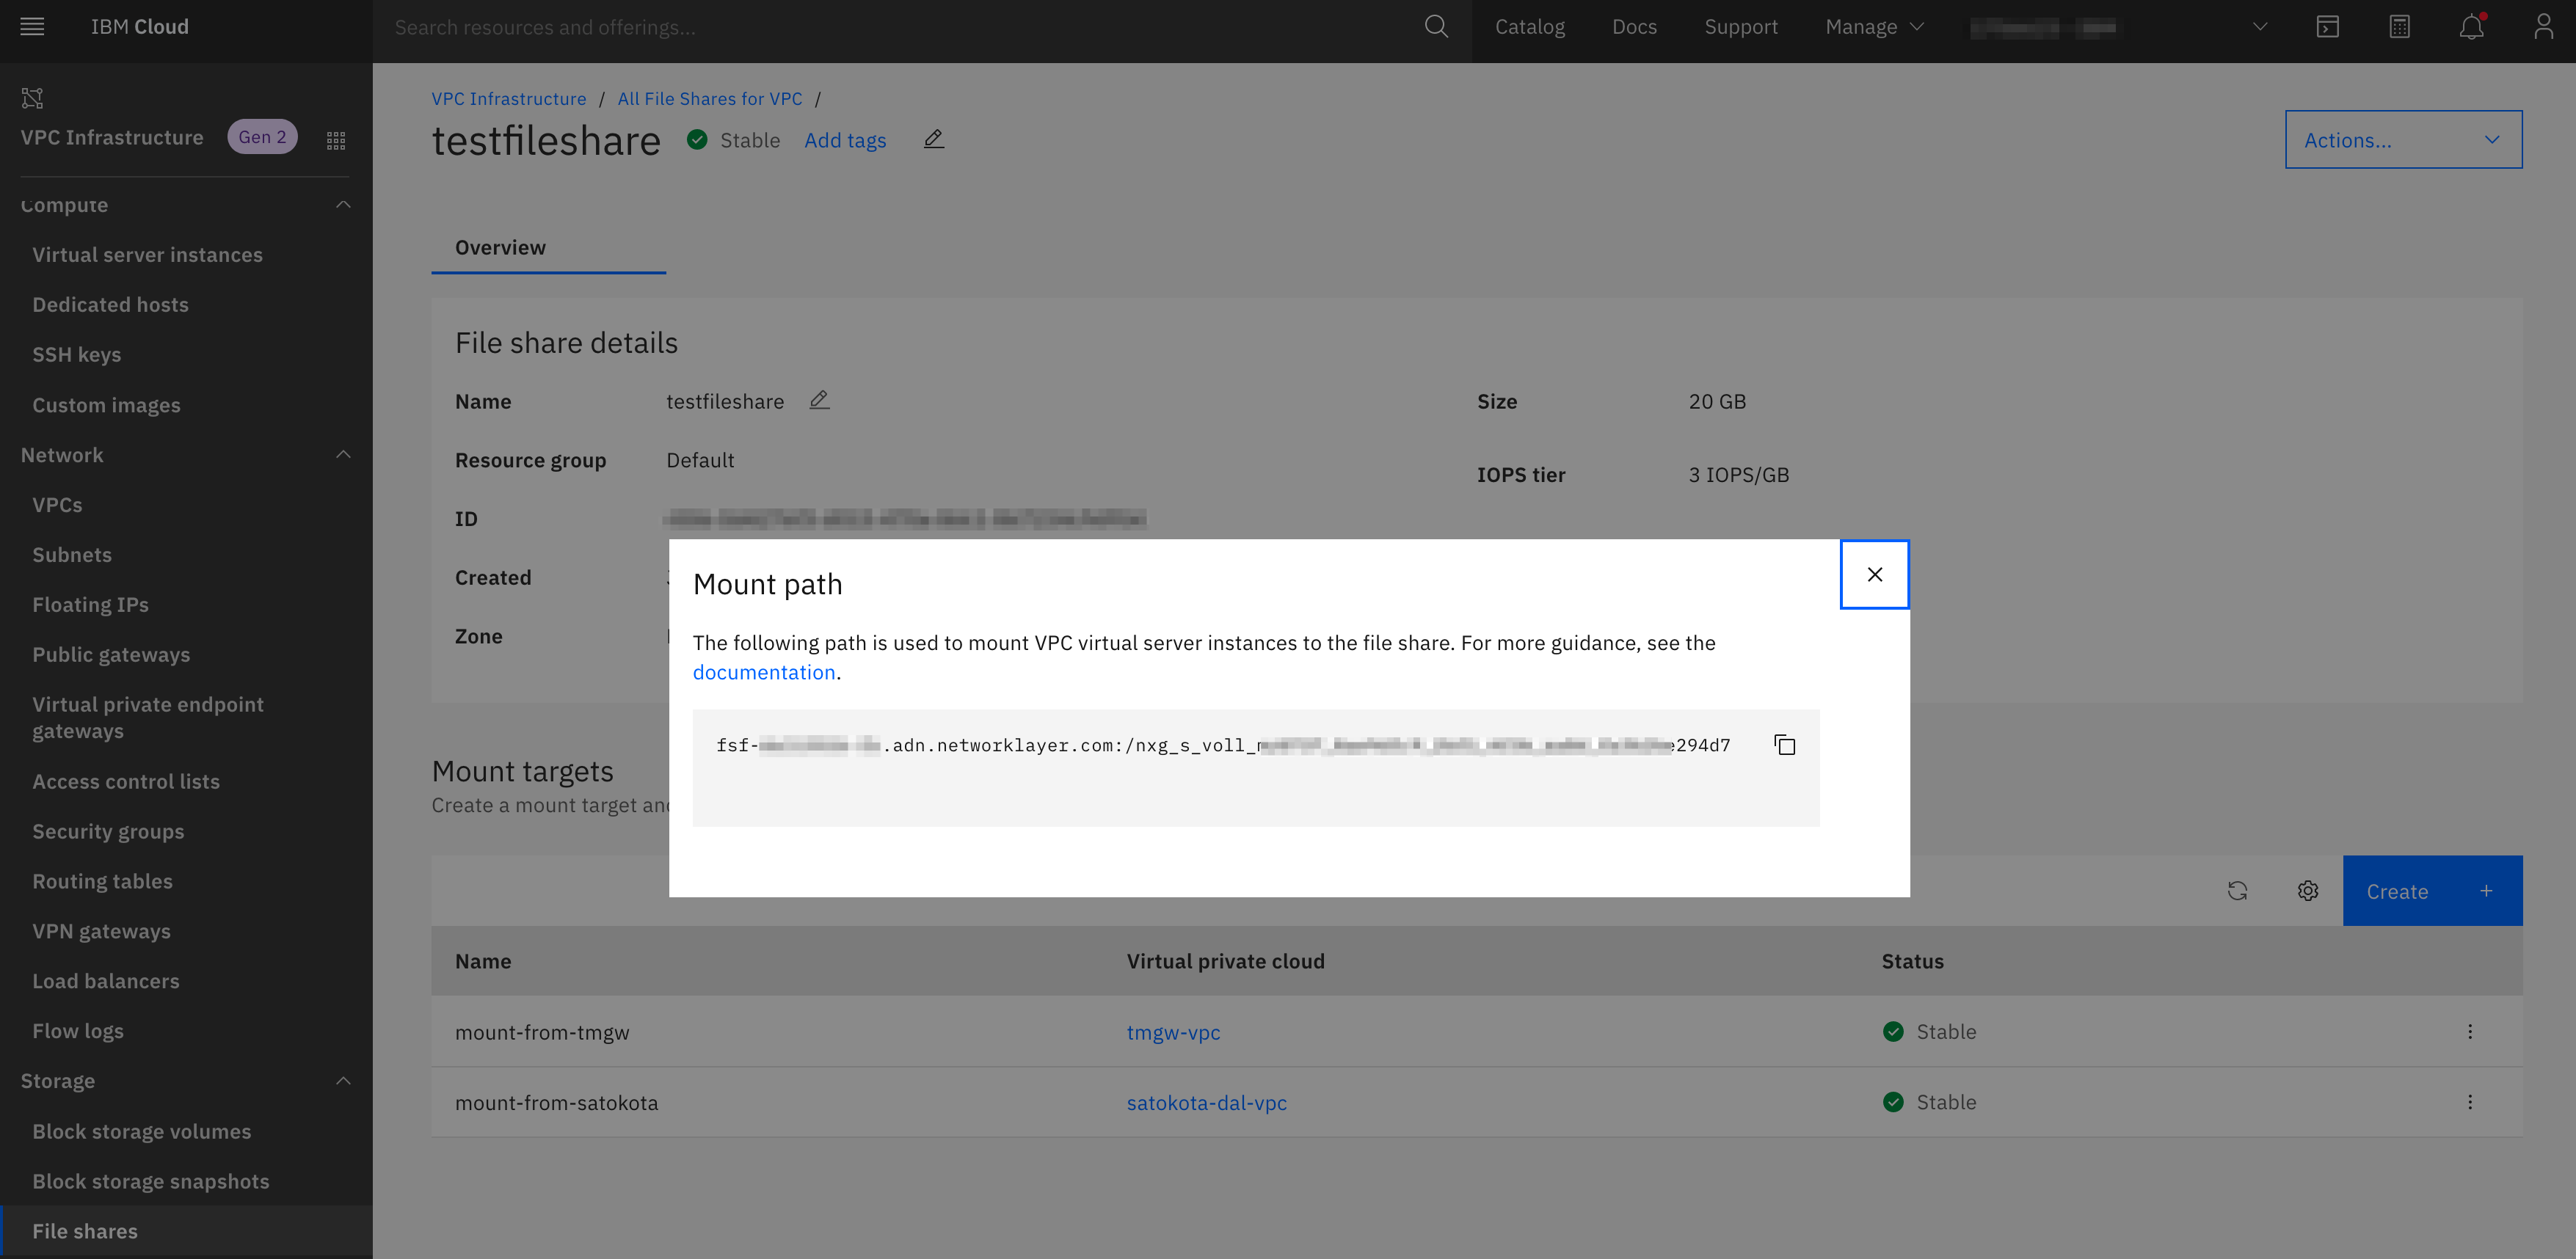
プロビジョニング後は、以下からMountのためのパス情報を確認する。

4. サーバーからマウント
以下はCentOS7で試した例。
# yum install -y nfs-utils

# mkdir /share

# mount -t nfs4 -o sec=sys,nfsvers=4.1 fsf-dalxxxxx-xx.adn.networklayer.com:/nxg_s_voll_xxxxxxxxxxxxxxxxxxxxxxxxxxxxxxxxxxxxxxxxxxx /share

# cat /proc/mounts |grep "/share"
fsf-dalxxxxx-xx.adn.networklayer.com:/nxg_s_voll_xxxxxxxxxxxxxxxxxxxxxxxxxxxxxxxxxxxxxxxxxxx /share nfs4 rw,relatime,vers=4.1,rsize=65536,wsize=65536,namlen=255,hard,proto=tcp,timeo=600,retrans=2,sec=sys,clientaddr=10.33.20.9,local_lock=none,addr=161.26.114.181 0 0

# touch /share/test1
# ls -l /share/test1
-rw-r-----. 1 nobody nobody 0  6月 14 02:56 /share/test1
-oオプションで、sec=sysを付けているのがポイント(私はこのオプションに気づかず、なぜ書き込みができないのか15分ぐらい悩んでしまいました)。
5. no_root_squashの構成(オプション)
このままだとNFS Clientのrootで書き込んだファイルは全部nobodyとなってしまう(それがNFSでのデフォルト・セキュリティーだが)。セキュリティー上の考慮点はあるだろうが、rootで書き込んだ共有ファイルシステム上のファイルには、そのままroot権限を持たせたいというのであれば、以下のようにidmap.confを作成してID mappingを行い、nfsidmap -cでキャッシュクリアすれば、rootで作成されたファイルのowner情報はrootとして表示されるようになる。詳細はこちらを参照。
# vi /etc/idmapd.conf
(以下を追記)
Domain = slnfsv4.com

# nfsidmap -c

# ls -l /share
合計 0
-rw-r-----. 1 root root 0  6月 14 02:56 test1
6. 備考
- 別VPCにあるVSIからも、Zoneが同じであればマウントできた。
- 別Zone上のVSIからマウントを試行すると以下のようなPermissionエラーになった。
# mount -t nfs4 -o sec=sys,nfsvers=4.1 fsf-dalxxxxx-xx.adn.networklayer.com:/nxg_s_voll_xxxxxxxxxxxxxxxxxxxxxxxxxxxxxxxxxxxxxxxxxxx /share
mount.nfs4: access denied by server while mounting fsf-dalxxxxx-xx.adn.networklayer.com:/nxg_s_voll_xxxxxxxxxxxxxxxxxxxxxxxxxxxxxxxxxxxxxxxxxxx