1. はじめに
- VPC Gen2のPrimary boot volumeとSecondary data volumeはIBM管理の鍵でデフォルトでAES256で暗号化されている。
- IBM管理の鍵ではなく、自分の鍵を持ち込んでVPC Gen2のストレージを暗号化したいので、その手順を確認したのがこの記事の目的
- 公式docsはこちら。
- VPC-Gen2のBlock Storageの暗号化の仕組みの詳細については、この記述が参考になる。
With customer-managed encryption, you provision customer root keys (CRKs) to protect your encrypted resources in the cloud. Root keys serve as key-wrapping keys that safeguard LUKS passphrases. You decide whether to import your existing root keys ("bring your own key"), or have a supported IBM key management service (KMS) create one for you.
Block storage volumes are assigned a unique master encryption key generated by the instance's host hypervisor. The master key for each volume is encrypted with a unique KMS-generated LUKS passphrase, which is then encrypted by the CRK and stored in the KMS.
2. KeyProtectを購入

3. コマンドラインの初期セットアップ
鍵の持ち込み自体はGUIからでもできるが、汎用的な手順を示すためにCLIで行うことにする。
# pluginの導入
$ ibmcloud plugin install kp

# KeyProtectを作成したリージョン、リソースグループに変更
$ ibmcloud target -g Common -r jp-tok

# 作成したKey Protectの名称が"KeyProtect-Tokyo"のため、この名称を元にIDを探索
$ ibmcloud resource service-instance "KeyProtect-Tokyo" --id
Retrieving service instance KeyProtect-Tokyo in all resource groups under account IBM as xxxx@xx.xx.xx...
crn:v1:bluemix:public:kms:jp-tok:a/039dbe6794084c7cb514a276dd2345da:6efdc301-0119-4472-872c-86de0b6dd8c7:: 6efdc301-0119-4472-872c-86de0b6dd8c7

# 環境変数の設定
$ export KP_INSTANCE_ID=6efdc301-0119-4472-872c-86de0b6dd8c7

# 鍵のチェック(まだ作成していないので何もない)
$ ibmcloud kp keys
Retrieving keys...
The Key Protect instance does not have any associated keys.
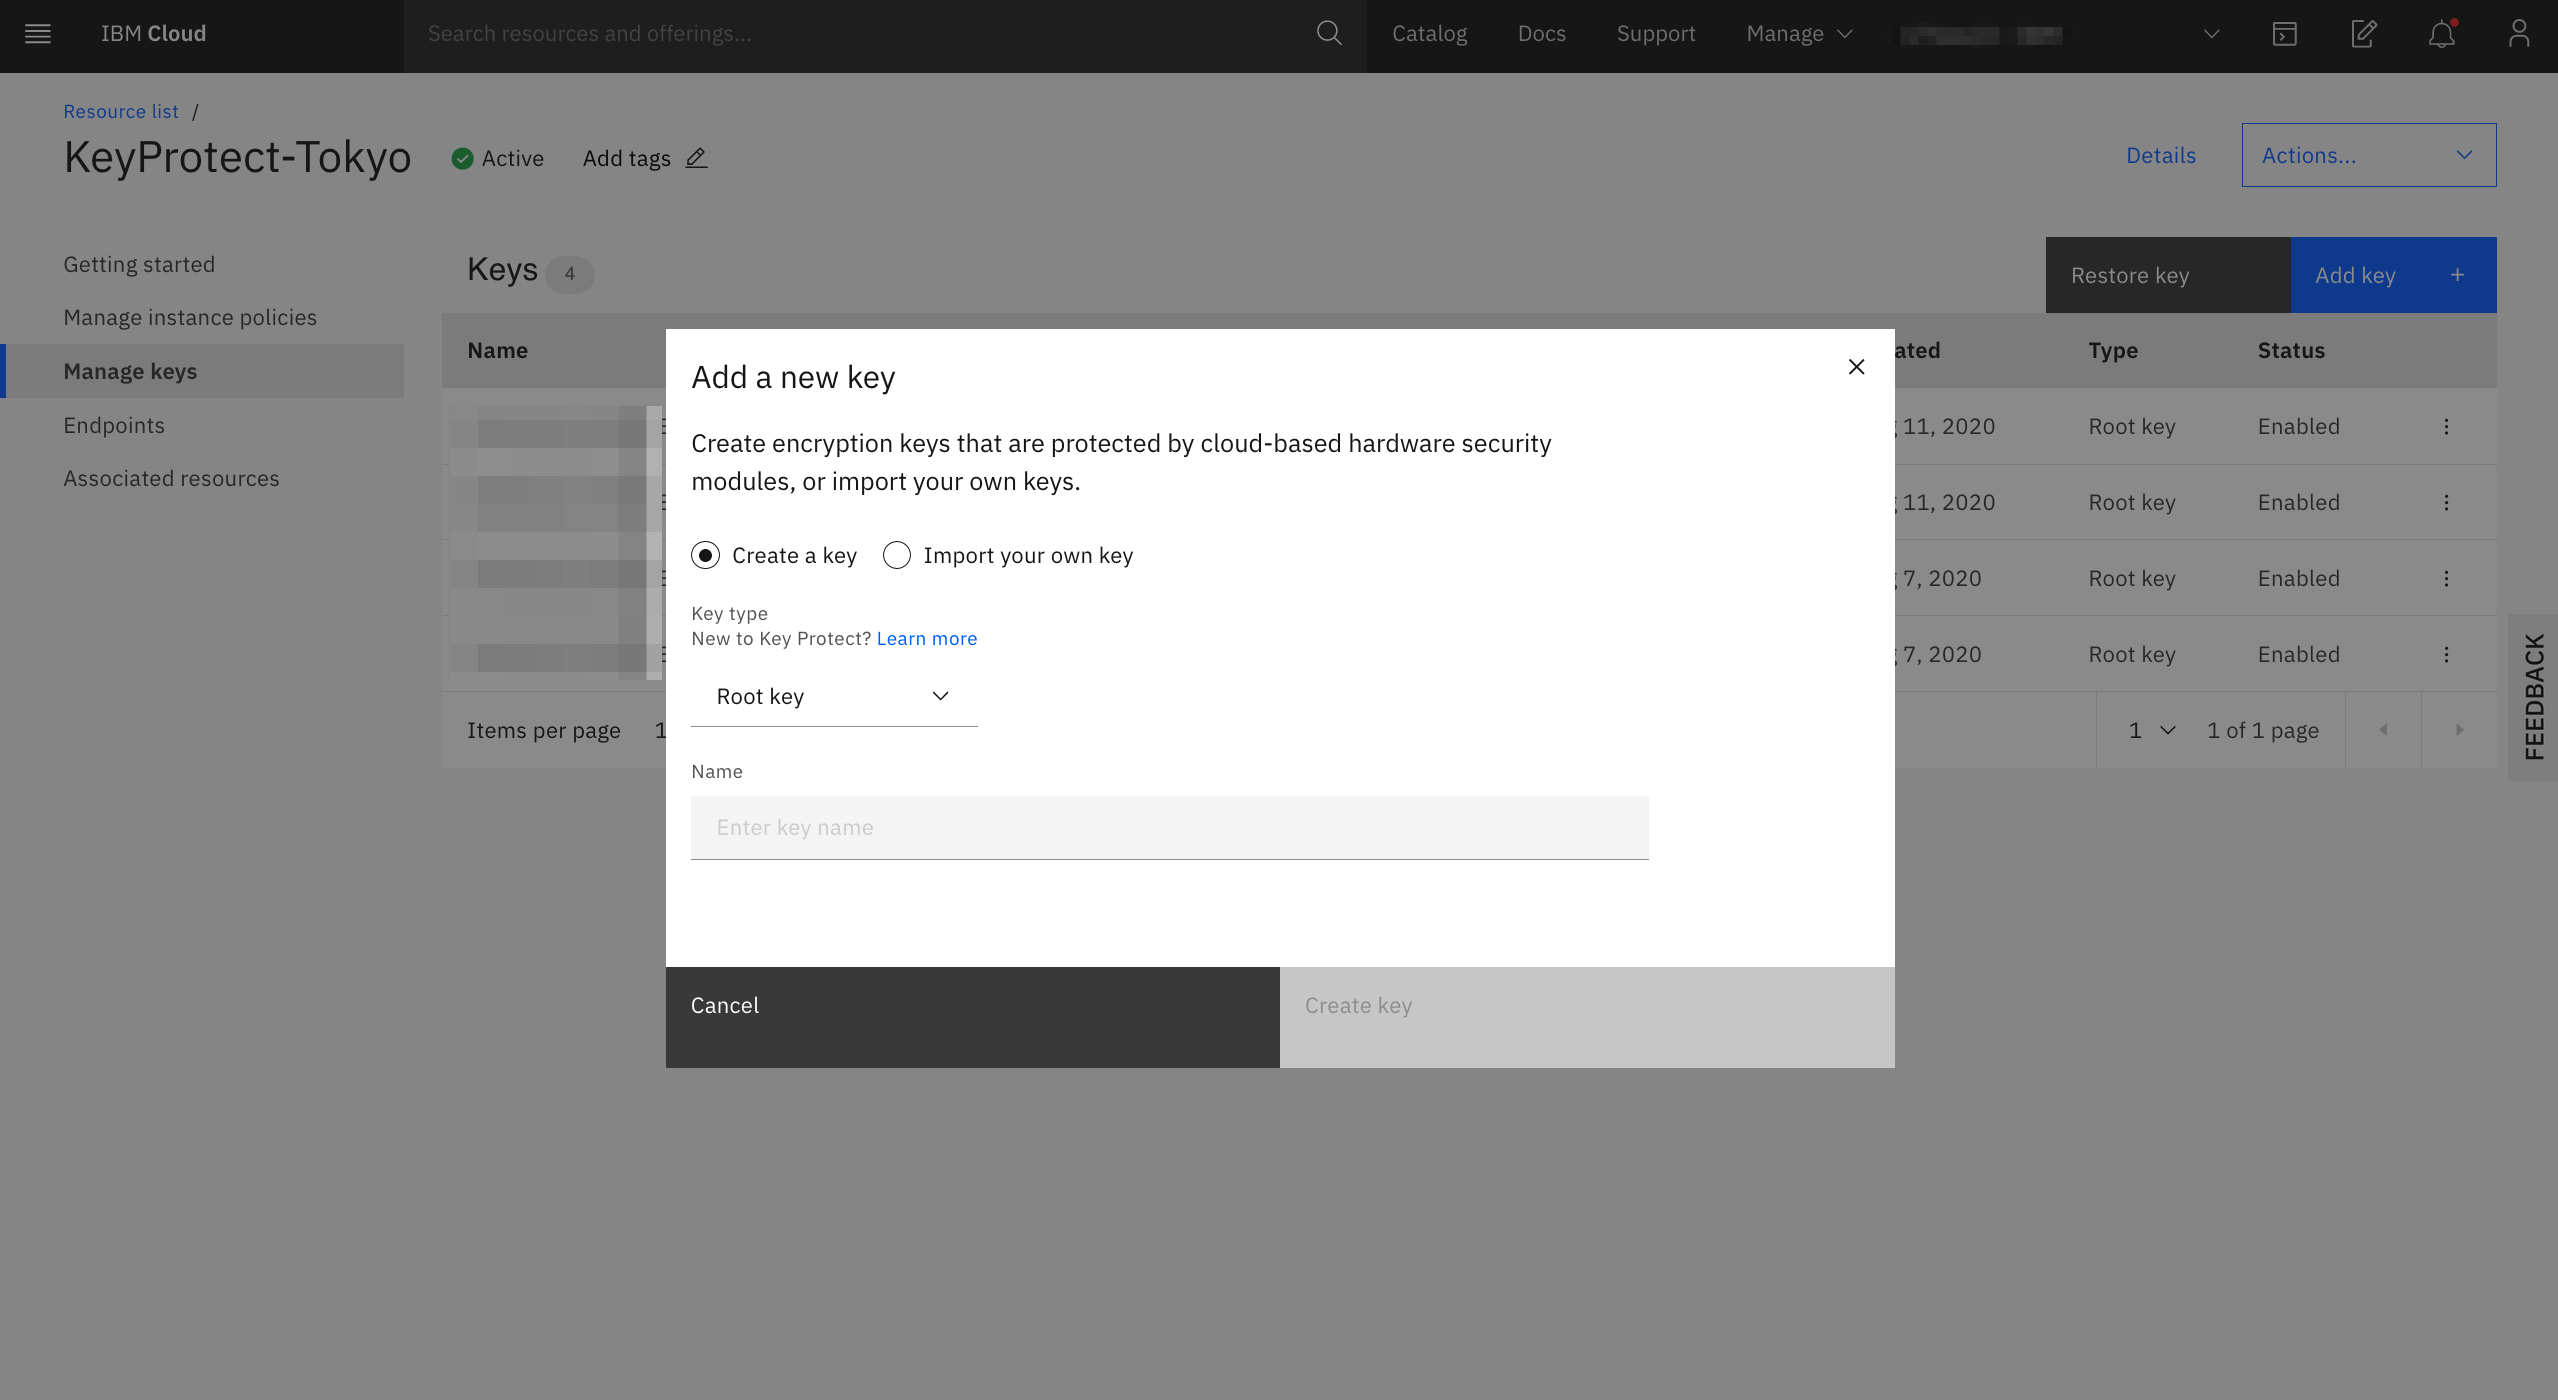
4. Root Keyの作成
KeyProtectによってRoot Keyを生成する方法と、自身の鍵をRoot Keytとして持ち込む方法の2種類が存在する。
4.1 KeyProtectによってRootKeyを生成する方法
$ ibmcloud kp key create SYASUDA_ROOT-KEY
Creating key: 'SYASUDA_ROOT-KEY', in instance: '6efdc301-0119-4472-872c-86de0b6dd8c7'...
OK
Key ID                                 Key Name
e3e396fe-aa85-4985-860f-0c4bd4104c90   SYASUDA_ROOT-KEY
4.2 KeyProtectに自身の鍵をRoot Keyとして持ち込む方法
Root Keyとしての持ち込み要件としては、128bit, 192bit, 256bitのいずれかである必要がある。つまり、16 byte, 24 byte, 32 byteである。
例として
596sGYh!F7t.AN/gfEM347$KK8*Zu7CZ
という鍵を持ち込むことにする。(本来はHSMなどでちゃんと生成したり、隠蔽して構成するべきですが、今回は手順確認のためわざとパスワードを表示しています)
# パスワードを環境変数にセット
$ PASSWORD='596sGYh!F7t.AN/gfEM347$KK8*Zu7CZ'

# KeyProtectに保管する際にはbase64エンコーディング化する必要があるため変換
$ KEY_MATERIAL=`echo $PASSWORD |base64 -w 0`

# Root KeyとしてImport
$ ibmcloud kp key create SYASUDA_ROOT-KEY -k $KEY_MATERIAL
Creating key: 'SYASUDA_ROOT-KEY', in instance: '6efdc301-0119-4472-872c-86de0b6dd8c7'...
OK
Key ID                                 Key Name
e3e396fe-aa85-4985-860f-0c4bd4104c90   SYASUDA_ROOT-KEY

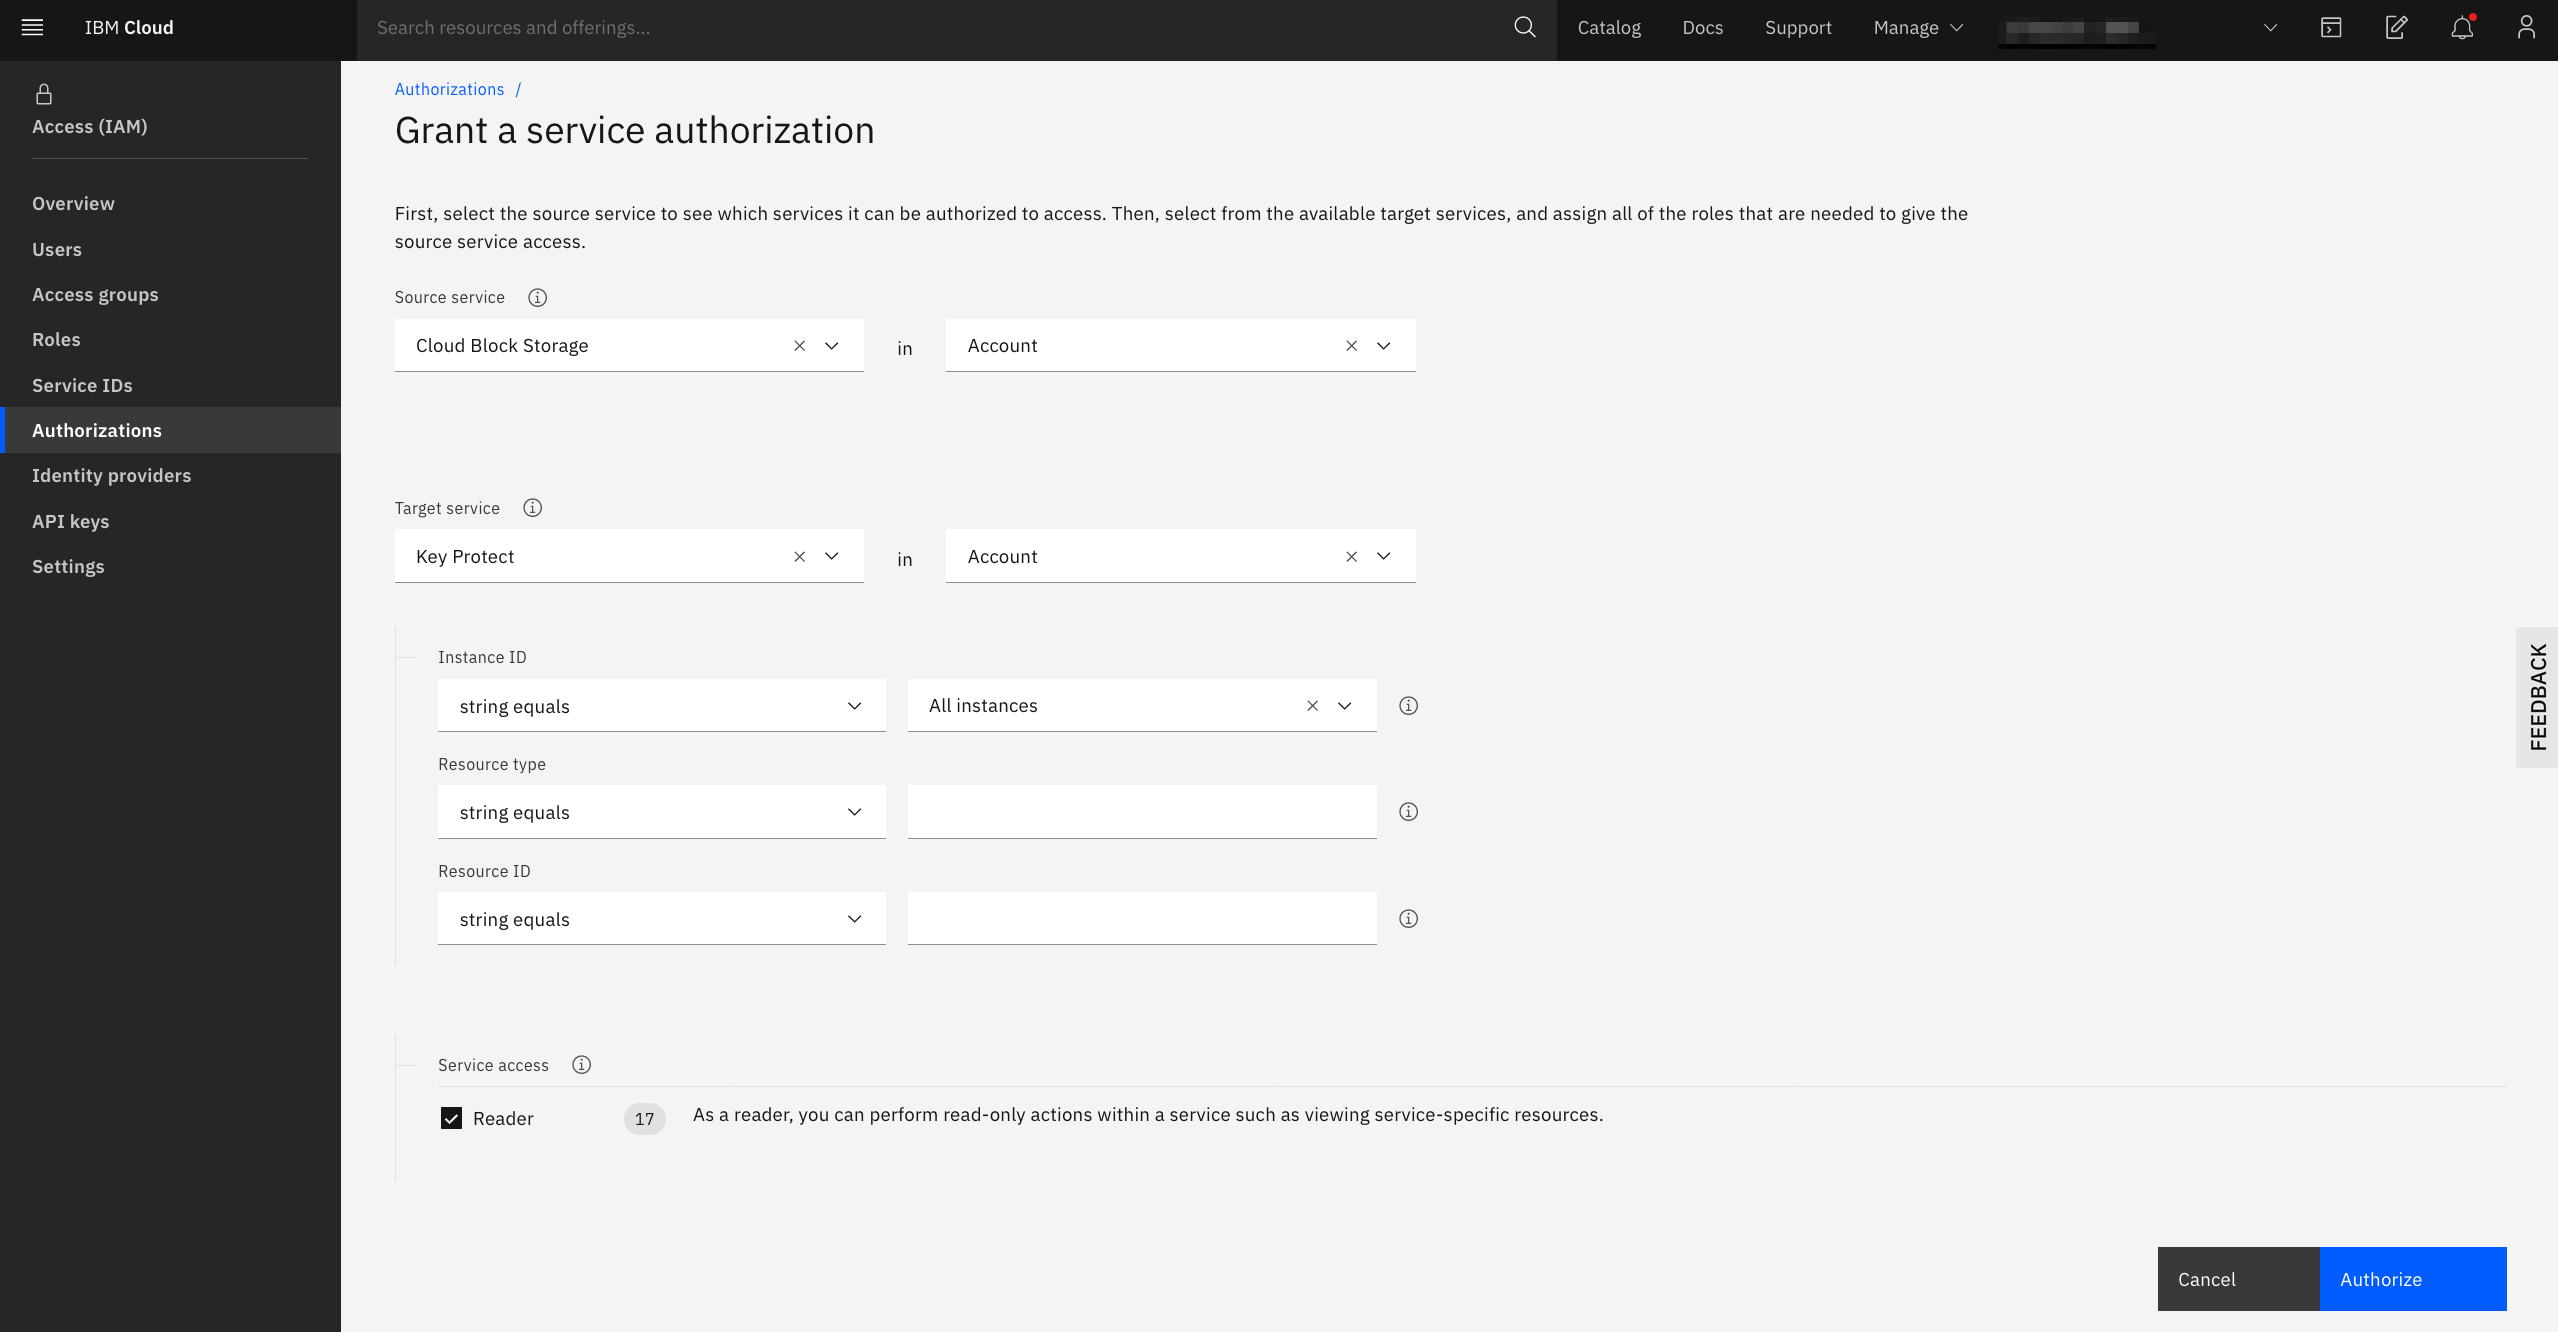
5. IAMでの権限付与
ここでは構成を簡単にするために、本アカウント内のCloud Block Storageは任意のKey Protectにアクセスできるように権限を与える。
(2020/08/12現在、KeyProtectの特定のリソースグループのみを指定して権限付与するやり方だとうまくいかないようです)

6.VPCでサーバーを注文する
デフォルトではProvider Managedになっているので、Editにて編集を行い、


