1. はじめに
IBM Cloud ShellというIBM Cloud上で動くブラウザーベースのshell環境が提供されるようになったので、その特徴を紹介したいと思います。
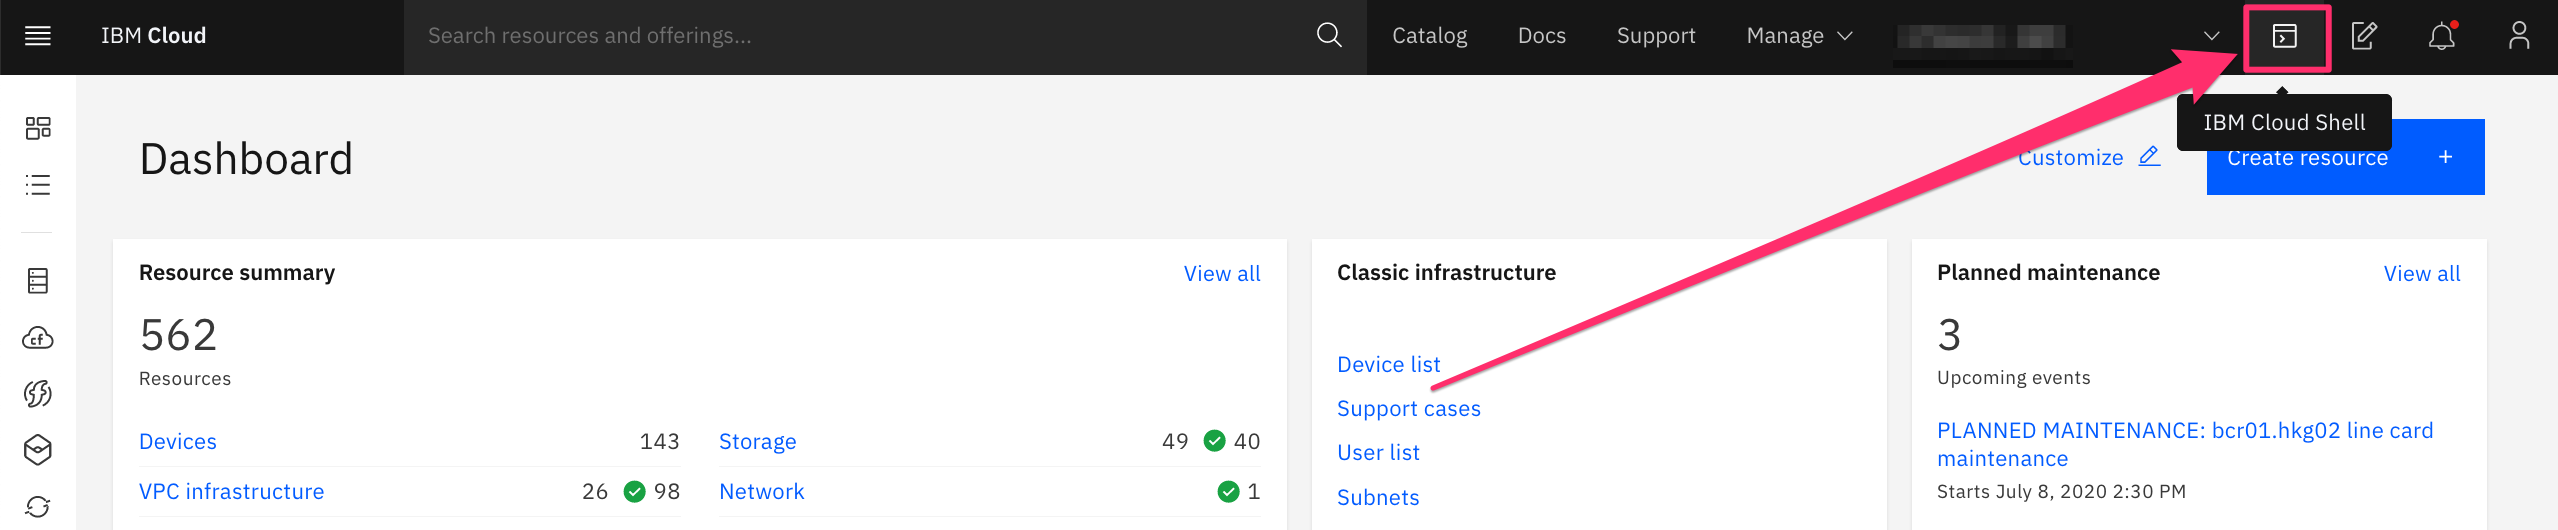
2. IBM Cloud Shellの起動方法
IBM Cloud Portalのここから選ぶだけです。
3. 特徴
いくつか知っておくと便利な機能などを紹介します。
3.1 デフォルトの機能
- (少なくともいまのところは)課金は発生しない。
- インターネットにアクセスすることはできるが、各アカウントのPrivate NWには繋がっていない。
- 各種コマンドがプリインストールされている。詳細は、こちらを参照。
- 5つまでセッションが開ける
- ワークスペース用ストレージ(500MB)はセッション間で共有されているだけでなく、同一ユーザーであればアカウントをまたがっても共有されている。
xxxxxxx@cloudshell:~$ touch hoge
xxxxxxx@cloudshell:~$ ls hoge
hoge
Your IBM Cloud Shell workspace includes 500 MB of temporary secure storage per region that you can access through your personal home directory, /home/. This storage space is provided at the user level rather than the account level. This means that only you can access your storage, and you can access it from any of your accounts. No one else in your accounts can access your workspace storage.
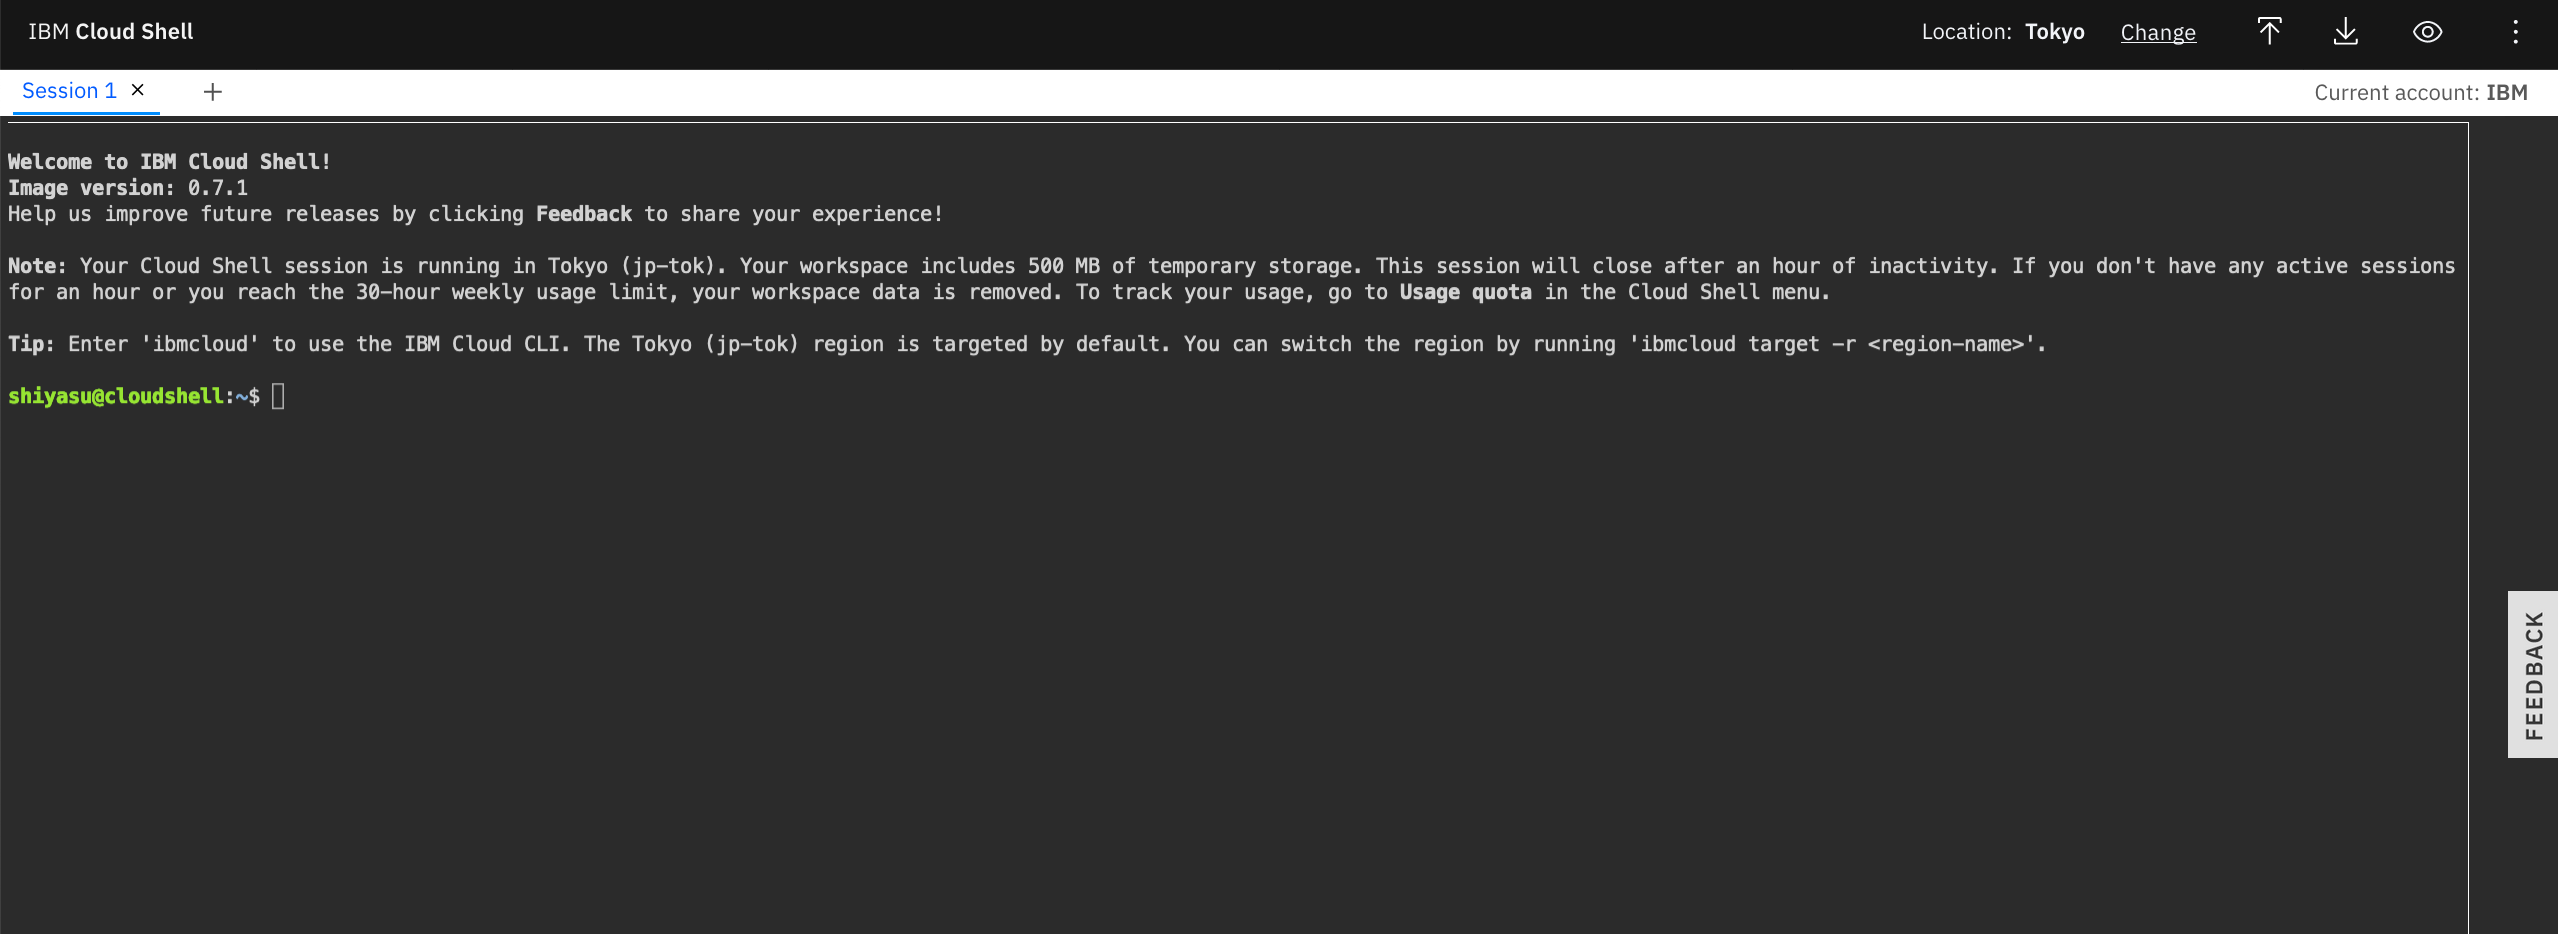
3.2 Locationの選択
IBM Cloud Shellが内部的に動く場所を明示的に選択できます。一応アクセスしている環境によって自動選択されるらしいので、日本のユーザーであればTokyoが選択されるでしょう。今は、Dallas/Frankfurt/Tokyoが選択できるようです。


3.3 ローカル端末からのファイルのアップロード・ダウンロード
IBM Cloud Shellはインターネットに繋がっているため、インターネット上のファイルサーバーにアクセスすることでファイルをダウンロードすることができますが、ローカル端末から直接ファイルをアップロードすることが可能です。もちろんIBM Cloud Shell上の環境からローカル端末にファイルをダウンロードすることも可能です。

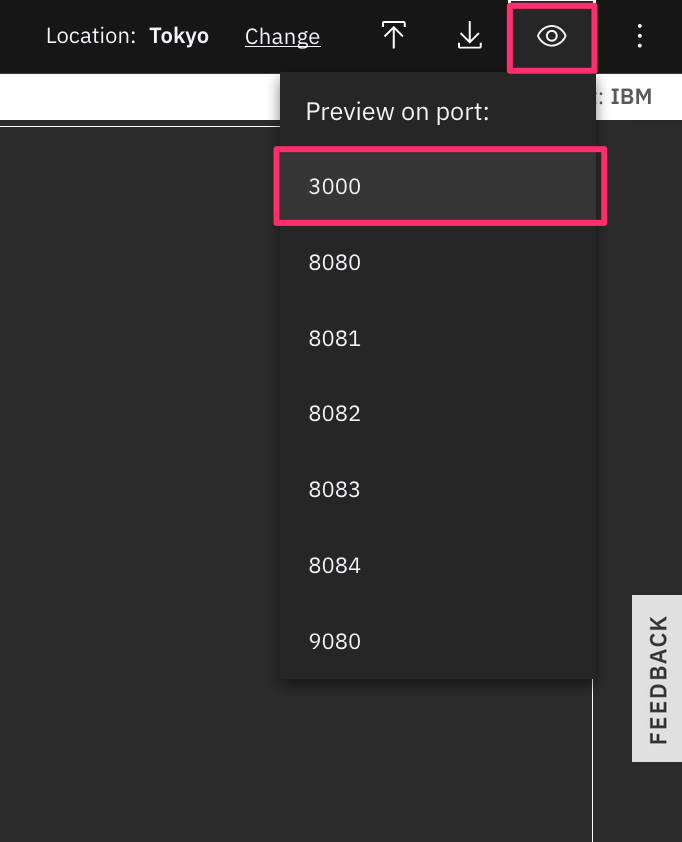
3.4 ローカルで稼働するサービスアクセスする方法
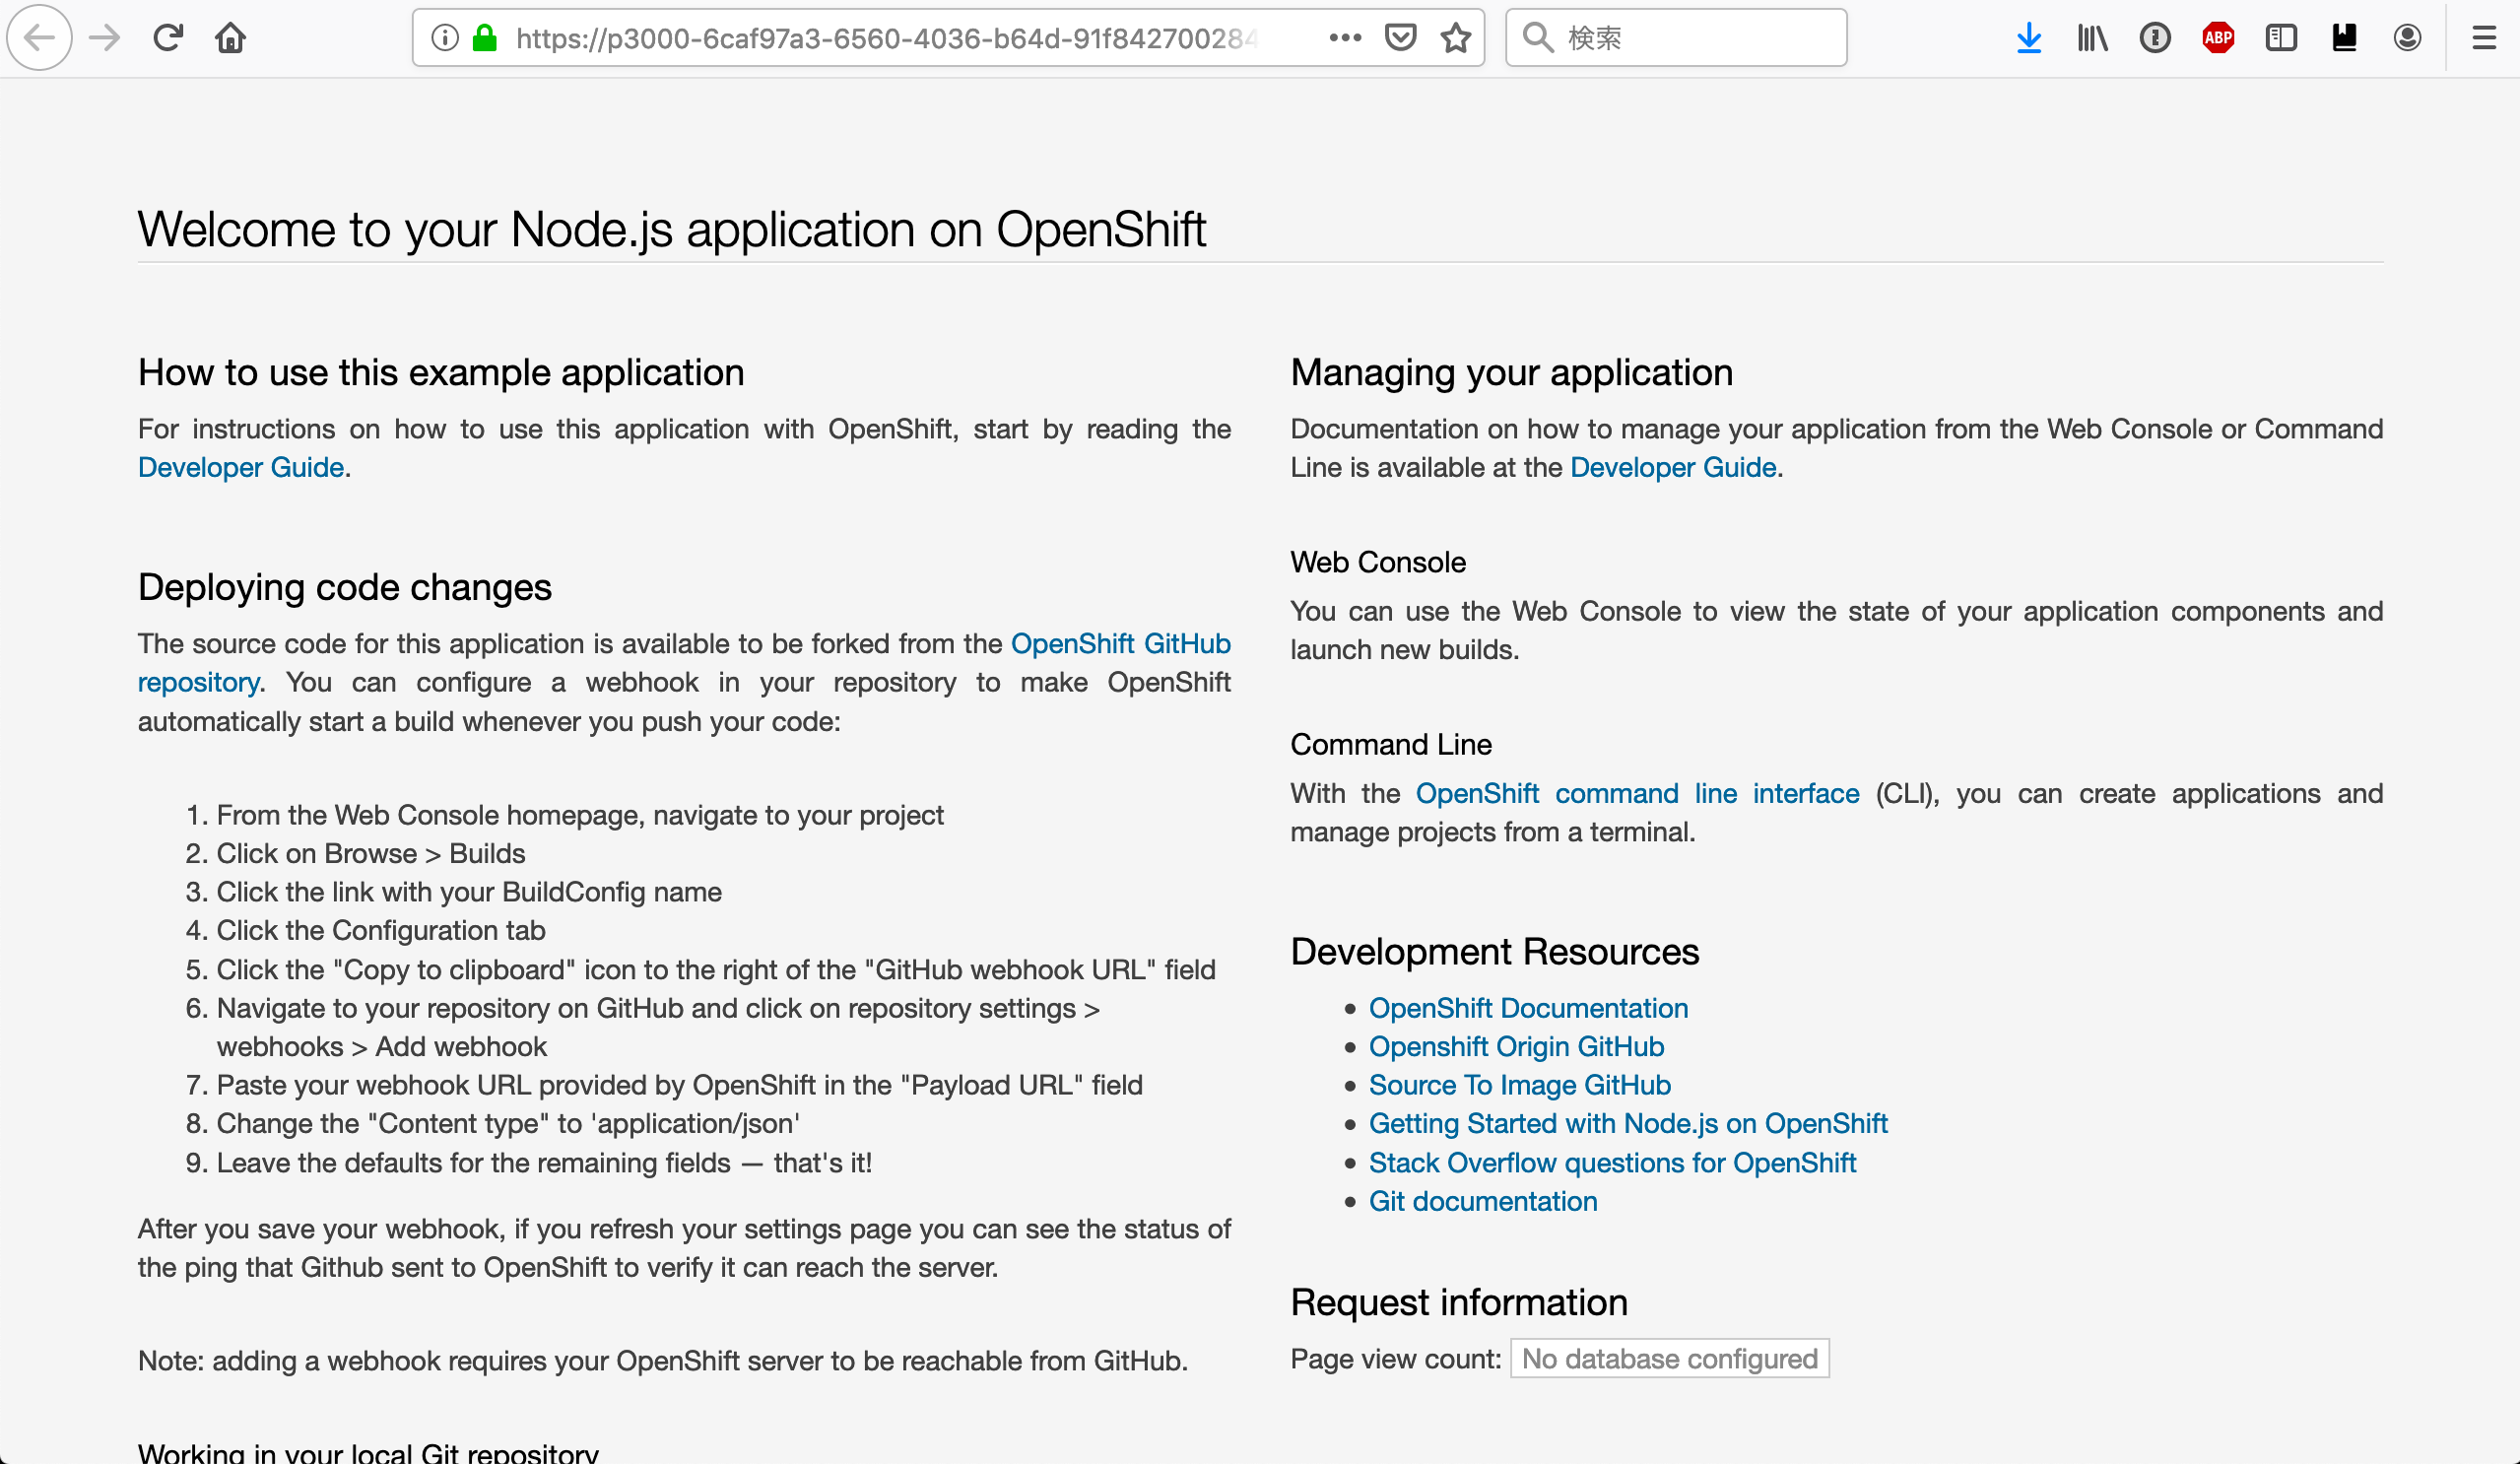
IBM Cloud Shell上に例えばnode.jsやapacheなどでローカルWeb Serviceを立てておくと、このpreview on portの機能でアクセスすることができます。
xxxxxxx@cloudshell:~$ git clone https://github.com/IBM/nodejs-express-app.git
xxxxxxx@cloudshell:~$ cd nodejs-express-app
xxxxxxx@cloudshell:~/nodejs-express-app$ npm install
xxxxxxx@cloudshell:~/nodejs-express-app$ npm run start

> nodejsexpressapp@1.0.0 start /home/shiyasu/nodejs-express-app
> node server/server.js

App UI available http://localhost:3000
Swagger UI available http://localhost:3000/swagger/api-docs
-
Port 3000を選択する
-
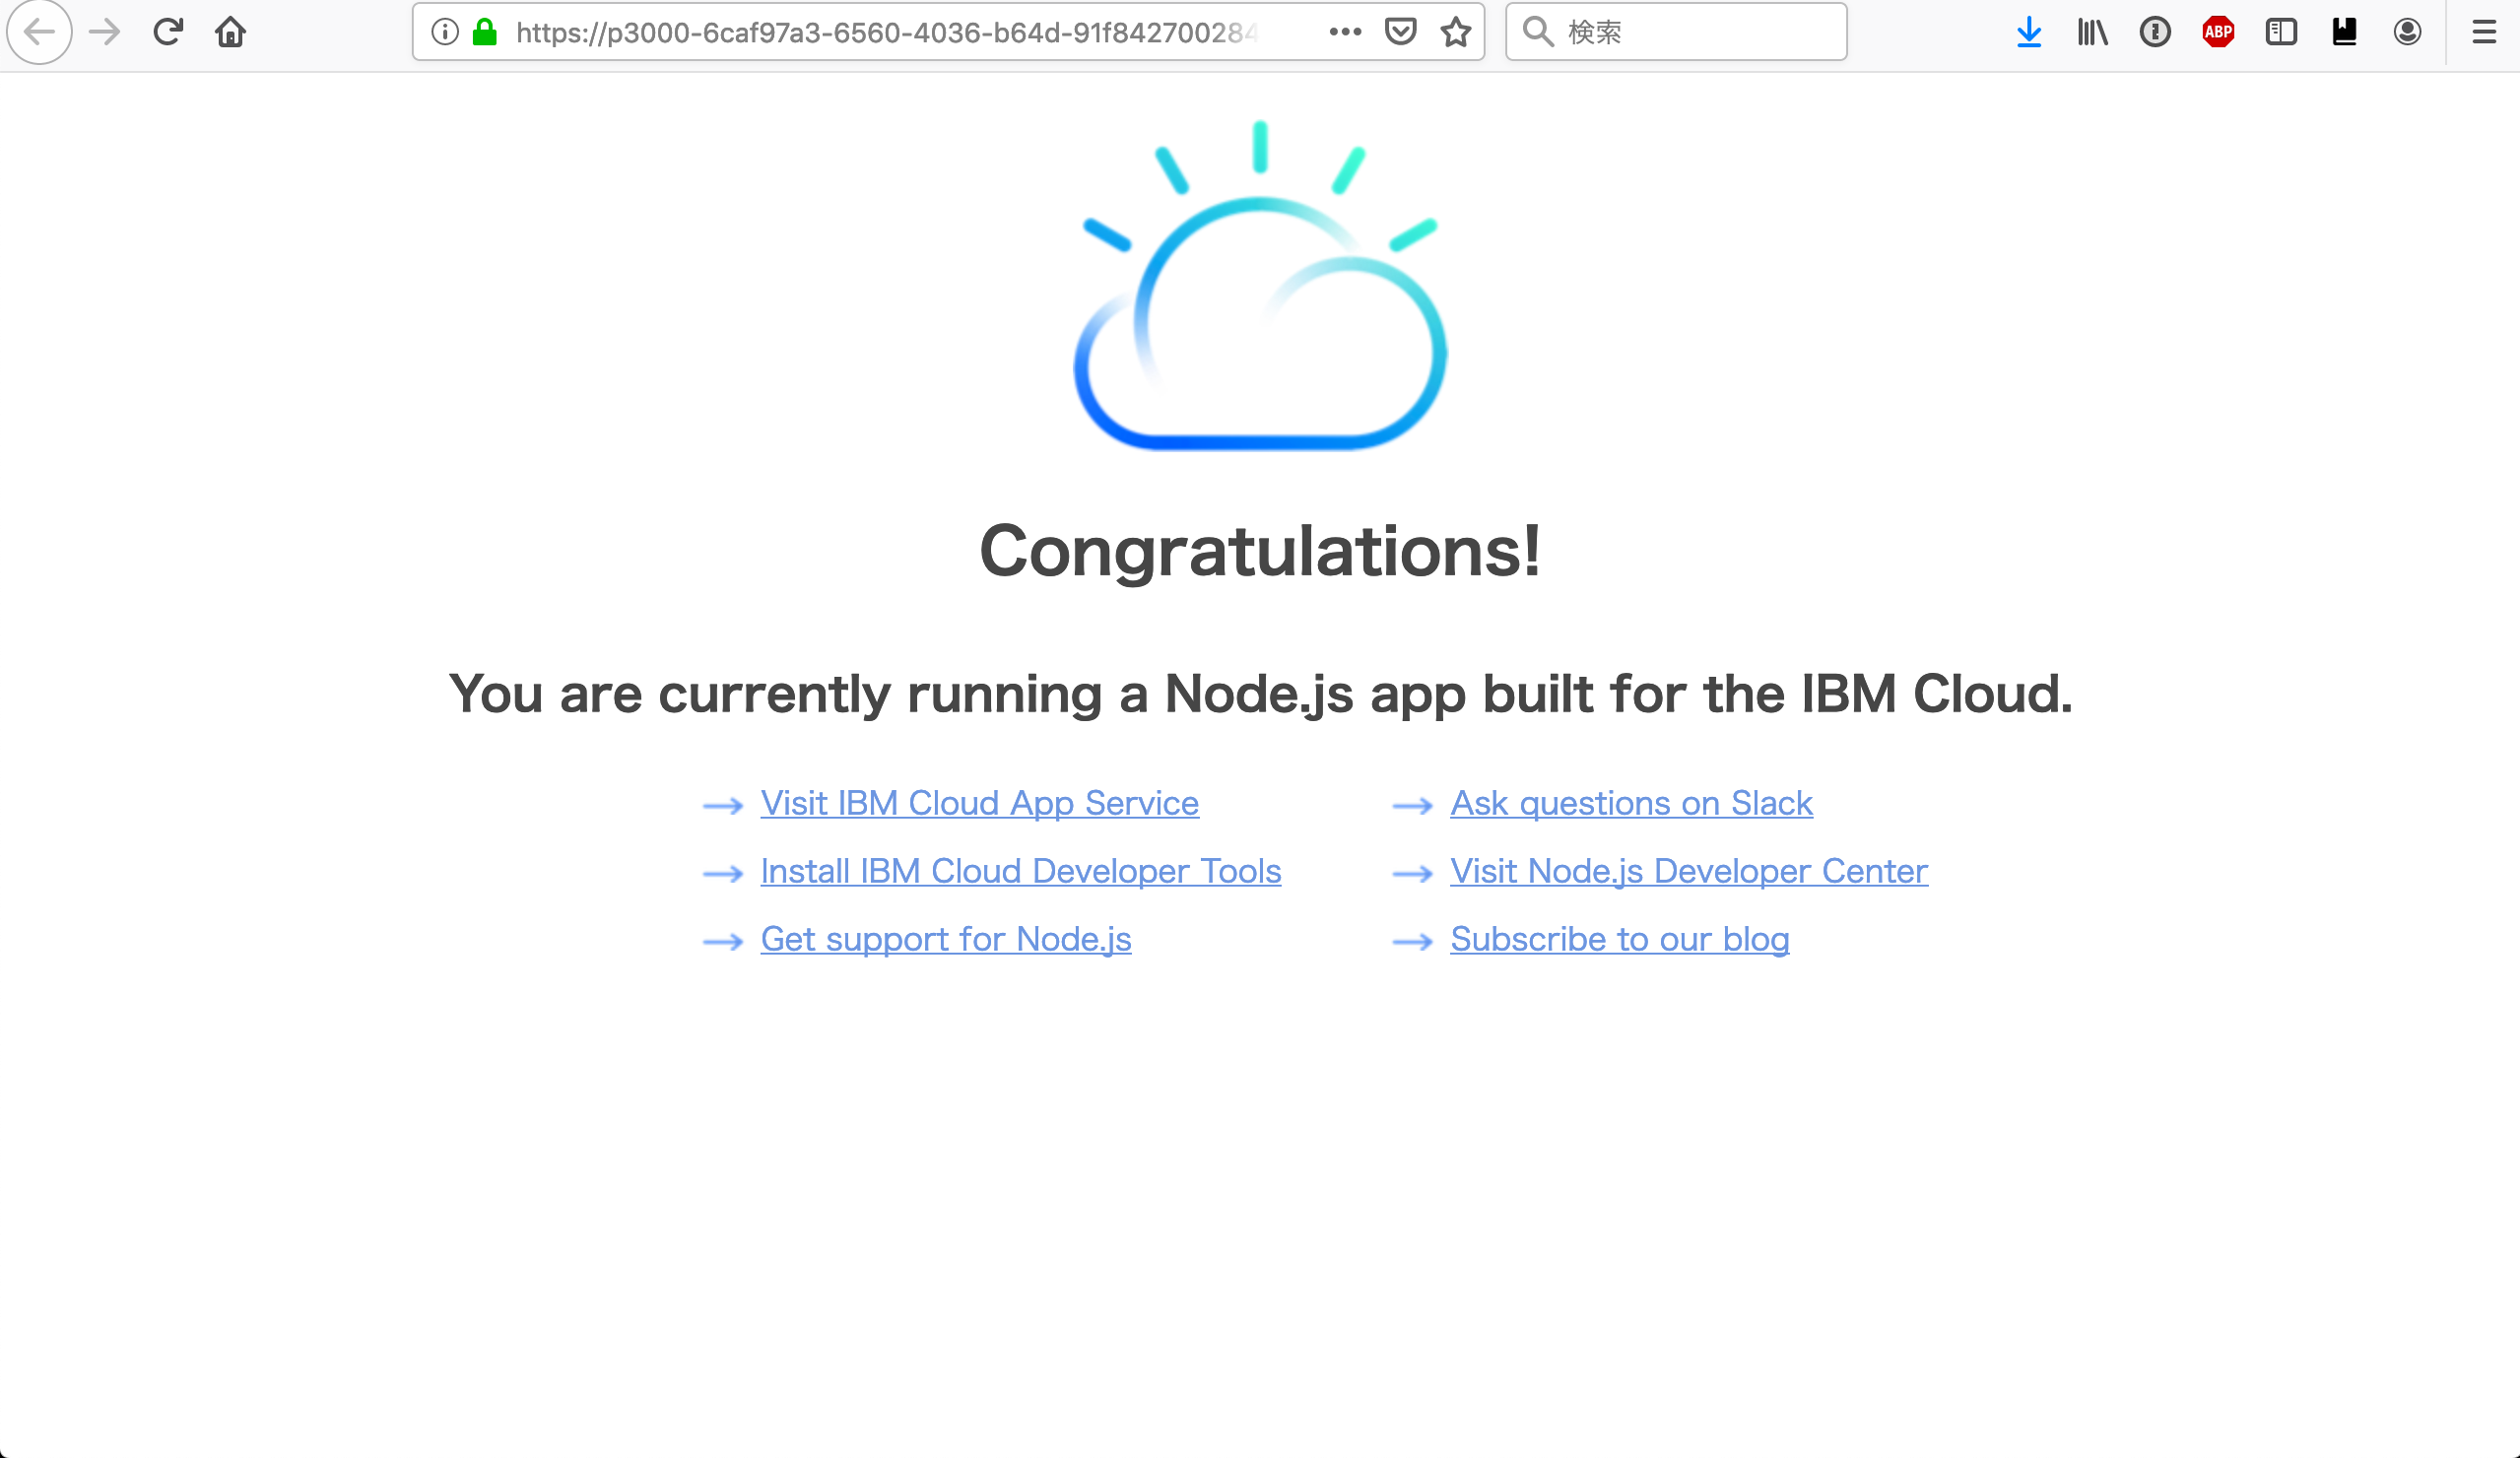
サービスが表示された
-
(この稼動確認の後、cloud foundryにpushするなどの作業を行うことが可能)
3.5 リモートで稼働するサービスにアクセスする方法
ssh port forwardingを利用したり、kubectl port-forwardやoc port-forwardなどを利用すれば、リモート環境で動いているサービスをローカルポートにアクセスすることで転送されるようになります。これを前節のようにIBM Cloud Shell経由でアクセスすれば、例えばリモート環境で動いているPodに対して、直接利用者端末のブラウザから稼働確認することができます。。
https://cloud.ibm.com/docs/cloud-shell?topic=cloud-shell-preview-apps#preview-kube-cluster
xxxxxxx@cloudshell:~$ oc get pods -n syasuda
NAME                                       READY   STATUS      RESTARTS   AGE
nodejs-ex-1-build                          0/1     Completed   0          15d
nodejs-ex-649bd6778d-wrznm                 1/1     Running     0          15d

xxxxxxx@cloudshell:~$ oc port-forward pod/nodejs-ex-649bd6778d-wrznm -n syasuda 3000:8080
Forwarding from 127.0.0.1:3000 -> 8080
Forwarding from [::1]:3000 -> 8080
xxxxxxx@cloudshell:~$ ss -anpt|grep 3000
LISTEN     0      0      127.0.0.1:3000                     *:*                   users:(("oc",pid=305,fd=7))
LISTEN     0      0          ::1:3000                    :::*                   users:(("oc",pid=305,fd=8))

xxxxxxx@cloudshell:~$ curl -I http://localhost:3000
HTTP/1.1 200 OK
X-Powered-By: Express
Content-Type: text/html; charset=utf-8
Content-Length: 40430
ETag: W/"9dee-3nm2OJV/pDUlKWUTQSk1Z/pOG6E"
Date: Fri, 26 Jun 2020 00:09:56 GMT
Connection: keep-alive
- Port 3000を選択すると・・・
- Podに直接アクセスできた!
4. 注意点
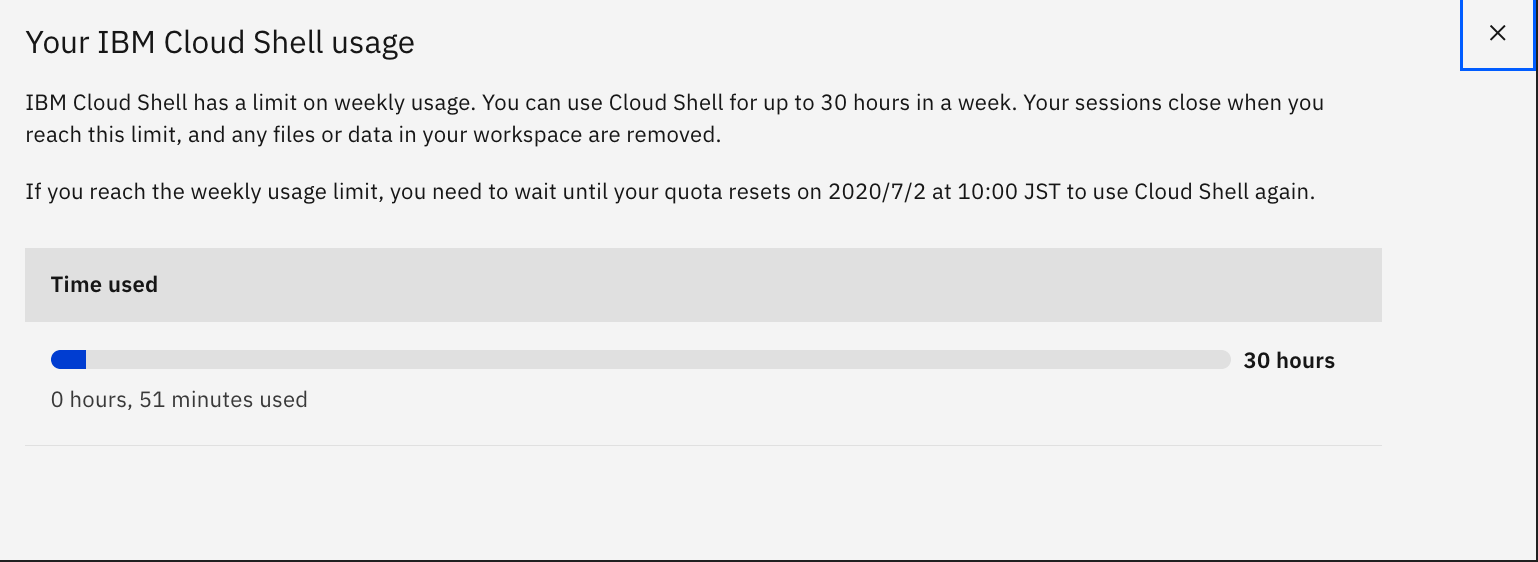
- 利用時間はリージョンあたり週に30時間まで。30時間を超えると、リセットされるまで5分しか使えなくなる。
- セッションは、1時間利用しないと自動的にcloseされて、データも消去される。
- セッションがopen中は利用中とカウントされるので、使っていない時間はcloseすること
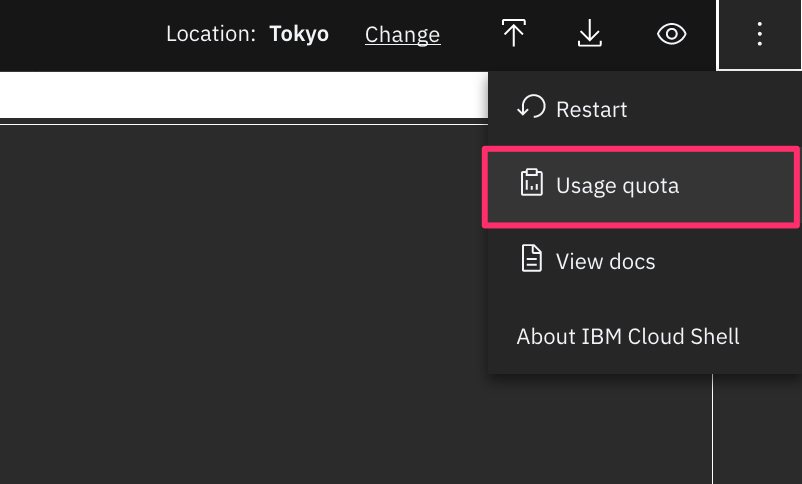
- 利用時間の確認方法は以下の通り
- コンソールから"Usage quota"を選択
- 30時間中51分利用している。
- コンソールから"Usage quota"を選択
- IBM Cloud Shellはあくまで管理コンソール経由で起動するため、Private NW経由では利用できない。