tippyとは
ShinyアプリやR Markdownドキュメントにツールチップを追加するためのパッケージです。
パッケージ作者John Coene氏による公式ページはこちらです: http://tippy.john-coene.com/
本記事ではShinyでの利用法をご紹介します。
注意
tippyは2018年8月にCRANに登録されたばかりの新しいパッケージです。
本記事では tippy バージョン 0.0.1 を使用しています。今後のアップデートにより下記の内容は変化する可能性があります。
デモ
デモアプリをこちらで公開しました: https://terashim.shinyapps.io/begin-r-tippy-pkg/
ソースコードはGitHub terashim/begin-r-tippy-pkg で公開しています。
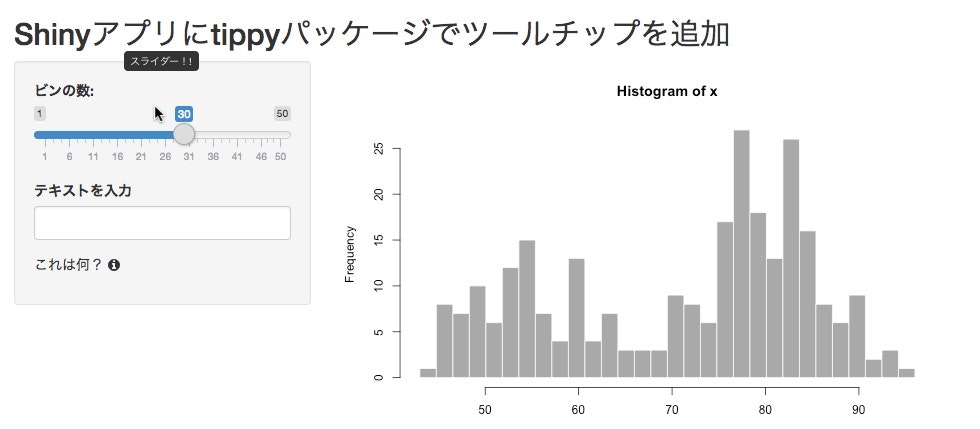
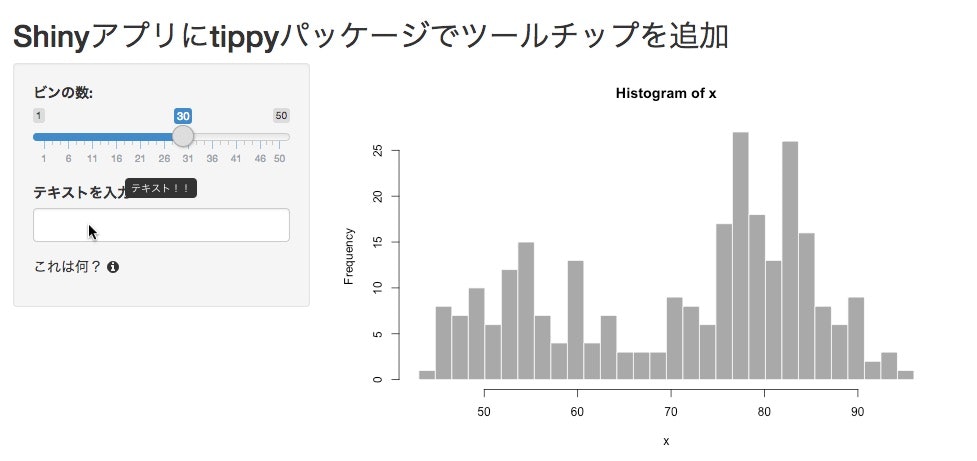
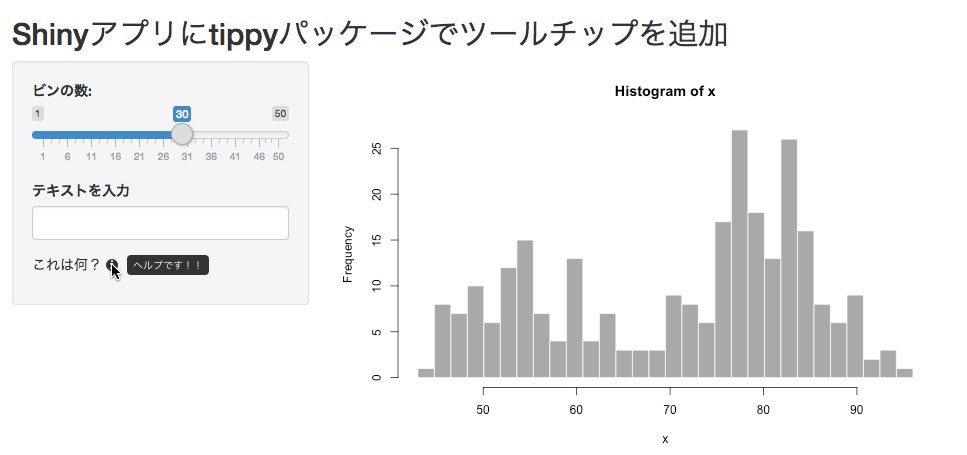
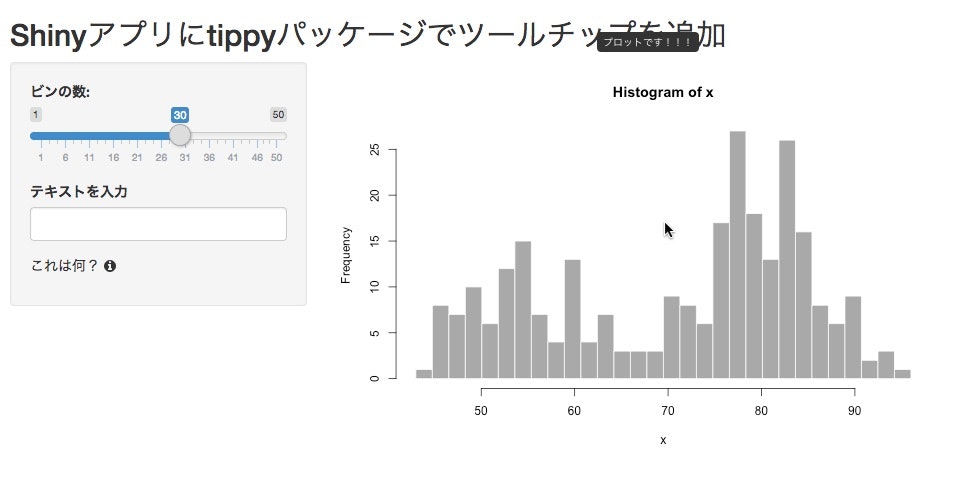
スクリーンショット
ソースコード
app.R
library(shiny)
library(tippy)

# アプリケーションのUIを定義
ui <- fluidPage(

  # アプリケーションのタイトル
  titlePanel("Shinyアプリにtippyパッケージでツールチップを追加"),

  sidebarLayout(
    # サイドバー
    sidebarPanel(

      # スライダー入力にツールチップを付けるための工夫 = ラッパーdiv要素で囲む
      # tippyバージョン0.1.0ではsliderInputとselectInputに直接ツールチップを付けられない
      # Cf. https://github.com/JohnCoene/tippy/issues/2
      div(
        id = "bins-wrapper",
        # スライダー入力
        sliderInput("bins", "ビンの数:", min = 1, max = 50, value = 30)
      ),
      # スライダー入力ウィジェットにツールチップを付ける
      tippy_this(elementId = "bins-wrapper", tooltip = "スライダー!!"),

      # テキスト入力
      textInput("text", "テキストを入力"),
      # テキスト入力ウィジェットにツールチップを付ける
      tippy_this(elementId = "text", tooltip = "テキスト!!"),


      p(
        "これは何?",
        # font-awesomeのアイコンにツールチップを付けるため、ラッパーspan要素で囲む
        span(icon("info-circle"), id = "info"),
        tippy_this(
          elementId = "info",
          tooltip = "ヘルプです!!",
          placement = "right" # 右側にツールチップを出すオプション
        )
      )
    ),

    # メインパネル
    mainPanel(
      # ラッパーdiv要素で囲み、idを付ける
      div(
        id = "plot",
        plotOutput("distPlot")
      ),
      # ツールチップを付ける
      tippy_this(elementId = "plot", tooltip = "プロットです!!!")
    )
  )
)

# サーバー側ロジックを定義
server <- function(input, output) {

  output$distPlot <- renderPlot({
    # ui.Rから来た input$bins に基づいてビンを生成
    x    <- faithful[, 2]
    bins <- seq(min(x), max(x), length.out = input$bins + 1)

    # 指定のビン数でヒストグラムを描画
    hist(x, breaks = bins, col = 'darkgray', border = 'white')
  })
}

# アプリケーションを起動する
shinyApp(ui = ui, server = server)
ポイント
Shinyにおける基本的な使い方
Shinyにおけるtippyの最も基本的な使い方は次のようなものです:
      # テキスト入力
      textInput("text", "テキストを入力"),
      # テキスト入力ウィジェットにツールチップを付ける
      tippy_this(elementId = "text", tooltip = "テキスト!!"),
ここでは関数 tippy_this() を使い、ID "text" のついたテキスト入力要素にツールチップを追加しています。
この例で想像できるように、関数 tippy_this() の基本文法は
tippy_this(elementId = "ツールチップを追加したい要素のID", tooltip = "ツールチップの表示メッセージ")
のようになっています。
sliderInputやselectInputで使うときの工夫
tippyバージョン0.1.0では、sliderInputとselectInputに直接ツールチップを付けられないという問題があります(tippy_this not working for some input widgets · Issue #2 · JohnCoene/tippy)。
これを回避するため、今回のデモアプリではスライダー入力をdiv要素で囲むという工夫をしています
      div(
        id = "bins-wrapper",
        # スライダー入力
        sliderInput("bins", "ビンの数:", min = 1, max = 50, value = 30)
      ),
      # スライダー入力ウィジェットにツールチップを付ける
      tippy_this(elementId = "bins-wrapper", tooltip = "スライダー!!"),
よく見るインフォメーションマークの実装
よく見かける “i” マークにマウスカーソルを合わせるとツールチップが出てくるUIを次のようにして実装しました:
        # font-awesomeのアイコンにツールチップを付けるため、ラッパーspan要素で囲む
        span(icon("info-circle"), id = "info"),
        tippy_this(
          elementId = "info",
          tooltip = "ヘルプです!!",
          placement = "right" # 右側にツールチップを出すオプション
        )
関数 shiny::icon() でfontawesomeの info-circle アイコンを挿入し、それをspan要素で囲んでIDを "info" と設定しました。このspan要素にツールチップを付けています。
さらに、tippy_this() のオプション placement = "right" を指定することによってツールチップがアイコンの右側に出てくるよう調整しました。
まとめ
以上、tippyパッケージについてShinyで利用する際のポイントを中心にご紹介しました。
他にもツールチップの挙動を制御する様々オプションやR Markdownにおける利用などの話題がありますが本記事では割愛しました。
詳細については Tippy.js や tippyパッケージ の公式ページをご覧ください。
参考
- tippyパッケージ公式サイト Add Tooltips to 'R markdown' Documents or 'Shiny' Apps • tippy
- JavaScriptライブラリTippy.jsの公式ページ Tippy.js - Vanilla JS Tooltip and Popover Library
- tippy_this not working for some input widgets · Issue #2 · JohnCoene/tippy


