SpringBootでブラウザにHelloworldを表示して
CSS・JSファイルを読み込むまで
ゼロからWEBアプリケーション開発の環境構築をするためのメモ。
初心者でも簡単にSpring Bootを使った開発を始めることができます。
Helloworldだけでは感動が薄いので、画面デザインつきHelloworldを実現します。
はじめに
WEBアプリ開発に必要な技術をプロジェクト外で試したい時ってありますよね。
特に最近はSpringが主流で、画面遷移時の動きを確認したいこともよくあります。
また、サーバー側だけでなく、ついでにJavascriptやCSSの動きも試したい。
そういう時に、ハマらずにすぐ環境を用意できる備忘録があれば便利ですよね。
そこで、今回はSpringBoot, Gradle, STS(Eclipseベース)を使った
環境構築手順を用意しました。
技術要素
- SpringBoot (2.x)
- SpringMVC
- Gradle
- Thymeleaf
- CSS3
- JavaScript
環境(事前に用意するもの)
- STS (EclipseをSpring用にカスタムしたIDE)
STSの用意
・以下のURLからダウンロードします。
https://spring.io/tools3/sts/all
→ これをDドライブ直下などに解凍して、STSを起動します。
プロジェクトの作成
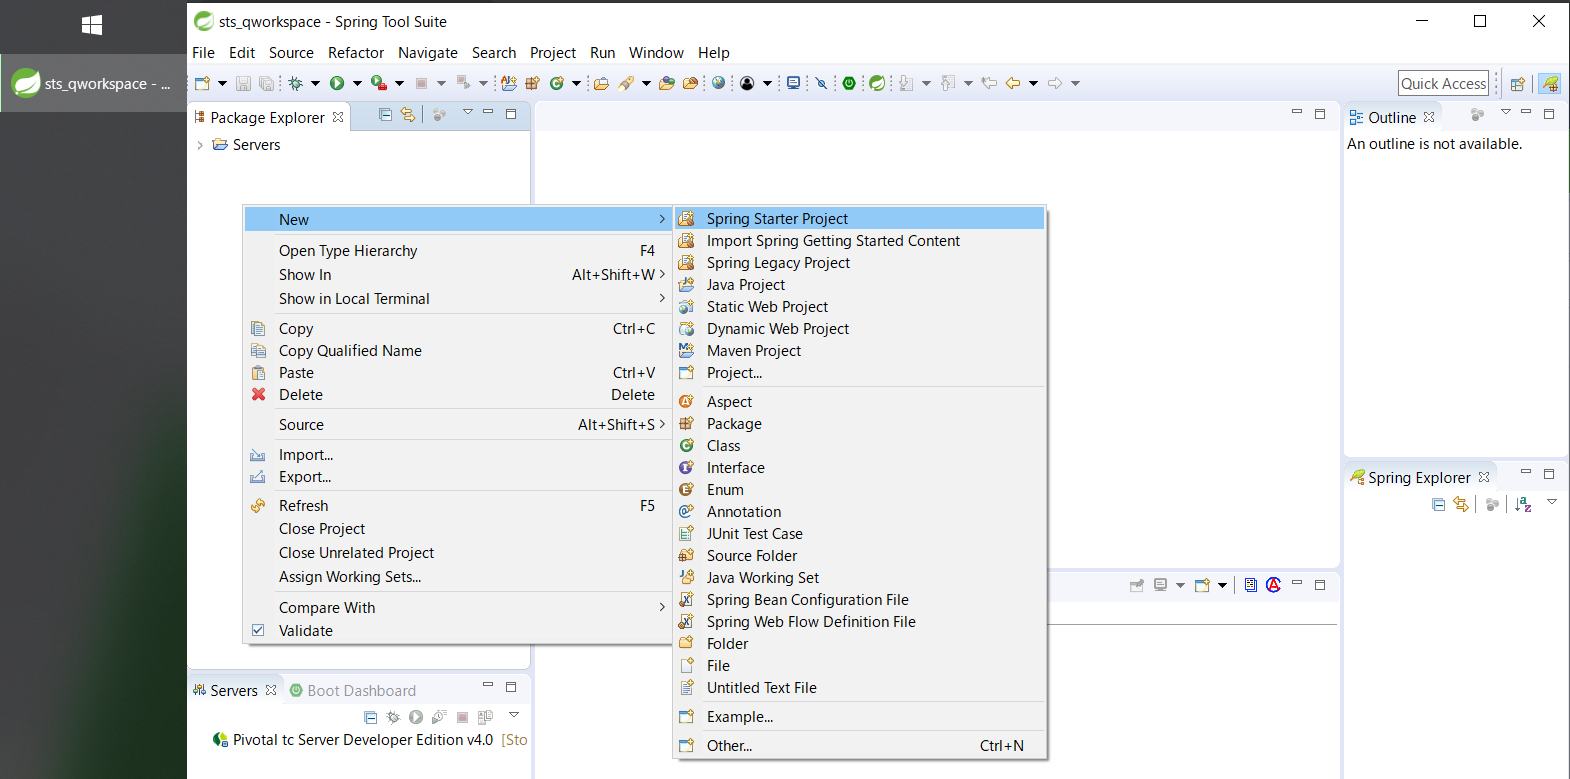
パッケージエクスプローラーから右クリック > New > Spring Starter Project を選択。
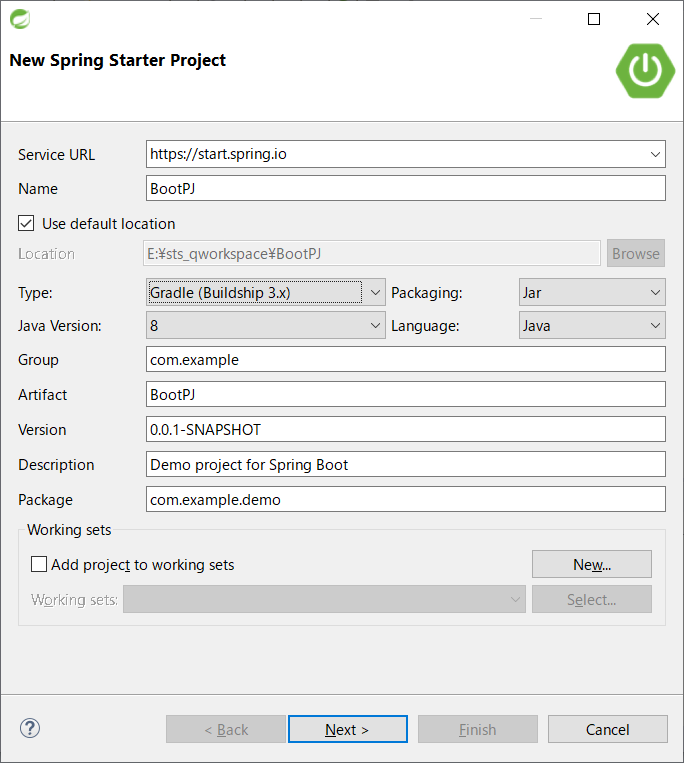
「Name」にプロジェクト名を入力。
今回はMavenでなくGradleを使いたいので「Type」で最新のGradleを選択して、「Next」。
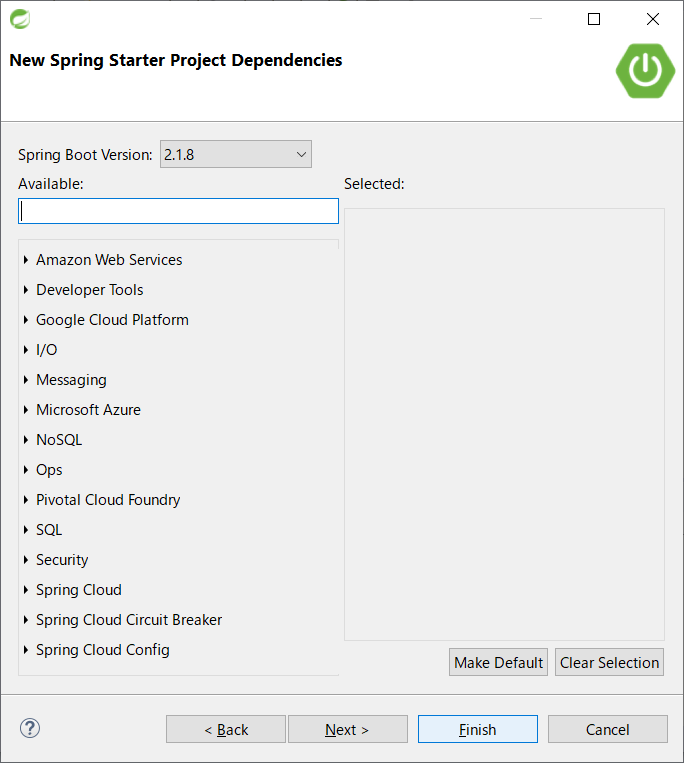
Spring Boot Version は現在2.1.8となっています。
今回はその他は特に何も指定せずに 「Finish」 で完了。
HTMLファイルの用意
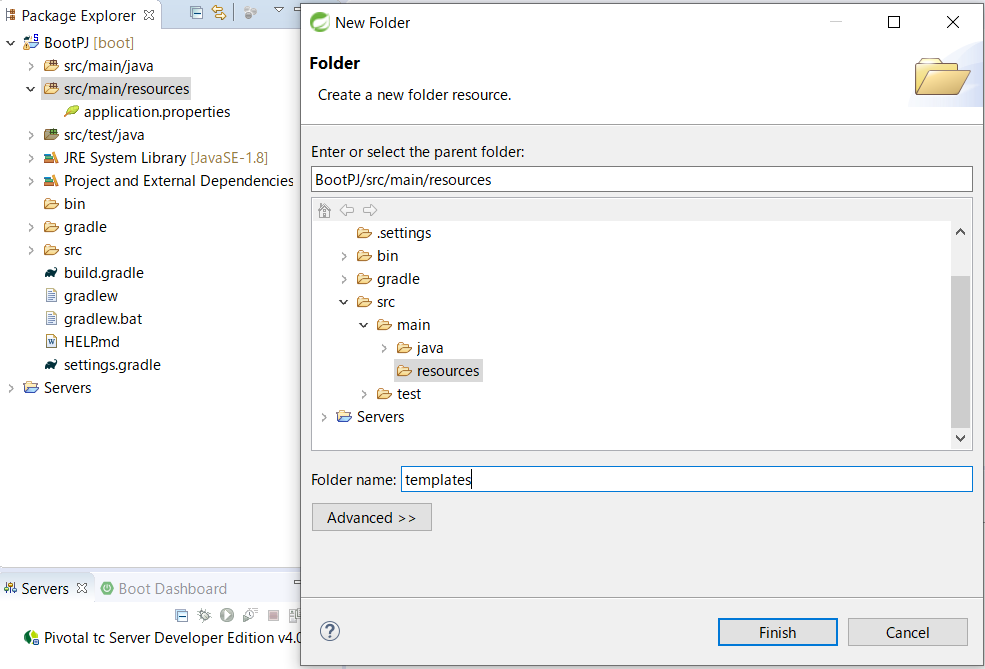
プロジェクトの 「src/main/resources」配下に「templates」という名称のフォルダを作成します。
(templates という名称と作成場所はSpringBootプロジェクトの決まりです)
次に、templates 配下に適当なHTMLファイルを作成します。
templatesフォルダ右クリック> New > other > Web > HTML File を選択して
適当なファイル名称でHTMLファイルが作成できます。
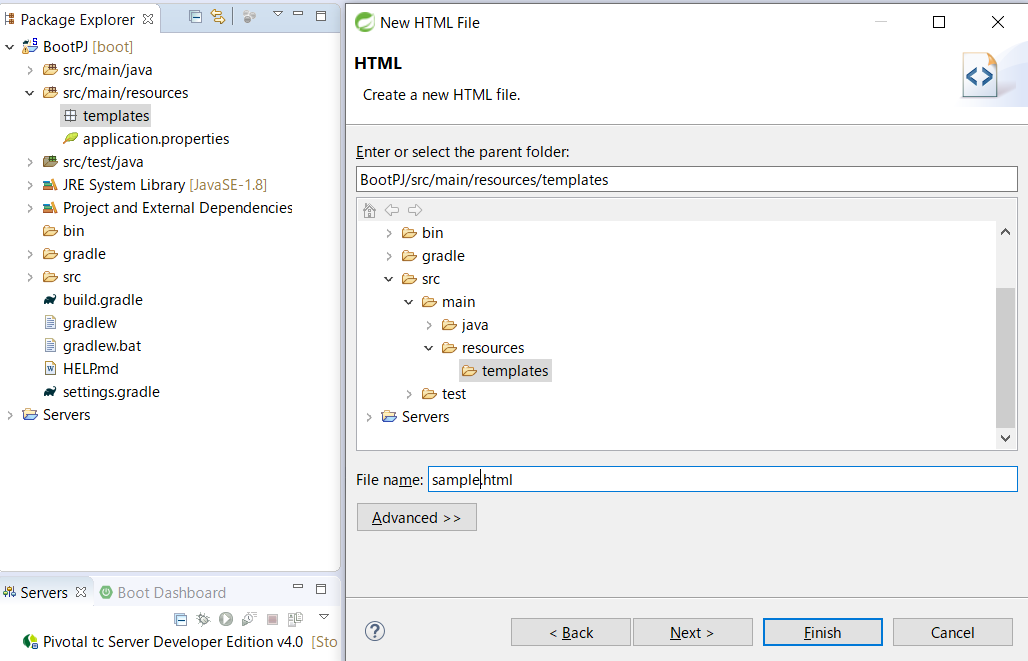
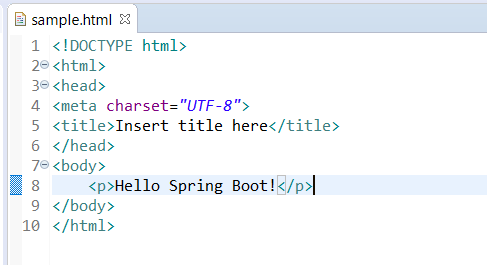
今回は「Hello Spring Boot!」と入力しておきます。
JavaScript, CSSファイルの用意
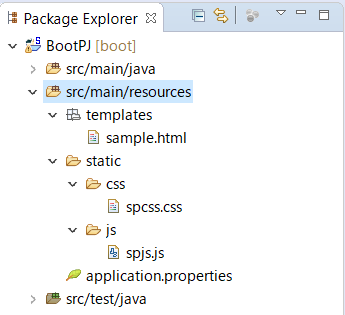
「src/main/resources」配下に「static」という名称のフォルダを作成します。
(static という名称と作成場所もSpringBoot プロジェクトの決まりです)
次に、「Static」配下にそれぞれ「js」「css」フォルダを作成しておきます。
各フォルダ配下に空のJavaScriptファイルとCSSファイルを作成しておきましょう。
build.gradle の編集
次に、SpringMVCとTymeleafを使いたいので、build.gradleを編集します。
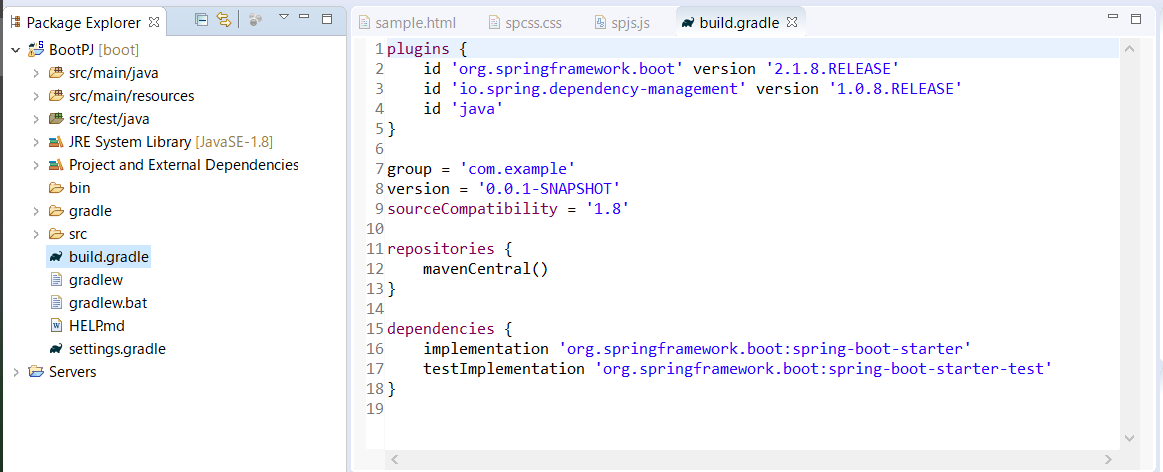
私の場合、デフォルトでは以下内容となっています。
build.gradle にdependenciesを追加します。以下3行です。
これでSpringMVCの必要な機能と、Themeleafが利用できます。
また、3行目のライブラリだけでホットデプロイ機能が有効になります。
compile 'org.springframework.boot:spring-boot-starter-web'
compile 'org.springframework.boot:spring-boot-starter-thymeleaf'
compile 'org.springframework.boot:spring-boot-devtools'
buil.gradle全体の内容は以下の通りです。
plugins {
	id 'org.springframework.boot' version '2.1.8.RELEASE'
	id 'io.spring.dependency-management' version '1.0.8.RELEASE'
	id 'java'
}

group = 'com.example'
version = '0.0.1-SNAPSHOT'
sourceCompatibility = '1.8'

repositories {
	mavenCentral()
}

dependencies {
	implementation 'org.springframework.boot:spring-boot-starter'
	testImplementation 'org.springframework.boot:spring-boot-starter-test'
	compile 'org.springframework.boot:spring-boot-starter-web'
	compile 'org.springframework.boot:spring-boot-starter-thymeleaf'
	compile 'org.springframework.boot:spring-boot-devtools'
}
build.gradle の実装が完了したら、
プロジェクト右クリック > Gradle > Refresh Gradle Project を必ず実行しましょう。
ビルドが開始され、追加したdependenciesの機能が使えるようになります。
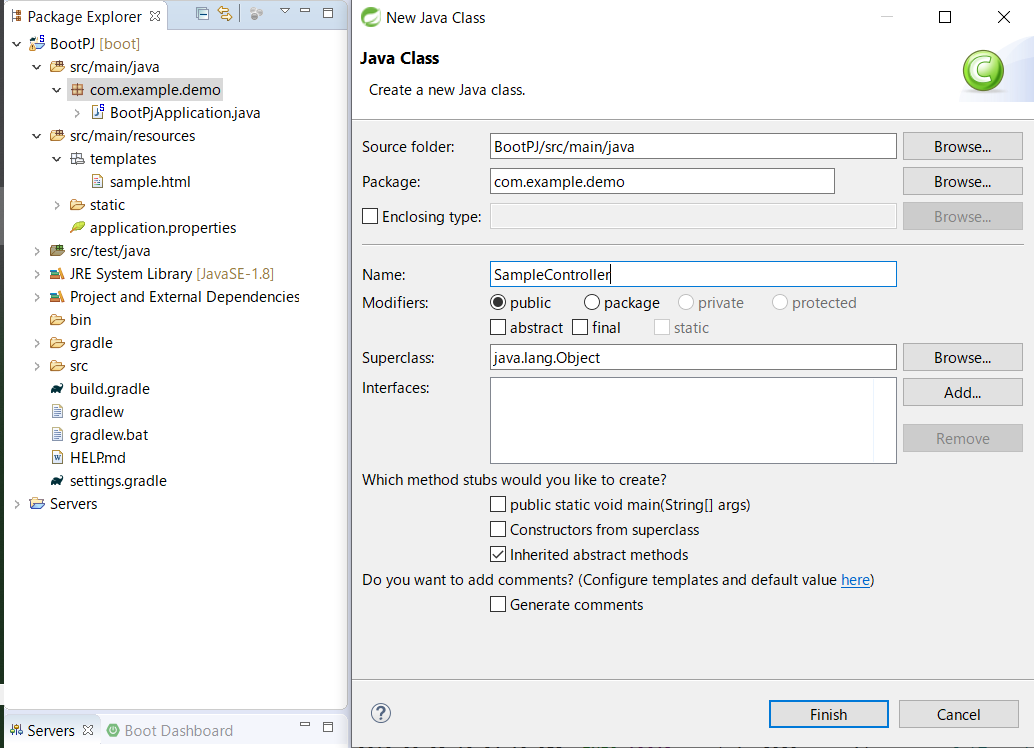
Controllerクラスの作成
SpringMVCのコントローラークラスを作成し、画面にアクセスできるようにします。
今回はデフォルトのApplicationクラスと同じパッケージ配下にプレーンなクラスファイルを作成します。
(この記事のバージョンのSpringBootでは違うパッケージに作ると動作しない場合があります。)
コントローラークラスを以下のように実装します。
package com.example.demo;

import org.springframework.stereotype.Controller;
import org.springframework.web.bind.annotation.RequestMapping;
import org.springframework.web.servlet.ModelAndView;

@Controller
public class SampleController {

	@RequestMapping("/spsample") // アクセス先URIに関連する
	public ModelAndView page(ModelAndView mav) {
		mav.setViewName("sample"); // HTMLファイル名を拡張子無しで指定する
		return mav;
	}
}
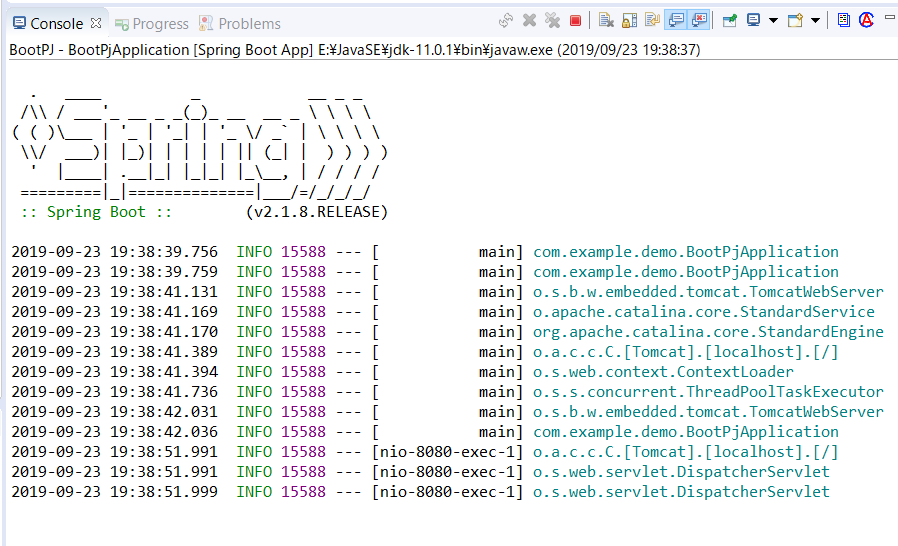
サーバーを起動してブラウザからアクセスしてみる
STS上のプロジェクトを右クリック > Run As > Spring Boot App を選択。
サーバー起動に成功すると、コンソールに以下のようなログが表示される。
ブラウザを開いて、以下のURLにアクセスすると、HelloWorldの表示に成功します。
http://localhost:8080/spsample
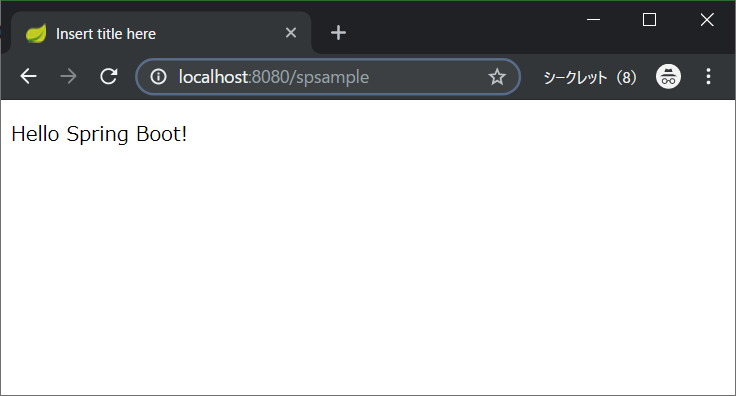
実際のメッセージは「Hello Spring Boot!」ですが、無事アクセスできました。
トラブルシューティング
1.Controllerクラス実装中、@RequestMapping記述部にエラーが出る場合
→ build.gradle の手順を再実行してください。
正しく記述できていても、Refresh Gradle Project を実行しないと
必要なJavaライブラリが利用できません。
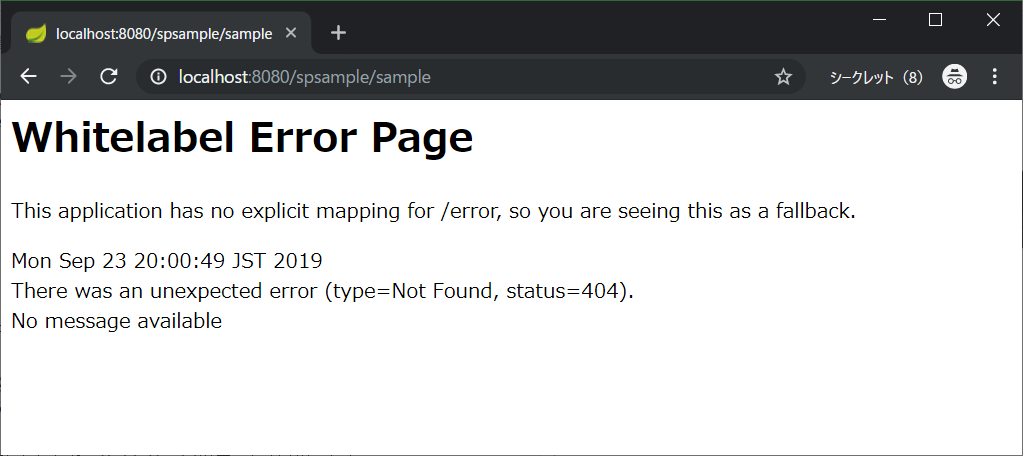
2.ブラウザからの画面アクセスに失敗する場合
→ アクセス先URIが間違っていたり、Controllerクラスの実装に失敗すると、
以下のようなエラー画面に遷移します。
この場合、サーバー起動には成功していますので、以下を見直しましょう。
・URIが「localhost:8080」+「@RequestMappingで指定した文字列」になっているか
・HTMLファイル名が setViewNameで指定したファイル名になっているか
・HTMLファイルの置き場所はtemplates直下かどうか。フォルダ階層がある場合、
setViewNameでtemplates配下のディレクトリ構造を指定する必要があります。
CSSとJSファイルの読み込み
CSS,JSファイルの用意
まず、以下のようなCSSとJSファイルを用意しておきます。
@charset "UTF-8";

.title {
	font-size: 20px;
	color: #83d94f;
}
console.log("読み込めました");
HTMLファイルへの追記
HTMLファイルのヘッダー部分に以下のように
cssファイル読み込み処理とjavascriptファイル読み込み処理を追記します。
また、bodyのpタグに、cssデザイン処理を指定します。
<!DOCTYPE html>
<html>
<head>
<meta charset="UTF-8">
<link rel="stylesheet" type="text/css" href="/css/spcss.css">
<script type="text/javascript" src="/js/spjs.js"></script>
<title>Insert title here</title>
</head>
<body>
	<p class="title">Hello Spring Boot!</p>
</body>
</html>
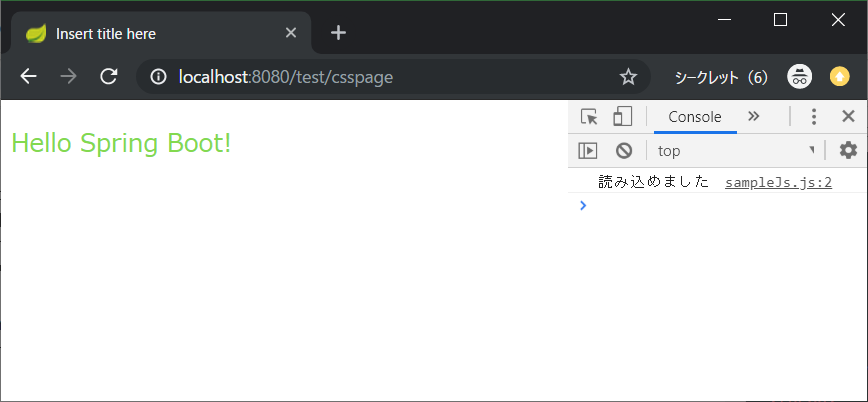
動作確認
ブラウザからページにアクセスして、動作確認をします。
今回はChromeを立ち上げてからF12ボタンでConsoleを同時に確認します。
Hello Spring Boot!の文字がSpringっぽい色で表示できました。
Javascriptの動作もバッチリです。
2022年追記<最新版対応>
build.gradleにライブラリを読込ませるための書式が変わっていますので、SpringBoot2.5以降でエラーが出る方はこちらを使ってください。
dependencies {
	implementation 'org.springframework.boot:spring-boot-starter'
	implementation group: 'org.springframework.boot', name: 'spring-boot-starter-web', version: '2.6.2'
	implementation group: 'org.springframework.boot', name: 'spring-boot-starter-thymeleaf', version: '2.5.9'
	implementation group: 'org.springframework.boot', name: 'spring-boot-devtools', version: '2.5.9'
	testImplementation 'org.springframework.boot:spring-boot-starter-test'
}