動機
Web上で3D表現するにはUnityかWebGLの選択肢に大体落ち着くと思います。
Unityに関してはとても素晴らしいフレームワークなのですが、
Web上で動かすにはプラグインが必要なのと、Unity自体の仕組みやライセンスにロックオンされるのが個人的にあまり好きではなかったので、オープンな仕様でプラグイン不要なWebGLのほうが好きです。
WebGLのフレームワークもA-Frameとか最近色々増えてきましたが古参でライブラリが充実しているThreeJSでちょっと本気でアクションゲームぽいものを作ってみました。
アクションゲームを作ろうとした時に厄介なのが、3Dオブジェクトの当たり判定だと思います。
その辺に関してまとめられてる情報が少ない気がしたので、
今回はAmmo.js(物理エンジン)を使ってキャラクターを地形に沿って移動できたり、落ちてくる物体を動かせたりできるようにしました。
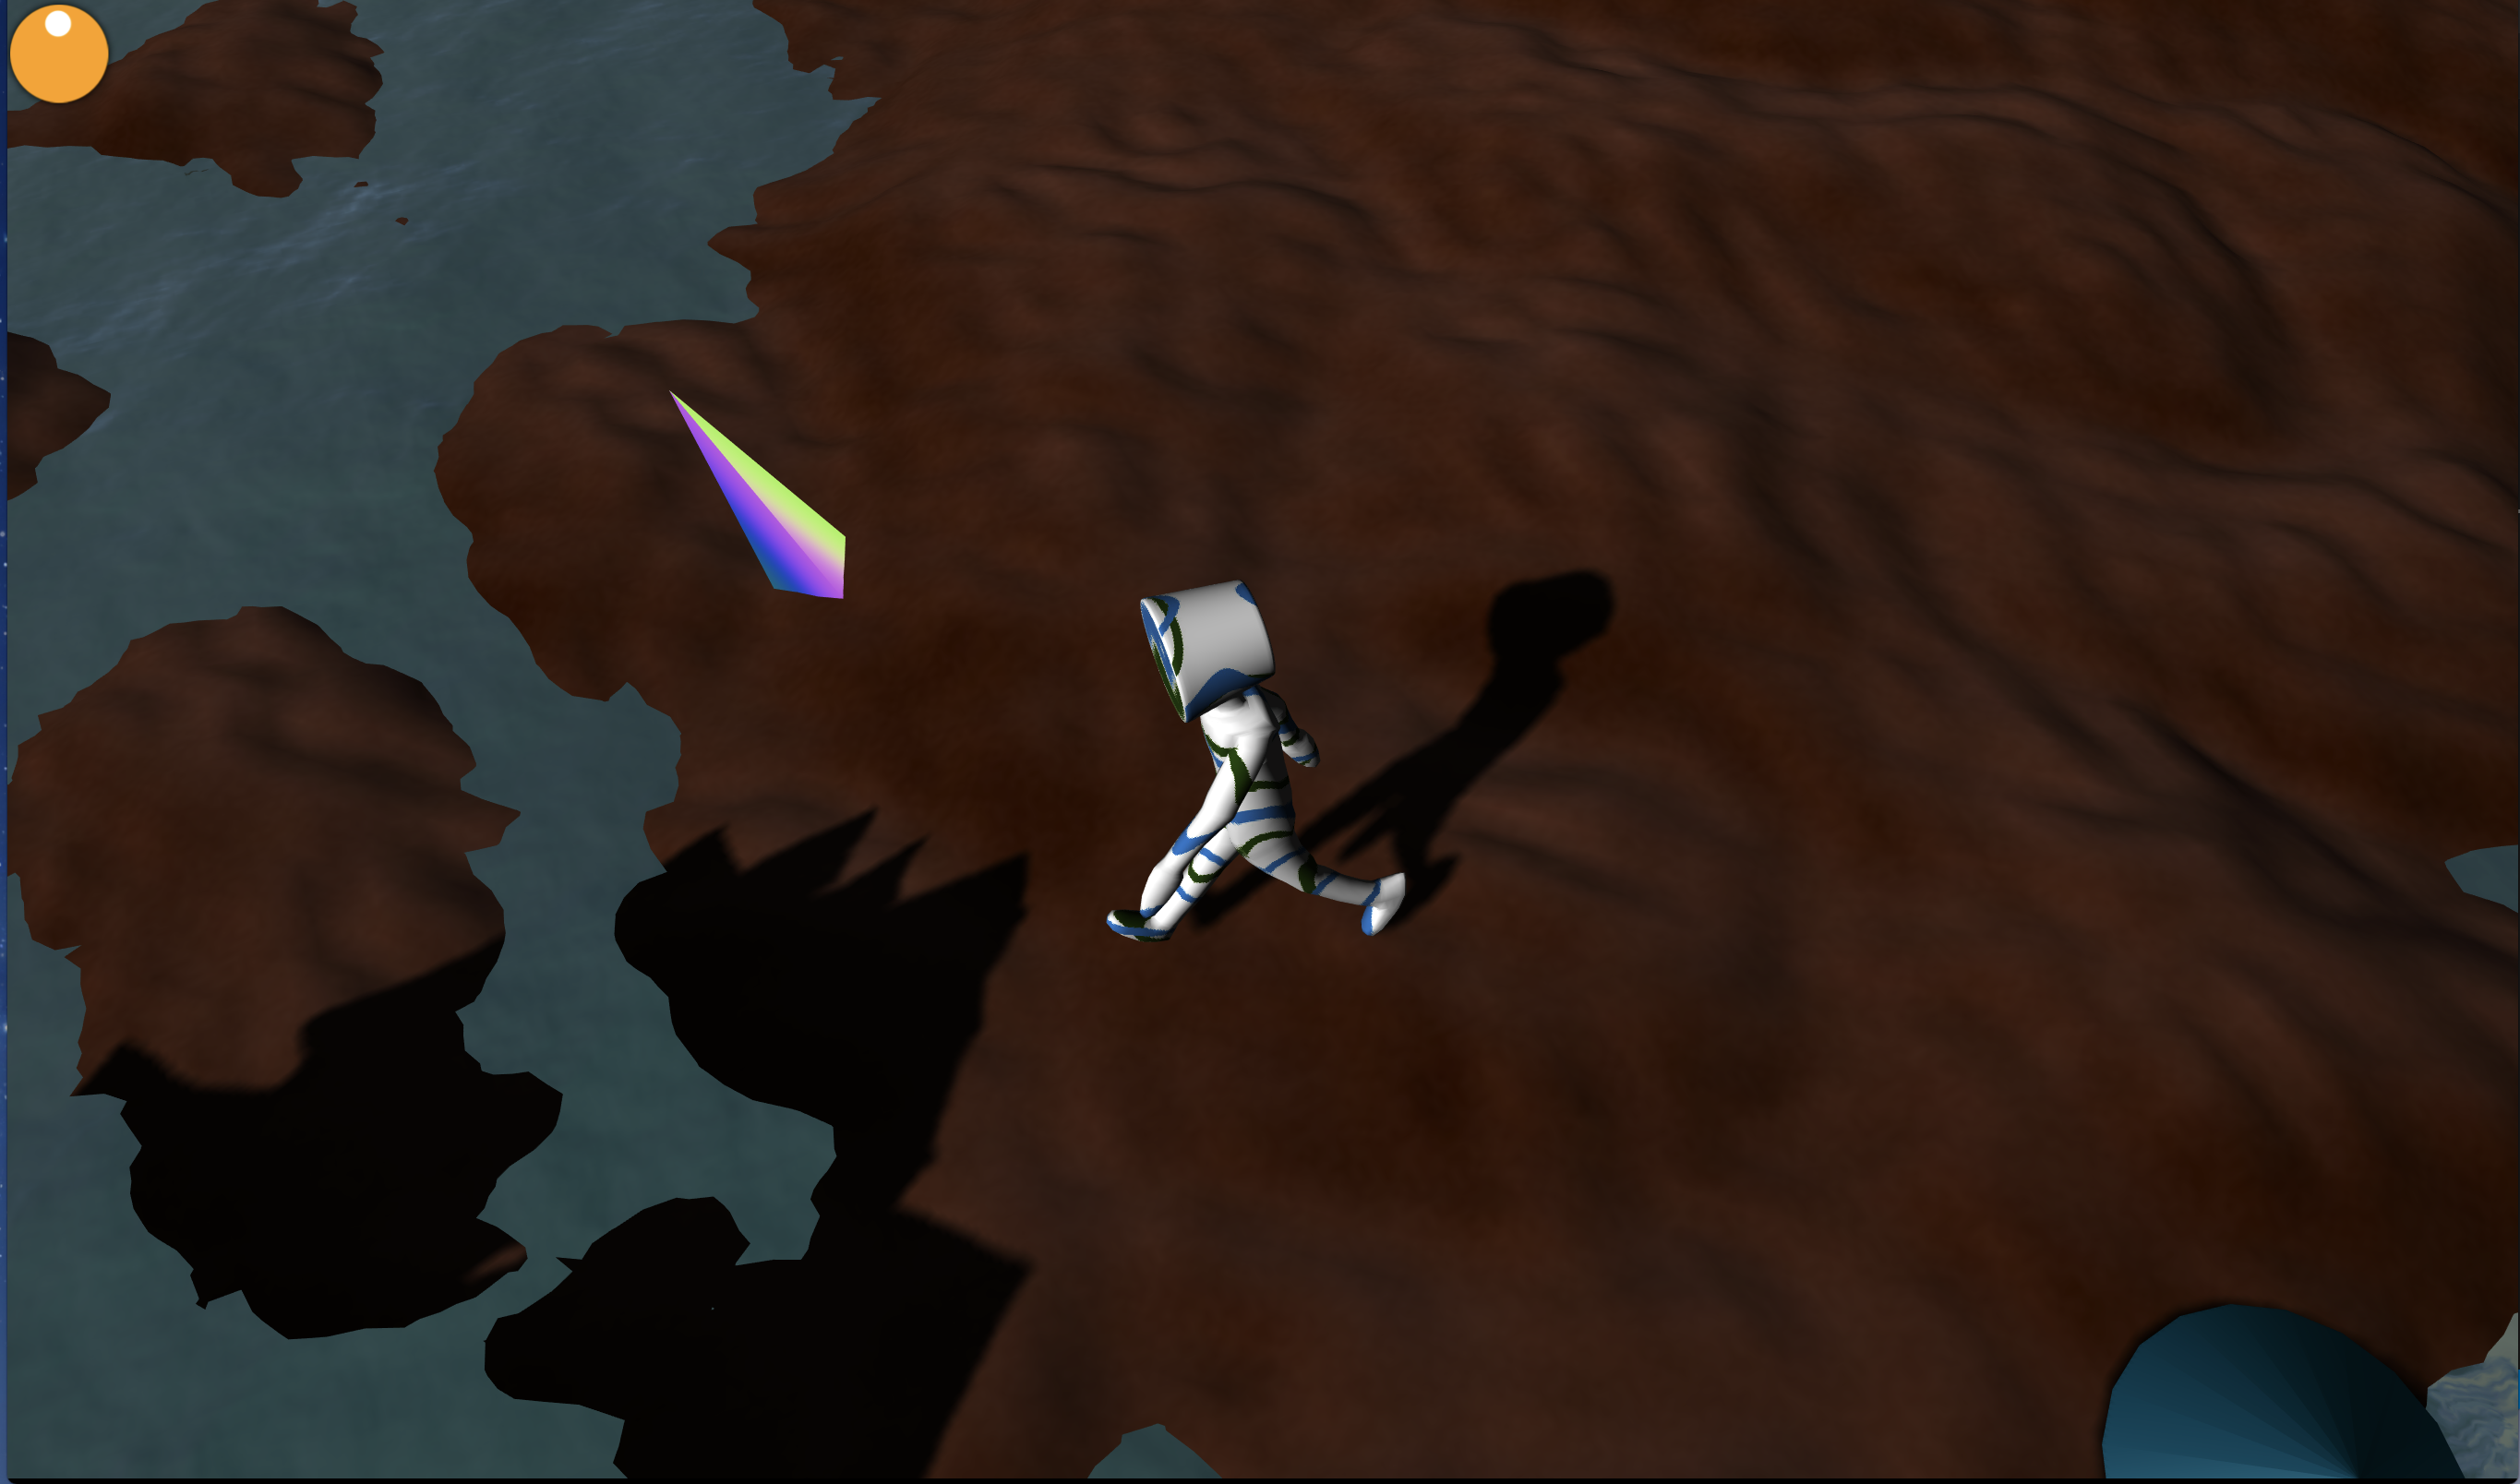
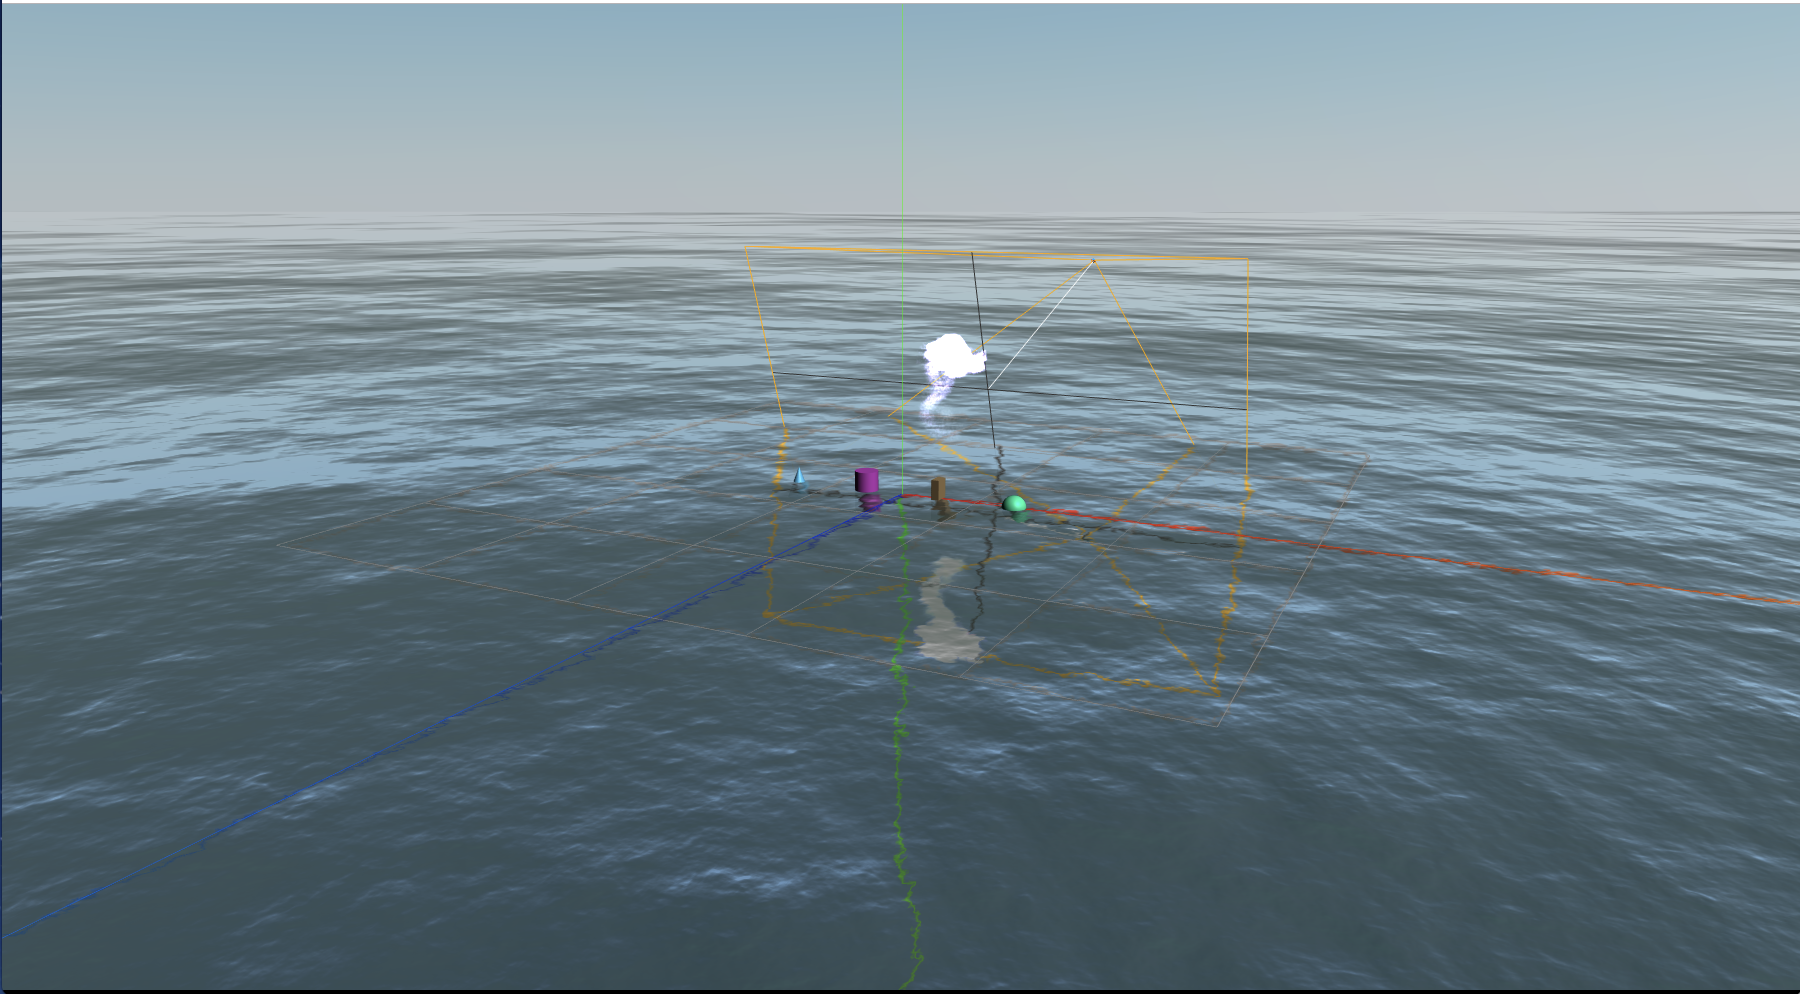
デモ
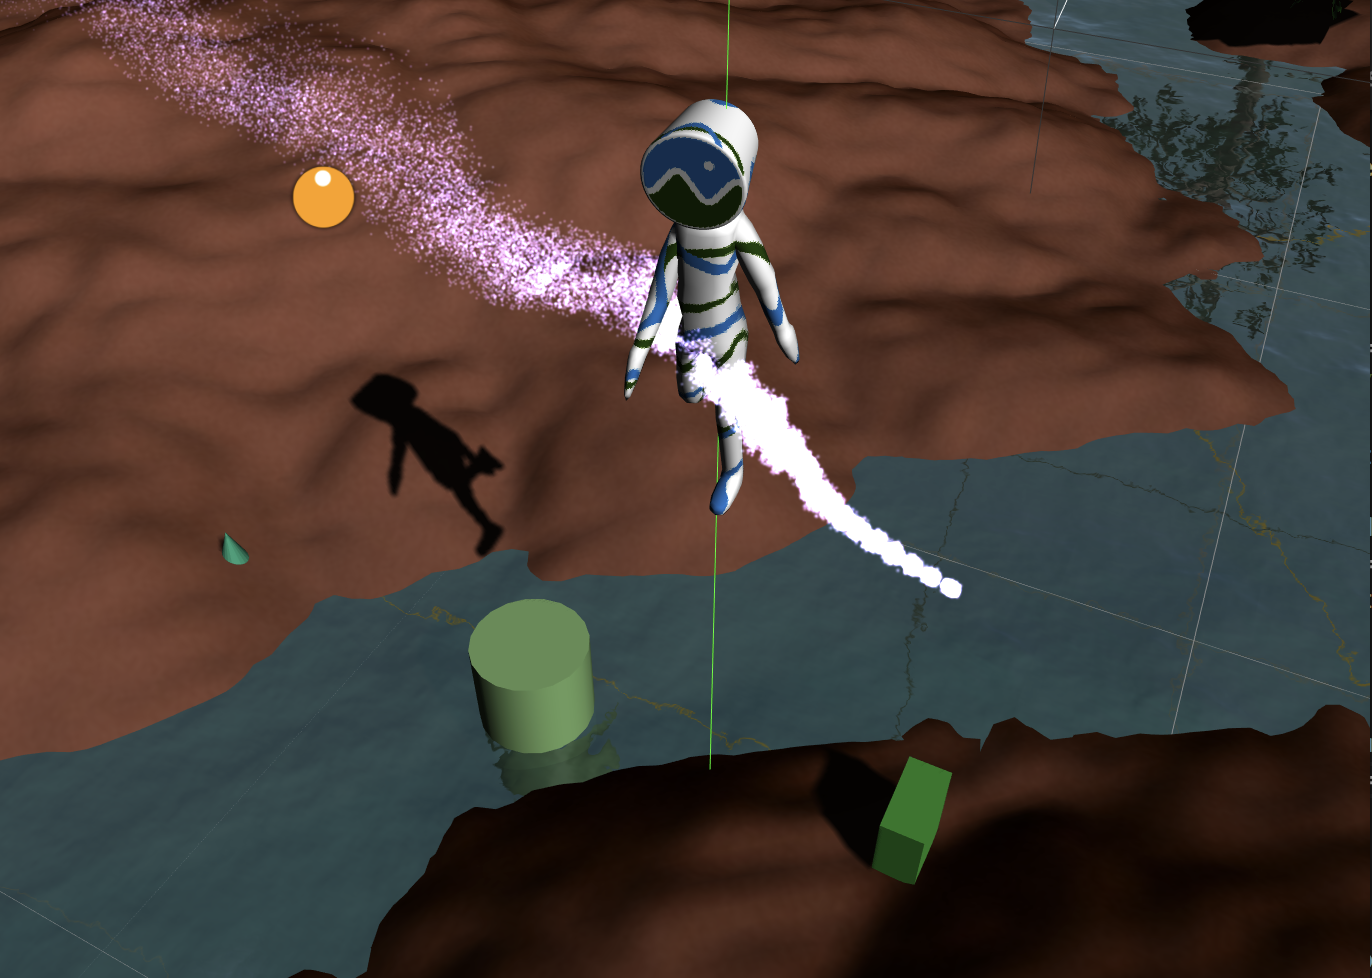
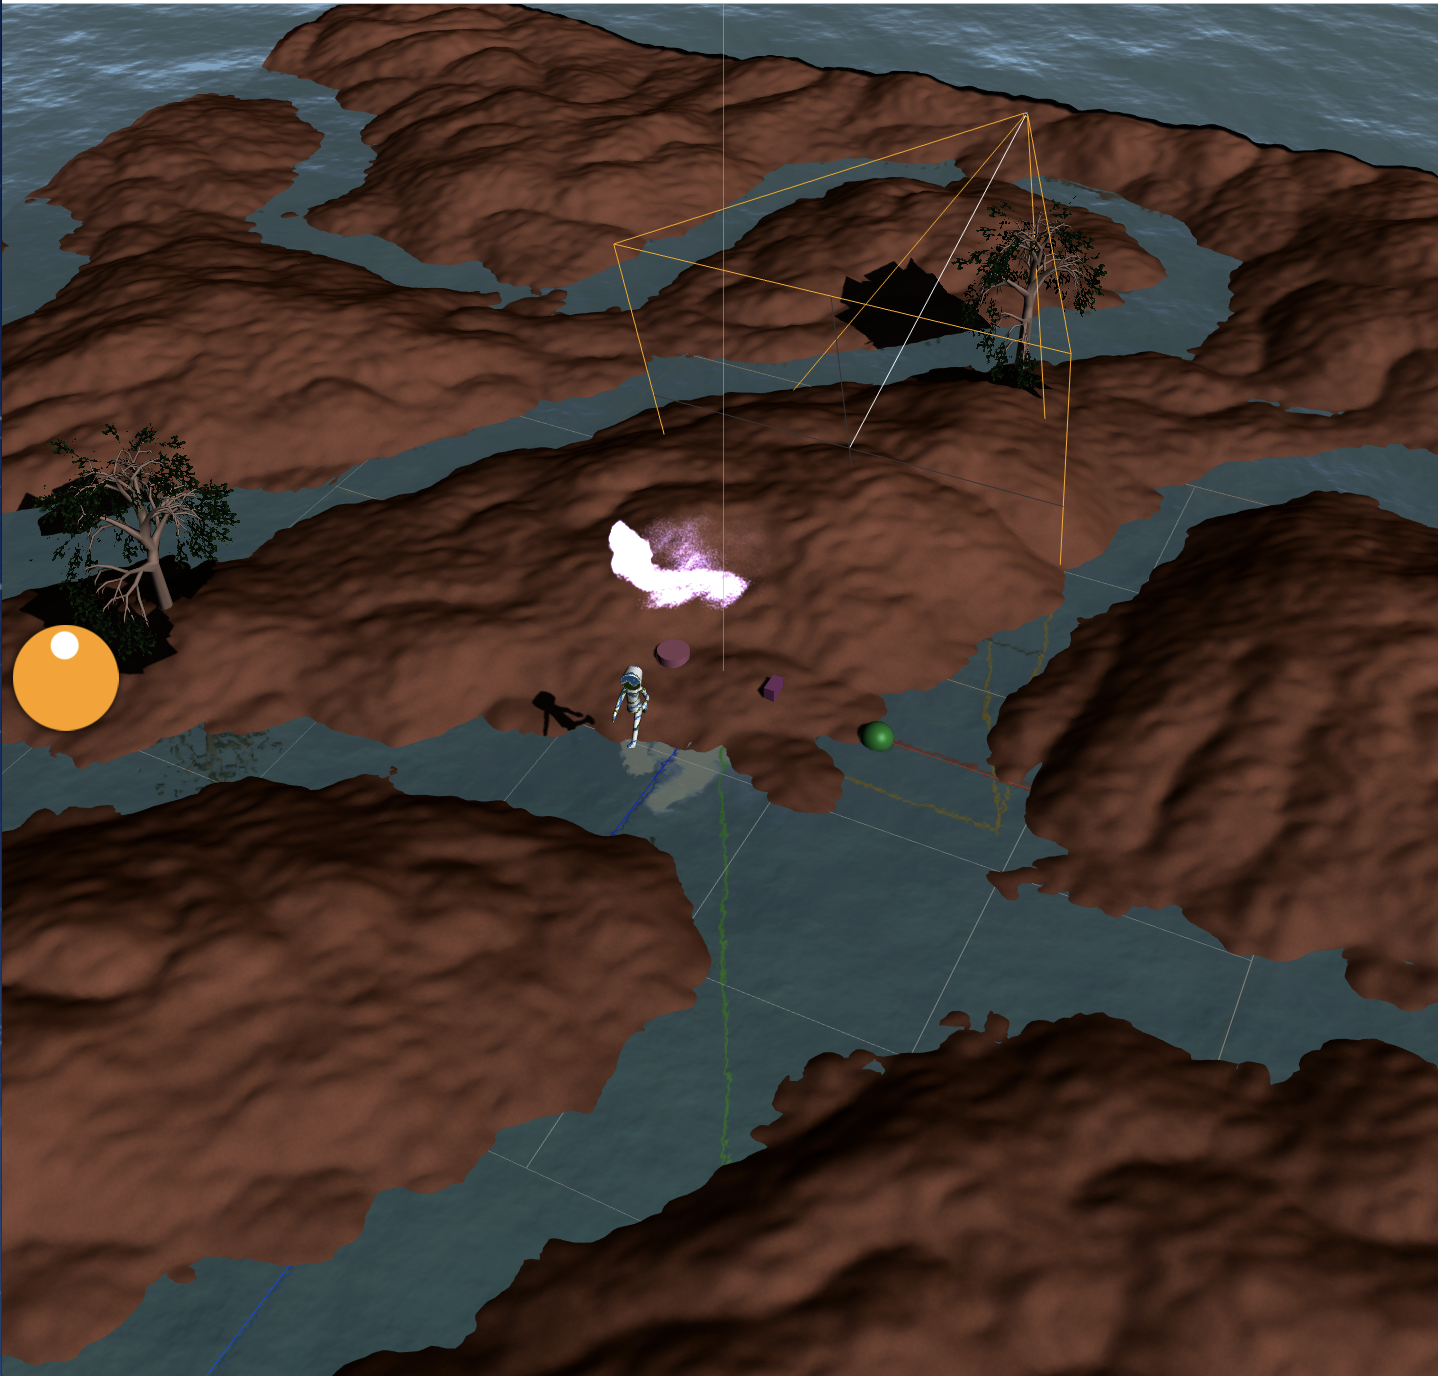
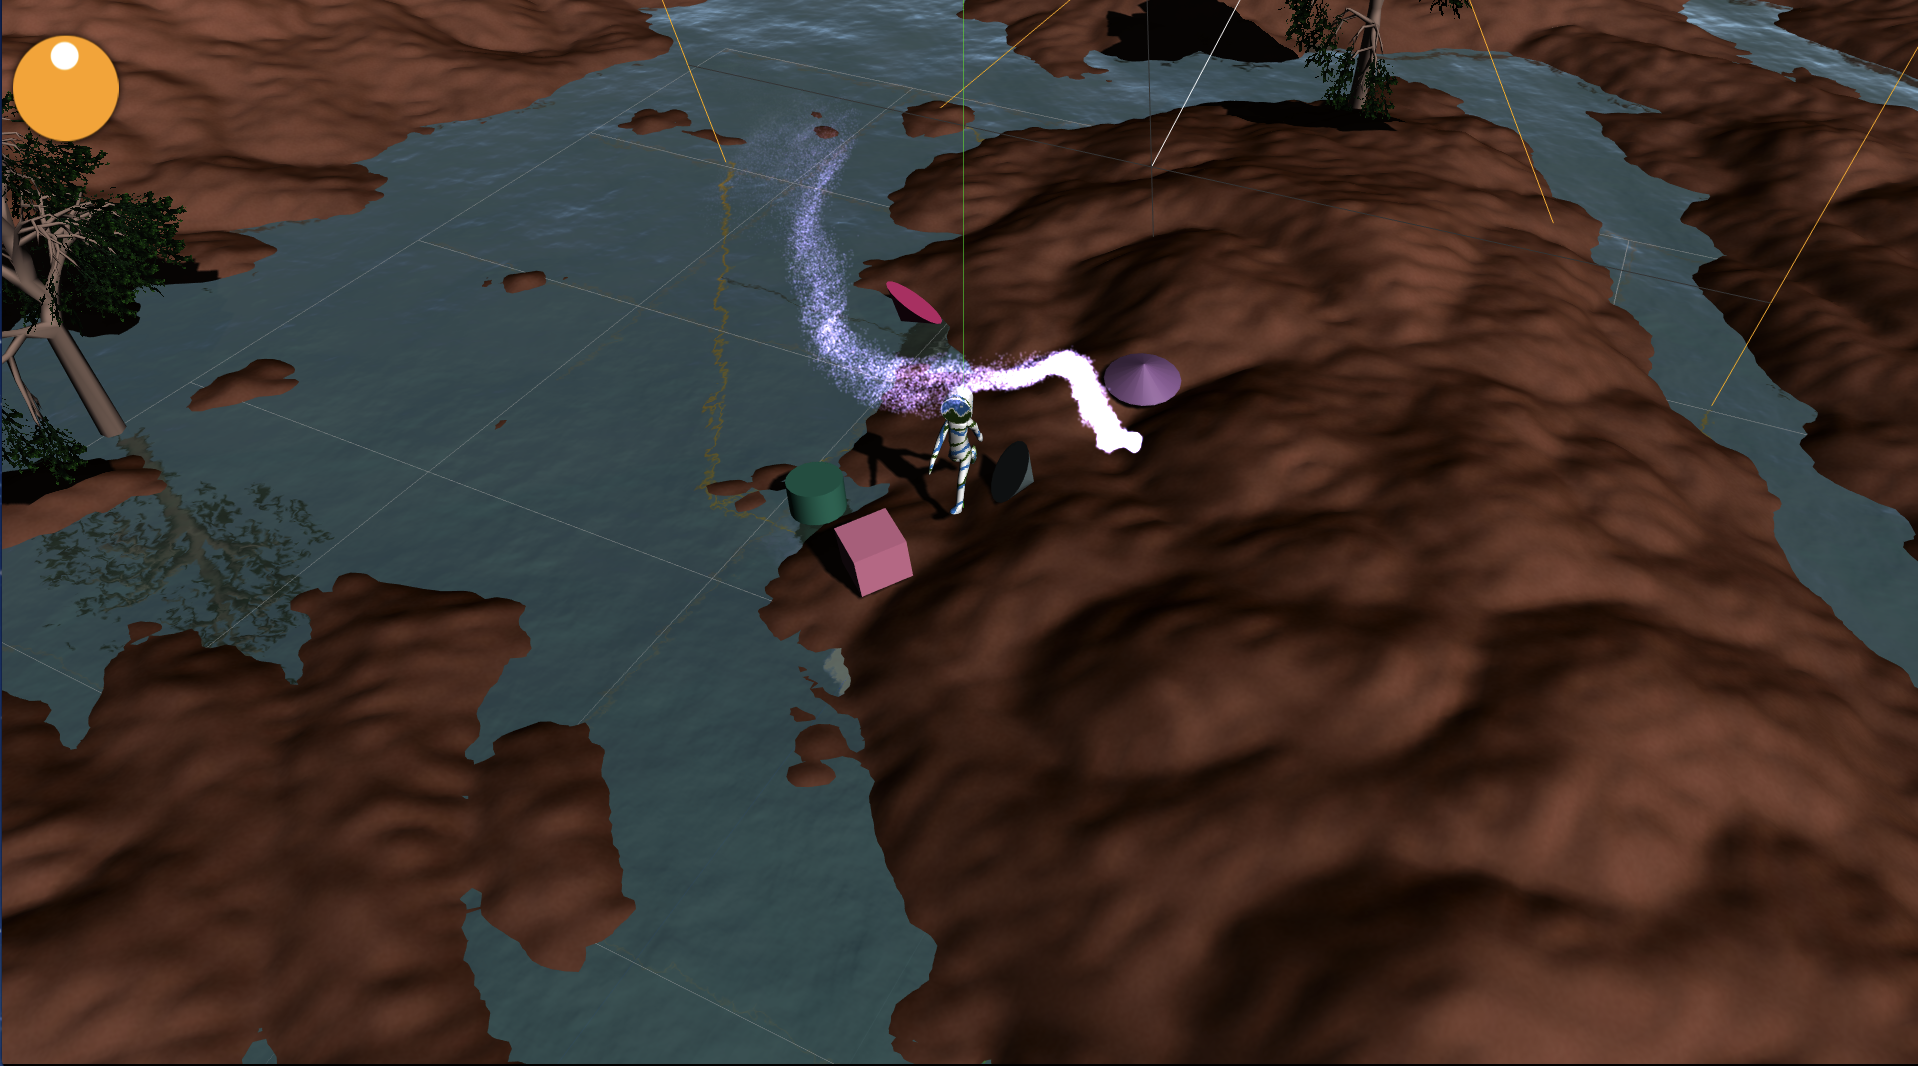
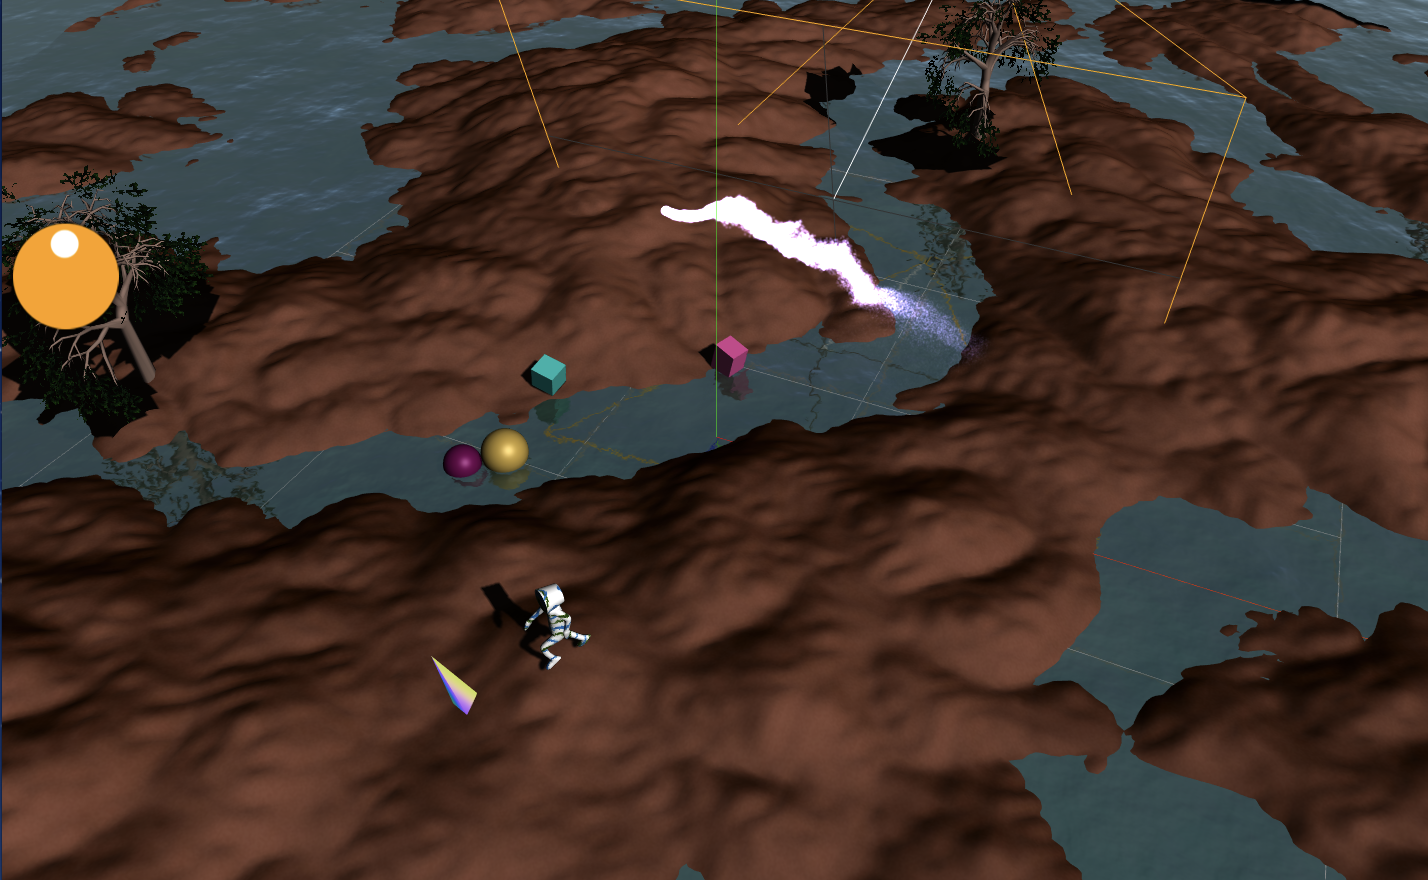
・デバックモードのスクショ
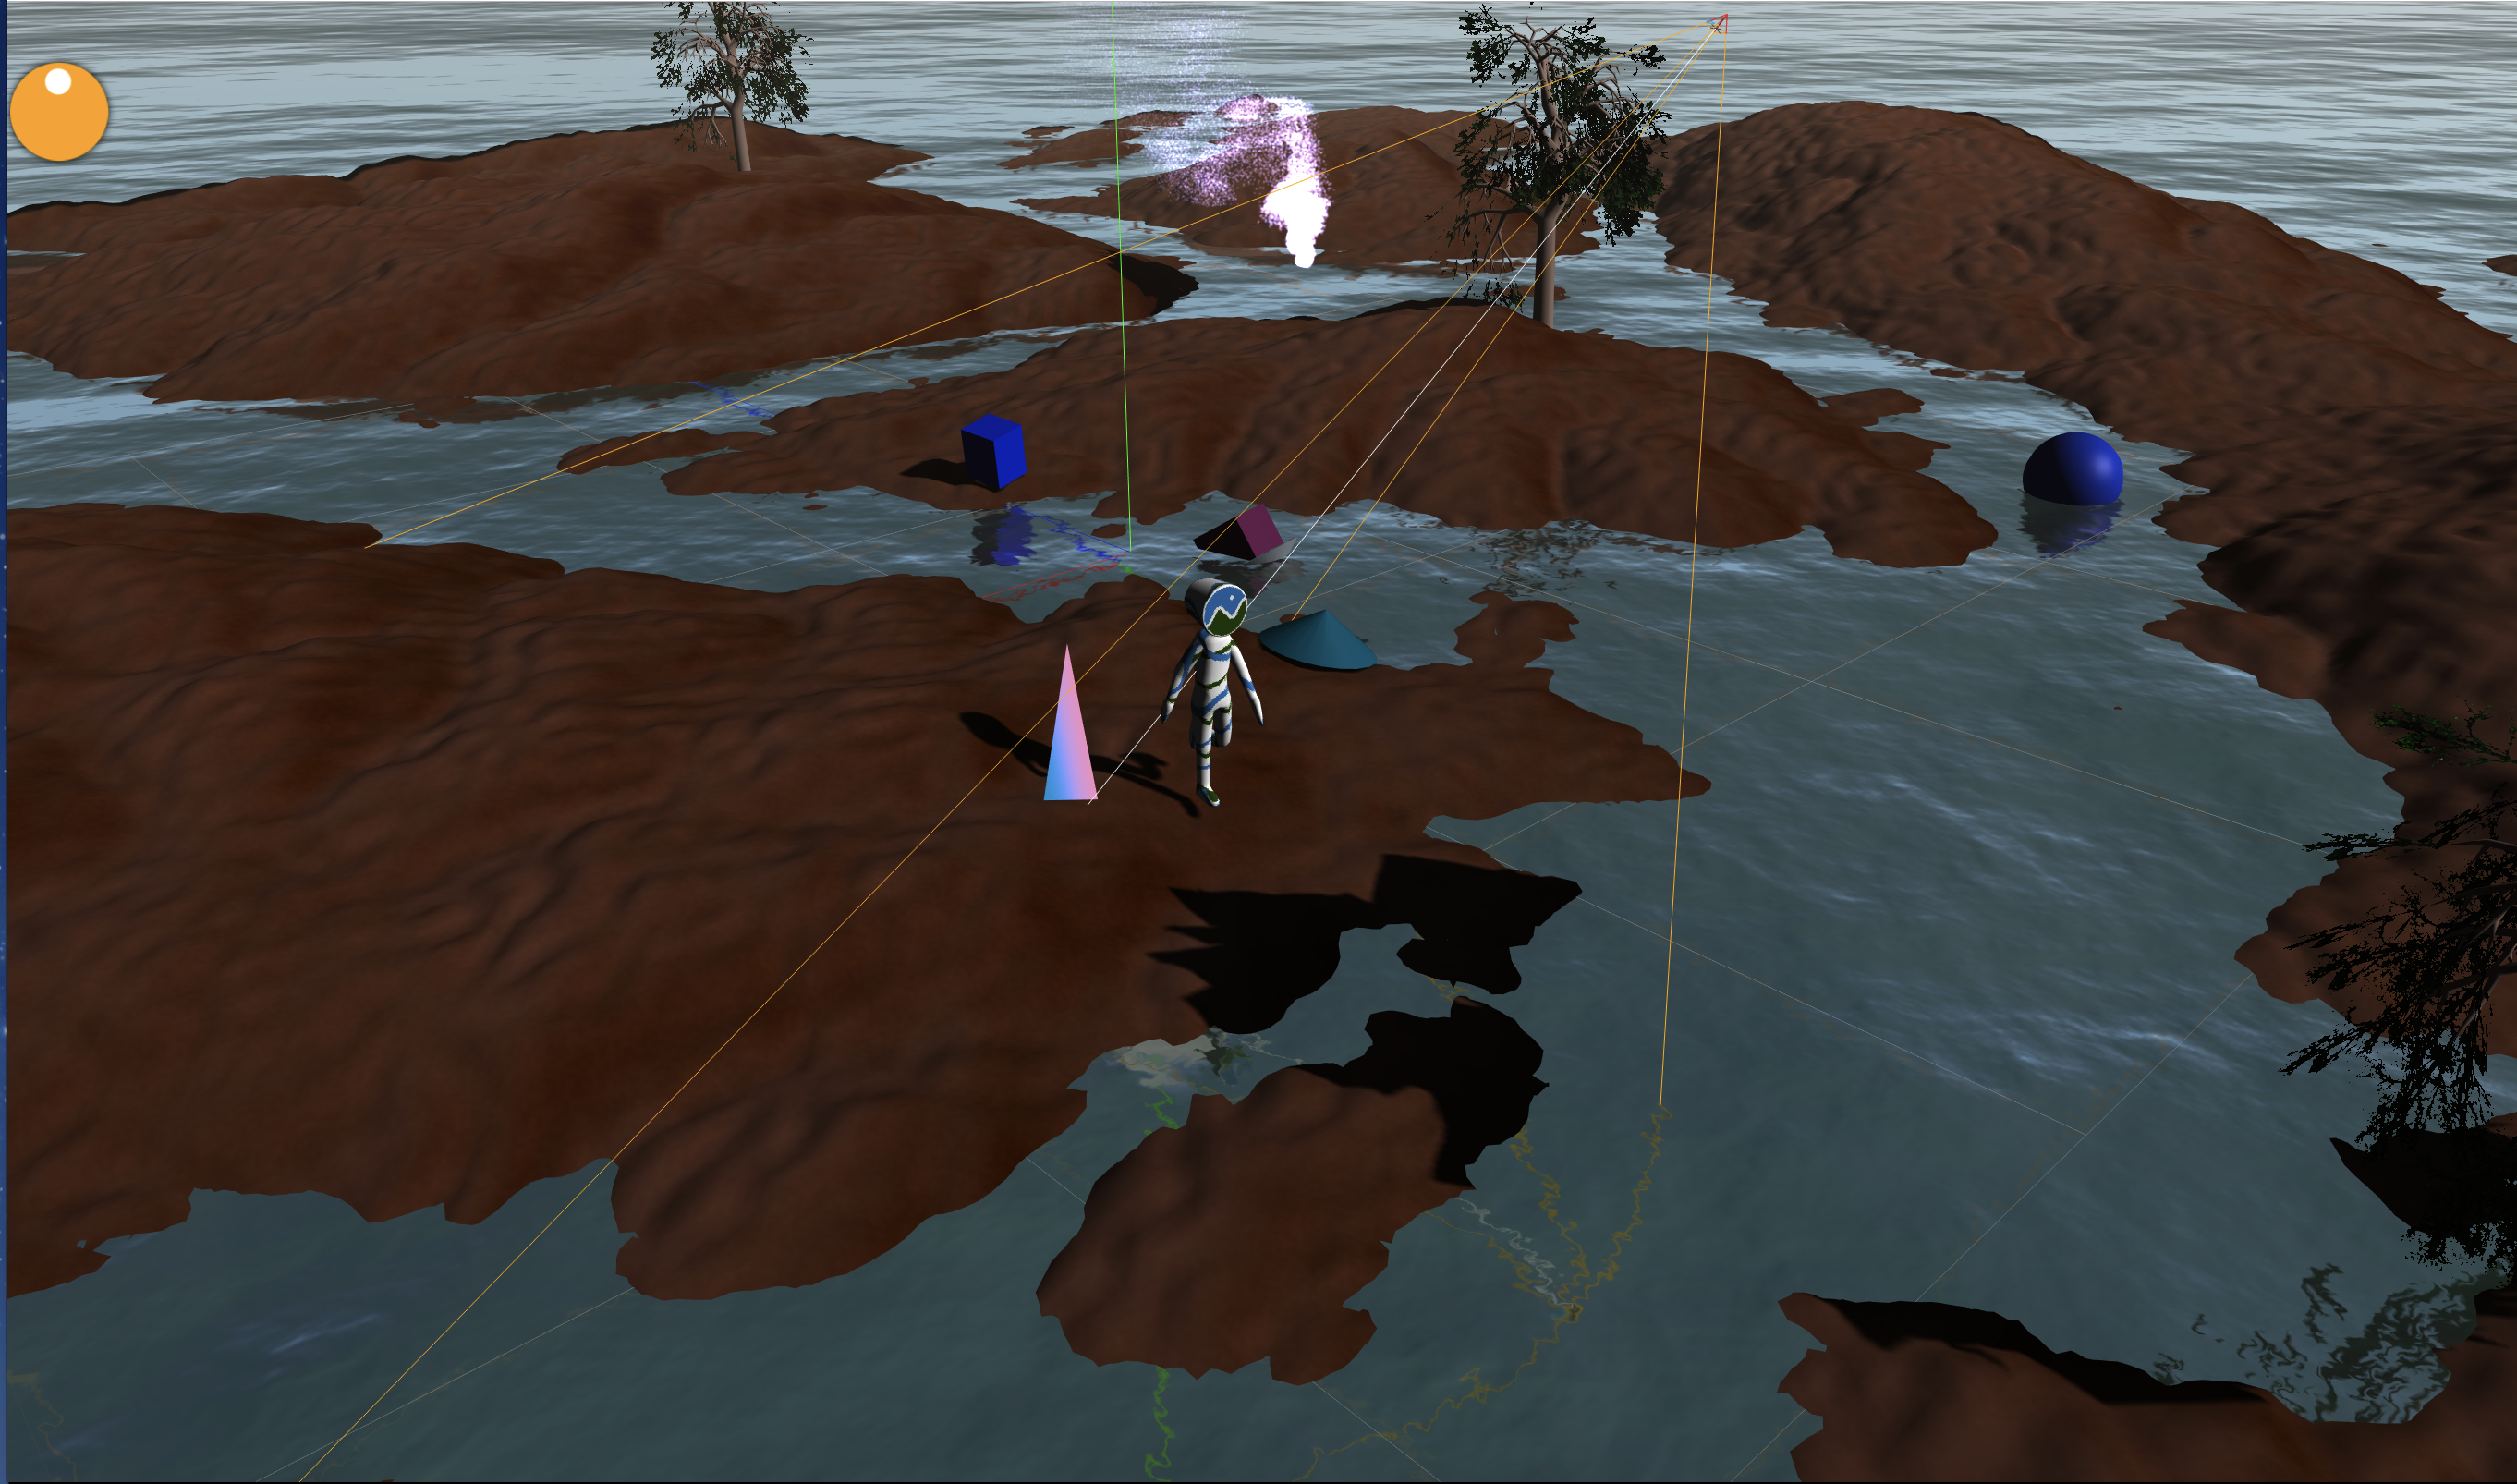
・プレイヤーモードのスクショ
実際に動くデモ(Github Pages)
https://teradonburi.github.io/threejs/demo
ちなみに色々盛り込みすぎて結構重いです。
スペックの低いノートPCだと動かないと思います。
コマンドリスト
・地面クリック→クリックした位置にキャラクター移動
・Wキー→カメラ正面方向にキャラクター移動
・Sキー→カメラ背面方向にキャラクター移動
・Aキー→カメラ左方向にキャラクター移動
・Dキー→カメラ右方向にキャラクター移動
・スペースキー→キャラクターがジャンプ
・Cキー→カメラ切り替え(デバッグモード→プレイヤーモード)
・落ちてくるオブジェクトをドラッグ→持ち上げることができる(デバッグモードのみ)
デモで必要なファイルはソースコードの以下のファイルです。
・demo.html
・demoフォルダ以下のファイル
特にAPIやサーバサイドの処理などはしていません。
環境構築
ソースコード
https://github.com/teradonburi/threejs
以下のコマンドで起動できます。
THREE.js r95を使用してます。
webpack4とbrowser-syncで開発しました。
$ brew install yarn
$ yarn global add browser-sync
$ yarn
$ yarn dev
以下ソースコードというかThreeJSでの実装方法に関して色々解説
前準備について
モダンなJS(ES6以降文法)で書きたかったのでwebpackを導入してます。
ThreeJSは色々なexamplesが充実していますが、古いexamplesとかはES6のimportに対応してなかったりしてツラミがあったりします。
webpackのProvidePluginを使うことでTHREEオブジェクトをグローバル参照することが可能になります。
THREE.DragControlsなどはwebpackのresolveに指定することでimportすることが可能になります。
const webpack = require('webpack')
const path = require('path')

module.exports = {
  mode: 'development',
  devtool: 'inline-source-map',
  entry: ['babel-polyfill', './app.js'],
  output: {
    // 出力ファイル名
    filename: 'bundle.js',
  },
  resolve: {
    // 使用したいコントロールやレンダラを定義しておきます
    alias: {
      // 物体ドラッグ
      'three/DragControls': path.join(__dirname, 'node_modules/three/examples/js/controls/DragControls.js'),
      // カメラ制御
      'three/OrbitControls': path.join(__dirname, 'node_modules/three/examples/js/controls/OrbitControls.js'),
      // GLTF
      'three/GLTFLoader': path.join(__dirname, 'node_modules/three/examples/js/loaders/GLTFLoader.js'),
      // DracoLoader
      'three/Draco': path.join(__dirname, 'node_modules/three/examples/js/loaders/DRACOLoader.js'),
      // Particle
      'three/Particle': path.join(__dirname, 'node_modules/three/examples/js/GPUParticleSystem.js'),
      // Water
      'three/Water': path.join(__dirname, 'node_modules/three/examples/js/objects/Water.js'),
      // Sky
      'three/Sky': path.join(__dirname, 'node_modules/three/examples/js/objects/Sky.js'),
    },
    extensions: [
      '.js',
    ],
  },
  module: {
    rules: [
      {
        // 拡張子 .js の場合
        test: /\.js$/,
        use: [
          {
            loader: 'babel-loader',
            query: {
              cacheDirectory: true,
              presets: [
                [
                  '@babel/env', {
                    targets: {
                      browsers: [
                        '>0.25%',
                        'not ie 11',
                        'not op_mini all',
                      ],
                    },
                    modules: false,
                  },
                ],
              ],
              plugins: ['babel-plugin-transform-class-properties'],
            },
          },
        ],
      },
    ],
  },
  plugins: [
    // THREE.Scene などの形式で three.js のオブジェクトを使用できるようにします。
    new webpack.ProvidePlugin({
      'THREE': 'three/build/three',
    }),
  ],
}
ImprovedNoise.jsはvarのグローバル変数で定義されているためか
webpackではどうしてもimportできなかったのでscriptタグで読み込んでいます。
import-loaderやexpose-loaderも試してみたけど無理そう・・・?
(もしできた方がいたら教えていただけると嬉しいです。)
ammo.jsに関しては内部的にfsモジュールを使っているため、webpackのブラウザ版ビルドに含めることは無理そうです。
<!DOCTYPE html>
<html lang="ja">
  <head>
    <meta charset="utf-8" />
    <title>タイトル</title>
    <meta name="viewport" content="width=device-width, initial-scale=1" />
    <style>
  body {
    margin: 0;
    overflow: hidden;
  }
    </style>
  </head>
<body>
  <div id="startButton">Click to start (※音が出ます)</div>
  <script type="text/javascript" src='node_modules/three/examples/js/ImprovedNoise.js'></script>
  <script type="text/javascript" src="node_modules/three/examples/js/libs/ammo.js"></script>
  <script type="text/javascript" src="dist/bundle.js"></script>
</body>
</html>
処理本体
起動時の処理はapp.jsに記述してあります。
WebAudio周りのautoplayには制限がかかっているため、音の再生にはユーザアクションが必要です。
(なお、Chrome 70でautoplayの制限は解除されるっぽい)
そのため、スタートボタンをクリックしたらゲームが開始する仕組みにしています。
import Game from './game'

const startButton = document.getElementById('startButton')

function init() {
  startButton.remove()
  const game = new Game()
  game.init()
}

startButton.addEventListener('click', init)
game.jsの基本構造は次のようになっています。
initメソッドで初期化してrequestAnimationFrameメソッドでrenderメソッドを繰り返し処理させます。
export default class Game {

  init = async () => {

    requestAnimationFrame(this.loop)
  }

  loop = (frame) => {
    requestAnimationFrame(this.loop)
    this.render(frame)
  }

  render = (frame) => {
  }
}
メインの処理はgame.jsに記述してあります。
以下の機能をクラス化して実装しています。
- 2D表示(スプライトとTWEENアニメーション)
- Axisデバッグオブジェクトの表示
- Gridデバッグオブジェクトの表示
- Camera処理
- CubeMap
- Lighting(DirectionalLight、AmbientLight)
- 各種Loader(Audio、テクスチャ、GLTFモデル)
- ハイトマップ
- フォグ
- Primitiveオブジェクトの作成(Sphere、Box、Cylinder、Cone)
- GLTFモデル描画(スキンメッシュ+アニメーション)
- Physics演算(AmmoJS)
- ドラッグ操作
- レイキャスト
- キーボード操作
- オーディオ再生
- 3Dオーディオ再生
- パーティクル
- 海の表現
- 空の表現
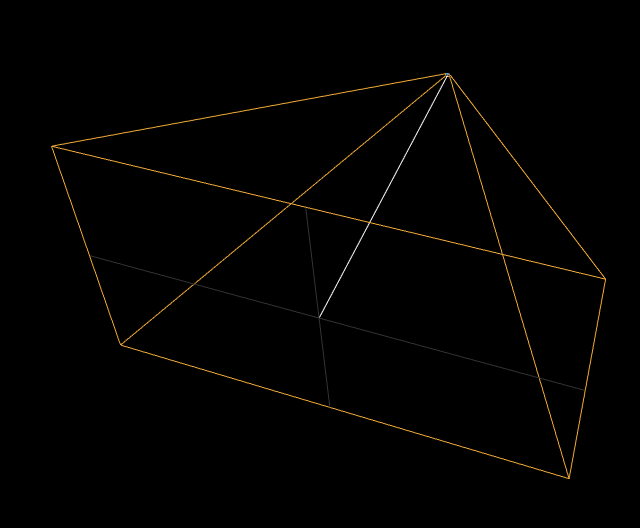
レンダラとシーンの作成
シーンに描画するオブジェクトを追加して、レンダラーで描画します。
カメラの見ている範囲をhelperで表示して、デバッグカメラで俯瞰する以下はサンプルです。
画面リサイズに対応するためにonResizeメソッドでリサイズ時にレンダリングを最適化します。
import Render from './src/Render'
import Scene from './src/Scene'
import Clock from './src/Clock'
import Camera3D from './src/Camera3D'
import Vec3 from './src/Vec3'

export default class Game {

  init = async () => {
    // アニメーションとかで使う時間用
    this.clock = new Clock()
    // シーン作成
    this.scene = new Scene()
    // レンダラー作成
    this.renderer = new Render(this.onResize)

    // 3Dカメラ
    const eye = new Vec3(0, 50, -150)
    const lookAt = new Vec3(0, 0, 0)
    this.camera = new Camera3D(eye, lookAt, 1, 100)
    this.scene.add(this.camera)
    this.scene.add(this.camera.helper) // helper

    // コントロールカメラ
    const debugEye = new Vec3(100, 200, 200)
    const debugLookAt = new Vec3(0, 0, 0)
    this.controlCamera = new Camera3D(debugEye, debugLookAt, 1, 4000)
    this.controlCamera.controls = this.controlCamera.createControls()

    requestAnimationFrame(this.loop)
  }

  onResize = () =>  {
    this.renderer.resize()

    const cameras = [this.camera, this.controlCamera]
    for (let camera of cameras) {
      camera.resize()
    }
    this.sprite.onResizeWindow()
  }

  loop = (frame) => {
    requestAnimationFrame(this.loop)
    this.render(frame)
  }

  render = (frame) => {
    const {delta, time} = this.clock.update()

    this.controlCamera.controls.update()
    this.renderer.setClearColor(0x000000, 0)
    this.renderer.clear(true, true, true)
    this.renderer.render(this.scene, this.controlCamera)
  }
}
実行結果です。左クリックしながらドラッグすると回転できます。
右クリックしながらドラッグすると平行移動できます。
マウスホイールで拡大縮小できます。
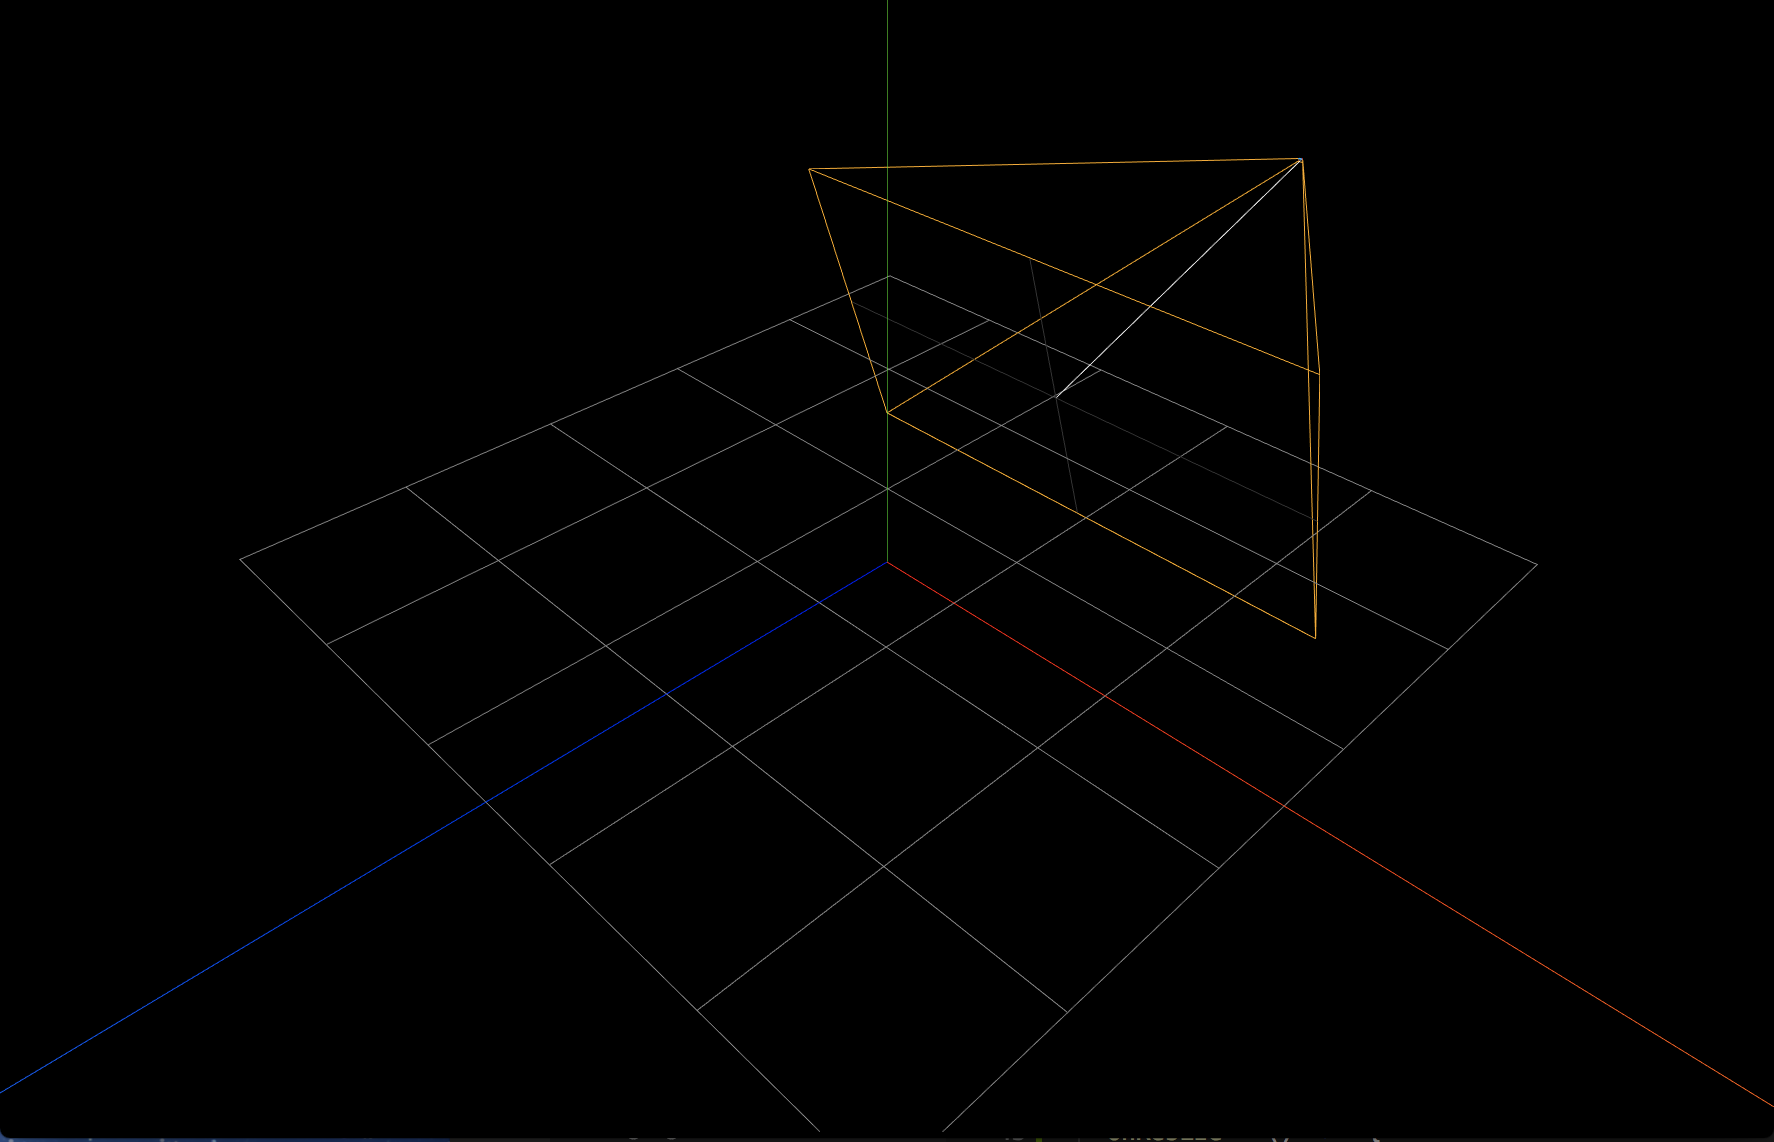
デバッグオブジェクトの表示
デバッグ用に他のオブジェクトとの位置関係を把握しやすいように軸(Axis)とグリッド(Grid)を描画します。
描画するにはsceneに3Dオブジェクトを追加するだけです。
import Axis from './src/Axis'
import Grid from './src/Grid'

export default class Game {

  init = async () => {
    // レンダラ作成の処理
    ...

    // Grid
    this.grid = new Grid()
    this.scene.add(this.grid)
    // Axis
    this.axis = new Axis()
    this.scene.add(this.axis)
  }

  ...略
}
軸とグリッドが描画されます。
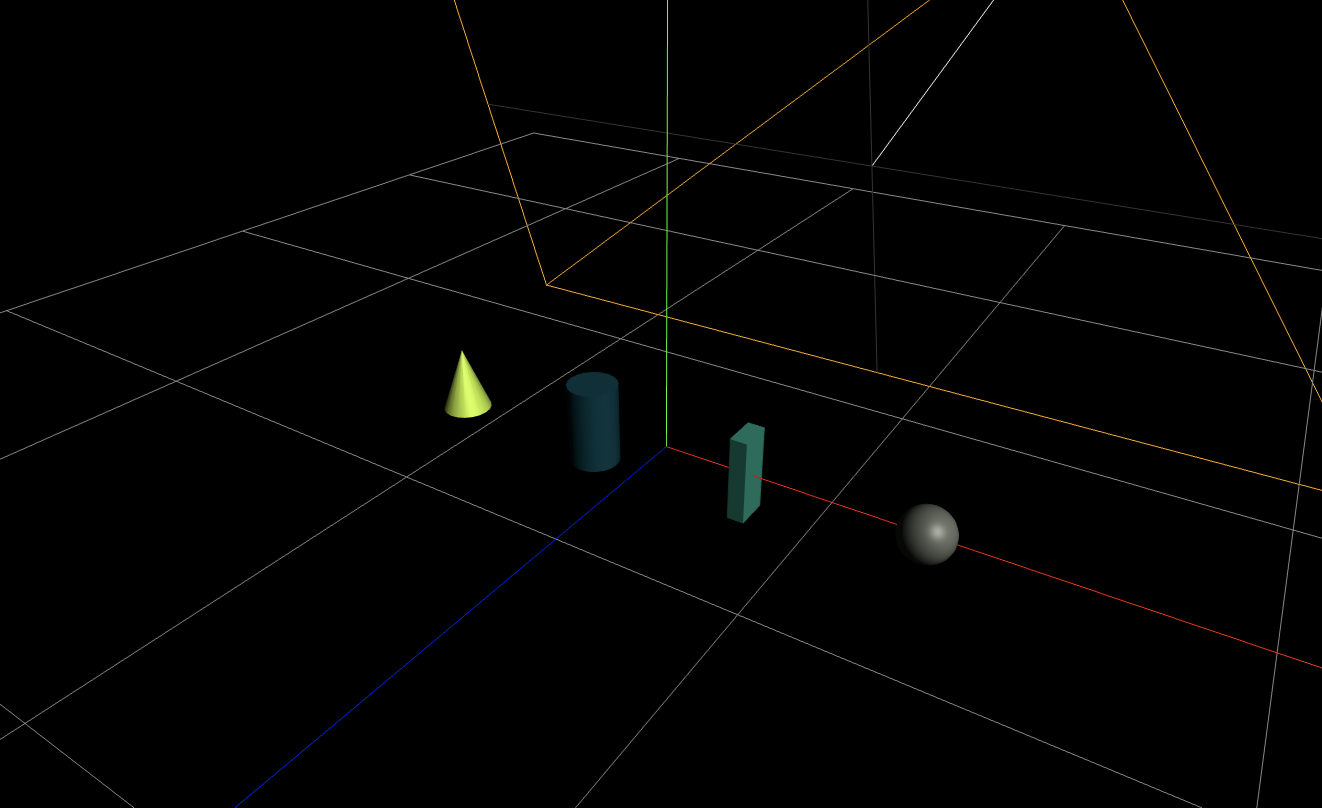
Primitiveオブジェクトと光源(DirectionalLight、AmbientLight)の作成
Sphere、Box、Cylinder、Coneの各種基本オブジェクトを作成します。
import Sphere from './src/Sphere'
import Box from './src/Box'
import Cylinder from './src/Cylinder'
import Cone from './src/Cone'

export default class Game {

  init = async () => {
    // レンダラ作成の処理
    ...

    // Sphere
    const sphere = new Sphere(3)
    sphere.position.set(30, 0, 0)
    this.scene.add(sphere)

    // Box
    const box = new Box(new Vec3(2, 10, 4))
    box.position.set(10, 0, 0)
    this.scene.add(box)

    // Cylinder
    const cylinder = new Cylinder(3, 10)
    cylinder.position.set(-10, 0, 0)
    this.scene.add(cylinder)

    // Cone
    const cone = new Cone(3, 8)
    cone.position.set(-30, 0, 0)
    this.scene.add(cone)

    ...
  }

  ...略
}

軸上に何かあるけど、真っ暗で見えないので光源を追加します。
DirectionalLightは向きを持つ光源です。太陽の差し込む光をイメージしたらわかりやすいでしょう。
AmbientLightはすべての3Dオブジェクトに均一の明るさを加算する光源です。
import DirectionalLight from './src/DirectionalLight'
import AmbientLight from './src/AmbientLight'

export default class Game {

  init = async () => {
    // レンダラ作成の処理
    ...

    // lighting
    this.light = new DirectionalLight()
    this.scene.add(this.light)
    // AmbientLight
    this.ambient = new AmbientLight()
    this.scene.add(this.ambient)

    ...
  }

  ...略
}
基本オブジェクトが描画されました。
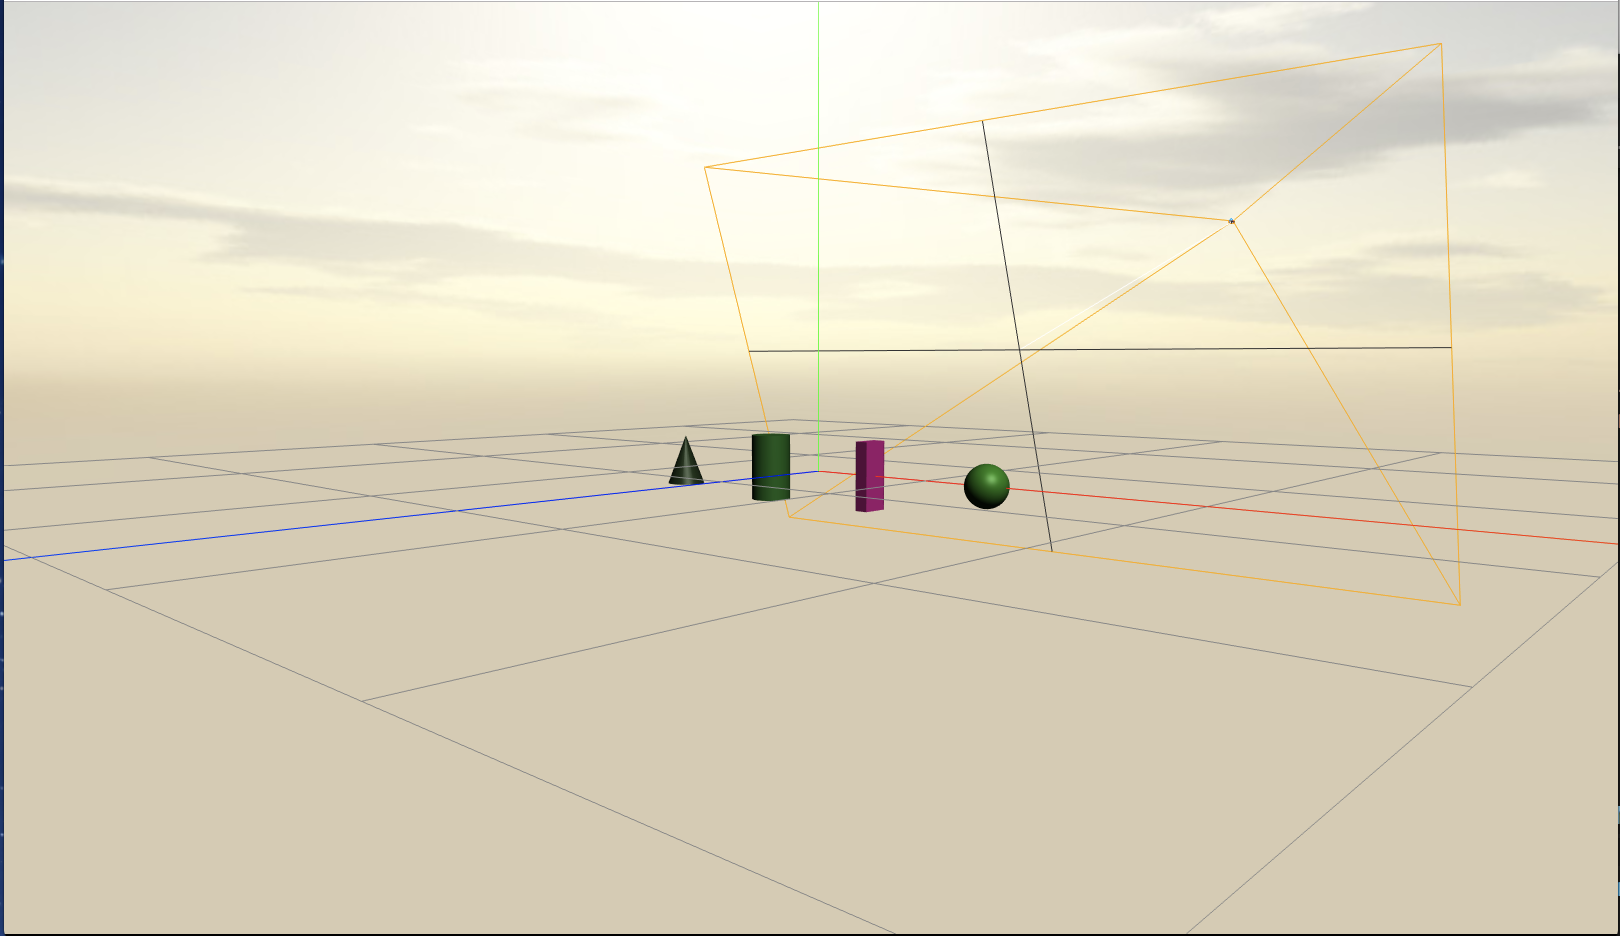
CubeMap
背景を描画します。CubeMapという立方体状のテクスチャを使うことで表現することができます。
CubeMap生成後、sceneのbackgroundにCubeMapを指定します。
import CubeMap from './src/CubeMap'

export default class Game {

  init = async () => {
    // レンダラ作成の処理
    ...

    // シーン作成
    this.scene = new Scene()
    this.cubeMap = new CubeMap('textures/')
    this.scene.background = this.cubeMap

    ...
  }

  ...略
}
texturesフォルダ以下のnx.png, ny.png, nz.png, px.png, py.png, pz.pngを利用してCubeMapを作成しています。
背景を変えたい場合は適宜差し替えてください。
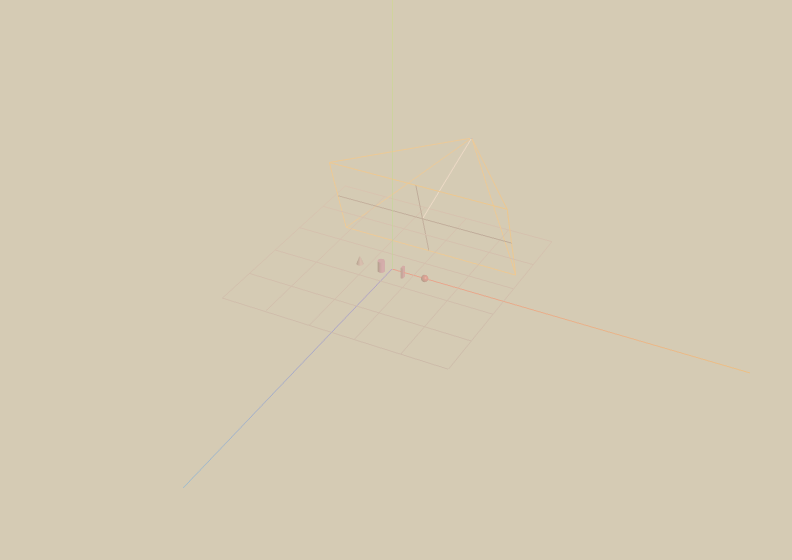
フォグ
距離フォグを設定します。カメラから遠くにある3Dオブジェクトは霞んで見えます。
sceneのfogプロパティにfogオブジェクトを追加します。
import Fog from './src/Fog'

export default class Game {

  init = async () => {
    // レンダラ作成の処理
    ...

    // シーン作成
    this.scene = new Scene()
    this.scene.fog = new Fog()

    ...
  }

  ...略
}
カメラを中心位置から遠くにすると3Dオブジェクトが霞んで見えます。
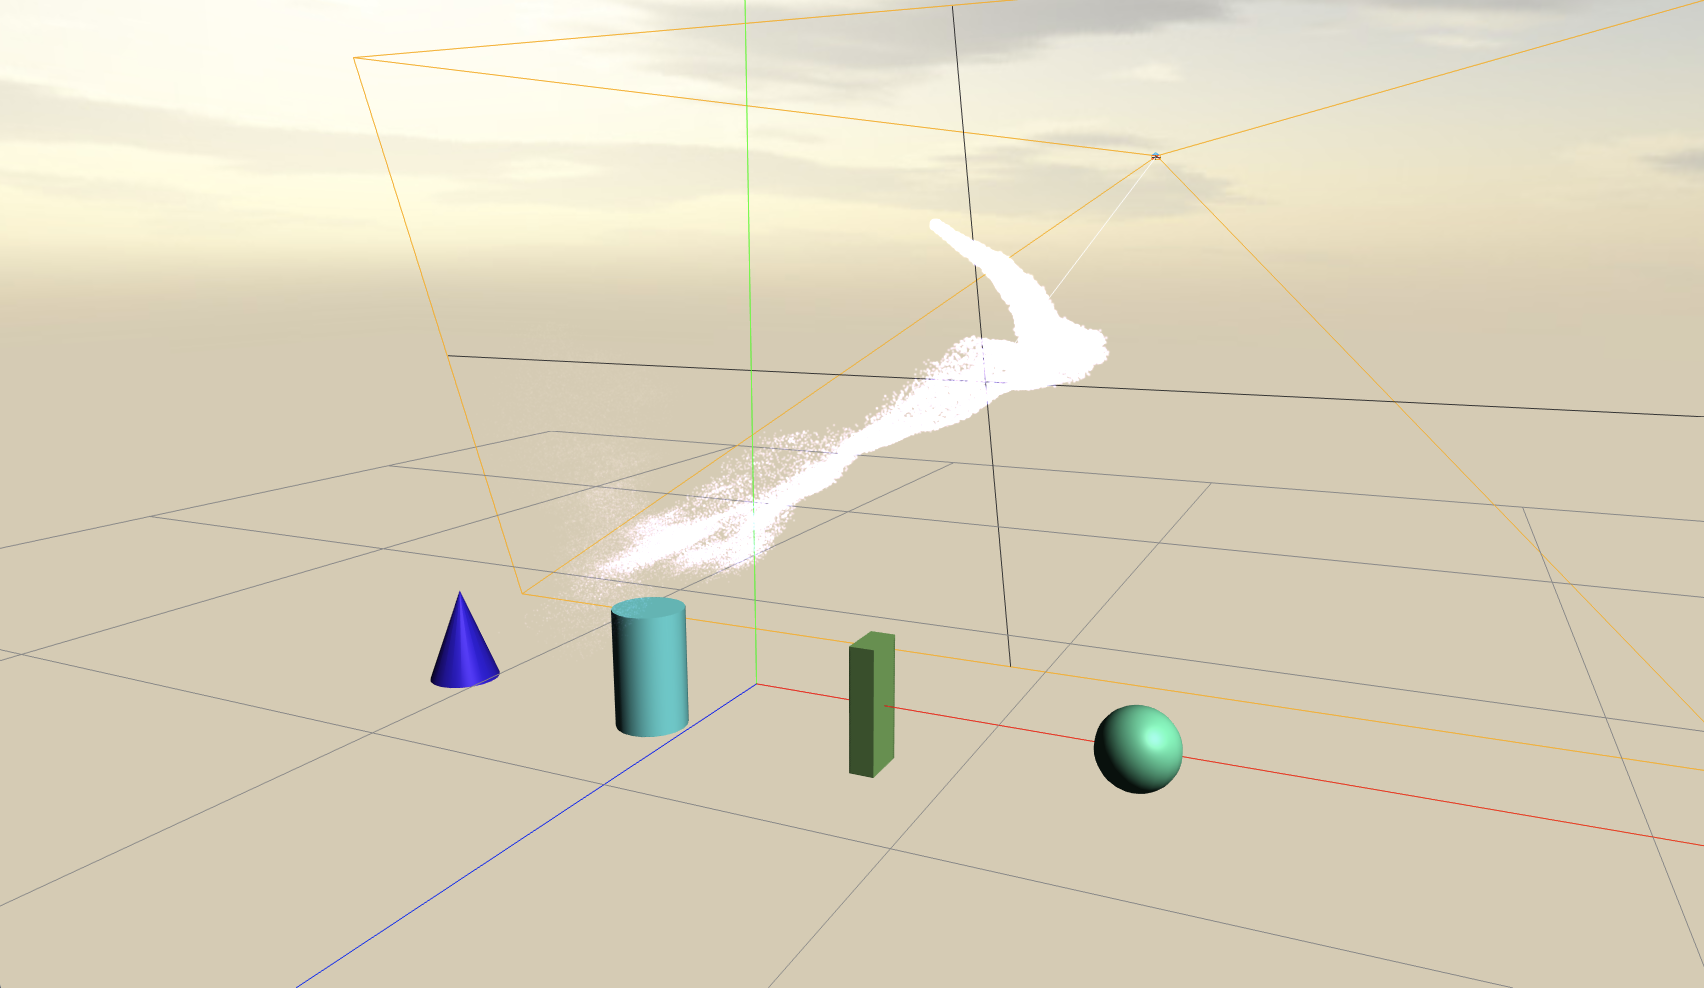
パーティクル
大量の粒子の動きを表現します。負荷が高い処理なので注意が必要です。
このサンプルを参考にTHREE.GPUParticleSystemクラスを使って実装しているのでGPUの性能に依存します。
import Particle from './src/Particle'

export default class Game {

  init = async () => {
    // レンダラ作成の処理
    ...

    // Particle
    this.particle = new Particle()
    this.scene.add(this.particle)

    ...
  }

  render = (frame) => {
    const {delta, time} = this.clock.update()

    // パーティクルの動きをシミュレーションする
    const horizontalSpeed = 1.5
    const verticalSpeed = 1.33
    this.particle.simulate(delta, new Vec3(Math.sin(this.particle.tick * horizontalSpeed) * 20, Math.sin(this.particle.tick * verticalSpeed) * 10 + 30, Math.sin(this.particle.tick * horizontalSpeed + verticalSpeed) * 5))

    // デバッグカメラの操作
    this.controlCamera.controls.update()
    // 描画画面をクリアする
    this.renderer.setClearColor(0x000000, 0)
    this.renderer.clear(true, true, true)
    // 描画
    this.renderer.render(this.scene, this.controlCamera)
  }
}
粒子が飛び回ります。
空と海の表現
このサンプルを参考に空と海を表現します。
今回はSkyの表現と同時には使えないのでCubeMapをオフにしています。
レンダリングがおかしくなるのでParticleより前にscene追加する必要があります。
threejsはシーンに追加されたオブジェクトの奥行きに対してソートして描画を最適化しています。
半透明でないオブジェクトに関しては問題ないのですが、
半透明のオブジェクトの場合は描画の順番でレンダリングがくずれるのでシーンの追加順番を入れ替えます。
// import CubeMap from './src/CubeMap'
import Water from './src/Water'
import Sky from './src/Sky'

export default class Game {

  init = async () => {
    // レンダラ作成の処理
    ...
    this.scene = new Scene()
    // this.cubeMap = new CubeMap('textures/')
    // this.scene.background = this.cubeMap

    // Sky
    this.sky = new Sky()
    this.sky.setEnv({turbidity: 10, rayleigh: 2, luminance: 1, mieCoefficient: 0.005, mieDirectionalG: 0.8})
    this.sky.setLight(this.light)
    this.scene.add(this.sky)

    // Water
    this.water = new Water(this.light)
    this.water.setEnv({distortionScale: 3.7, alpha: 0.95})
    this.water.setLight(this.light)
    this.scene.add(this.water)

    // Particle
    this.particle = new Particle()
    this.scene.add(this.particle)

    ...
  }

  render = (frame) => {
    const {delta, time} = this.clock.update()

    // 波を動かす
    this.water.update()

    ...
    // 描画
  }
}
海と空が表示されました
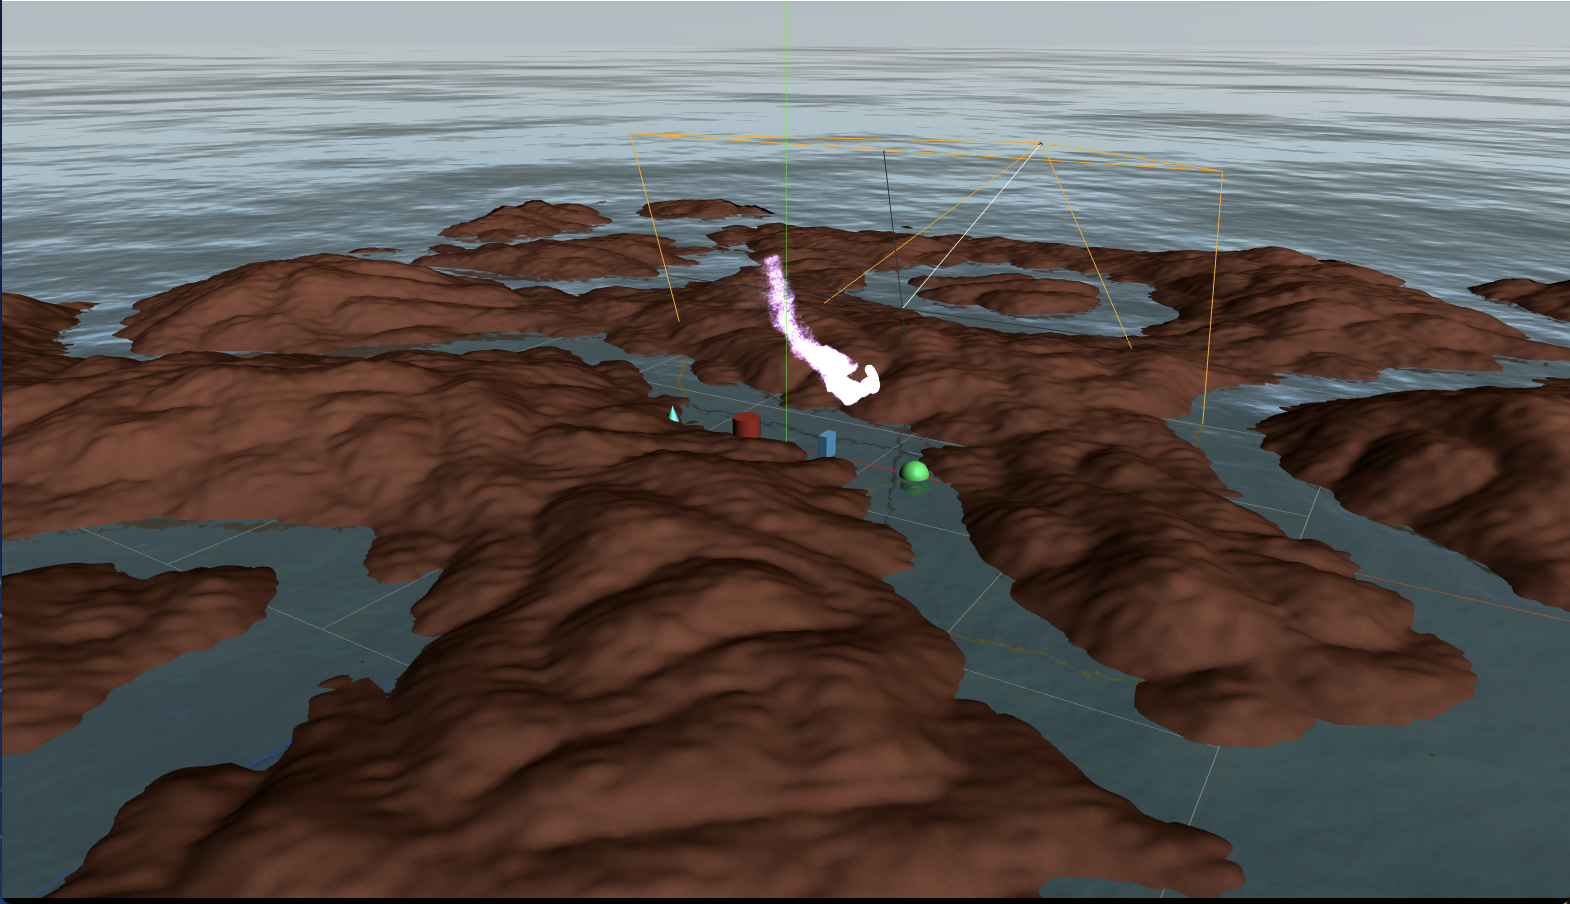
ハイトマップ
隆起した凸凹の地面を生成します。グリッドの高さを色々変化させたポリゴンをハイトマップと呼びます。
import HeightMap from './src/HeightMap'

export default class Game {

  init = async () => {
    // レンダラ作成の処理
    ...
    // HeightMap
    this.heightMap = new HeightMap()
    this.scene.add(this.heightMap)

    ...
  }

}
パーリンノイズより生成しているため、地面の形状を毎回ランダムに生成しています。
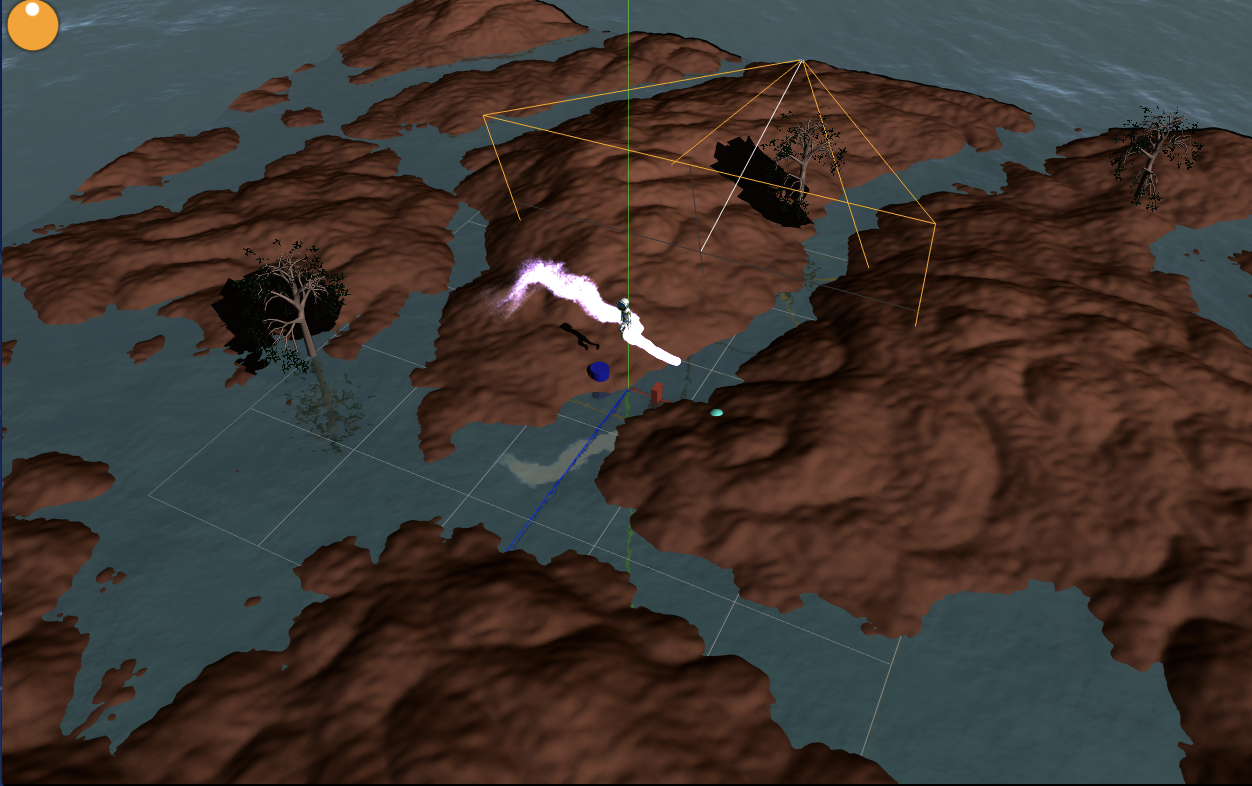
GLTFモデル描画
3Dモデルファイルを表示します。木とキャラクター(SkinedMesh)を描画しています。
ThreeJSは標準でGLTFフォーマットのモデルファイルのローディングをサポートしています。
木はglTF Procedural Treeというサイトで作成できます。
キャラクターは今回はThreeJS付属のサンプルモデルを使いましたが、
自分で作成する際はBlenderのglTF-Blender-Exporterプラグイン等を使うといいでしょう。
import Loader from './src/Loader'
import GLTFModel from './src/GLTFModel'

export default class Game {

  init = async () => {
    // レンダラ作成の処理
    ...
    // Loader
    this.loader = new Loader()

    // GLTF
    const tree = await this.loader.loadGLTFModel('./model/tree.glb')
    const treePositions = [
      new Vec3(132, 20, -190),
      new Vec3(216, 20, 80),
      new Vec3(-82, 20, 222),
      new Vec3(13, 20, -125),
      new Vec3(-100, 20, 31),
    ]
    this.trees = []
    for (let i = 0; i < 5; i++) {
      this.trees.push(new GLTFModel(tree, true, true))
      this.trees[i].init(treePositions[i], 0, 8)
      this.scene.add(this.trees[i])
    }

    // GLTF Skin
    const gltf = await this.loader.loadGLTFModel('./model/CesiumMan.gltf')
    this.model = new GLTFModel(gltf, true)
    this.model.init(new Vec3(0, 20, 0), -Math.PI/2, 10)
    this.model.actions[0].play()
    this.scene.add(this.model)

    ...
  }

  render = (frame) => {
    const {delta, time} = this.clock.update()

    this.model.mixer && this.model.mixer.update(delta) // モデルアニメーション更新

    ...
    // 描画
  }
}

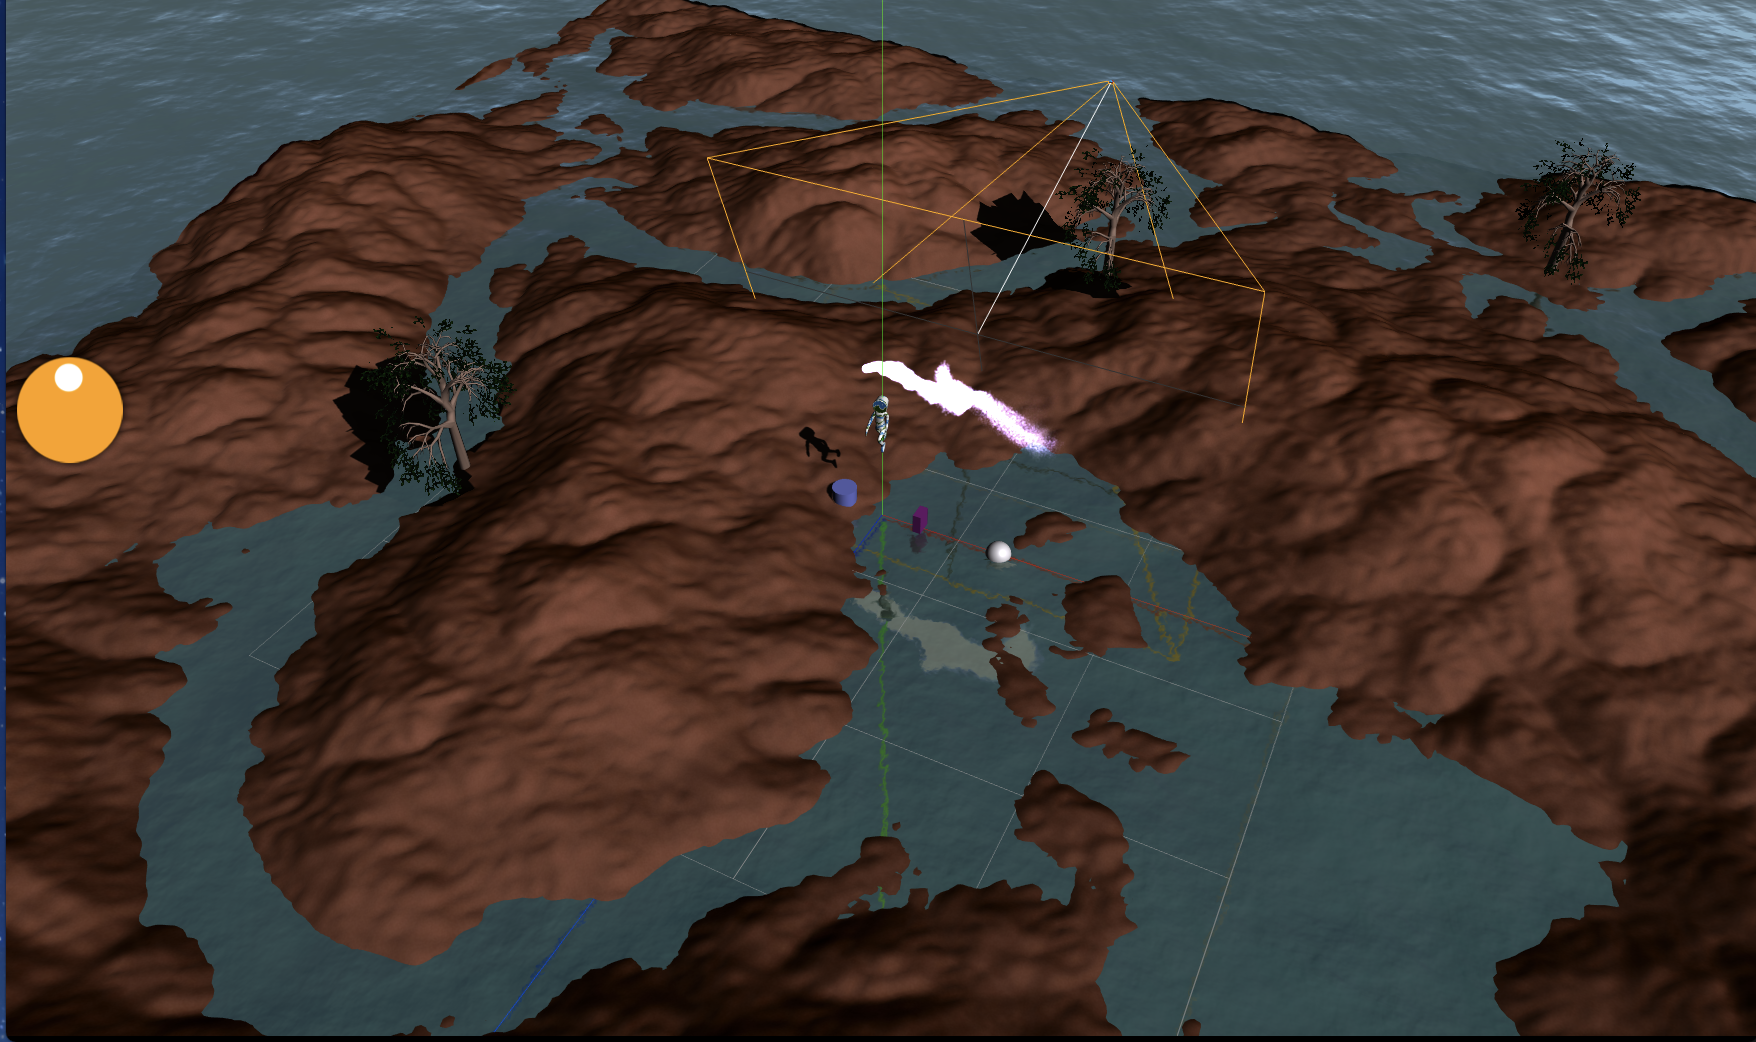
2D表示
2D画像を描画します。
2D用のOrthoカメラを作成して、2D用のシーンを作成します。
2D画像オブジェクト(スプライト)は2D用のシーンに作成します。
2D描画は基本的に3D描画の後に行います。
import Camera2D from './src/Camera2D'
import Sprite from './src/Sprite'

export default class Game {

  init = async () => {
    // レンダラ作成の処理
    ...

    // シーン作成
    this.scene = new Scene()
    this.sceneOrtho = new Scene()

    // 2Dカメラ
    this.cameraOrtho = new Camera2D()

    // Sprite
    const texture = await this.loader.loadTexture('./textures/sprite1.png')
    this.sprite = new Sprite(texture)
    this.sprite.setPos(-1, 1)
    this.sprite.setCenter({right: true, bottom: true})
    this.sprite.setSize(64, 64)
    this.sceneOrtho.add(this.sprite)

    ...
  }

  onResize = () =>  {
    this.renderer.resize()

    // 2Dカメラ追加
    const cameras = [this.camera, this.cameraOrtho, this.controlCamera]
    for (let camera of cameras) {
      camera.resize()
    }
    this.sprite.onResizeWindow()
  }

  render = (frame) => {
    const {delta, time} = this.clock.update()

    this.controlCamera.controls.update()
    this.renderer.setClearColor(0x000000, 0)
    this.renderer.clear(true, true, true)
    this.renderer.render(this.scene, this.controlCamera)
    // 2D描画前にレンダラのzバッファをクリアする
    this.renderer.clearDepth()
    // 2D描画
    this.renderer.render(this.sceneOrtho, this.cameraOrtho)
  }
}
画面左上に画像が表示されます
TWEENアニメーション
tween.jsを使うことで簡易的にtweenアニメーションを行うことができます。今回はスプライトを動かしてみます。
(もちろん3Dオブジェクトのtweenアニメーションも同様に可能)
import TWEEN from '@tweenjs/tween.js'

export default class Game {

  init = async () => {
    // レンダラ作成の処理
    ...

    const coords = { x: -1, y: 1 }
    this.tween = new TWEEN.Tween(coords)
        .to({ x: -1, y: 0 }, 3000)
        .easing(TWEEN.Easing.Quadratic.Out)
        .onUpdate(() => {
          this.sprite.setPos(coords.x, coords.y)
        })

    this.tweenBack = new TWEEN.Tween(coords)
        .to({ x: -1, y: 1 }, 3000)
        .easing(TWEEN.Easing.Quadratic.Out)
        .onUpdate(() => {
          this.sprite.setPos(coords.x, coords.y)
        })

    this.tween.chain(this.tweenBack)
    this.tweenBack.chain(this.tween)
    this.tween
      .delay(3000)
      .start()

    ...
  }

  render = (frame) => {
    const {delta, time} = this.clock.update()

    TWEEN.update(frame) // TWEENオブジェクト更新

    ...
    // 描画
  }
}
2D画像が上下に動きます。
オーディオ再生(と3Dサウンド再生)
オーディオ(BGM)と3Dサウンド(3Dオブジェクトの位置から発生する音)を再生します。
import Audio from './src/Audio'
import AudioListener from './src/AudioListener'
import PositionalAudio from './src/PositionalAudio'

export default class Game {

  init = async () => {
    // レンダラ作成の処理
    ...

    // Audio
    this.audioListener = new AudioListener()
    this.buffer = await this.loader.loadAudio('./sounds/bgm_maoudamashii_healing13.mp3')
    this.bgm = new Audio(this.buffer, this.audioListener)
    this.bgm.setLoop(true)
    this.bgm.setVolume(0.1)
    this.bgm.play()
    // PositionalAudio(3Dサウンド)
    this.soundBuffer = await this.loader.loadAudio('./sounds/ping_pong.mp3')
    this.sound = new PositionalAudio(this.soundBuffer, this.audioListener)
    this.sound.setVolume(10)
    this.sound.setRefDistance(20)
    // 3Dサウンドの場合は音を聞く位置をカメラに紐付ける
    this.controlCamera.add(this.audioListener)
    // 3Dオブジェクトに3Dサウンドを紐付ける
    this.model.add(this.sound)

    ...
  }

  render = (frame) => {
    const {delta, time} = this.clock.update()

    // 一定時間おきに再生
    this.count = this.count || 0
    if (this.count % 60 === 0) {
      this.sound.play()
    }
    this.count++

    ...
    // 描画
  }
}
3Dサウンドはキャラクターに近づくことで音が大きくなるはずです
Physics演算(AmmoJS)
物理エンジンで衝突判定を行います。
AmmoJSはbulletという物理エンジンをEmscriptenというツールを使ってDirect Importしています。
つまり、JavaScriptからC言語で書かれたbullet SDKを直接コールバックしているため、web上でも比較的高速に衝突計算ができます。
import PhysicsWorld from './src/PhysicsWorld'

export default class Game {

  init = async () => {
    // レンダラ作成の処理
    ...

    // 物理世界作成
    this.physicsWorld = new PhysicsWorld()


    // HeightMap
    this.heightMap = new HeightMap()
    this.scene.add(this.heightMap)
    // HeightMapオブジェクトを物理空間に追加
    this.physicsWorld.addHeightMapBody(this.heightMap)

    // Loader
    this.loader = new Loader()

    // GLTF
    const tree = await this.loader.loadGLTFModel('./model/tree.glb')
    const treePositions = [
      new Vec3(132, 20, -190),
      new Vec3(216, 20, 80),
      new Vec3(-82, 20, 222),
      new Vec3(13, 20, -125),
      new Vec3(-100, 20, 31),
    ]
    this.trees = []
    for (let i = 0; i < 5; i++) {
      this.trees.push(new GLTFModel(tree, true, true))
      this.trees[i].init(treePositions[i], 0, 8)
      this.trees[i].getCenter()
      this.scene.add(this.trees[i])
      // Kinematicオブジェクトを物理空間に追加
      let size = new Vec3()
      this.trees[i].boundingBox.getSize(size)
      this.physicsWorld.addBoxBody(this.trees[i], size.multiplyScalar(6), 0, true)
    }

    // GLTF Skin
    const gltf = await this.loader.loadGLTFModel('./model/CesiumMan.gltf')
    this.model = new GLTFModel(gltf, true)
    this.model.init(new Vec3(0, 20, 0), -Math.PI/2, 10)
    this.model.actions[0].play()
    this.scene.add(this.model)
    // 物理空間に追加
    this.model.getCenter()
    this.physicsWorld.addHumanBody(this.model, 0.8)

    ...
  }


  render = (frame) => {
    const {delta, time} = this.clock.update()

    // 物理計算更新
    this.physicsWorld.update(delta)

    // 物理空間上のオブジェクトの当たり判定
    const hitResult = this.physicsWorld.hitTest([this.heightMap, this.model])
    if (Object.keys(hitResult).length > 0) {
      this.physicsWorld.addImpulse(this.model, new Vec3(0, 50, 0))
    } else {
      this.physicsWorld.addForce(this.model, new Vec3(0, 0, 50))
    }
    this.physicsWorld.setModelPose(this.model)

    ...
    描画
  }
}
キャラクターが地面に沿ってジャンプしながら移動します。
キーボード操作
キーボード操作でキャラクターを動かしてみます。AWSDキーカメラ正面方向に対してキャラクターを移動させます。(さらに物理エンジンを適用することで地面に沿って移動できます)
import Keyboard from './src/Keyboard'

export default class Game {

  init = async () => {
    // レンダラ作成の処理
    ...

    // キーボード
    this.keyboard = new Keyboard()

    ...
  }

  render = (frame) => {
    const {delta, time} = this.clock.update()

    if (!(this.keyboard.isPressA() || this.keyboard.isPressD() || this.keyboard.isPressW() || this.keyboard.isPressS())) {
      this.model.stop()
    // A
    } else if (this.keyboard.isPressA()) {
      this.model.move(this.controlCamera, Math.PI/2)
    // D
    } else if (this.keyboard.isPressD()) {
      this.model.move(this.controlCamera, -Math.PI/2)
    // W
    } else if (this.keyboard.isPressW()) {
      this.model.move(this.controlCamera, 0)
    // S
    } else if (this.keyboard.isPressS()) {
      this.model.move(this.controlCamera, Math.PI)
    }
    // 移動結果を物理計算空間に反映
    this.physicsWorld.setPhysicsPose(this.model)

    // 物理計算更新
    this.physicsWorld.update(delta)

    /*
    // 物理空間上のオブジェクトの当たり判定
    const hitResult = this.physicsWorld.hitTest([this.heightMap, this.model])
    if (Object.keys(hitResult).length > 0) {
      this.physicsWorld.addImpulse(this.model, new Vec3(0, 50, 0))
    } else {
      this.physicsWorld.addForce(this.model, new Vec3(0, 0, 50))
    }
    */
    this.physicsWorld.setModelPose(this.model)

    ...
    描画
  }
}
キーを追加したい場合はKeyboard.jsにキーを追加してください
export default class Keyboard {
  constructor () {
    this.keys = []
    document.addEventListener('keydown', (e) => {
      const keycode = e.keyCode
      this.keys[keycode] = true
      e.preventDefault()
      e.stopPropagation()
      return false
    })
    document.addEventListener('keyup', (e) => {
      const keycode = e.keyCode
      this.keys[keycode] = false
      e.preventDefault()
      e.stopPropagation()
      return false
    })
  }

  isPressEnter = () => this.getKey(13)
  isPressSpace = () => this.getKey(32)
  isPressA = () => this.getKey(65)
  isPressD = () => this.getKey(68)
  isPressW = () => this.getKey(87)
  isPressS = () => this.getKey(83)
  isPressC = () => this.getKey(67)
  isPressLeft = () => this.getKey(37)
  isPressRight = () => this.getKey(39)
  isPressUp = () => this.getKey(38)
  isPressDown = () => this.getKey(40)

  getKey = (keycode) => {
    return this.keys[keycode]
  }
}
ドラッグ操作
一定時間おきにPrimitiveを生成し、
ドラッグ操作で持ち上げることができるようにします。
import DragControls from './src/DragControls'

export default class Game {
init = async () => {
    // レンダラ作成の処理
    ...


    /*
    // Sphere
    const sphere = new Sphere(3)
    sphere.position.set(30, 0, 0)
    this.scene.add(sphere)

    // Box
    const box = new Box(new Vec3(2, 10, 4))
    box.position.set(10, 0, 0)
    this.scene.add(box)

    // Cylinder
    const cylinder = new Cylinder(3, 10)
    cylinder.position.set(-10, 0, 0)
    this.scene.add(cylinder)

    // Cone
    const cone = new Cone(3, 8)
    cone.position.set(-30, 0, 0)
    this.scene.add(cone)
    */

    // ドラッグ処理
    this.dynamicObjects = []
    this.dragControls = new DragControls(this.dynamicObjects, this.controlCamera, this.renderer, this.onDragStart, this.onDragEnd)
    this.objectTimePeriod = 3
    this.timeNextSpawn = this.objectTimePeriod

    ...
  }

  onDragStart = (e) => {
    if (this.controlCamera.controls) {
      this.controlCamera.controls.enabled = false
    }
    if (e.object.userData) {
      e.object.userData.ignorePhysics = true
    }
  }

  onDragEnd = (e) => {
    if (e.object.userData) {
      this.physicsWorld.setPhysicsPose(e.object)
      e.object.userData.ignorePhysics = false
    }
    if (this.controlCamera.controls) {
      this.controlCamera.controls.enabled = true
    }
  }

  render = (frame) => {
    const {delta, time} = this.clock.update()

    // 一定時間おきに動的にオブジェクトを生成する
    if (this.dynamicObjects.length < 5 && time > this.timeNextSpawn)
    {
      const objectType = Math.ceil(Math.random() * 4)
      let mesh = null
      const initPos = new Vec3(0, 100, 0)
      const objectSize = 2
      switch (objectType) {
        case 1:
          mesh = new Sphere(3 + Math.random() * objectSize)
          mesh.position.set(initPos.x, initPos.y, initPos.z)
          this.physicsWorld.addSphereBody(mesh, mesh.radius, objectSize * 5)
          break
        case 2:
          mesh = new Box(new Vec3(4 + Math.random() * objectSize, 4 + Math.random() * objectSize, 4 + Math.random() * objectSize))
          mesh.position.set(initPos.x, initPos.y, initPos.z)
          this.physicsWorld.addBoxBody(mesh, mesh.size, objectSize * 5)
          break
        case 3:
          mesh = new Cylinder(3 + Math.random() * objectSize, 3 + Math.random() * objectSize)
          mesh.position.set(initPos.x, initPos.y, initPos.z)
          this.physicsWorld.addCylinderBody(mesh, mesh.radius, mesh.height, objectSize * 5)
          break
        default:
          mesh = new Cone(3 + Math.random() * objectSize, 2 + Math.random() * objectSize)
          mesh.position.set(initPos.x, initPos.y, initPos.z)
          this.physicsWorld.addConeBody(mesh, mesh.radius, mesh.height, objectSize * 5)
          break
      }

      this.scene.add(mesh)
      this.dynamicObjects.push(mesh)
      this.timeNextSpawn = time + this.objectTimePeriod
    }

    // 物理計算更新
    this.physicsWorld.update(delta)

for (let i = 0; i < this.dynamicObjects.length; i++) {
      const objThree = this.dynamicObjects[i]
      // ドラッグしていないオブジェクト以外反映する
      if (objThree.userData && objThree.userData.ignorePhysics) {
        continue
      }
      this.physicsWorld.setModelPose(objThree)
    }

    ...
    描画
  }
}
一定時間おきにPrimitiveオブジェクトが落ちてきて、地面に転がります。
Primitiveを上方向にドラッグしてドロップすると落ちます
レイキャスト
線に対して、オブジェクトが交差しているかの判定をレイキャストと呼びます。
よく使われるのはマウスの位置からカメラ視点正面に対して線が出ているのを想定して、3Dオブジェクトとの交差判定を行います。
今回は地面のどの位置に対して交差しているか判別します。
import RayCaster from './src/RayCaster'
import ConeMarker from './src/ConeMarker'

export default class Game {
init = async () => {
    // レンダラ作成の処理
    ...

    // RayCaster
    this.rayCaster = new RayCaster()
    // マウス/タッチ
    this.helper = new ConeMarker(20, 100)
    this.helper.geometry.translate(0, 50, 0)
    this.helper.geometry.rotateX(Math.PI / 2)
    this.helper.geometry.scale(0.1, 0.1, 0.1)
    this.scene.add(this.helper)
    document.addEventListener('mousemove', this.onMouseMove, false)
    document.addEventListener('mousedown', this.onMouseClick, false)
    this.clicked = false
    this.clickPos = new Vec3()

    ...
  }

  onMouseMove = (event) => {
    const mouse = {
      x: (event.clientX / this.renderer.domElement.clientWidth) * 2 - 1,
      y: -(event.clientY / this.renderer.domElement.clientHeight) * 2 + 1,
    }

    const intersects = this.rayCaster.getIntersect(mouse, this.controlCamera, this.heightMap)

    if (intersects.length > 0) {
      this.helper.position.set(0, 0, 0)
      this.helper.lookAt(intersects[0].face.normal)
      this.helper.position.copy(intersects[0].point)
    }
  }

  onMouseClick = (event) => {
    const mouse = {
      x: (event.clientX / this.renderer.domElement.clientWidth) * 2 - 1,
      y: -(event.clientY / this.renderer.domElement.clientHeight) * 2 + 1,
    }

    const intersects = this.rayCaster.getIntersect(mouse, this.controlCamera, this.heightMap)

    if (intersects.length > 0) {
      this.clicked = true
      this.clickPos = intersects[0].point
    }
  }

  render = (frame) => {
    const {delta, time} = this.clock.update()

    if (this.clicked) {
      const dir = new Vec3(this.clickPos.x - this.model.position.x, 0, this.clickPos.z - this.model.position.z)
      if (dir.length() < 3) {
        this.clicked = false
      }
      this.model.moveTo(this.clickPos)
    }
    // 移動結果を物理計算空間に反映
    this.physicsWorld.setPhysicsPose(this.model)

    // 物理計算更新
    this.physicsWorld.update(delta)

    ...
    描画
  }
}
マウスを移動させると交差する地面の位置にマーカーが表示されます。
マーカ位置をクリックするとキャラクターが移動します。
全部組み合わせる
デモで動いているソースコードは次のようになります。
import TWEEN from '@tweenjs/tween.js'
import Render from './src/Render'
import Scene from './src/Scene'
import Clock from './src/Clock'
import Vec3 from './src/Vec3'
import Axis from './src/Axis'
import Grid from './src/Grid'
import Camera2D from './src/Camera2D'
import Camera3D from './src/Camera3D'
// import CubeMap from './src/CubeMap'
import DirectionalLight from './src/DirectionalLight'
import AmbientLight from './src/AmbientLight'
import Loader from './src/Loader'
import HeightMap from './src/HeightMap'
import Fog from './src/Fog'
import Sprite from './src/Sprite'
import Sphere from './src/Sphere'
import Box from './src/Box'
import Cylinder from './src/Cylinder'
import Cone from './src/Cone'
import ConeMarker from './src/ConeMarker'
import GLTFModel from './src/GLTFModel'
import PhysicsWorld from './src/PhysicsWorld'
import DragControls from './src/DragControls'
import Keyboard from './src/Keyboard'
import AudioListener from './src/AudioListener'
import PositionalAudio from './src/PositionalAudio'
import Audio from './src/Audio'
import Particle from './src/Particle'
import Water from './src/Water'
import Sky from './src/Sky'
import RayCaster from './src/RayCaster'

export default class Game {

  init = async () => {
    // アニメーションとかで使う時間用
    this.clock = new Clock()
    this.loader = new Loader()
    // シーン作成
    this.scene = new Scene()
    this.sceneOrtho = new Scene()
    // this.cubeMap = new CubeMap('textures/')
    // this.scene.background = this.cubeMap
    this.scene.fog = new Fog()
    // レンダラー作成
    this.renderer = new Render(this.onResize)
    // 物理世界作成
    this.physicsWorld = new PhysicsWorld()

    // RayCaster
    this.rayCaster = new RayCaster()

    // 3Dカメラ
    const eye = new Vec3(0, 50, -150)
    const lookAt = new Vec3(0, 0, 0)
    this.camera = new Camera3D(eye, lookAt)
    this.scene.add(this.camera)
    this.scene.add(this.camera.helper) // helper

    // コントロールカメラ
    const debugEye = new Vec3(100, 200, 200)
    const debugLookAt = new Vec3(0, 0, 0)
    this.controlCamera = new Camera3D(debugEye, debugLookAt, 1, 4000)
    this.controlCamera.controls = this.controlCamera.createControls()

    this.selectCamera = this.controlCamera
    this.isDebug = true

    // 2Dカメラ
    this.cameraOrtho = new Camera2D()

    // Audio
    this.audioListener = new AudioListener()
    this.buffer = await this.loader.loadAudio('./sounds/bgm_maoudamashii_healing13.mp3')
    this.bgm = new Audio(this.buffer, this.audioListener)
    this.bgm.setLoop(true)
    this.bgm.setVolume(0.1)
    this.bgm.play()
    this.soundBuffer = await this.loader.loadAudio('./sounds/ping_pong.mp3')
    this.selectCamera.add(this.audioListener)
    this.sound = new PositionalAudio(this.soundBuffer, this.audioListener)
    this.sound.setVolume(10)

    // lighting
    this.light = new DirectionalLight()

    const parameters = {
      distance: 400,
      inclination: 0.3,
      azimuth: 0.205,
    }
    const theta = Math.PI * (parameters.inclination - 0.5)
    const phi = 2 * Math.PI * (parameters.azimuth - 0.5)
    this.light.position.x = parameters.distance * Math.cos(phi)
    this.light.position.y = parameters.distance * Math.sin(phi) * Math.sin(theta)
    this.light.position.z = parameters.distance * Math.sin(phi) * Math.cos(theta)
    this.scene.add(this.light)
    this.ambient = new AmbientLight()
    this.scene.add(this.ambient)

    // Sky
    this.sky = new Sky()
    this.sky.setEnv({turbidity: 10, rayleigh: 2, luminance: 1, mieCoefficient: 0.005, mieDirectionalG: 0.8})
    this.sky.setLight(this.light)
    this.scene.add(this.sky)

    // Water
    this.water = new Water(this.light)
    this.water.setEnv({distortionScale: 3.7, alpha: 0.95})
    this.water.setLight(this.light)
    this.scene.add(this.water)

    // HeightMap
    this.heightMap = new HeightMap()
    this.scene.add(this.heightMap)
    this.physicsWorld.addHeightMapBody(this.heightMap)

    // GLTF
    const tree = await this.loader.loadGLTFModel('./model/tree.glb')
    const treePositions = [
      new Vec3(132, 20, -190),
      new Vec3(216, 20, 80),
      new Vec3(-82, 20, 222),
      new Vec3(13, 20, -125),
      new Vec3(-100, 20, 31),
    ]
    this.trees = []
    for (let i = 0; i < 5; i++) {
      this.trees.push(new GLTFModel(tree, true, true))
      this.trees[i].init(treePositions[i], 0, 8)
      this.trees[i].getCenter()
      let size = new Vec3()
      this.trees[i].boundingBox.getSize(size)
      this.physicsWorld.addBoxBody(this.trees[i], size.multiplyScalar(6), 0, true)
      this.scene.add(this.trees[i])
      // const box = new Box(this.trees[i].boundingBox.size().multiplyScalar(6))
      // box.position.copy(this.trees[i].position)
      // this.scene.add(box)
    }

    // GLTF Skin
    const gltf = await this.loader.loadGLTFModel('./model/CesiumMan.gltf')
    this.model = new GLTFModel(gltf, true)
    this.model.init(new Vec3(0, 20, 0), -Math.PI/2, 10)
    this.model.actions[0].play()
    this.model.getCenter()
    this.physicsWorld.addHumanBody(this.model, 0.8)
    this.scene.add(this.model)
    this.model.add(this.sound)
    // this.scene.add(this.model.boxHelper)
    this.isGround = false

    // Particle
    this.particle = new Particle()
    this.scene.add(this.particle)

    // Grid
    this.grid = new Grid()
    this.scene.add(this.grid)
    // Axis
    this.axis = new Axis()
    this.scene.add(this.axis)

    // Sprite
    const texture = await this.loader.loadTexture('./textures/sprite1.png')
    this.sprite = new Sprite(texture)
    this.sprite.setPos(-1, 1)
    this.sprite.setCenter({right: true, bottom: true})
    this.sprite.setSize(64, 64)
    this.sceneOrtho.add(this.sprite)

    const coords = { x: -1, y: 1 }
    this.tween = new TWEEN.Tween(coords)
        .to({ x: -1, y: 0 }, 3000)
        .easing(TWEEN.Easing.Quadratic.Out)
        .onUpdate(() => {
          this.sprite.setPos(coords.x, coords.y)
        })

    this.tweenBack = new TWEEN.Tween(coords)
        .to({ x: -1, y: 1 }, 3000)
        .easing(TWEEN.Easing.Quadratic.Out)
        .onUpdate(() => {
          this.sprite.setPos(coords.x, coords.y)
        })

    this.tween.chain(this.tweenBack)
    this.tweenBack.chain(this.tween)
    this.tween
      .delay(3000)
      .start()

    // キーボード
    this.keyboard = new Keyboard()

    // ドラッグ処理
    this.dynamicObjects = []
    this.dragControls = new DragControls(this.dynamicObjects, this.controlCamera, this.renderer, this.onDragStart, this.onDragEnd)

    // マウス/タッチ
    this.helper = new ConeMarker(20, 100)
    this.helper.geometry.translate(0, 50, 0)
    this.helper.geometry.rotateX(Math.PI / 2)
    this.helper.geometry.scale(0.1, 0.1, 0.1)
    this.scene.add(this.helper)
    document.addEventListener('mousemove', this.onMouseMove, false)
    document.addEventListener('mousedown', this.onMouseClick, false)
    this.clicked = false
    this.clickPos = new Vec3()

    this.objectTimePeriod = 3
    this.timeNextSpawn = this.objectTimePeriod

    requestAnimationFrame(this.loop)
  }

  onDragStart = (e) => {
    if (this.selectCamera.controls) {
      this.selectCamera.controls.enabled = false
    }
    if (e.object.userData) {
      e.object.userData.ignorePhysics = true
    }
  }

  onDragEnd = (e) => {
    if (e.object.userData) {
      this.physicsWorld.setPhysicsPose(e.object)
      e.object.userData.ignorePhysics = false
    }
    if (this.selectCamera.controls) {
      this.selectCamera.controls.enabled = true
    }
  }

  loop = (frame) => {
    requestAnimationFrame(this.loop)
    this.render(frame)
  }

  onResize = () =>  {
    this.renderer.resize()

    const cameras = [this.camera, this.cameraOrtho, this.controlCamera]
    for (let camera of cameras) {
      camera.resize()
    }
    this.sprite.onResizeWindow()
  }

  onMouseMove = (event) => {
    const mouse = {
      x: (event.clientX / this.renderer.domElement.clientWidth) * 2 - 1,
      y: -(event.clientY / this.renderer.domElement.clientHeight) * 2 + 1,
    }

    const intersects = this.rayCaster.getIntersect(mouse, this.selectCamera, this.heightMap)

    if (intersects.length > 0) {
      this.helper.position.set(0, 0, 0)
      this.helper.lookAt(intersects[0].face.normal)
      this.helper.position.copy(intersects[0].point)
    }
  }

  onMouseClick = (event) => {
    const mouse = {
      x: (event.clientX / this.renderer.domElement.clientWidth) * 2 - 1,
      y: -(event.clientY / this.renderer.domElement.clientHeight) * 2 + 1,
    }

    const intersects = this.rayCaster.getIntersect(mouse, this.selectCamera, this.heightMap)

    if (intersects.length > 0) {
      this.clicked = true
      this.clickPos = intersects[0].point
    }
  }

  render = (frame) => {
    const {delta, time} = this.clock.update()
    this.camera.lookAt(new Vec3(this.model.position.x, this.model.position.y + 10, this.model.position.z))
    const cameraDir = new Vec3(this.model.position.x - this.camera.position.x, 0, this.model.position.z - this.camera.position.z)
    const cameraDistance = 100
    if (cameraDir.length() > cameraDistance) {
      const target = cameraDir.normalize().multiplyScalar(cameraDistance)
      this.camera.position.copy(new Vec3(this.model.position.x - target.x, this.camera.position.y, this.model.position.z - target.z))
    }

    TWEEN.update(frame) // TWEENオブジェクト更新
    this.model.mixer && this.model.mixer.update(delta) // モデルアニメーション更新

    // 動的にオブジェクトを生成する
    if (this.dynamicObjects.length < 5 && time > this.timeNextSpawn) {
      const objectType = Math.ceil(Math.random() * 4)
      let mesh = null
      const initPos = new Vec3(0, 100, 0)
      const objectSize = 2
      switch (objectType) {
        case 1:
          mesh = new Sphere(3 + Math.random() * objectSize)
          mesh.position.set(initPos.x, initPos.y, initPos.z)
          this.physicsWorld.addSphereBody(mesh, mesh.radius, objectSize * 5)
          break
        case 2:
          mesh = new Box(new Vec3(4 + Math.random() * objectSize, 4 + Math.random() * objectSize, 4 + Math.random() * objectSize))
          mesh.position.set(initPos.x, initPos.y, initPos.z)
          this.physicsWorld.addBoxBody(mesh, mesh.size, objectSize * 5)
          break
        case 3:
          mesh = new Cylinder(3 + Math.random() * objectSize, 3 + Math.random() * objectSize)
          mesh.position.set(initPos.x, initPos.y, initPos.z)
          this.physicsWorld.addCylinderBody(mesh, mesh.radius, mesh.height, objectSize * 5)
          break
        default:
          mesh = new Cone(3 + Math.random() * objectSize, 2 + Math.random() * objectSize)
          mesh.position.set(initPos.x, initPos.y, initPos.z)
          this.physicsWorld.addConeBody(mesh, mesh.radius, mesh.height, objectSize * 5)
          break
      }

      this.scene.add(mesh)
      this.dynamicObjects.push(mesh)
      this.timeNextSpawn = time + this.objectTimePeriod
    }

    // C
    if (this.keyboard.isPressC() && !this.prevPressC) {
      this.isDebug = !this.isDebug
      this.prevPressC = true
      if (this.isDebug) {
        this.selectCamera.remove(this.audioListener)
        this.selectCamera = this.controlCamera
        this.camera.helper.visible = true
        this.grid.visible = true
        this.axis.visible = true
        this.selectCamera.add(this.audioListener)
      } else {
        this.selectCamera.remove(this.audioListener)
        this.selectCamera = this.camera
        this.camera.helper.visible = false
        this.grid.visible = false
        this.axis.visible = false
        this.selectCamera.add(this.audioListener)
      }
    } else if (!this.keyboard.isPressC()) {
      this.prevPressC = false
    }

    if (!(this.keyboard.isPressA() || this.keyboard.isPressD() || this.keyboard.isPressW() || this.keyboard.isPressS())) {
      this.model.stop()
    // A
    } else if (this.keyboard.isPressA()) {
      this.model.move(this.selectCamera, Math.PI/2)
    // D
    } else if (this.keyboard.isPressD()) {
      this.model.move(this.selectCamera, -Math.PI/2)
    // W
    } else if (this.keyboard.isPressW()) {
      this.model.move(this.selectCamera, 0)
    // S
    } else if (this.keyboard.isPressS()) {
      this.model.move(this.selectCamera, Math.PI)
    }
    if (this.clicked) {
      const dir = new Vec3(this.clickPos.x - this.model.position.x, 0, this.clickPos.z - this.model.position.z)
      if (dir.length() < 3) {
        this.clicked = false
      }
      this.model.moveTo(this.clickPos)
    }
    // 移動結果を物理計算空間に反映
    this.physicsWorld.setPhysicsPose(this.model)

    const delay = 3
    if (this.isGround && time > (this.jumbTime || 0) + delay && this.keyboard.isPressSpace()) {
      this.physicsWorld.addImpulse(this.model, new Vec3(0, 8000, 0))
      this.sound.play()
      this.isGround = false
      this.jumbTime = time
    }
    this.physicsWorld.addForce(this.model, new Vec3(0, -3000, 0))

    // 物理計算更新
    this.physicsWorld.update(delta)

    // 物理空間上のオブジェクトの当たり判定
    const hitResult = this.physicsWorld.hitTest([this.heightMap, this.model])
    if (Object.keys(hitResult).length > 0) {
      if (time > (this.jumbTime || 0) + delay) {
        this.isGround = true
      }
    }

    for (let i = 0; i < this.dynamicObjects.length; i++) {
      const objThree = this.dynamicObjects[i]
      // ドラッグしていないオブジェクト以外反映する
      if (objThree.userData && objThree.userData.ignorePhysics) {
        continue
      }
      this.physicsWorld.setModelPose(objThree)
    }

    const horizontalSpeed = 1.5
    const verticalSpeed = 1.33
    this.particle.simulate(delta, new Vec3(Math.sin(this.particle.tick * horizontalSpeed) * 20, Math.sin(this.particle.tick * verticalSpeed) * 10 + 30, Math.sin(this.particle.tick * horizontalSpeed + verticalSpeed) * 5))
    this.water.update()

    this.physicsWorld.setModelPose(this.model)
    this.controlCamera.controls.update()
    this.renderer.setClearColor(0x000000, 0)
    this.renderer.clear(true, true, true)
    this.renderer.render(this.scene, this.selectCamera)
    this.renderer.clearDepth()
    this.renderer.render(this.sceneOrtho, this.cameraOrtho)
  }
}