今回はtmlib.jsを使って
画像を描画したいと思います。
最近お遊びで楽するつもりが割と頑張ってる感じがします。
tmlib.jsは作りはすばらしいけど、公式ページのチュートリアルが少なくて
具体的にどれが正しいやり方なのか、どのように実装すればいいのか迷います。
(結局ライブラリの実装見ながらやってる始末、う〜ん・・・)
今回の全ソースです
test.html
<script src="tmlib.min.js"></script>
<script>

/**
 * スクリーンサイズ
 */
var SCREEN_WIDTH  = 960;
var SCREEN_HEIGHT = 640;
var SCREEN_CENTER_X  = SCREEN_WIDTH/2;
var SCREEN_CENTER_Y = SCREEN_HEIGHT/2;

tm.main(function() {
    // アプリケーション作成
    var app = tm.app.CanvasApp("#world");
    app.resize(SCREEN_WIDTH, SCREEN_HEIGHT); // 画面サイズに合わせる
    app.fitWindow(); // リサイズ対応
    app.background = "rgb(0, 0, 0)"; // 背景色をセット

    // ローディング表示
    var label = tm.display.Label("Now Loading");
    label.setPosition(SCREEN_CENTER_X, SCREEN_CENTER_Y);
    label.setAlign("center").setBaseline("middle");
    app.currentScene.addChild(label);

    // リソースの読み込み
    var loader = tm.asset.Loader();
    loader.load({"piyo":"piyoko.png","balloon":"balloon.png"});
    // 読み込み中(リソースが1つ読み込まれるたびコールバック)
    loader.onprogress = function() {
        label.text += ".";
        console.log(label.text);
    };
    // 全リソース読み込み完了
    loader.onload = function() {
        // シーンの切り替え
        app.replaceScene(GameScene());
    };

    // tmlibの実行
    app.run();
});


tm.define("GameScene", {
    superClass : "tm.app.Scene",

    // シーン初期化処理
    init : function() {
        this.superInit();

        // シーン内変数作成
        this.sprite = null;
        this.animsprite = null;

        // スプライト作成
        this.sprite = tm.display.Sprite("piyo",100,100);
        this.sprite.setPosition(50, 50);


        var ss = tm.asset.SpriteSheet({
            // 画像
            image: "balloon",
            // 1コマのサイズ指定および全コマ数
            frame: {
                width: 192/6,
                height: 384/12,
                count: 6*12
            },
            // アニメーションの定義(開始コマ、終了コマ、次のアニメーション)
            animations: {
                "crash": [0, 6*12-1, "crash_back"],
                "crash_back": [6*12-1, 0, "crash"]
            }
        });


        // アニメーションスプライト作成
        this.animsprite = tm.display.AnimationSprite(ss,100,100);
        this.animsprite.setPosition(250, 250);
        this.animsprite.gotoAndPlay("crash");

        // スプライトをシーンに追加
        this.addChild(this.sprite);
        this.addChild(this.animsprite);


    },

    // シーン更新処理
    update: function (app) {
    },
});

</script>
<canvas id="world"></canvas>
スクリーンショットはこんな感じ
ちなみに風船はアニメーションします。

今回使った画像はこちら
ひよこ(piyoko.png)

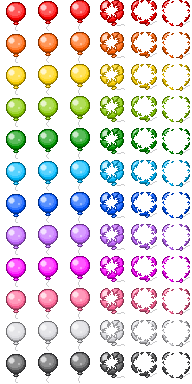
風船(balloon.png)
リソースの読み込みは
tm.asset.Loaderクラスで行えるようです。
(この使い方であっているのか若干自信ありませんが)
tmlib.jsライブラリ内部では読みこんだリソースは
tm.asset.Managerクラスで管理されているようです
読み込んだリソースを使いたいときはアセット名で検索します。
    // リソースの読み込み
    var loader = tm.asset.Loader();
    loader.load({"アセット名":ファイル名});
    // 読み込み中(リソースが1つ読み込まれるたびコールバック)
    loader.onprogress = function() {
        // 読み込み中処理
    };
    // 全リソース読み込み完了
    loader.onload = function() {
        // スプライトなどのリソースを使うオブジェクトの生成
    };
スプライトの作成は次のように行います
tm.display.Sprite(アセット名,WIDTH,HEIGHT);
アニメーションスプライトに関しては
tm.asset.SpriteSheetクラスで
コマ分割とアニメーションに使うコマ定義をする
スプライトシートを事前に作成する必要があります
        // スプライトシートの作成
        tm.asset.SpriteSheet({
            // 画像
            image: アセット名,
            // 1コマのサイズ指定および全コマ数
            frame: {
                width: 1コマの幅,
                height: 1コマの高さ,
                count: 全コマ数
            },
            // アニメーションの定義
            animations: {
                "アニメーション名": [開始コマ, 終了コマ, 次に行うアニメーション名]
            }
        });
アニメーションスプライトの作成と
開始アニメーションの指定は次のように行います
        // アニメーションスプライト作成
        this.animsprite = tm.display.AnimationSprite(スプライトシート,WIDTH,HEIGHT);
        this.animsprite.gotoAndPlay(アニメーション名);