サンプルコード:GitHub
React Nativeを使って楽にスマホアプリを作ろうぜってことでまとめてみようと思います。
ReactJSで作る今時のSPA入門(基本編)の続編です。
ReactJSの基本がわかっている前提で説明します。
ちなみに楽と書いたのはネイティブコードでアプリを作るよりは楽という意味です。
(後は開発サイクルが早く回せるという意味で)
React Nativeのアーキテクチャ
参考:React Native Architecture : Explained!
React Nativeの構成はざっくり次の図のようになっています。

JavaScriptCoreと言われるWebkitにも使われているJavaScriptエンジンでJavaScript Runtime Environmentが作成されています。React NativeのJavaScriptコードはJavaScript Runtime Environment上で実行されます。
次にBridgeの詳細を見てみます。

React Nativeコントロールは、ネイティブの対応コンポーネントと相互関係を持つことがわかります。React Nativeは、ネイティブコードとJavaScript Runtime Environmentの双方向通信のためのBridgeを単に許可します。
それぞれのネイティブコードは実際には自分のスレッドで動作しています。
これは、React Native JavaScriptコードの実行が長時間かかる場合でも、UIはハングしたり遅くならないことを意味します。イベントを使用してBridgeをコールバックするだけです。
上記のような仕組みのため、React Nativeアプリ開発時はJavaScriptコード内のプロセスをブロックしないよう注意が必要です。
次にReact Nativeのビルドとデバッグの仕組みをみてみましょう。
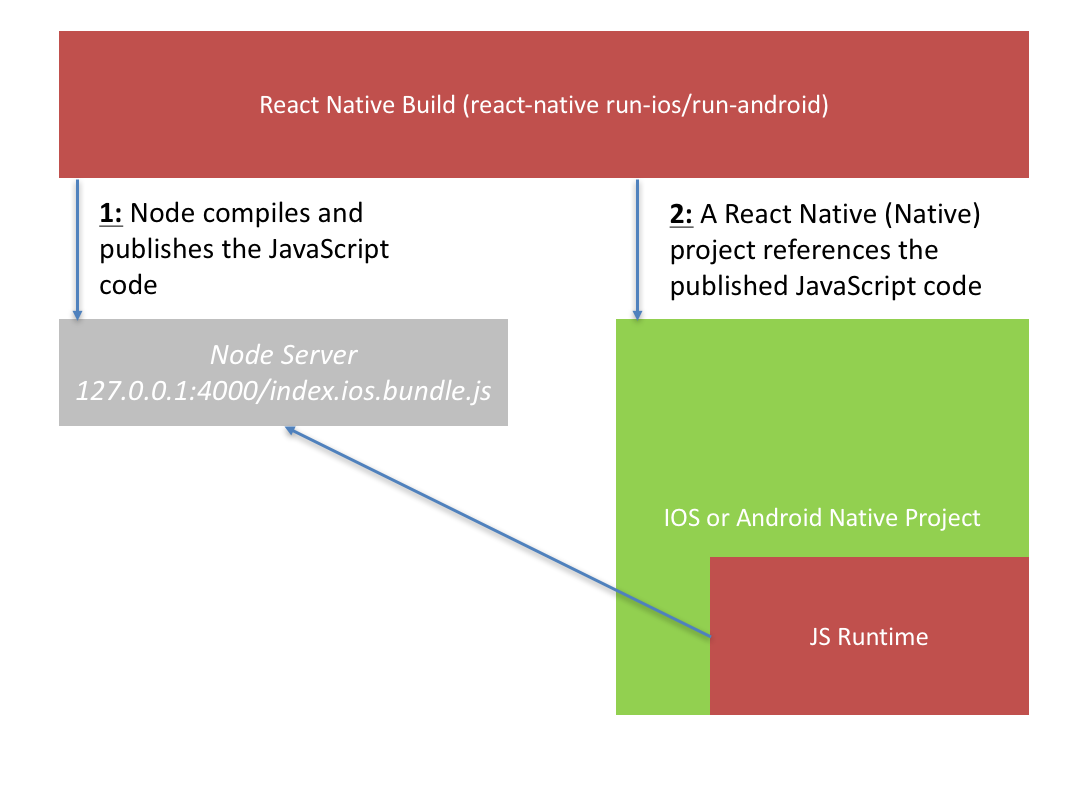
①React Native JavaScriptコードの「すべて」を保持するペイロードファイルを公開するNodeJS Webサーバーをローカルで実行します。ペイロードファイルの中身はJavaScriptの実行コードです。
②JavaScript Runtime Environmentが組み込まれたiOS、Androidのネイティブプロジェクトにペイロードファイルがダウンロードされ、実行されます。
注:iOSでは、JavaScript Runtime EnvironmentはiOSオペレーティングシステムから呼び出していますが、AndroidではReact Nativeに付属しています。
・Hot Reloadingの仕組み
React NativeはJavaScriptコードをプルダウンするだけで、JavaScriptはコンパイルまたはビルドする必要はありません。これは、React Nativeの最大の利点をもたらします。(一度アプリケーションを起動したら、修正時に再ビルドが必要なく、JSコードをpullするだけで即時反映される)
React Nativeのアーキテクチャ概要まとめ
- React NativeはWebkit(スマホブラウザ)のJavaScriptランタイムで動く(つまり、スマホブラウザ上で動くようなコードを書いているイメージ)
- UIスレッドはそれぞれのコンポーネントで独自のスレッドで動く(対応するネイティブコードが実行される)ため、UI操作のブロッキングはされない(速度的にはWebView < React Native < ネイティブコード直接実行)
- 初回ビルド後、JavaScriptランタイム上で実行されるため、一度起動してしまえば、修正時はJavaScriptコードをランタイムにpullするだけなので再ビルドがいらない(修正反映が早い!!)
- ネイティブコードを書かなくてもReactがわかっていれば、JavaScriptでアプリが作れる
- ライブラリ内部で特にマルチメディア系のライブラリ内部で機種依存系の不具合が起きると修正がほぼ無理
結論から書くと、そこそこのクォリティのものをスピード開発するのに向いている。(あとはJSの知識しかないプロジェクトメンバーでアプリ開発を迫られた場合など)
環境構築
詳細はReact Nativeインストールガイドを参考にしてください。
NodeJSはインストール済み前提(v8.10.0)
watchmanとreact-native-cliをインストールします。
$ brew install watchman
$ yarn global add react-native-cli
次のコマンドでReact Nativeのプロジェクトを作成します。
$ react-native init --version="0.55.4" learnReactNative
Androidの環境構築
・Java 8のインストール
JDK 8をインストールします。
・Android Studioのインストール
Googleのダウンロードページより取得
Android SDKをインストールします。
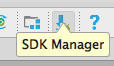
Android SDKパッケージマネージャを起動します。
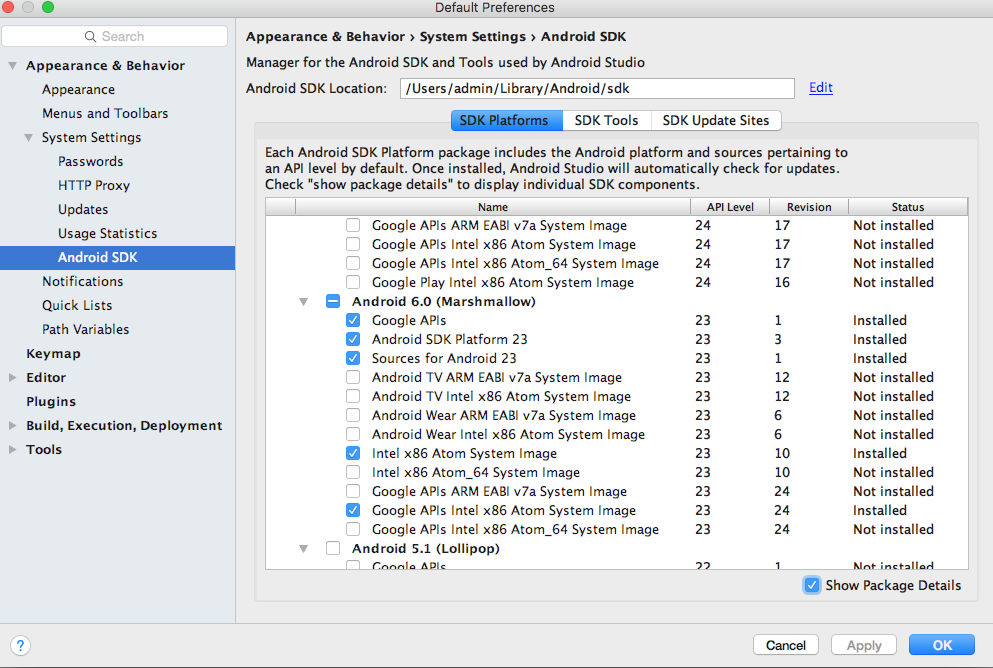
Show Package Detailにチェックをつけて下記をインストールします。
- Google APIs
- Android SDK Platform 23
- Sources for Android 23
- Intel x86 Atom System Image
- Google APIs Intel x86 Atom System Image
Android NDKをインストールします。
- [File] > [Project Structure] > [SDK Location]
- NDKがインストールされていない場合、Android NDK locationにダウンロード用のリンクが表示されているのでそこからダウンロード開始
.bash_profileに以下のAndroid SDK、Android NDK、JDKのパスを記述します。
ANDROID_HOME=/Users/admin/Library/Android/sdk
ANDROID_NDK_HOME=/Users/admin/Library/Android/sdk/ndk-bundle
export JAVA_HOME=`/usr/libexec/java_home -v 1.8`
export PATH=/usr/local:$PATH:$NODEBREW_HOME/bin:$ANDROID_HOME:$ANDROID_NDK_HOME:$ANDROID_HOME/tools:$ANDROID_HOME/platform-tools
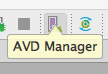
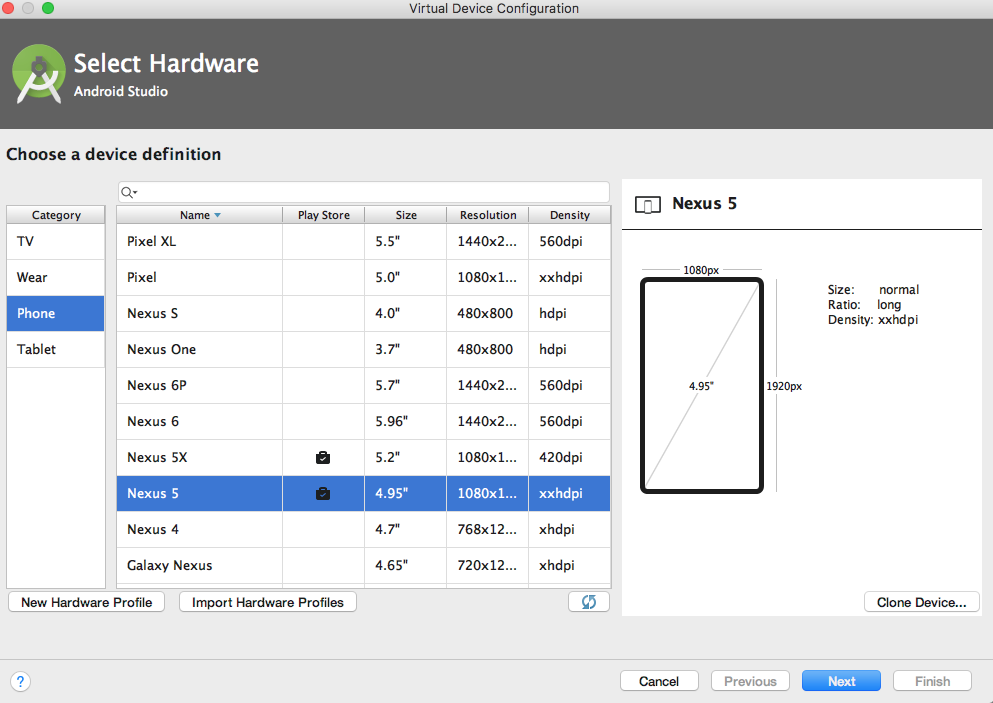
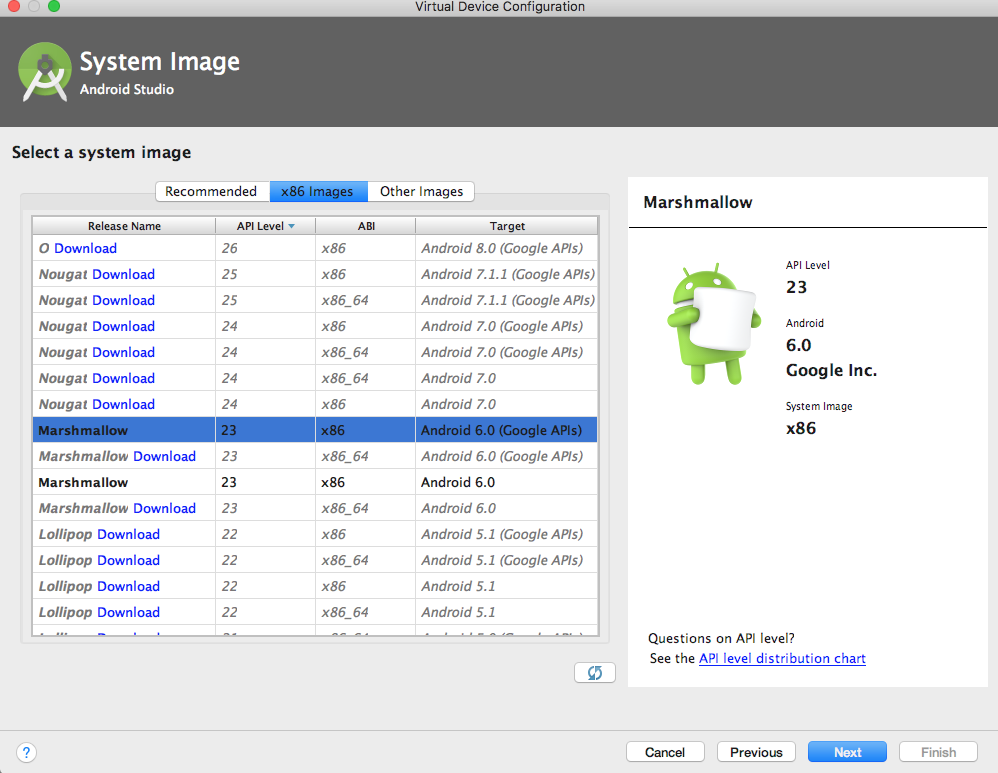
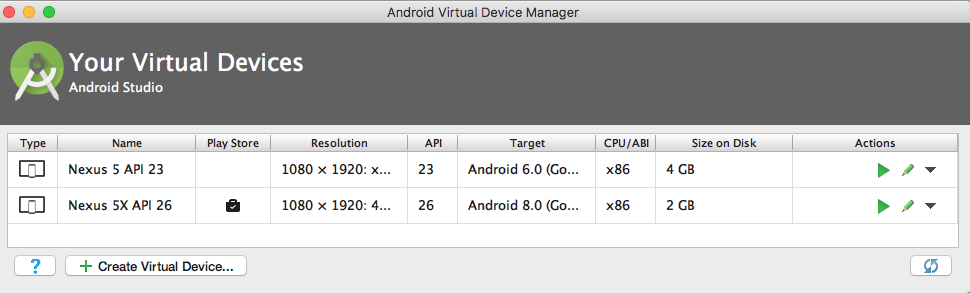
Android エミュレーターの作成をします。
AVD Managerを起動します。
API 23のNexus 5を作成します。
local.propertiesファイルを作成します。
(gradleコマンドからANDROID_HOMEパスを認識させるために必要)
echo sdk.dir=/Users/(ユーザ名)/Library/Android/sdk > android/local.properties
下記コマンドでエミュレータ上で実行されます。
# エミュレータを起動
# うまく起動しない場合はAndroid StudioのAVDマネージャより起動する
$ ./Users/(ユーザ名)/Library/Android/sdk/emulator -avd Nexus_5_API_23
$ react-native run-android
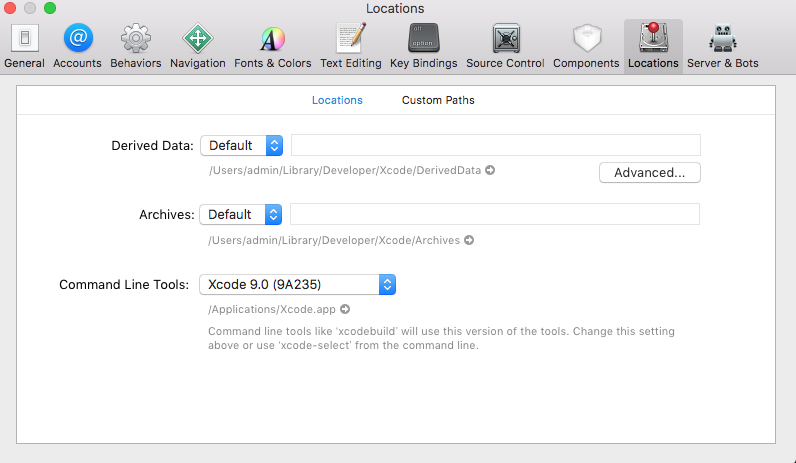
iOSの環境構築
IDE:Xcode
Apple Developerのダウンロードページより取得
コマンドラインツールをXCodeのPreferenceよりダウンロードしておく
下記コマンドでエミュレータ上で実行されます。
$ react-native run-ios
VSCodeの設定
VSCodeにFlowを認識させます。
flow-for-vscodeプラグインを導入します。
.vscode/settings.jsonを作成して以下を記述します。
{
  "flow.useNPMPackagedFlow": true,
  "javascript.validate.enable": false,
}
ESLintによる文法チェック
ESLintを導入することでルールベースで不要なコードのチェックや文法チェックを行うことができます。
eslint babel-eslint eslint-reactに加え、react-native用のESLintを導入します。
eslint-plugin-react-native
$ yarn add --dev eslint babel-eslint eslint-plugin-react eslint-plugin-react-native
.eslintrc.jsです。
envパラメータに'react-native/react-native': trueを設定します。
extendsにplugin:react-native/allを指定するとチェックが厳密になります。
module.exports = {
  'parser': 'babel-eslint',
  'env': {
    'react-native/react-native': true,
  },
  'extends': ['eslint:recommended', 'plugin:react/recommended', 'plugin:react-native/all'],
  'parserOptions': {
    'ecmaFeatures': {
      'experimentalObjectRestSpread': true,
      'jsx': true
    },
    'sourceType': 'module'
  },
  'plugins': [
    'react',
    'react-native'
  ],
  'globals': {
  },
  'rules': {
    'indent': 'off',
    'indent-legacy': [
      'error',
      2,
      { 'SwitchCase': 1 }
    ],
    'linebreak-style': [
      'error',
      'unix'
    ],
    'quotes': [
      'error',
      'single'
    ],
    'semi': [
      'error',
      'never'
    ],
    'comma-dangle': [
      'error',
      'always-multiline'
    ],
    'no-trailing-spaces': [
      'error'
    ],
    'keyword-spacing': [
      'error',
      { 'before': true, 'after': true }
    ],
    'key-spacing': [
      'error',
      { 'mode': 'minimum' }
    ],
    'comma-spacing': [
      'error',
      { 'before': false, 'after': true }
    ],
    'space-before-blocks': [
      'error'
    ],
    'arrow-spacing': [
      'error',
      { "before": true, "after": true }
    ],
    'space-in-parens': [
      'error',
      'never'
    ],
    'dot-notation': [
      'error'
    ],
    'brace-style': [
      'error',
      '1tbs'
    ],
    'no-else-return': [
      'error'
    ],
    'no-unused-vars': [
      'warn',
      { 'ignoreRestSiblings': true }
    ],
    'no-console': 'off',
    'no-useless-escape': 'off',
    'react/prop-types': 'off',
    'react/display-name': 'off',
    'react/prefer-stateless-function': [
      2,
      { 'ignorePureComponents': true },
    ],
    'react/no-string-refs': 'off', // TODO
  }
}
ESLintに引っかかるようになるので
App.jsを次のように書き直します。
/**
 * Sample React Native App
 * https://github.com/facebook/react-native
 * @flow
 */

import React from 'react'
import {
  Platform,
  StyleSheet,
  Text,
  View,
} from 'react-native'

const instructions = Platform.select({
  ios: 'Press Cmd+R to reload,\n' +
    'Cmd+D or shake for dev menu',
  android: 'Double tap R on your keyboard to reload,\n' +
    'Shake or press menu button for dev menu',
})

const App = () => (
  <View style={styles.container}>
    <Text style={styles.welcome}>
      Welcome to React Native!
    </Text>
    <Text style={styles.instructions}>
      To get started, edit App.js
    </Text>
    <Text style={styles.instructions}>
      {instructions}
    </Text>
  </View>
)

const bgColor = '#F5FCFF'
const textColor = '#333333'

const styles = StyleSheet.create({
  container: {
    flex: 1,
    justifyContent: 'center',
    alignItems: 'center',
    backgroundColor: bgColor,
  },
  welcome: {
    fontSize: 20,
    textAlign: 'center',
    margin: 10,
  },
  instructions: {
    textAlign: 'center',
    color: textColor,
    marginBottom: 5,
  },
})

export default App
Reduxによるアプリケーションデータ管理
Reduxを用いることでアプリケーション全体の状態を管理し、
イベントコールバック→一元管理されたストアのパラメータ更新→描画反映
といったことが可能になります。
Reduxによる状態制御
以下のnpmパッケージを追加します。
$ yarn add redux react-redux redux-thunk axios
$ yarn add --dev remote-redux-devtools@0.5.0 babel-plugin-transform-decorators-legacy
.babelrcにtransform-decorators-legacyプラグインとbabel-plugin-module-resolverの設定を追加します。
transform-decorators-legacyはdecoratorsを使うための設定です。
{
  "presets": ["react-native"],
  "plugins": ["transform-decorators-legacy"]
}
index.jsにReduxの初期化を行います。
import { AppRegistry } from 'react-native'
import React from 'react'
import { createStore, applyMiddleware, compose } from 'redux'
import { Provider } from 'react-redux'
import { composeWithDevTools } from 'remote-redux-devtools'
import thunk from 'redux-thunk'
import client from 'axios'
import allReducers from './src/modules/reducer'
import App from './src/App'

// TODO: 開発時以外は環境設定で有効にしない
const isDevelopment = true
const reduxCompose = isDevelopment ? composeWithDevTools : compose
// axiosをthunkの追加引数に加える
const thunkWithClient = thunk.withExtraArgument(client)
// redux-thunkをミドルウェアに適用
const store = createStore(allReducers, reduxCompose(applyMiddleware(thunkWithClient)))


// リクエスト共通処理
client.interceptors.request.use(req => {
  // 共通のAPI処理、認証ヘッダー等を付与する
  return req
}, err => Promise.reject(err))

// レスポンス共通処理
client.interceptors.response.use(res => res, err => {
  // 通信キャンセル
  if (client.isCancel(err)) {
    return Promise.reject({code: 999, message: 'cancel'})
  }

  if (err.response.status === 401) {
    // 認証エラーなど
  }
  return Promise.reject(err.response || {})
})


const Application = () => (
  <Provider store={store}>
    <App/>
  </Provider>
)

AppRegistry.registerComponent('learnReactNative', () => Application)
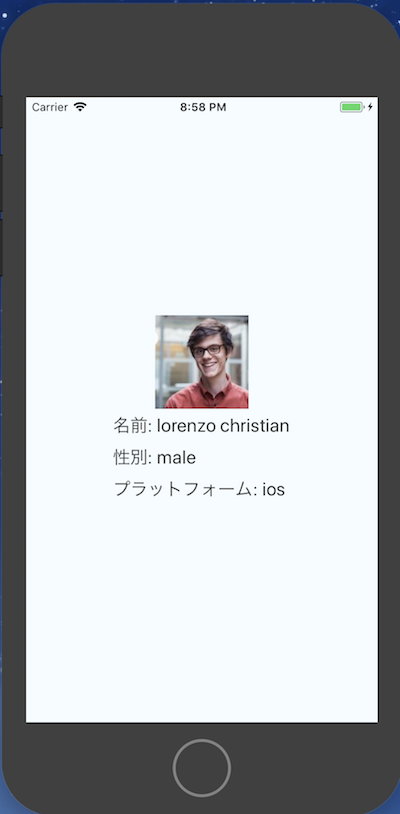
RANDOM USER GENERATORのダミーユーザAPIからユーザ情報を取得して表示するサンプルを作成します。
user.jsにreducerを作成します。(axiosでのAPIコール)
const LOAD = 'user/LOAD'

const initData = {
  user: null,
}

export default function reducer(state = initData, action = {}) {
  switch (action.type) {
    case LOAD:
      return {
        ...state,
        user: action.user || state.user,
      }
    default:
      return state
  }
}

export function load() {
  return (dispatch, getState, client) => {
    // axiosでのAPIコール
    return client
      .get('https://randomuser.me/api/')
      .then(res => res.data)
      .then(user => {
        dispatch({type: LOAD, user: user.results[0]})
        return user
      })
  }
}
reducer.jsです。
reducer.jsでcombineReducersを用いて複数のreducerを1つにマージします。
import { combineReducers } from 'redux'
import user from './user'

const allReducers = combineReducers({
  user,
})

export default allReducers
App.jsをsrcフォルダに移動します。
App.jsではconnectによってreducerのstateを取得します。
取得したuser情報でrenderメソッドにて描画します。
/**
 * Sample React Native App
 * https://github.com/facebook/react-native
 * @flow
 */

import React from 'react'
import { connect } from 'react-redux'
import { Platform, StyleSheet, Image, Text, View } from 'react-native'
import { load } from './modules/user'

const instructions = Platform.select({
  ios: 'ios',
  android: 'android',
})

const bgColor = '#F5FCFF'
const textColor = '#333333'

const styles = StyleSheet.create({
  container: {
    flex: 1,
    justifyContent: 'center',
    alignItems: 'center',
    backgroundColor: bgColor,
  },
  content: {
    display: 'flex',
    justifyContent: 'center',
    alignItems: 'center',
  },
  img: {
    width: 100,
    height: 100,
  },
  text: {
    fontSize: 20,
    margin: 5,
    color: textColor,
  },
})

@connect(
state => ({
  user: state.user.user,
}),
{load})
export default class App extends React.Component {

  componentDidMount () {
    this.props.load()
  }

  render () {
    const { user } = this.props
    console.log(user)
    return (
      <View style={styles.container}>
        {user &&
          <View style={styles.content}>
            <Image source={{uri: user.picture.large}} style={styles.img} />
            <View>
              <Text style={styles.text}>名前: {user.name.last} {user.name.first}</Text>
              <Text style={styles.text}>性別: {user.gender}</Text>
              <Text style={styles.text}>プラットフォーム: {instructions}</Text>
            </View>
          </View>
        }
      </View>
    )
  }
}
実行すると次のような画面になります。
デバッグツールの導入
エミュレータ上でCommand + Dキーを押すと各種デバッグ機能が使えます。
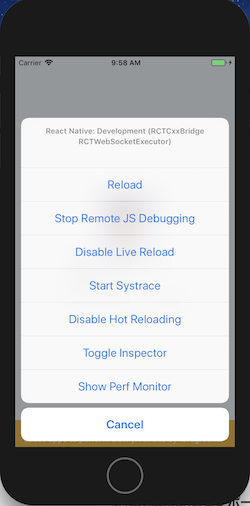
- Reload: 画面を再読み込みします。
- Start Remote JS Debugging: Chromeの開発者ツールでデバッグできるようになります。
- Enable Live Reload: ファイル変更保存時に自動的に画面を再読込します。
- Start Systrace: 端末のメモリなどのハードウェア状態を確認できます。
- Enable Hot Reloading: Live Reloadとセットで使います。内部パラメータは変更しないで画面表示のみ再レンダリングします。
- Toggle Inspector: Viewのレイアウト情報をデバッグできます。
- Show Perf Monitor: どのレンダリングに負荷がかかっているかなどの表示がされます。
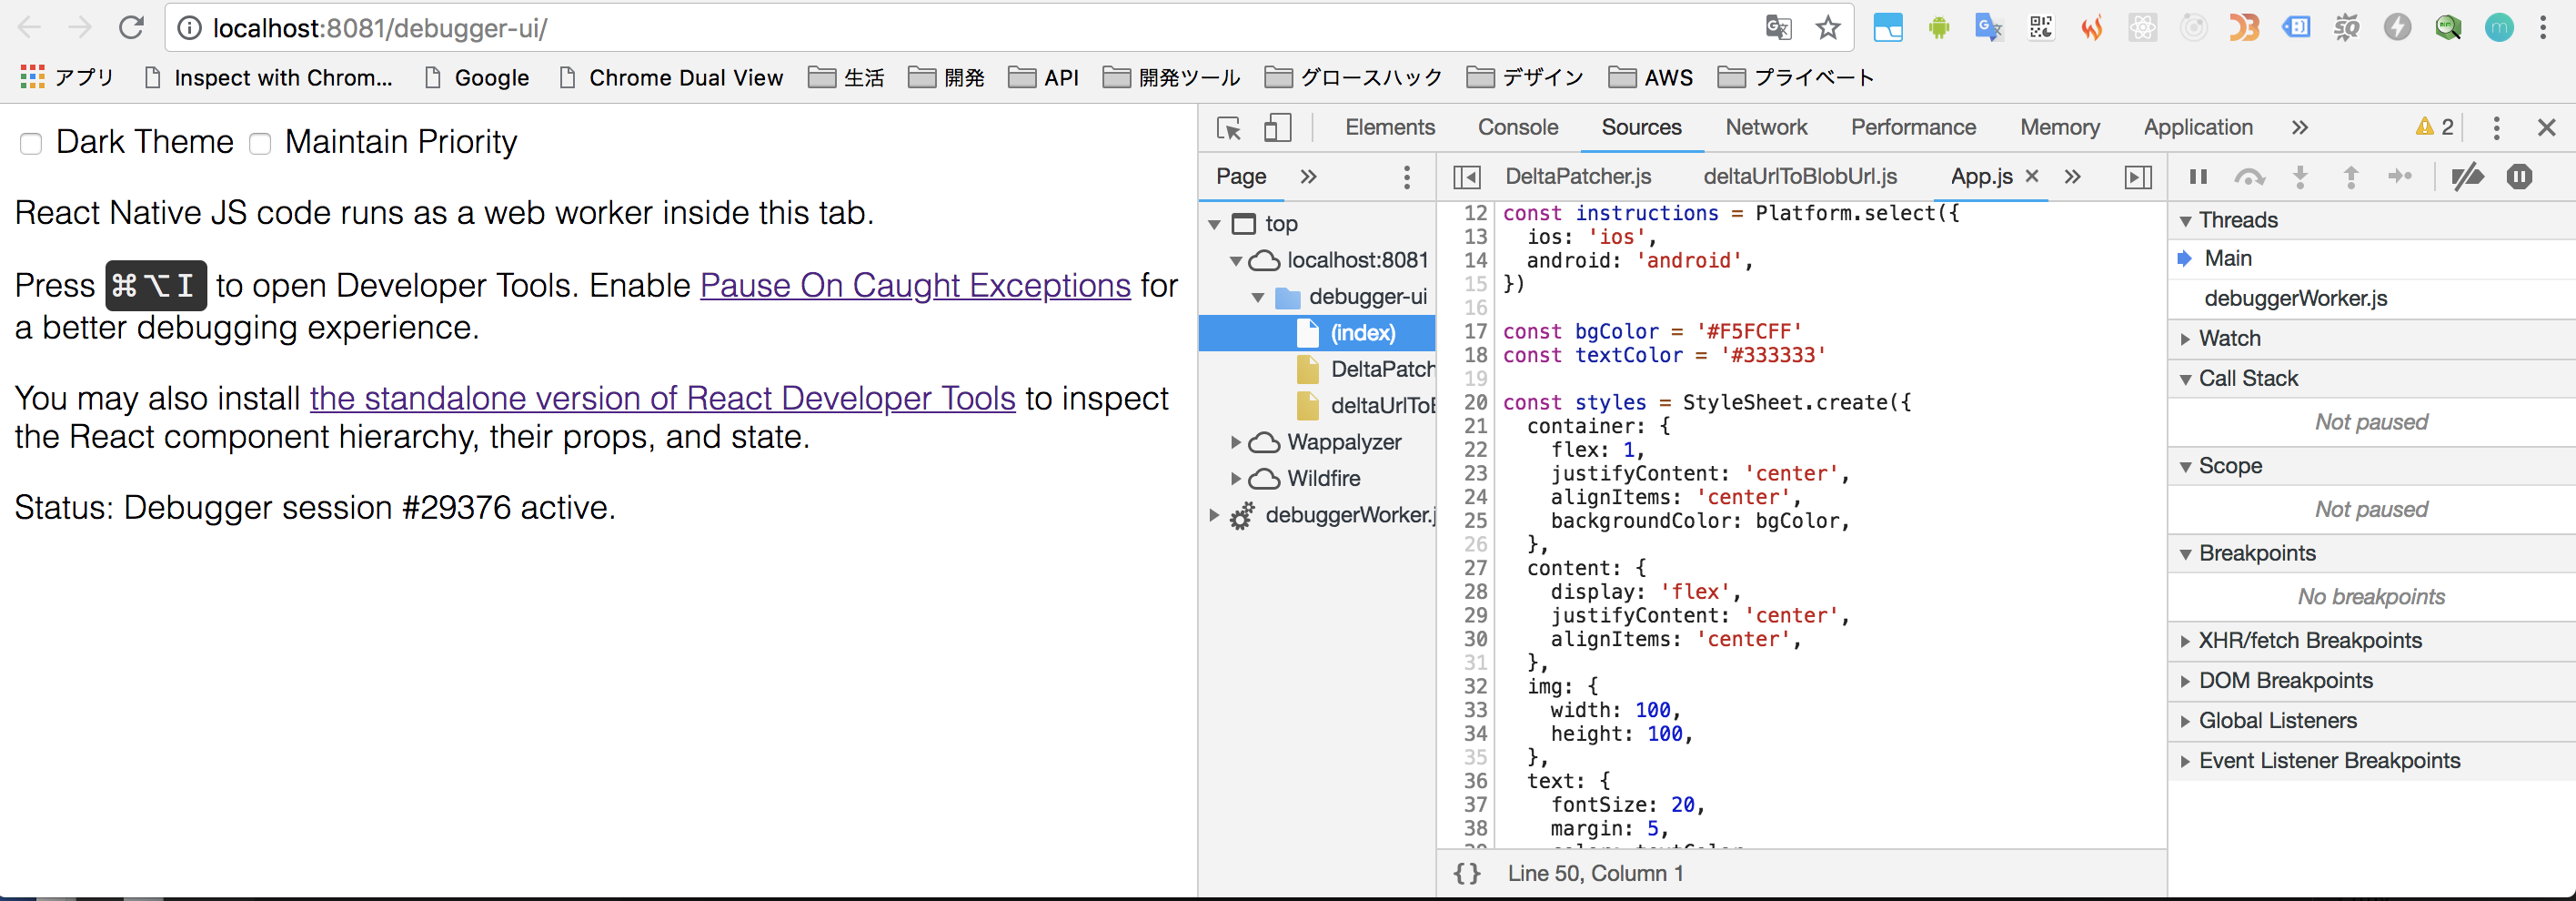
Start Remote JS Debuggingを有効にするとChromeで以下の画面が開きます。
開発者ツールを開くとリモートでソースコードが見れるようになります。
ブレークポイントなどをセットしてデバッグします。
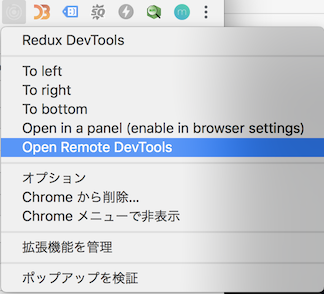
Remote Redux Devtoolを導入している前提で
Chromeアドオンを入れておくと
エミュレータのReduxのパラメータ状態を確認することができます。
開発者ツール画面を開いている状態でアドオンのアイコンからOpen Remote Devtoolsを開きます。

NativeBaseによるUIデザイン
NativeBaseを使うと
iOS、Android両対応なネイティブのUIコンポーネントを使うことができます。
$ yarn add native-base
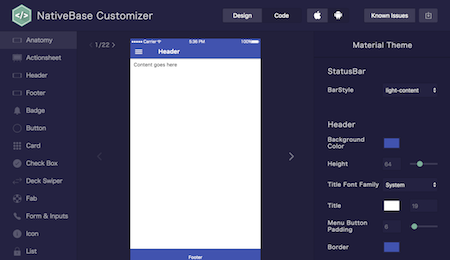
テーマを変更するにはCustomizeを参考にします。
次のコマンドでテーマを生成することができます。
$ node node_modules/native-base/ejectTheme.js
$ react-native link
native-base-themeフォルダ以下にテーマのファイルが作成されます。
- components: 各UIコンポーネント独自のスタイリングが記述されています。
- variables: アプリ内の共通色、アプリ内の共通フォント(テーマ)を記述します。
カスタムテーマを適用するにはindex.jsに以下のように初期化する必要があります。
デフォルトのテーマでplatform.js/material.js/commonColor.jsがそれぞれ用意されています。
以下の例はmaterialテーマを適用した場合の初期化です。
import { StyleProvider } from 'native-base'
import getTheme from './native-base-theme/components'
import material from './native-base-theme/variables/material'

const Application = () => (
  <StyleProvider style={getTheme(material)}>
    <Provider store={store}>
      <App/>
    </Provider>
  </StyleProvider>
)

AppRegistry.registerComponent('learnReactNative', () => Application)
次のビジュアルエディタより独自のvariable.jsを生成することもできます。
NativeBase Customizer
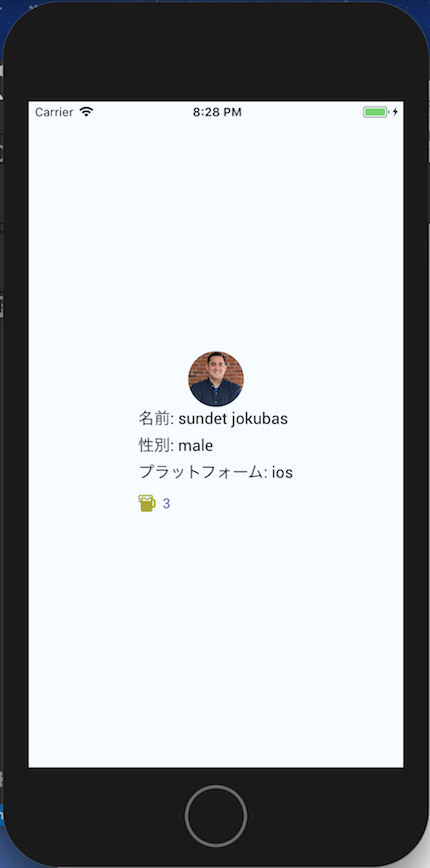
App.jsにてText、Thumbnail、Button、Iconコンポーネントを利用します。
/**
 * Sample React Native App
 * https://github.com/facebook/react-native
 * @flow
 */

import React from 'react'
import { connect } from 'react-redux'
import { Platform, StyleSheet, View } from 'react-native'
import { Text, Thumbnail, Icon, Button } from 'native-base'
import { load } from './modules/user'

const instructions = Platform.select({
  ios: 'ios',
  android: 'android',
})

const bgColor = '#F5FCFF'
const iconColor = '#aaaa00'

const styles = StyleSheet.create({
  container: {
    flex: 1,
    justifyContent: 'center',
    alignItems: 'center',
    backgroundColor: bgColor,
  },
  content: {
    display: 'flex',
    justifyContent: 'center',
    alignItems: 'center',
  },
  beer: {
    marginLeft: -25,
  },
})

@connect(
state => ({
  user: state.user.user,
}),
{load})
export default class App extends React.Component {
  state = {count: 0}

  componentDidMount () {
    this.props.load()
  }

  render () {
    const { user } = this.props
    const { count } = this.state

    return (
      <View style={styles.container}>
        {user &&
          <View style={styles.content}>
            <Thumbnail source={{uri: user.picture.large}} />
            <View>
              <Text>名前: {user.name.last} {user.name.first}</Text>
              <Text>性別: {user.gender}</Text>
              <Text>プラットフォーム: {instructions}</Text>
              <Button small iconRight  transparent primary onPress={() => this.setState({count: count + 1})}>
                <Icon type='Ionicons' name='md-beer' style={{color: iconColor}}/>
                <Text style={styles.beer}>{count}</Text>
              </Button>
            </View>
          </View>
        }
      </View>
    )
  }
}
テーマ色の指定
テーマ色を変更するにはplatform.js(もしくはmaterial.js/commonColor.js)以下の色を変更します。
- Primary color: brandPrimary
- Info color: brandInfo
- Success color: brandSuccess
- Danger color: brandDanger
- Warning color: brandWarning
テーマフォントの指定
デフォルトのフォントファミリーを変更するには、platform.js(もしくはmaterial.js/commonColor.js)のfontFamily変数を変更します。
以下のフォントファミリがデフォルトで利用可能です。
- Entypo
- EvilIcons
- FontAwesome
- Foundation
- Ionicons
- MaterialIcons
- Octicons
- Roboto
- Roboto_medium
- SimpleLineIcons
- Zocial
テーマの細かい色指定やサイズ指定は次のチートシートを参考にしてください。
Theme variables Cheat sheet
アイコン
アイコンはIconコンポーネントを利用することで利用可能です。
内部的にはreact-native-vector-iconsのvectorアイコンを利用しています。
アイコン一覧より利用可能なアイコンを検索して
種別を指定して利用します。
<Icon type='Ionicons' name='md-beer' style={{color: iconColor}}/>
上級者編
さらにネイティブアプリぽいUIを追求したい人は次の記事が参考になります。
NativeBaseをはじめとするUI関連のライブラリを活用してReactNativeでUIサンプルを作成した際の詳細解説
react-navigationによる画面遷移
react-navigationを使うと画面遷移ができます。
$ yarn add react-navigation
App.jsにルーティング設定を記述します。
後述のEntryScreen画面とUserScreen画面を
createStackNavigatorにて指定し、Navigation Componentを作成します。
headerオプションをnullにすることでreact-navigationのNavigationBarを非表示にできます。(NativeBaseの方で表示するため)
initialRouteNameには初期画面を指定します。
import React from 'react'
import { createStackNavigator } from 'react-navigation'
// react-nativeの警告を非表示にする
import { YellowBox } from 'react-native'
YellowBox.ignoreWarnings(['Warning: isMounted(...) is deprecated', 'Module RCTImageLoader'])

// 画面を読み込み
import EntryScreen from './screens/EntryScreen'
import UserScreen from './screens/UserScreen'

// ルーティングする画面を定義
export const Navigation = createStackNavigator({
  Entry: { screen: EntryScreen, navigationOptions: { header: null } },
  User: { screen: UserScreen, navigationOptions: { header: null }},
}, {initialRouteName: 'Entry'})


export const App = () => (
  <Navigation />
)
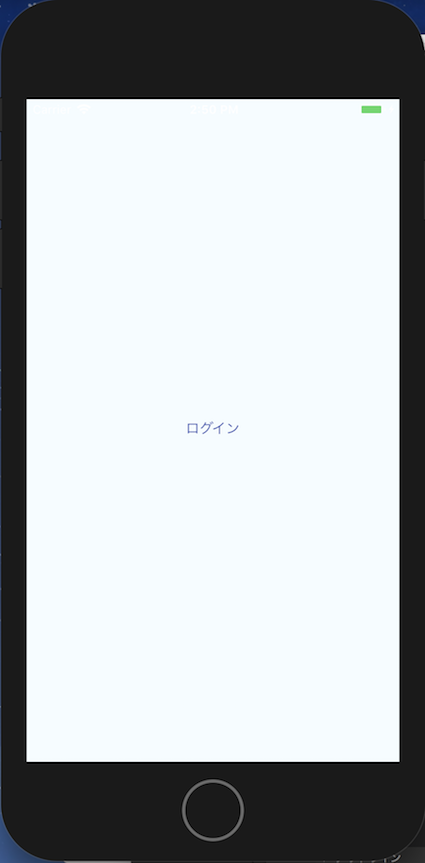
EntryScreen.jsを作成します。
Navigation Componentでwrapされているため、
navigation propsが参照できます。
実際に遷移しているのはnavigation.navigate('User')の箇所です。
/**
 * Sample React Native App
 * https://github.com/facebook/react-native
 * @flow
 */

import React from 'react'
import { StyleSheet, View } from 'react-native'
import { Button, Text } from 'native-base'

const bgColor = '#F5FCFF'

const styles = StyleSheet.create({
  container: {
    flex: 1,
    justifyContent: 'center',
    alignItems: 'center',
    backgroundColor: bgColor,
  },
})

export default class EntryScreen extends React.Component {

  move = () => {
    const { navigation } = this.props
    navigation.navigate('User')
  }

  render () {

    return (
      <View style={styles.container}>
        <View>
          <Button small iconRight  transparent primary onPress={this.move}>
            <Text style={styles.beer}>ログイン</Text>
          </Button>
        </View>
      </View>
    )
  }
}
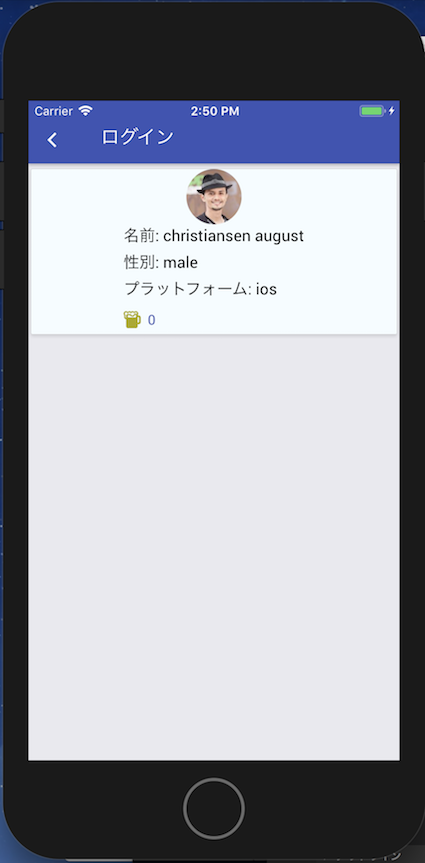
UserScreen画面です。
navigation.goBack()で前の画面に遷移できます。
/**
 * Sample React Native App
 * https://github.com/facebook/react-native
 * @flow
 */

import React from 'react'
import { connect } from 'react-redux'
import { Platform, StyleSheet, View } from 'react-native'
import { Text, Thumbnail, Icon, Button, Container, Header, Content, Title, Body, Left, Right, Card } from 'native-base'
import { load } from '../modules/user'

const instructions = Platform.select({
  ios: 'ios',
  android: 'android',
})

const bgColor = '#F5FCFF'
const iconColor = '#aaaa00'

const styles = StyleSheet.create({
  container: {
    flex: 1,
    justifyContent: 'center',
    alignItems: 'center',
    backgroundColor: bgColor,
  },
  content: {
    display: 'flex',
    justifyContent: 'center',
    alignItems: 'center',
  },
  beer: {
    marginLeft: -25,
  },
})

const HeaderBackButton = ({onPress}) => (
  <Left>
    <Button transparent>
      <Icon name={Platform.OS === 'ios' ? 'ios-arrow-back' : 'arrow-back'} onPress={onPress} />
    </Button>
  </Left>
)

@connect(
state => ({
  user: state.user.user,
}),
{load})
export default class UserScreen extends React.Component {
  state = {count: 0}

  componentDidMount () {
    this.props.load()
  }

  render () {
    const { user, navigation } = this.props
    const { count } = this.state

    return (
       <Container>
        <Header>
          <HeaderBackButton onPress={() => navigation.goBack()} />
          <Body>
            <Title>ユーザ</Title>
          </Body>
          <Right />
        </Header>
        <Content>
          <Card style={styles.container}>
            {user &&
              <View style={styles.content}>
                <Thumbnail source={{uri: user.picture.large}} />
                <View>
                  <Text>名前: {user.name.last} {user.name.first}</Text>
                  <Text>性別: {user.gender}</Text>
                  <Text>プラットフォーム: {instructions}</Text>
                  <Button small iconRight  transparent primary onPress={() => this.setState({count: count + 1})}>
                    <Icon type='Ionicons' name='md-beer' style={{color: iconColor}}/>
                    <Text style={styles.beer}>{count}</Text>
                  </Button>
                </View>
              </View>
            }
          </Card>
        </Content>
      </Container>
    )
  }
}
ReduxFormによるフォーム送信
form送信をする場合はredux-formライブラリが便利なので、
redux-formライブラリを導入します。
$ yarn add redux-form
reducer.jsにてredux-formのreducerを追加します。
import { combineReducers } from 'redux'
import { reducer as formReducer } from 'redux-form'
import user from './user'

const allReducers = combineReducers({
  form: formReducer,
  user,
})

export default allReducers
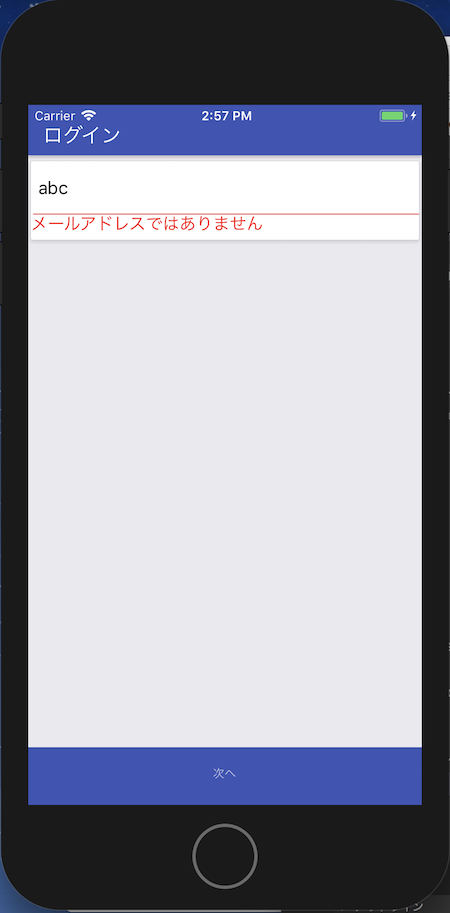
EntryScreen画面にてメールアドレスの入力画面を作成します。
/**
 * Sample React Native App
 * https://github.com/facebook/react-native
 * @flow
 */

import React from 'react'
import { connect } from 'react-redux'
import { View, StyleSheet } from 'react-native'
import { Container, Item, Header, Body, Title, Content, Right, Footer, FooterTab, Card, Input, Button, Text } from 'native-base'
import { Field, reduxForm } from 'redux-form'
import { update } from '../modules/user'

const red = '#FF0000'

const styles = StyleSheet.create({
  error: {
    color: red,
  },
})

const renderInput = ({ input, placeholder, meta: { touched, error } }) => {
  const hasError = touched && error
  return (
    <View>
      <Item error={!!hasError}>
        <Input placeholder={placeholder} {...input}/>
      </Item>
      {hasError ? <Text style={styles.error}>{error}</Text> : <Text />}
    </View>
  )
}

// メールアドレス判定
function isEmail(mail) {
  const mail_regex1 = new RegExp('(?:[-!#-\'*+/-9=?A-Z^-~]+\.?(?:\.[-!#-\'*+/-9=?A-Z^-~]+)*|"(?:[!#-\[\]-~]|\\\\[\x09 -~])*")@[-!#-\'*+/-9=?A-Z^-~]+(?:\.[-!#-\'*+/-9=?A-Z^-~]+)*') // eslint-disable-line
  const mail_regex2 = new RegExp('^[^\@]+\@[^\@]+$')
  if (mail.match(mail_regex1) && mail.match(mail_regex2)) {
    // 全角チェック
    if (mail.match(/[^a-zA-Z0-9\!\"\#\$\%\&\'\(\)\=\~\|\-\^\\\@\[\;\:\]\,\.\/\\\<\>\?\_\`\{\+\*\} ]/)) {
      return false
    }
        // 末尾TLDチェック(〜.co,jpなどの末尾ミスチェック用)
    if (!mail.match(/\.[a-z]+$/)) {
      return false
    }
    return true
  }
  return false
}

@reduxForm({
  form: 'login',
  validate: values => {
    const errors = {}
    if (!values.email) {
      errors.email = '必須項目です'
    } else if (!isEmail(values.email)) {
      errors.email = 'メールアドレスではありません'
    }
    return errors
  },
})
@connect(
() => ({}),
{update})
export default class EntryScreen extends React.Component {

  submit = (values) => {
    const { navigation } = this.props
    this.props.update(values.email).then(() => navigation.navigate('Login'))
  }

  render () {
    const {handleSubmit} = this.props

    return (
      <Container>
        <Header>
          <Body>
            <Title>ログイン</Title>
          </Body>
          <Right />
        </Header>
        <Content>
          <Card>
            <Field name='email' component={renderInput} placeholder='メールアドレス' />
          </Card>
        </Content>
        <Footer>
          <FooterTab>
            <Button full onPress={handleSubmit(this.submit)}><Text>次へ</Text></Button>
          </FooterTab>
        </Footer>
      </Container>
    )
  }
}
Fieldコンポーネントで入力チェック項目を指定します。
name属性のパラメータ名がvalidateチェック時やsubmit時のvaluesのパラメータとして参照できるようになります。
<Field name='email' component={renderInput} placeholder='メールアドレス' />
Fieldのパラメータは入力ごとにreduxForm decoratorsで入力チェックされます。
@reduxForm({
  form: 'login',
  validate: values => {
    const errors = {}
    if (!values.email) {
      errors.email = '必須項目です'
    } else if (!isEmail(values.email)) {
      errors.email = 'メールアドレスではありません'
    }
    return errors
  },
})
入力チェックコンポーネントです。
一度でもfocusがあたった場合にtouchedがtrueになります。
(focusが当たってvalidateエラーがある場合にエラーとする)
const renderInput = ({ input, placeholder, meta: { touched, error } }) => {
  const hasError = touched && error
  return (
    <View>
      <Item error={!!hasError}>
        <Input placeholder={placeholder} {...input}/>
      </Item>
      {hasError ? <Text style={styles.error}>{error}</Text> : <Text />}
    </View>
  )
}
handleSubmit関数を呼び出すことでsubmit処理の関数を呼び出すことができます。
values引数にはField項目の入力内容がnameパラメータ名で渡ってきます。
入力項目をupdate関数で送信し、完了後、User画面に遷移します。
  submit = (values) => {
    const { navigation } = this.props
    this.props.update(values.email).then(() => navigation.navigate('Login'))
  }

  render () {
    const {handleSubmit} = this.props

    return (
      <Button full onPress={handleSubmit(this.submit)}><Text>次へ</Text></Button>
    )
  }
userのreducerに(user.js)にupdate関数を追加します。
今回は擬似的にreduxにのみ保存します。
const LOAD = 'user/LOAD'
const UPDATE = 'user/UPDATE'

const initData = {
  user: null,
  email: null,
}

export default function reducer(state = initData, action = {}) {
  switch (action.type) {
    case LOAD:
      return {
        ...state,
        user: action.user || state.user,
      }
    case UPDATE:
      return {
        ...state,
        email: action.email || state.email,
      }
    default:
      return state
  }
}

export function load() {
  return (dispatch, getState, client) => {
    return client
      .get('https://randomuser.me/api/')
      .then(res => res.data)
      .then(user => {
        dispatch({type: LOAD, user: user.results[0]})
        return user
      })
  }
}

export function update(email) {
  return (dispatch) => {
    dispatch({type: UPDATE, email})
    return Promise.resolve(email)
  }
}
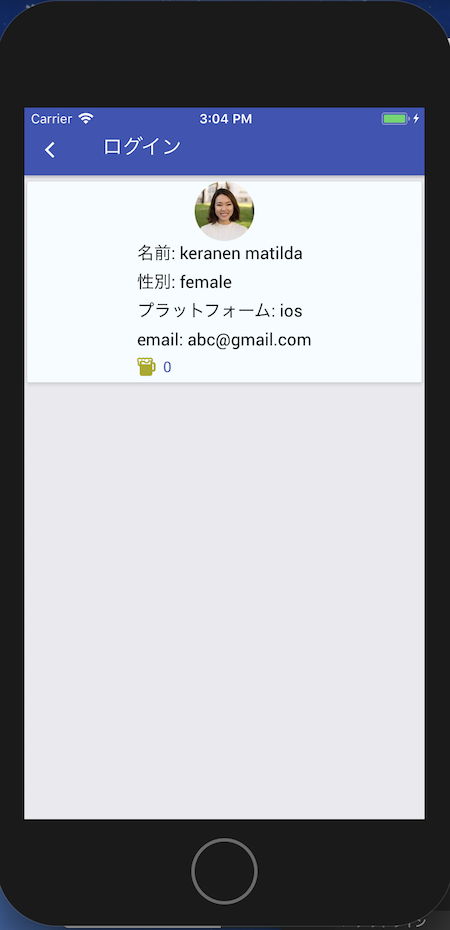
UserScreen画面ではEntryScreen画面で入力したメールアドレスを表示します。
/**
 * Sample React Native App
 * https://github.com/facebook/react-native
 * @flow
 */

import React from 'react'
import { connect } from 'react-redux'
import { Platform, StyleSheet, View } from 'react-native'
import { Text, Thumbnail, Icon, Button, Container, Header, Content, Title, Body, Left, Right, Card } from 'native-base'
import { load } from '../modules/user'

const instructions = Platform.select({
  ios: 'ios',
  android: 'android',
})

const bgColor = '#F5FCFF'
const iconColor = '#aaaa00'

const styles = StyleSheet.create({
  container: {
    flex: 1,
    justifyContent: 'center',
    alignItems: 'center',
    backgroundColor: bgColor,
  },
  content: {
    display: 'flex',
    justifyContent: 'center',
    alignItems: 'center',
  },
  beer: {
    marginLeft: -25,
  },
})

const HeaderBackButton = ({onPress}) => (
  <Left>
    <Button transparent>
      <Icon name={Platform.OS === 'ios' ? 'ios-arrow-back' : 'arrow-back'} onPress={onPress} />
    </Button>
  </Left>
)

@connect(
state => ({
  user: state.user.user,
  email: state.user.email,
}),
{load})
export default class UserScreen extends React.Component {
  state = {count: 0}

  componentDidMount () {
    this.props.load()
  }

  render () {
    const { user, email, navigation } = this.props
    const { count } = this.state

    return (
       <Container>
        <Header>
          <HeaderBackButton onPress={() => navigation.goBack()} />
          <Body>
            <Title>ユーザ</Title>
          </Body>
          <Right />
        </Header>
        <Content>
          <Card style={styles.container}>
            {user &&
              <View style={styles.content}>
                <Thumbnail source={{uri: user.picture.large}} />
                <View>
                  <Text>名前: {user.name.last} {user.name.first}</Text>
                  <Text>性別: {user.gender}</Text>
                  <Text>プラットフォーム: {instructions}</Text>
                  <Text>email: {email}</Text>
                  <Button small iconRight  transparent primary onPress={() => this.setState({count: count + 1})}>
                    <Icon type='Ionicons' name='md-beer' style={{color: iconColor}}/>
                    <Text style={styles.beer}>{count}</Text>
                  </Button>
                </View>
              </View>
            }
          </Card>
        </Content>
      </Container>
    )
  }
}
jest+detoxによるE2Eテスト
JestはJavaScriptのテストフレームワークです。
特にReact DOMツリーのテストもできるフレームワークです。(React以外のJavaScriptフレームワークでも使える)
jest用のeslintプラグインとjestテスト用のredux-mock-storeが必要なため、
次のパッケージを追加します。
$ yarn add --dev eslint-plugin-jest redux-mock-store
jestコマンドが使えるようにjestをglobalインストールします。
$ yarn global add jest
jestテスト用にnative-baseは自動変換されないようにpackage.jsonを変更します。
  "jest": {
    "preset": "react-native",
    "transformIgnorePatterns": [
      "/node_modules/(?!native-base)/"
    ]
  }
testフォルダを作成します。
.eslintrc.jsをコピーしてjestテスト用の.eslintrc.jsを作成し、testフォルダ以下に置きます。
extendsに'plugin:jest/recommended'、pluginsに'jest'を追加します。
  'extends': ['eslint:recommended', 'plugin:react/recommended', 'plugin:react-native/all', 'plugin:jest/recommended'],
  'plugins': [
    'react',
    'react-native',
    'jest',
  ],
test.jsを作成します。
UIのスナップショットテストを行います。
import React from 'react'
import EntryScreen from '../src/screens/EntryScreen'
import renderer from 'react-test-renderer'
import configureStore from 'redux-mock-store'
import { Provider } from 'react-redux'


const mockStore = configureStore([])

describe('EntryScreen', () => {

  // redux-mock-storeの初期化
  const initialState = {
    user: {
      email: null,
    },
  }
  const store = mockStore(initialState)

  it('renders correctly', () => {
    const tree = renderer
      .create(
        <Provider store={store}>
          <EntryScreen />
        </Provider>
      )
      .toJSON()
    expect(tree).toMatchSnapshot()
  })

})
yarn testでテストを実行すると、test/__snapshots__フォルダが作成されます。
$ yarn test
yarn run v1.7.0
$ jest
 PASS  test/test.js
  EntryScreen
    ✓ renders correctly (66ms)

Test Suites: 1 passed, 1 total
Tests:       1 passed, 1 total
Snapshots:   1 passed, 1 total
Time:        1.77s, estimated 2s
Ran all test suites.
✨  Done in 2.42s.
EntryScreen.jsのrenderの一部を次のように変更します。
<FooterTab>
  <Button full onPress={handleSubmit(this.submit)}><Text>前へ</Text></Button>
  <Button full onPress={handleSubmit(this.submit)}><Text>次へ</Text></Button>
</FooterTab>
再びtestを行うとスナップショットからの変更が検知されてエラーとなります。
$ yarn test
yarn run v1.7.0
$ jest
 FAIL  test/test.js
  EntryScreen
    ✕ renders correctly (81ms)

  ● EntryScreen › renders correctly

    expect(value).toMatchSnapshot()

    Received value does not match stored snapshot "EntryScreen renders correctly 1".

    - Snapshot
    + Received

    @@ -297,10 +297,67 @@
                    "paddingRight": 16,
                  }
                }
                uppercase={false}
              >
    +           前へ
    +         </Text>
    +       </View>
    +       <View
    +         accessible={true}
    +         isTVSelectable={true}
    +         onResponderGrant={[Function]}
    +         onResponderMove={[Function]}
    +         onResponderRelease={[Function]}
    +         onResponderTerminate={[Function]}
    +         onResponderTerminationRequest={[Function]}
    +         onStartShouldSetResponder={[Function]}
    +         style={
    +           Object {
    +             "alignItems": "center",
    +             "alignSelf": "stretch",
    +             "backgroundColor": "transparent",
    +             "borderBottomWidth": null,
    +             "borderColor": null,
    +             "borderLeftWidth": null,
    +             "borderRadius": 0,
    +             "borderRightWidth": null,
    +             "borderTopWidth": null,
    +             "elevation": 0,
    +             "flex": 1,
    +             "flexDirection": null,
    +             "height": 55,
    +             "justifyContent": "center",
    +             "opacity": 1,
    +             "paddingBottom": 6,
    +             "paddingTop": 6,
    +             "shadowColor": null,
    +             "shadowOffset": null,
    +             "shadowOpacity": null,
    +             "shadowRadius": null,
    +           }
    +         }
    +       >
    +         <Text
    +           accessible={true}
    +           allowFontScaling={true}
    +           ellipsizeMode="tail"
    +           style={
    +             Object {
    +               "backgroundColor": "transparent",
    +               "color": "#6b6b6b",
    +               "fontFamily": "System",
    +               "fontSize": 14,
    +               "lineHeight": 16,
    +               "marginLeft": 0,
    +               "marginRight": 0,
    +               "paddingLeft": 16,
    +               "paddingRight": 16,
    +             }
    +           }
    +           uppercase={false}
    +         >
                次へ
              </Text>
            </View>
          </View>
        </View>

      21 |       )
      22 |       .toJSON()
    > 23 |     expect(tree).toMatchSnapshot()
         |                  ^
      24 |   })
      25 |
      26 | })

      at Object.<anonymous> (test/test.js:23:18)

 › 1 snapshot failed.
Snapshot Summary
 › 1 snapshot failed from 1 test suite. Inspect your code changes or run `yarn test -u` to update them.

Test Suites: 1 failed, 1 total
Tests:       1 failed, 1 total
Snapshots:   1 failed, 1 total
Time:        3.885s
Ran all test suites.
問題がない場合は、次のjestコマンドでスナップショットを更新します。
$ jest --updateSnapshot
detoxはReact NativeのE2Eテストツールです。
Automation Test(自動UIテスト)を行うことができます。
まず、必要なパッケージをインストールします。
$ yarn add --dev detox eslint-plugin-detox
$ yarn global add detox-cli
Homebrewでapplesimutilsをインストールします。
$ brew tap wix/brew
$ brew install applesimutils
package.jsonに次の設定を追加します。
learnReactNativeの名前の箇所(.app、.xcodeproj、-schemeの引数)は各プロジェクト名に置き換えてください。
"detox": {
    "configurations": {
      "ios.sim.debug": {
        "binaryPath": "ios/build/Build/Products/Debug-iphonesimulator/learnReactNative.app",
        "build": "xcodebuild -project ios/learnReactNative.xcodeproj -scheme learnReactNative -configuration Debug -sdk iphonesimulator -derivedDataPath ios/build",
        "type": "ios.simulator",
        "name": "iPhone 8"
      }
    },
    "test-runner": "jest"
  }
プロジェクトフォルダ直下で以下のコマンドを実行します。
$ detox build
$ detox init -r jest
e2eフォルダが生成され、フォルダ以下にconfig.json、init.js、firstTest.spec.jsが生成されます。
jestフォルダ以下の.eslintrc.jsをe2eフォルダにコピーします。
e2eフォルダの.eslintrc.jsにはeslint-detox-pluginの設定を追記します。
'plugins': [
  'react',
  'react-native',
  'jest',
  'detox',
],
firstTest.spec.jsにE2Eテストを追加します。
/* eslint-env detox/detox */
describe('Example', () => {
  beforeEach(async () => {
    await device.reloadReactNative()
  })

  it('ログイン画面からメールアドレスを入力してログインできる', async () => {
    await expect(element(by.text('ログイン'))).toBeVisible()
    await element(by.id('email')).typeText('abc@example.com')
    await element(by.id('login')).tap()
    await expect(element(by.text('ユーザ'))).toBeVisible()
  })
})
EntryScreen.jsに操作するUIにはtestID属性を付与します。
// custom属性追加
const renderInput = ({ input, placeholder, meta: { touched, error }, ...custom}) => {
  const hasError = touched && error
  return (
    <View>
      <Item error={!!hasError}>
        <Input placeholder={placeholder} {...input} {...custom}/>
      </Item>
      {hasError ? <Text style={styles.error}>{error}</Text> : <Text />}
    </View>
  )
}

export default class EntryScreen extends React.Component {
  render () {
    const {handleSubmit} = this.props

    return (
      <Container>
        <Header>
          <Body>
            <Title>ログイン</Title>
          </Body>
          <Right />
        </Header>
        <Content>
          <Card>
            <Field testID='email' name='email' component={renderInput} placeholder='メールアドレス' />
          </Card>
        </Content>
        <Footer>
          <FooterTab>
            <Button testID='login' full onPress={handleSubmit(this.submit)}><Text>次へ</Text></Button>
          </FooterTab>
        </Footer>
      </Container>
    )
  }
}
次のコマンドでtestを実行できます。
$ detox test
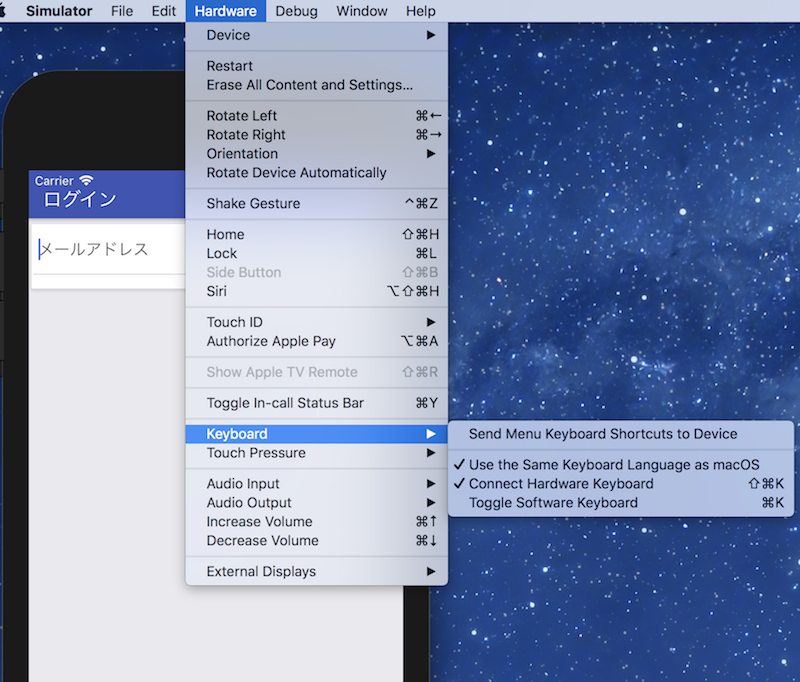
うまく動作しない場合は、simulatorのソフトウェアキーボードが動作しているか確認してみてください。
(Toggle Software Keyboardで表示切り替えを試してみる)
Android Emulatorで実行する場合
Android StudioでのAndroidプロジェクト側での設定が必要になります。
詳細は下記を参照ください。
Adding Android
その他
その他、ネイティブ特有の機能などを使いたい場合、どのライブラリが良いかは下記記事が参考になります。
React Native おすすめコンポーネント一覧v2
2018年 React Nativeで真剣なアプリを開発するなら、絶対使うライブラリー!