指定した時間に、指定したメッセージを、通知で表示するプログラムです。
使った機能
- UIButton
- UIPikcerView
- UIDatePicker
- UINotification
コード
import UIKit

class ViewController: UIViewController, UIPickerViewDelegate, UIPickerViewDataSource {

    // 通知メッセージ
    private let notificationMessageOptions: NSArray = [
        "Hello",
        "Are you free?",
        "Thanks anyway"
    ]

    var notificationMessagePicker: UIPickerView!
    var notificationTimeEditor: UIDatePicker!

    var notificationMessage: String?
    var notificationTime: NSDate?

    override func viewDidLoad() {
        super.viewDidLoad()

      // 通知許可
        let setting = UIUserNotificationSettings(forTypes: [.Sound, .Alert], categories: nil)
        UIApplication.sharedApplication().registerUserNotificationSettings(setting)

        // 通知内容を編集する
        notificationMessagePicker = UIPickerView()
        notificationMessagePicker.frame = CGRectMake(0,0,self.view.bounds.width, 180.0)
        notificationMessagePicker.delegate = self
        notificationMessagePicker.dataSource = self

        // 通知時間を設定する
        notificationTimeEditor = UIDatePicker()
        notificationTimeEditor.setDate(NSDate(),animated: true)
        notificationTimeEditor.datePickerMode = UIDatePickerMode.Time
        notificationTimeEditor.layer.position = CGPoint(x:self.view.bounds.width/2, y: 240)
        notificationTimeEditor.minimumDate = NSDate()
        notificationTimeEditor.locale = NSLocale(localeIdentifier: "ja_JP")
        notificationTimeEditor.addTarget(self, action: "fixNotificationTime:", forControlEvents: .ValueChanged)

        // 通知設定の決定ボタン
        let setNotificationButton: UIButton = UIButton(frame: CGRectMake(0,0,200,80))
        setNotificationButton.backgroundColor = UIColor.orangeColor()
        setNotificationButton.layer.masksToBounds = true
        setNotificationButton.setTitle("設定", forState: .Normal)
        setNotificationButton.layer.cornerRadius = 20.0
        setNotificationButton.layer.position = CGPoint(x: self.view.bounds.width/2, y: 400)
        setNotificationButton.addTarget(self, action: "setNotification:", forControlEvents: .TouchUpInside)

        self.view.addSubview(notificationMessagePicker)
        self.view.addSubview(notificationTimeEditor)
        self.view.addSubview(setNotificationButton)
    }


    // 通知の設定を行う
    internal func setNotification(sender: UIButton) {
        let notification: UILocalNotification = UILocalNotification()

        print(notificationMessage)
        notification.alertBody = notificationMessage
        notification.soundName = UILocalNotificationDefaultSoundName
        notification.timeZone = NSTimeZone.localTimeZone()

        print(notificationTime)
        notification.fireDate = notificationTime

        UIApplication.sharedApplication().scheduleLocalNotification(notification)
        print("set!")
    }

    // 通知内容の確定
    // pickerに表示する列数を返すデータソースメソッド
    func numberOfComponentsInPickerView(pickerView: UIPickerView) -> Int {
        return 1
    }

    // pickerに表示する行数を返すデータソースメソッド
    func pickerView(pickerView: UIPickerView, numberOfRowsInComponent component: Int) -> Int {
        return notificationMessageOptions.count
    }

    // pickerに表示する値を返すデリゲートメソッド
    func pickerView(pickerView: UIPickerView, titleForRow row: Int, forComponent component: Int) -> String? {
        return notificationMessageOptions[row] as? String
    }

    // pickerが選択された際に呼ばれるデリゲートメソッド
    func pickerView(pickerView: UIPickerView, didSelectRow row: Int, inComponent component: Int) {
        print("row: \(row)")
        print("value: \(notificationMessageOptions[row])")
        notificationMessage = notificationMessageOptions[row] as? String
    }


    // 通知時間の確定
    func fixNotificationTime(sender: UIDatePicker) {
        notificationTime = sender.date

        print(fixNotificationTime)
    }

    override func didReceiveMemoryWarning() {
        super.didReceiveMemoryWarning()
        // Dispose of any resources that can be recreated.
    }
}
画面
画面はこんな風になります。
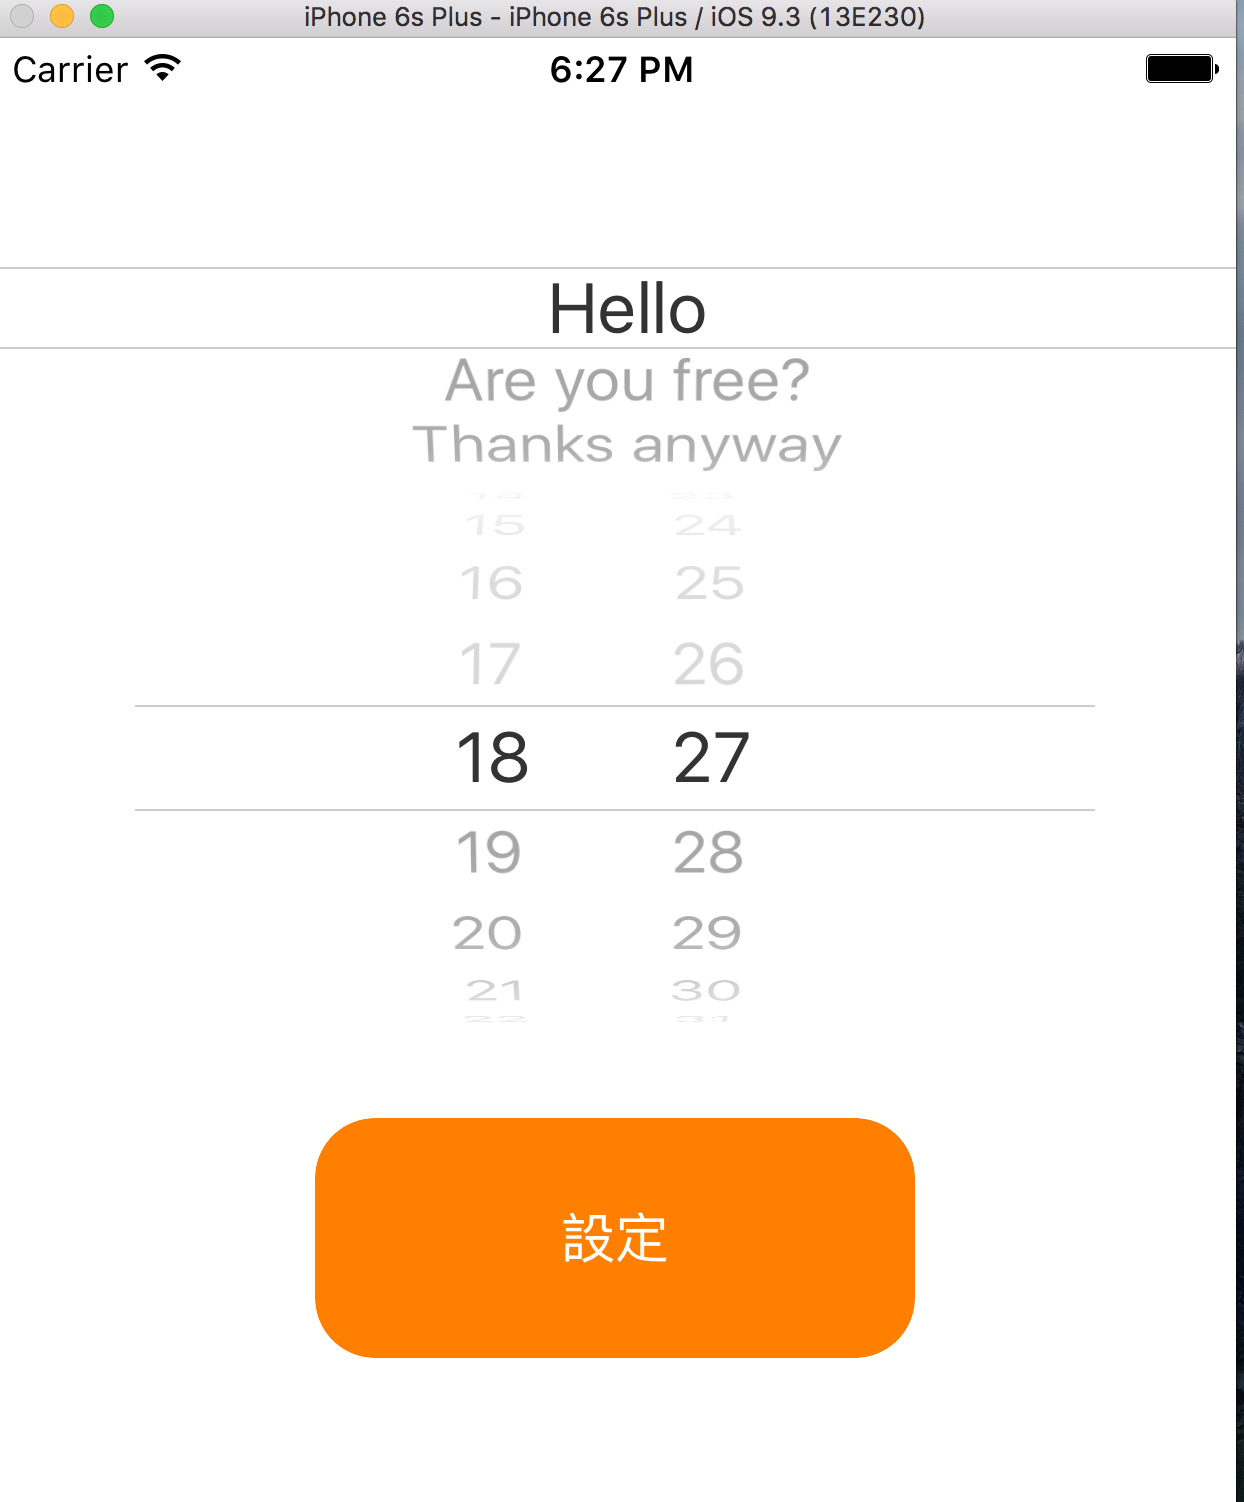
ここからメッセージを選択して、時間を選択して、設定ボタンを押すと、

指定した時間に指定したメッセージが、通知されます。