Astroとは
Astroはコンテンツ重視の高速なWebフレームワークです。サーバサイドの実装もできるので認証を組み込んだりヘッドレスCMSと連携することもできます。
Astroは比較的新しいフレームワークで、
2022.stateofjs.comではDeveloper RetentionとDeveloper Interest部門で1位を獲得しました。
2023/8/30にv3.0がリリースされましたが、v2のリリースが2023/1/25なので比較的速いスピードで成長していることが伺えます。
日本語のドキュメントが用意されているので学習の障壁は低めです。
v3.0でView Transition APIに対応したりパフォーマンスが向上したりと、より魅力的なフレームワークに仕上がっているわけですが、今回はAstroの基本的な魅力にフォーカスしていきます。
複数のUIフレームワークに対応
AstroではReact、Vue、SvelteなどのUIフレームワークコンポーネントが利用できます。さらにUIフレームワークの異なるコンポーネントが1つのプロジェクト内で共存できます。
もうチーム内で利用するUIフレームワークを限定する必要はありません。
今回はこの機能について実践してみたいと思います。
使ってみる
プロジェクト作成
スタートガイドに従い以下のコマンドを実行してプロジェクトを作成します。
$ npm create astro@latest
途中いくつかの質問があるので、以下のように回答しました。(お好みで)
- Where should we create your new project?
astro-demo - How would you like to start your new project?
Include sample files - Install dependencies?
Yes - Do you plan to write TypeScript?
Yes - How strict should TypeScript be?
Strict
Svelte と React を使えるようにする
以下のコマンドを実行するだけで必要なパッケージのインストールと初期設定を自動で行ってくれます。
$ yarn astro add svelte
$ yarn astro add react
Markdownでページを構成する
AstroはページをMarkdownで作成することができます。特殊な記法でMarkdownの中に定数を定義することもできるので、ページ固有のデータをコンポーネントへ渡して処理することができます。
src/content/blog/entry01.md
---
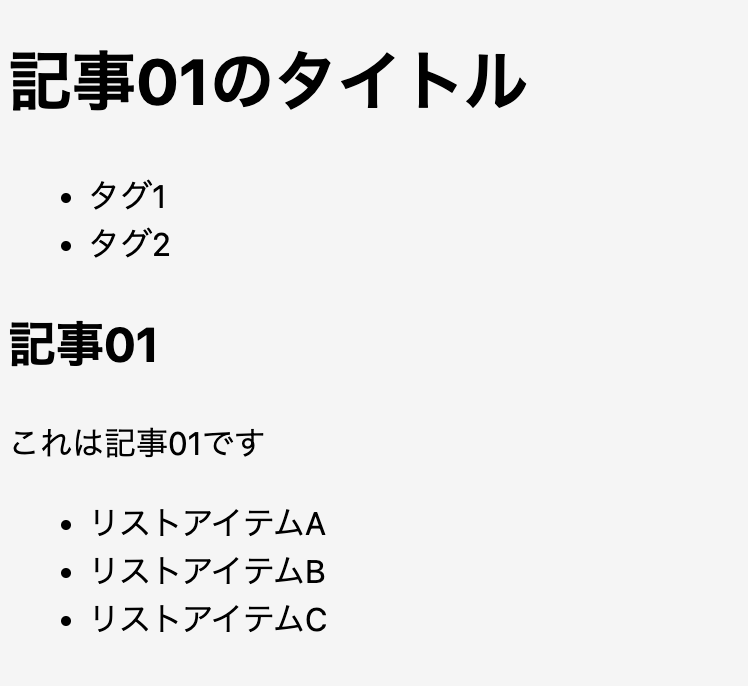
title: 記事01のタイトル
tags:
- タグ1
- タグ2
---
## 記事01
これは記事01です
- リストアイテムA
- リストアイテムB
- リストアイテムC
このMarkdownをページとして生成するために以下のastroファイルを作成しました。
getStaticPathsでslagの値をキーにコンテンツファイル(.md)を取得して、entry.render() でコンポーネント化しています。少々癖のある記法ですが慣れれば問題なさそうです。
Markdownに記されている定数は entry.data から取得できます。
src/pages/blog/[...slug].astro
---
import { CollectionEntry, getCollection } from 'astro:content';
import Layout from '../../layouts/Layout.astro';

interface Props {
	entry: CollectionEntry<'blog'>;
}

export async function getStaticPaths() {
	const blog = await getCollection('blog');
	return blog.map((entry) => ({
		params: { slug: entry.slug },
		props: { entry },
	}));
}

const { entry } = Astro.props;
const { Content } = await entry.render();
---

<Layout title={entry.data.title}>
	<h1>{entry.data.title}</h1>
	<ul>
		{
			entry.data.tags.map((tag) => (
				<li>
					{tag}
				</li>
			))
		}
	</ul>
	<Content />
</Layout>
このページをブラウザで確認してみると、以下のように表示されました。
ページにコンポーネントを配置してみる
ReactとSvelteそれぞれのフレームワークで作成したコンポーネントを、先ほど作成したページに設置してみます。
コンポーネントを作成する
各コンポーネントは src/components に配置します。
Svelte製カウンター
Counter.svelte
<script>
  let count = 0;

  function add() {
    count += 1;
  }

  function subtract() {
    count -= 1;
  }
</script>

<div class="message">
  <slot />
</div>
<div class="counter">
  <button on:click={subtract}>-</button>
  <pre>{count}</pre>
  <button on:click={add}>+</button>
</div>

<style>
  .counter {
    display: grid;
    font-size: 2em;
    grid-template-columns: repeat(3, minmax(0, 1fr));
    margin-top: 1em;
    place-items: center;
  }

  .message {
    text-align: center;
  }
</style>
React製カウンター
Counter.ts
import { useState } from 'react';
import './Counter.css';

export default function Counter({ children, count: initialCount }: { children: JSX.Element; count: number }) {
  const [count, setCount] = useState(initialCount);
  const add = () => setCount((i) => i + 1);
  const subtract = () => setCount((i) => i - 1);

  return (
    <>
      <div className="counter-message">{children}</div>
      <div className="counter">
        <button onClick={subtract}>-</button>
        <pre>{count}</pre>
        <button onClick={add}>+</button>
      </div>
    </>
  );
}
Counter.css
.counter {
  display: grid;
  font-size: 2em;
  grid-template-columns: repeat(3, minmax(0, 1fr));
  margin-top: 1em;
  place-items: center;
}

.counter-message {
  text-align: center;
}
ページにコンポーネントを設置する
src/pages/blog/[...slug].astro
---
  ...省略

import CounterReact from '../../components/Counter';
import CounterSvelte from '../../components/Counter.svelte';

  ...省略

<Layout title={entry.data.title}>

  ...省略

	<Content />

  <section>
    <CounterReact {...someProps} client:visible>
      <span>Here is React!</span>
    </CounterReact>
  </section>

  <section>
    <CounterSvelte {...someProps} client:visible>
      <span>Here is Svelte!</span>
    </CounterSvelte>
  </section>

</Layout>
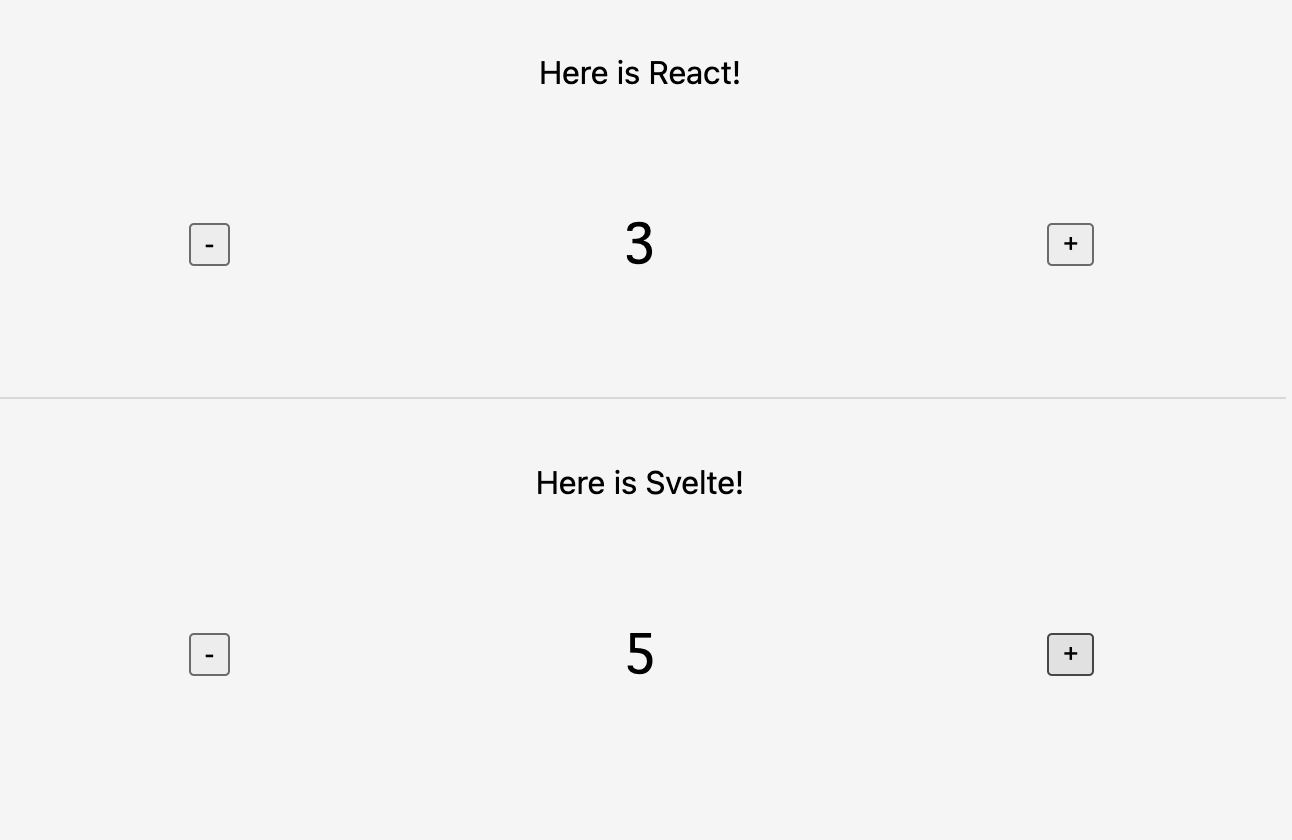
2つのコンポーネントを設置したページをブラウザで確認してみると、以下のように表示されました。
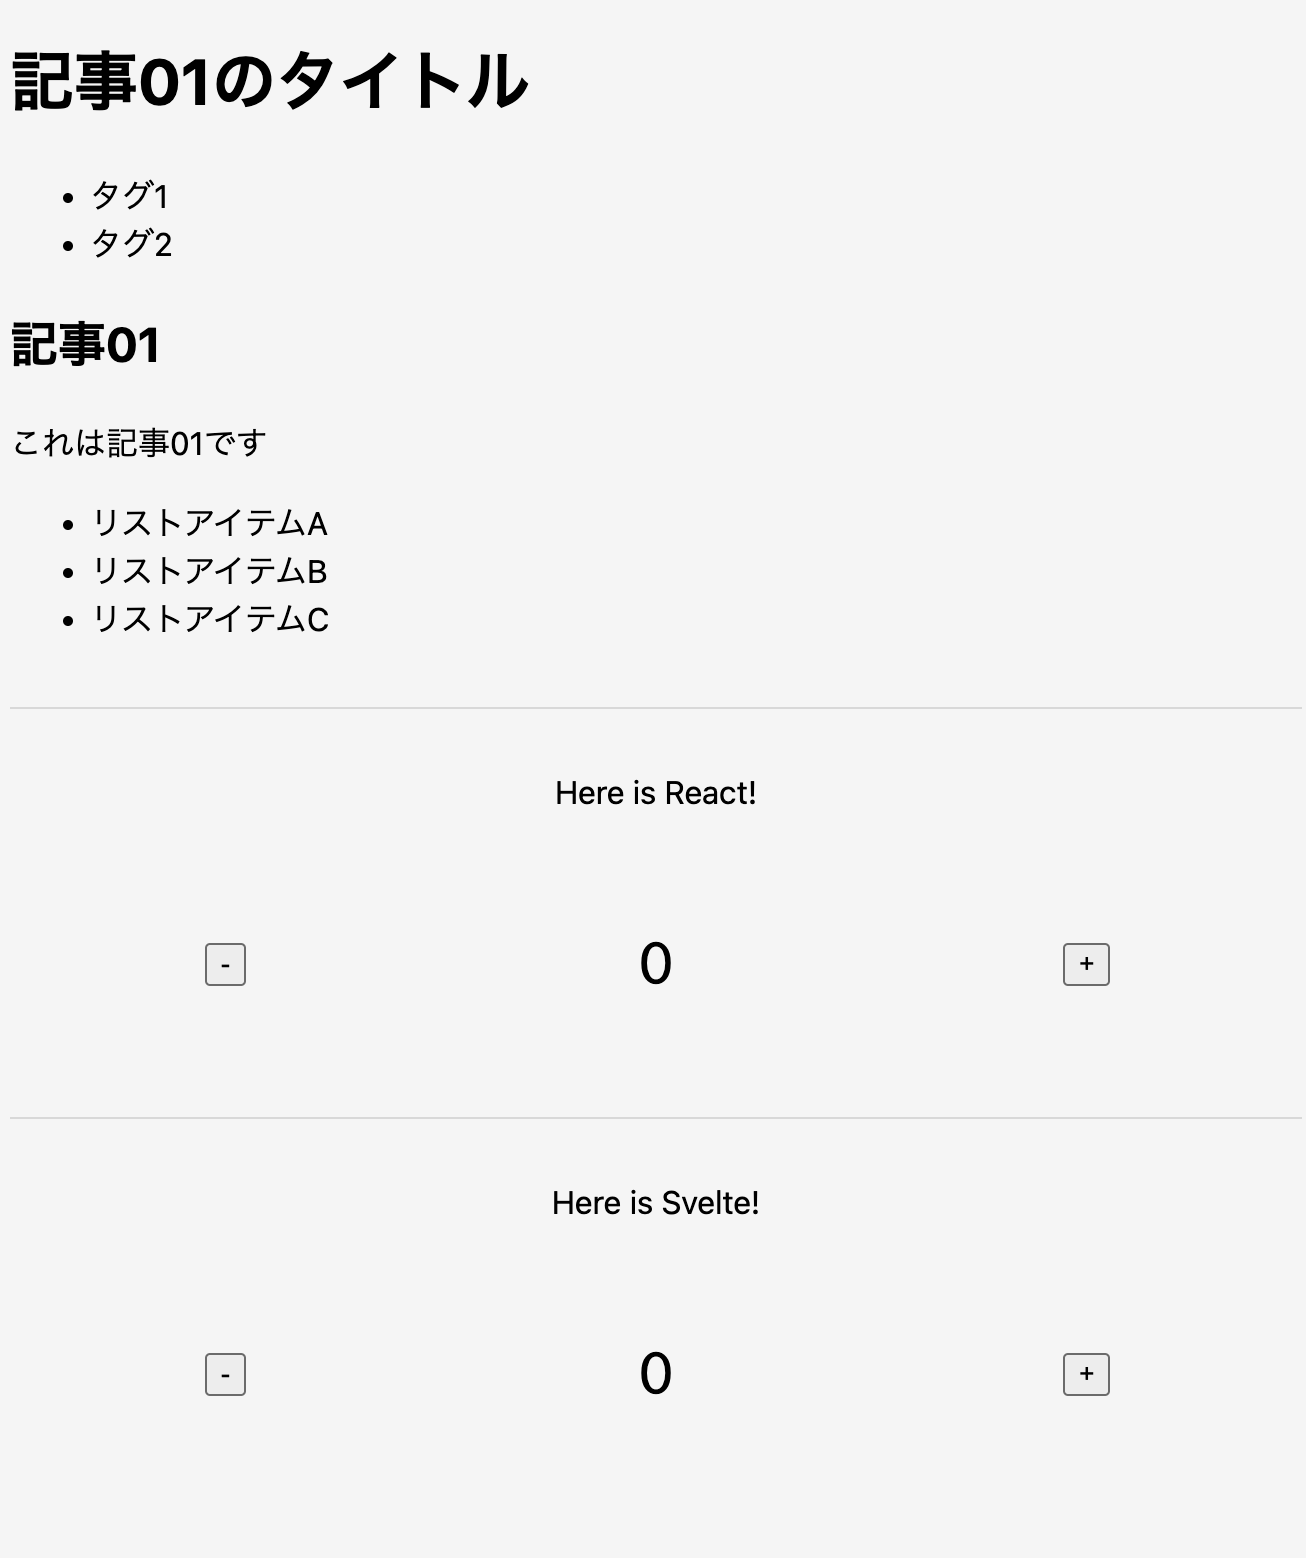
カウンターも個別に動作しています。
まとめ
Astroで極めて簡単に複数のUIフレームワークを使うことができました。
他にもここに書ききれないほどの様々な機能が用意されているので、興味のある方はぜひドキュメントを読んでみてください。
参考
https://astro.build/
https://docs.astro.build/ja/getting-started/