はじめに
ゴール
Reactで外部APIからデータを取得して表示するアプリケーションの作り方を学べる。
概要
OpenWeather APIを使用して天気情報を取得し、シンプルな天気アプリを作成する。機能は以下。
- 都市名を入力すると、その都市の天気情報を取得
- 温度をセルシウス度で表示
- 天気に応じたアイコンの表示
完成形はこんな感じ。

用いている技術要素
| 技術 | 説明 |
|---|---|
| React | UIコンポーネントを構築するためのJavaScriptライブラリ |
| Material-UI (MUI) | Reactのコンポーネントライブラリで、美しいUIを簡単に実装可能 |
| Axios | HTTPリクエストを簡単に行えるライブラリ |
| Weather Icons React | 天気アイコンを表示するためのコンポーネントライブラリ |
OpenWeather APIについて
OpenWeather APIは、世界中の都市の天気情報を提供する人気のある気象データサービス。このAPIを使用することで、現在の気温や天気の状態(晴れ、曇り、雨など)、湿度等様々な情報が取得できる。
APIの使用には無料のAPIキーが必要で、1分あたり60回までのリクエストが可能です。このチュートリアルでは、現在の天気を取得するエンドポイント(/data/2.5/weather)を使用します。
下記の記事を参考に、APIを取得してからプロジェクトの作成に取り掛かってください。
ステップ 1: プロジェクトのセットアップ
まず、必要なパッケージをインストールします:
npx create-react-app weather-app
cd weather-app
npm install @mui/material @emotion/react @emotion/styled axios weather-icons-react
プロジェクトの構成は以下のようになります:
weather-app/
├── src/
│   ├── App.js
│   └── comps/
│       └── WiComp.js
└── package.json
ステップ 2: MUIによるTextFieldの実装
以下のコードをsrc/App.jsに実装します:
import React, { useState } from "react";
import { Container, Box, TextField, Typography } from "@mui/material";

export default function App() {
  const [city, setCity] = useState("");

  return (
    <Container maxWidth="sm">
      <Box
        sx={{
          display: "flex",
          flexDirection: "column",
          alignItems: "center",
          gap: 3,
          my: 4,
        }}
      >
        <Typography variant="h4" component="h1">
          天気情報取得アプリ
        </Typography>

        <TextField
          fullWidth
          label="都市名を入力"
          value={city}
          onChange={(e) => setCity(e.target.value)}
          variant="outlined"
          sx={{ maxWidth: 400 }}
        />

        {/* 入力値の確認用表示 */}
        <Typography variant="body1">入力値: {city}</Typography>
      </Box>
    </Container>
  );
}
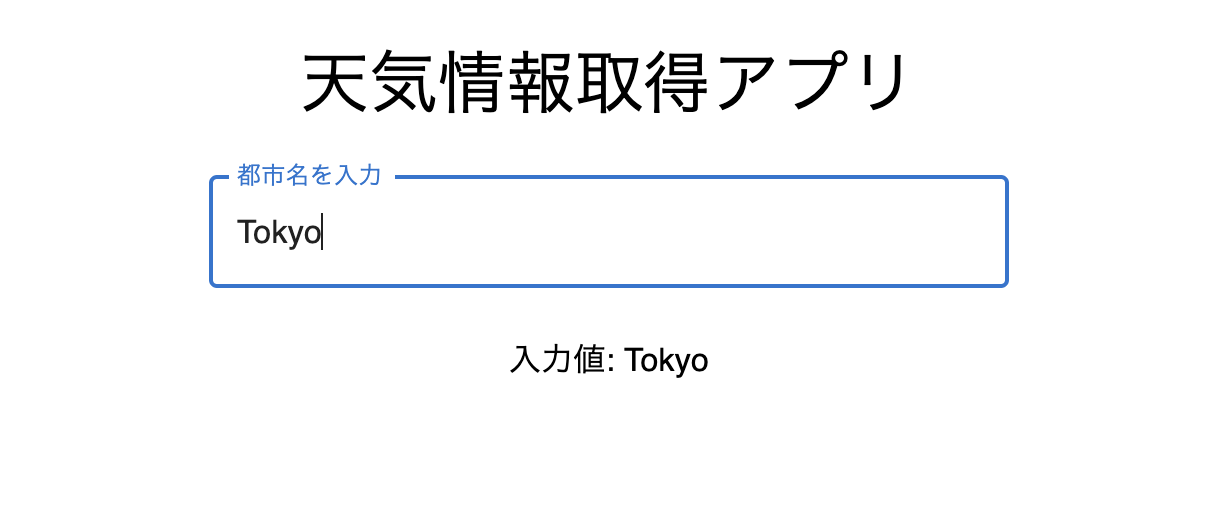
とりあえず入力した文字が出力できるようになった。
ステップ 3: OpenWeather APIによる天候情報の取得
// 【更新】importを適切に更新
import React, { useState, useEffect } from "react";
import { Container, Box, TextField, Typography } from "@mui/material";
import axios from "axios";

// 【追記】あなたのAPIキーに置き換えてください
const API_KEY = "xxxxxxxxxxxxxxxxxxxxx";

export default function App() {
  const [city, setCity] = useState("");
  // 【追記】状態変数を追加
  const [weather, setWeather] = useState(null);

  // 【追記】city が更新されるたびに呼び出される
  useEffect(() => {
    const fetchData = async () => {
      if (!city) return;
      try {
        const response = await axios.get(
          `https://api.openweathermap.org/data/2.5/weather?q=${city}&APPID=${API_KEY}`
        );
        console.log("取得した天候データ:", response.data);
        setWeather(response.data);
      } catch (error) {
        console.error("天候情報の取得に失敗しました:", error);
      }
    };

    fetchData();
  }, [city]);

  return (
    <Container maxWidth="sm">
      <Box
        sx={{
          display: "flex",
          flexDirection: "column",
          alignItems: "center",
          gap: 3,
          my: 4,
        }}
      >
        <Typography variant="h4" component="h1">
          天気情報取得アプリ
        </Typography>

        <TextField
          fullWidth
          label="都市名を入力"
          value={city}
          onChange={(e) => setCity(e.target.value)}
          variant="outlined"
          sx={{ maxWidth: 400 }}
        />

        {/* 【追記】取得した天候データを簡易的に表示 */}
        {weather && (
          <Box>
            <Typography variant="h6">都市名: {weather.name}</Typography>
            <Typography variant="body1">
              温度: {weather.main.temp} K
            </Typography>
          </Box>
        )}
      </Box>
    </Container>
  );
}
Tokyoと試しに打つと、以下のように取得できていることがわかる。

ステップ 4: エラーハンドリングの実装
import React, { useState, useEffect } from "react";
import { Container, Box, TextField, Typography } from "@mui/material";
import axios from "axios";

const API_KEY = "xxxxxxxxxxxxxxxxxxxxx";

export default function App() {
  const [city, setCity] = useState("");
  const [weather, setWeather] = useState(null);
  // 【追記】状態変数を追加
  const [error, setError] = useState("");

  useEffect(() => {
    const fetchData = async () => {
      if (!city) return;
      try {
        const response = await axios.get(
          `https://api.openweathermap.org/data/2.5/weather?q=${city}&APPID=${API_KEY}`
        );
        setWeather(response.data);
        setError("");
      } catch (error) {
        // 【追記】エラー時に適切な内容を変数(error)に格納
        if (error.response && error.response.status === 404) {
          setError("データが見つかりませんでした。");
        } else {
          setError("データの取得に失敗しました");
        }
        setWeather(null);
      }
    };

    fetchData();
  }, [city]);

  return (
    <Container maxWidth="sm">
      <Box
        sx={{
          display: "flex",
          flexDirection: "column",
          alignItems: "center",
          gap: 3,
          my: 4,
        }}
      >
        <Typography variant="h4" component="h1">
          天気情報取得アプリ
        </Typography>

        <TextField
          fullWidth
          label="都市名を入力"
          value={city}
          onChange={(e) => setCity(e.target.value)}
          variant="outlined"
          sx={{ maxWidth: 400 }}
        />

        {/* 【追記】エラー表示 */}
        {error && (
          <Typography color="error" sx={{ mt: 2 }}>
            {error}
          </Typography>
        )}

        {weather && (
          <Box>
            <Typography variant="h6">都市名: {weather.name}</Typography>
            <Typography variant="body1">
              温度: {weather.main.temp} K
            </Typography>
          </Box>
        )}
      </Box>
    </Container>
  );
}
これで、検索した文言が見つからない場合はエラー表示となる。

ステップ 5: 取得した情報の画面出力
import React, { useState, useEffect } from "react";
// 【更新】importを適切に更新
import {
  Container,
  Box,
  TextField,
  Typography,
  Card,
  CardContent,
} from "@mui/material";
import axios from "axios";

const API_KEY = "xxxxxxxxxxxxxxxxxxxxx";

export default function App() {
  const [city, setCity] = useState("");
  const [weather, setWeather] = useState(null);
  const [error, setError] = useState("");

  useEffect(() => {
    const fetchData = async () => {
      if (!city) return;
      try {
        const response = await axios.get(
          `https://api.openweathermap.org/data/2.5/weather?q=${city}&APPID=${API_KEY}`
        );
        setWeather(response.data);
        setError("");
      } catch (error) {
        if (error.response && error.response.status === 404) {
          setError("データが見つかりませんでした。");
        } else {
          setError("データの取得に失敗しました");
        }
        setWeather(null);
      }
    };

    fetchData();
  }, [city]);

  return (
    <Container maxWidth="sm">
      <Box
        sx={{
          display: "flex",
          flexDirection: "column",
          alignItems: "center",
          gap: 3,
          my: 4,
        }}
      >
        <Typography
          variant="h4"
          component="h1"
          sx={{ fontWeight: "bold", color: "primary.main", mb: 2 }}
        >
          天気情報取得アプリ
        </Typography>

        <TextField
          fullWidth
          label="都市名を入力"
          value={city}
          onChange={(e) => setCity(e.target.value)}
          variant="outlined"
          sx={{ maxWidth: 400 }}
        />

        {error && (
          <Typography color="error" sx={{ mt: 2 }}>
            {error}
          </Typography>
        )}

        {/* 【更新】カードのデザインを整える */}
        {weather && (
          <Card
            sx={{
              width: "100%",
              maxWidth: 400,
              boxShadow: 3,
              borderRadius: 2,
            }}
          >
            <CardContent
              sx={{
                display: "flex",
                flexDirection: "column",
                alignItems: "center",
                gap: 2,
              }}
            >
              <Typography variant="h5" component="h2">
                {weather.name}
              </Typography>
              <Typography variant="h6">
                {Math.round((weather.main.temp - 273.15) * 10) / 10} °C
              </Typography>
            </CardContent>
          </Card>
        )}
      </Box>
    </Container>
  );
}
Cardコンポーネントにより、体裁が整った。

ステップ 6: 天候アイコンの外部コンポーネント化
まず、src/comps/WiComp.jsを作成します:
import React from "react";
import { Box } from "@mui/material";
import { WiCloud, WiDaySunny, WiRain, WiSnowWind } from "weather-icons-react";

export default function WiComp({ weather_type }) {
  const getWeatherIcon = () => {
    switch (weather_type) {
      case "Clouds":
        return <WiCloud size={80} color="#607d8b" />;
      case "Snow":
        return <WiSnowWind size={80} color="#90a4ae" />;
      case "Rain":
        return <WiRain size={80} color="#4fc3f7" />;
      default:
        return <WiDaySunny size={80} color="#ffd54f" />;
    }
  };

  return <Box sx={{ py: 1 }}>{getWeatherIcon()}</Box>;
}
そして、最終的なApp.jsは以下のようになります:
import React, { useState, useEffect } from "react";
import {
  Container,
  Box,
  TextField,
  Typography,
  Card,
  CardContent,
} from "@mui/material";
import axios from "axios";
// 【追記】importを追記
import WiComp from "./comps/WiComp";

const API_KEY = "xxxxxxxxxxxxxxxxxxxxx";

export default function App() {
  const [city, setCity] = useState("");
  const [weather, setWeather] = useState(null);
  const [error, setError] = useState("");

  useEffect(() => {
    const fetchData = async () => {
      if (!city) return;
      try {
        const response = await axios.get(
          `https://api.openweathermap.org/data/2.5/weather?q=${city}&APPID=${API_KEY}`
        );
        setWeather(response.data);
        setError("");
      } catch (error) {
        if (error.response && error.response.status === 404) {
          setError("データが見つかりませんでした。");
        } else {
          setError("データの取得に失敗しました");
        }
        setWeather(null);
      }
    };

    fetchData();
  }, [city]);

  return (
    <Container maxWidth="sm">
      <Box
        sx={{
          display: "flex",
          flexDirection: "column",
          alignItems: "center",
          gap: 3,
          my: 4,
        }}
      >
        <Typography
          variant="h4"
          component="h1"
          sx={{ fontWeight: "bold", color: "primary.main", mb: 2 }}
        >
          天気情報取得アプリ
        </Typography>

        <TextField
          fullWidth
          label="都市名を入力"
          value={city}
          onChange={(e) => setCity(e.target.value)}
          variant="outlined"
          sx={{ maxWidth: 400 }}
        />

        {error && (
          <Typography color="error" sx={{ mt: 2 }}>
            {error}
          </Typography>
        )}

        {weather && (
          <Card
            sx={{
              width: "100%",
              maxWidth: 400,
              boxShadow: 3,
              borderRadius: 2,
            }}
          >
            <CardContent
              sx={{
                display: "flex",
                flexDirection: "column",
                alignItems: "center",
                gap: 2,
              }}
            >
              <Typography variant="h5" component="h2">
                {weather.name}
              </Typography>
              {/* 【追記】WiCompコンポーネントを呼び出す */}
              <WiComp weather_type={weather.weather[0].main} />
              <Typography variant="h6">
                {Math.round((weather.main.temp - 273.15) * 10) / 10} °C
              </Typography>
            </CardContent>
          </Card>
        )}
      </Box>
    </Container>
  );
}
アイコンが表示されたらOK.
ちなみに、NewYorkは雨。

これで完成
注意点
- OpenWeather APIのAPI_KEYは必ず自身のものに置き換えてください
- 必要なパッケージが全てインストールされていることを確認してください
- コンポーネントファイルの配置場所や名前は、プロジェクトの構成に合わせて適宜調整してください