はじめに
みなさん、こんにちは!今回は、Next.jsのApp Routerを利用して、LINE LIFFアプリを開発する方法についてご紹介します。私自身、LIFFを使用したアプリケーションの開発をする機会があり、Create LIFF AppがNext.jsのPage Routerにしか対応していなかったため、検証用にApp RouterにLIFFの導入を行ったので、是非、ご参考にしてください!
実装時のパッケージのバージョン
"dependencies": {
   "@line/liff": "2.23.1",
   "next": "14.0.4",
   "react": "^18",
   "react-dom": "^18"
}
0. App Router対応したリポジトリが欲しい方
こちらが今回検証に作成したリポジトリになります。
cloneして、よしなに利用してください
1. 開発環境の構築
まず、Next.jsアプリケーションのための開発環境を整えましょう。
App Router 以外は、お好みでカスタマイズしてください。
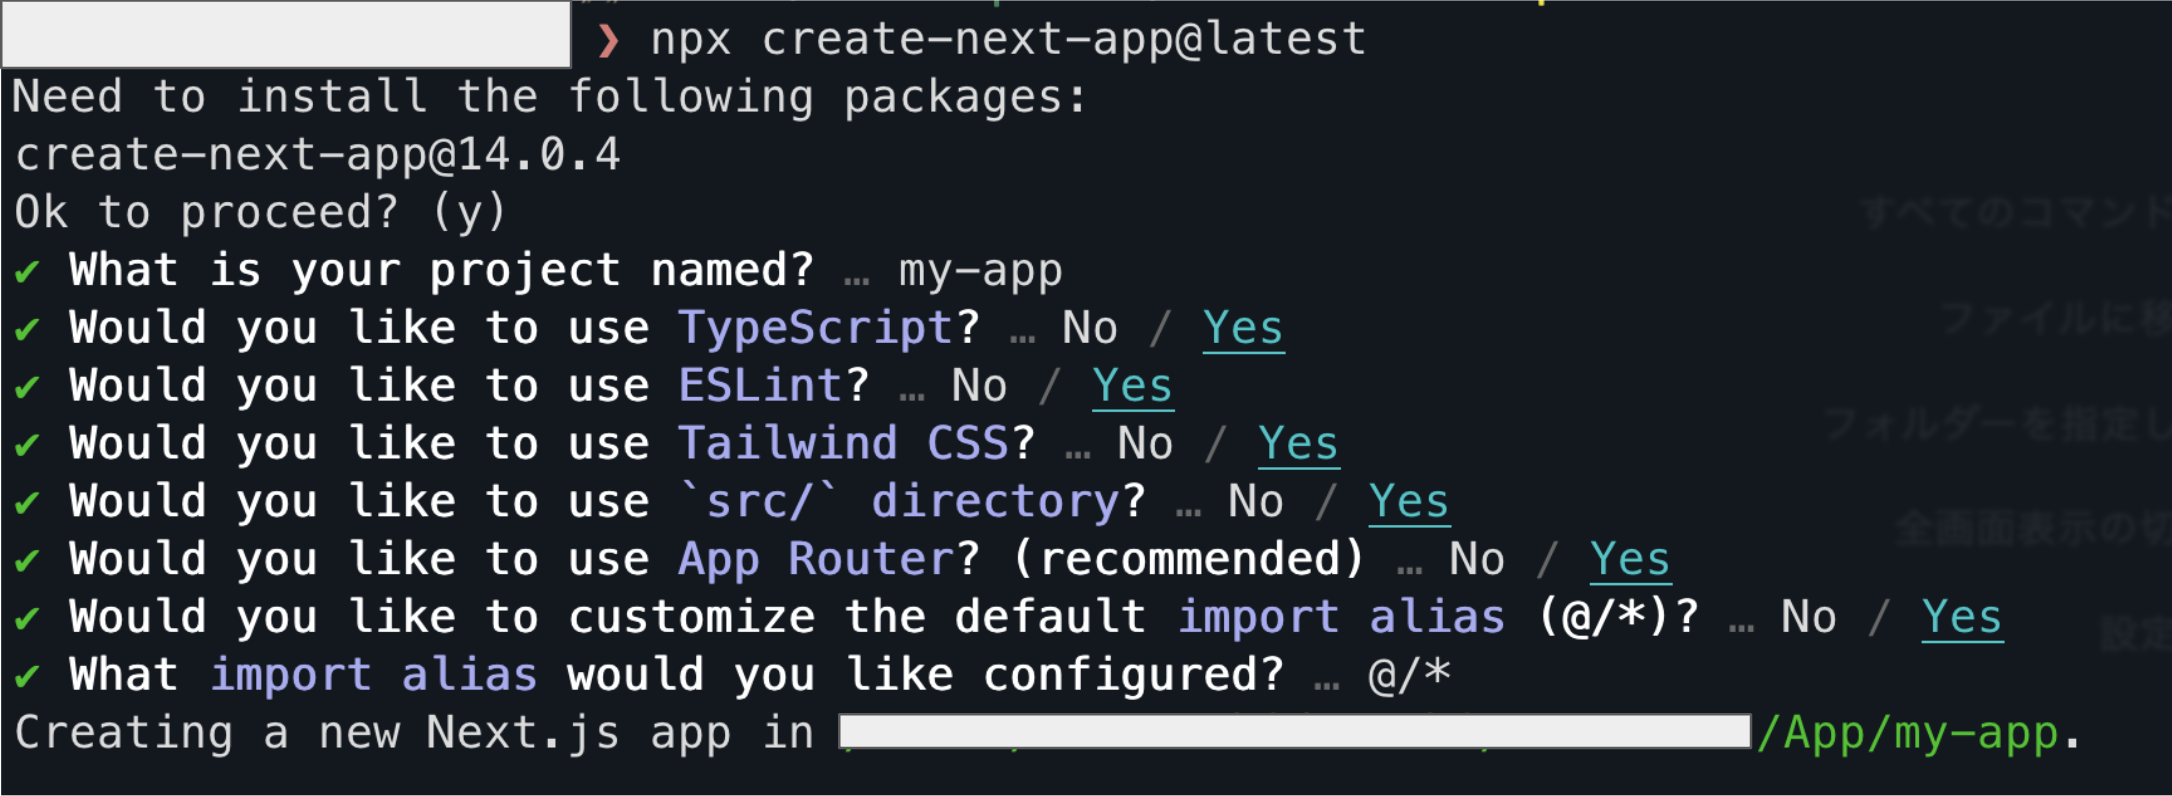
npx create-next-app@latest

> create-next-app@14.0.4
> Ok to proceed? (y)
> ✔ What is your project named? … my-app
> ✔ Would you like to use TypeScript? … No / Yes   (Yes)
> ✔ Would you like to use ESLint? … No / Yes   (Yes)
> ✔ Would you like to use Tailwind CSS? … No / Yes   (Yes)
> ✔ Would you like to use `src/` directory? … No / Yes   (Yes)
> ✔ Would you like to use App Router? (recommended) … No / Yes   (Yes) ← こちらのみYes必須
> ✔ Would you like to customize the default import alias (@/*)? … No / Yes   (Yes)
> ✔ What import alias would you like configured? … @/*
> Creating a new Next.js app in /※※※/※※※/my-app.
参考画像
2. LIFFパッケージのインストール
LIFFのnpmパッケージをインストールします。
npm install @line/liff
3. ngrokの準備
ngrokが入っていない方は、こちらの記事がわかりやすいです
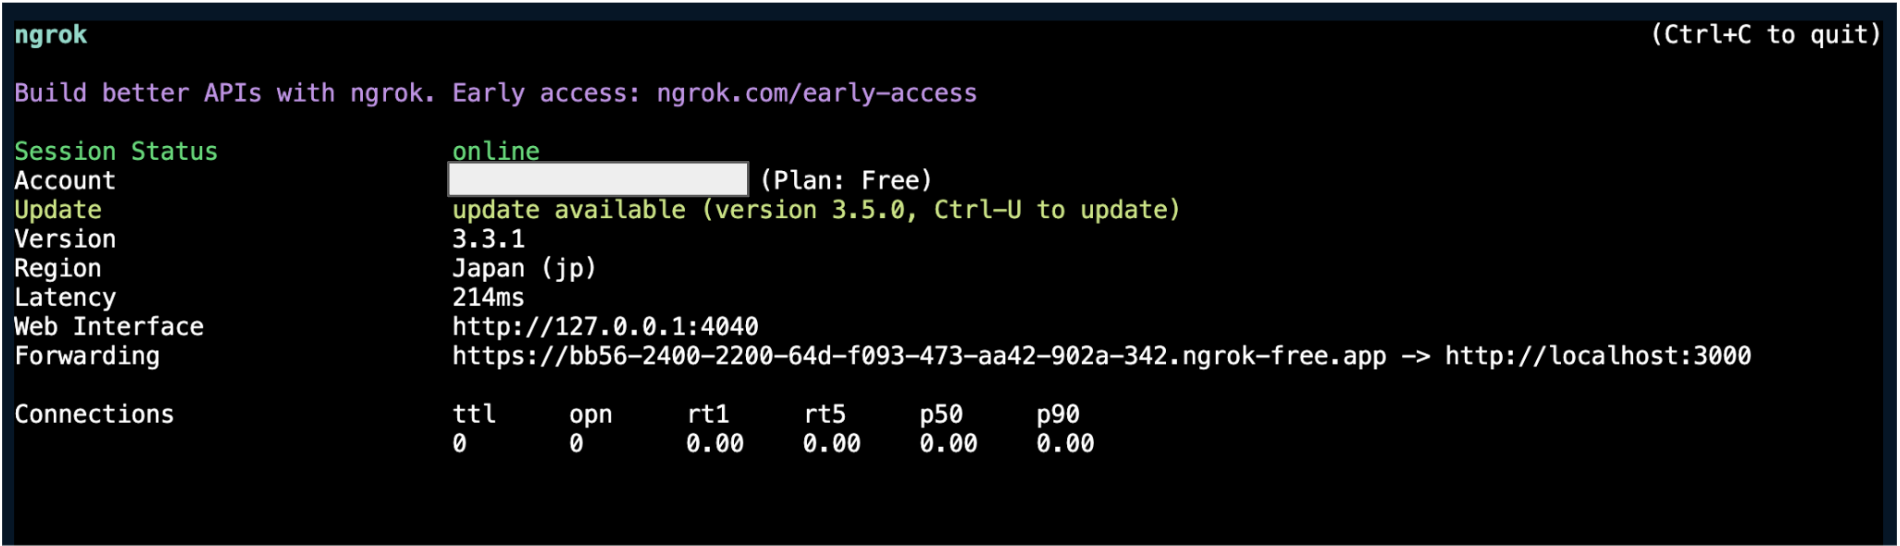
ngrokを用意し、ホスティングを起動します。
ngrok http 3000
上記コマンド実行後に以下のようにURが生成されるのでそれをメモしておきます。
https://bb56-2400-2200-64d-f093-473-aa42-902a-342.ngrok-free.app/
4. LIFF ID の用意
次に LIFF ID を用意します。
LINE Developersにログインし、プロバイダーを作成したらチャネルの作成から「LINE ログイン」を選択します。
LIFFタブから LIFF を作成します。エンドポイント URL には先程メモした ngrok の URL を記入します。
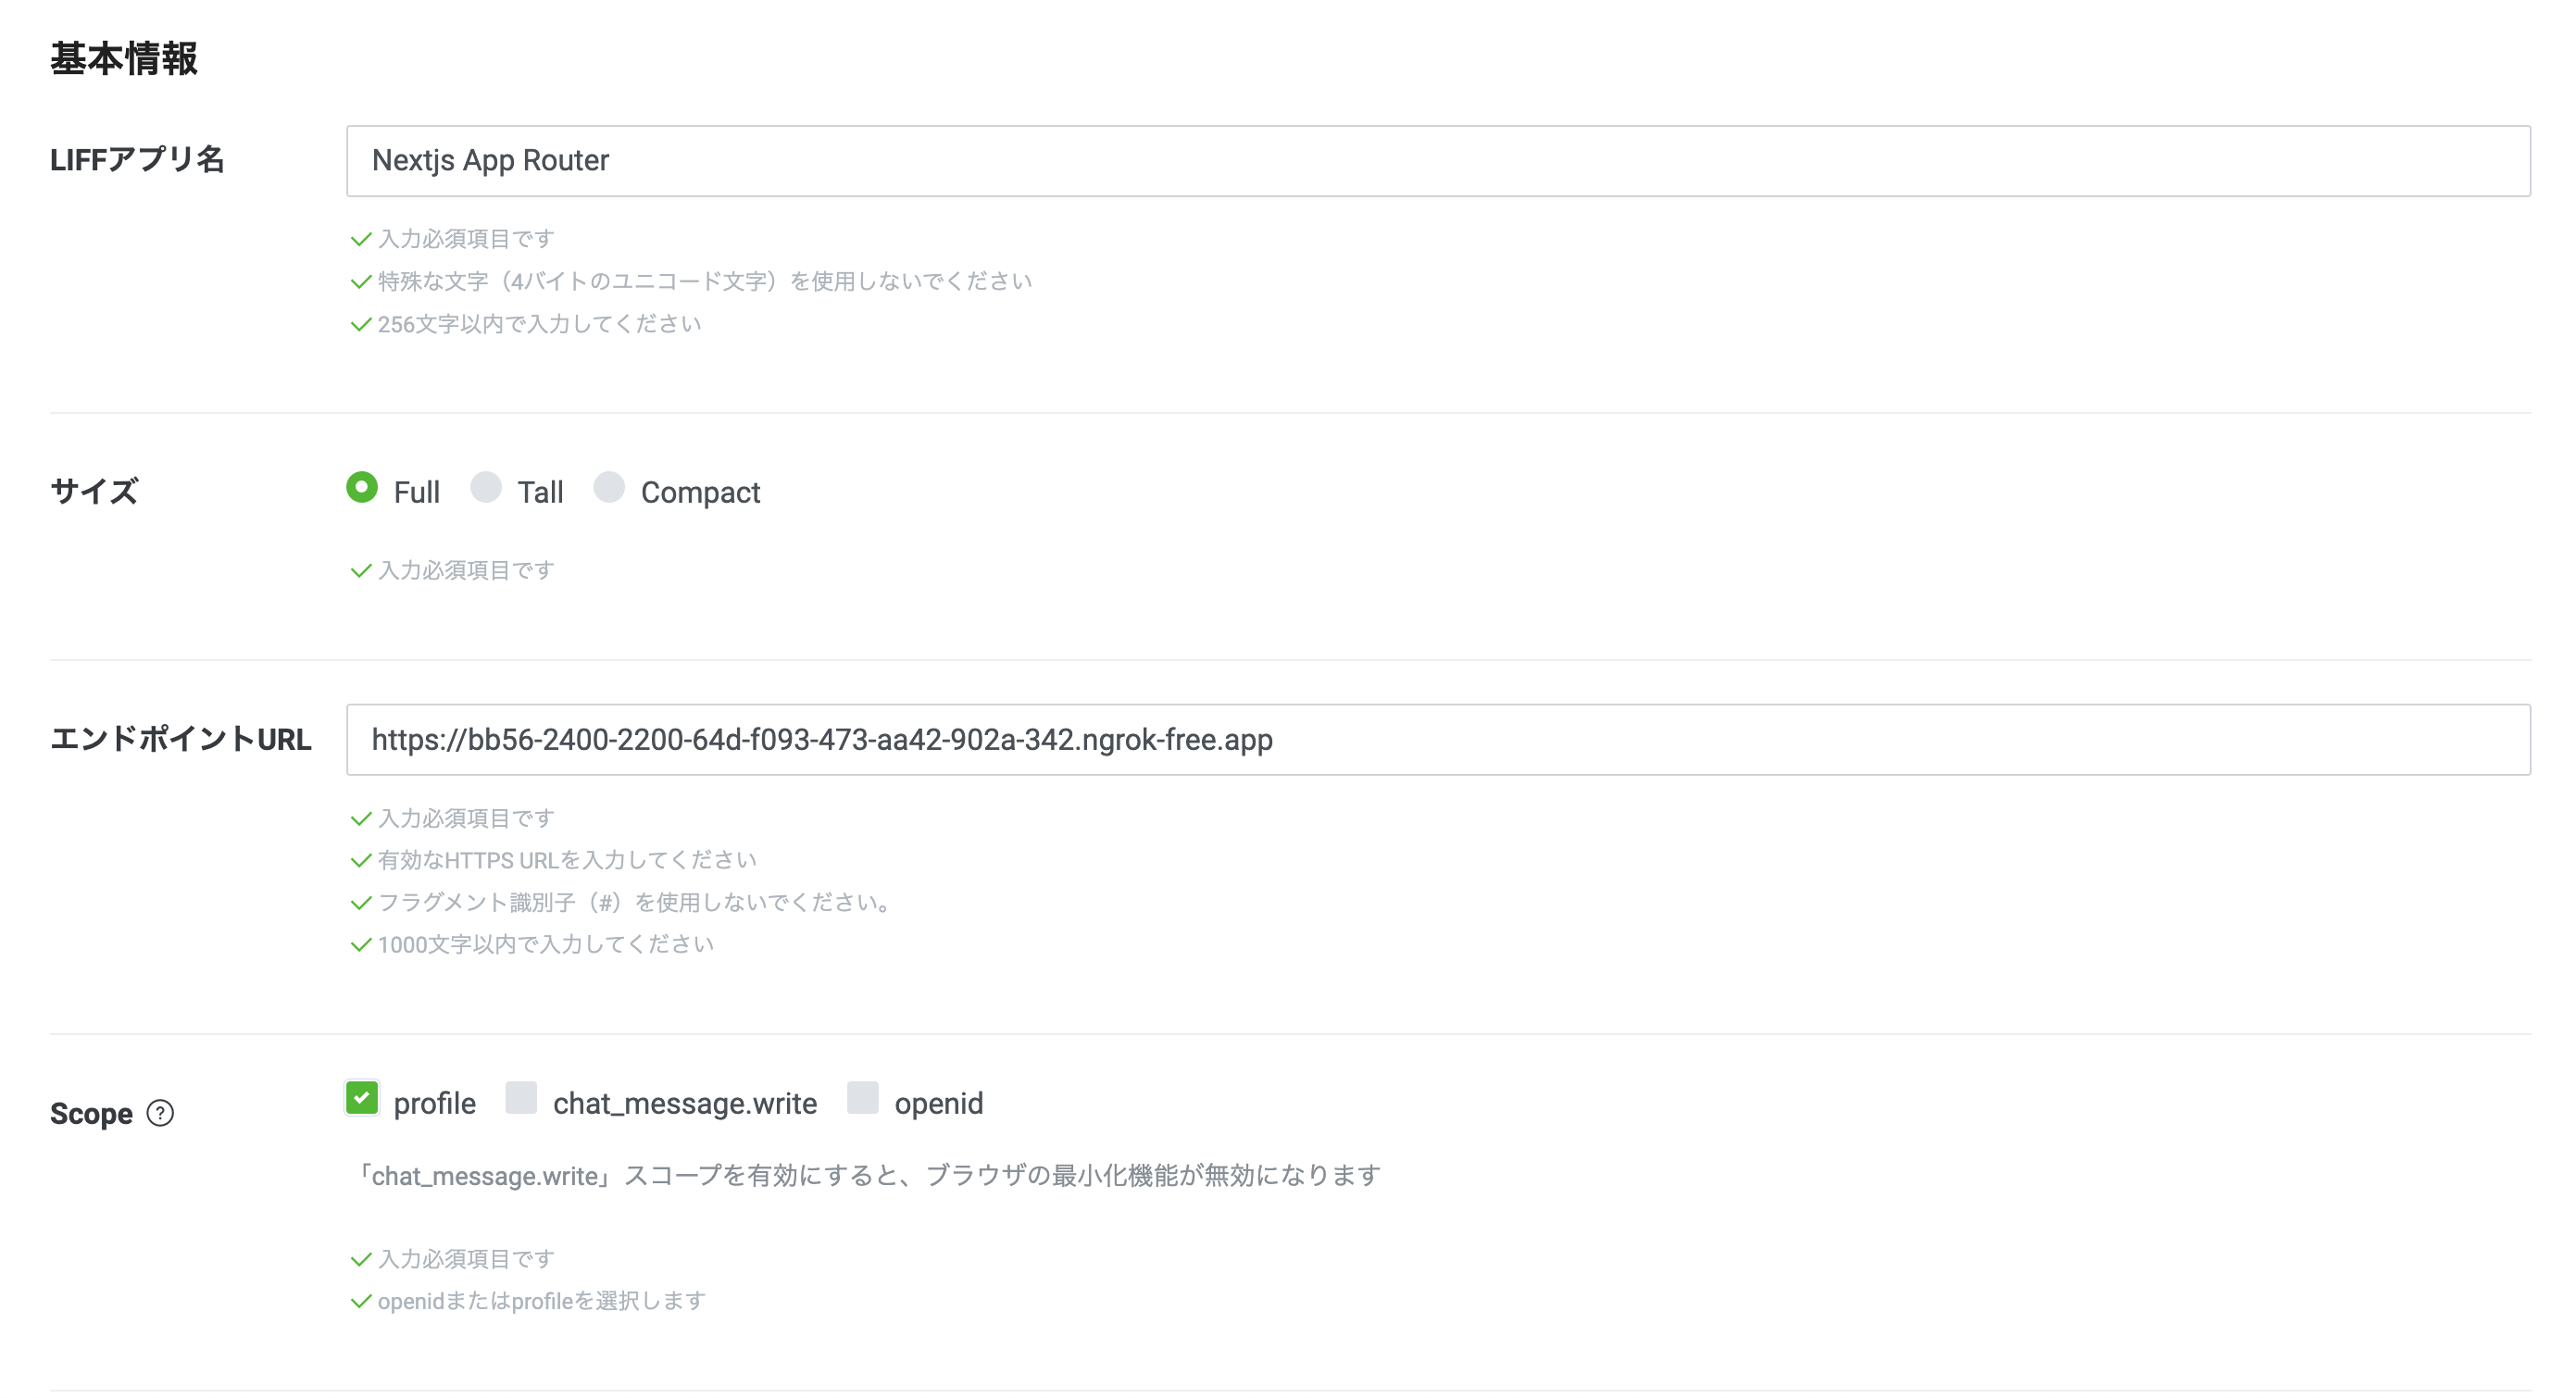
登録後に表示されるLIFF IDを環境変数に記載してください。
NEXT_PUBLIC_LIFF_ID=*****
5. 必要なファイルの用意
useLiffのカスタムフックスを作成しています。
こちらのuse-line-liffパッケージのコードを参考させていただきました。
LiffProvider.tsx
'use client';
import React, {
  createContext,
  FC,
  PropsWithChildren,
  useCallback,
  useContext,
  useEffect,
  useState,
} from 'react';
import { Liff } from '@line/liff';

const LiffContext = createContext<{
  liff: Liff | null;
  liffError: string | null;
}>({ liff: null, liffError: null });

export const useLiff = () => useContext(LiffContext);

export const LiffProvider: FC<PropsWithChildren<{ liffId: string }>> = ({
  children,
  liffId,
}) => {
  const [liff, setLiff] = useState<Liff | null>(null);
  const [liffError, setLiffError] = useState<string | null>(null);

  const initLiff = useCallback(async () => {
    try {
      const liffModule = await import('@line/liff');
      const liff = liffModule.default;
      console.log('LIFF init...');

      await liff.init({ liffId });

      console.log('LIFF init succeeded.');
      setLiff(liff);
    } catch (error) {
      console.log('LIFF init failed.');
      setLiffError((error as Error).toString());
    }
  }, [liffId]);

  // init Liff
  useEffect(() => {
    console.log('LIFF init start...');
    initLiff();
  }, [initLiff]);

  return (
    <LiffContext.Provider
      value={{
        liff,
        liffError,
      }}
    >
      {children}
    </LiffContext.Provider>
  );
};
lauout.tsxファイルにchildrenをLiffProviderでラップする
import type { Metadata } from 'next';
import { Inter } from 'next/font/google';
import '@/styles/globals.css';
import { LiffProvider } from './components/LiffProvider';

const inter = Inter({ subsets: ['latin'] });

export const metadata: Metadata = {
  title: 'LIFF App for App Router',
  description: 'Generated by create next app',
};

export default function RootLayout({ children }: { children: React.ReactNode }) {
  return (
    <html lang='en'>
      <body className={inter.className}>
        <LiffProvider liffId={process.env.NEXT_PUBLIC_LIFF_ID || ''}>
          {children}
        </LiffProvider>
      </body>
    </html>
  );
}
あとは、使いたいコンポーネントで、以下のようにuseLiffを呼び出すだけです!
'use client';
import { useLiff } from '@/app/components/LiffProvider';
import { Profile } from '@liff/get-profile';

import { useState } from 'react';

export function Profile() {
  const [profile, setProfile] = useState<Profile | null>(null);
  const { liff } = useLiff();

  useEffect(() => {
    if (liff?.isLoggedIn()) {
      (async () => {
        const profile = await liff.getProfile();
        setProfile(profile);
      })();
    }
  }, [liff]);

  return (
    <div>
      {profile && (
        <>
          {/* eslint-disable-next-line @next/next/no-img-element */},
          <img
            src={profile.pictureUrl}
            alt='profile'
            className='rounded-full w-20 h-20 mx-auto mb-4'
          />
          <p className='text-center font-bold text-xl'>userId: {profile.userId}</p>
          <p className='text-center text-gray-500'>displayName: {profile.displayName}</p>
        </>
      )}
      {profile ? (
        <button
          onClick={() => {
            liff?.logout();
            location.reload();
          }}
          className='bg-red-500 text-white px-4 py-2 mt-4 rounded-md hover:bg-red-600'
        >
          logout
        </button>
      ) : (
        <button
          onClick={() => liff?.login()}
          className='bg-blue-500 text-white px-4 py-2 mt-4 rounded-md hover:bg-blue-600'
        >
          login
        </button>
      )}
    </div>
  );
}
起動方法
以下コマンド実行後、ngrokのURLをアクセスします。
npm install
npm run dev

# 先ほど起動している状態なら必要ないです
# ※起動する度にURLが変わるので、LINE Developersで改めてURLを設定してください
ngrok http 3000
まとめ
これで、LIFFアプリをNext.jsのApp Routerを使用して開発する準備が整いました!
今回はngrokで確認をしていますが、最終的にはvercelでホスティングなどしてください。
NextjsでのLIFFアプリの記事が、増えることを祈っています☺️