はじめに
Google CloudのAI エージェントをフルマネージドで管理できるサービス「Vertex AI Agent Engine」(旧称 LangChain on Vertex AI、Vertex AI Reasoning Engine)がGAされました。
LangGraphで作成した簡易エージェントをデプロイしてみました。
Vertex AI Agent Engine
主な特徴として以下が挙げられています。
- フルマネージド
- セキュリティ (VPC Service Controls 対応) や管理機能を備えたランタイムで、エージェントを簡単デプロイ & スケーリング
- 品質 & 評価
- Vertex AI Rapid Evaluation サービスと統合し、エージェントの品質を確保
- 開発の簡素化
- アプリケーションサーバー開発や認証設定などのタスクを抽象化
- フレームワーク非依存
- LangGraph, LangChain, AG2, CrewAI に対応
デプロイ手順
インストール
pip install google-cloud-aiplatform[agent_engines,langchain,langgraph]
環境設定
Agent Engine では、デプロイされたエージェントのアーティファクトを Cloud Storage バケットにステージングします。
そのため、事前にバケットを作成しておきます。
Agent Engine の初期化を行います。
import vertexai
from vertexai import agent_engines

vertexai.init(
    project=PROJECT_ID,
    location=LOCATION,
    staging_bucket="gs://BUCKET_NAME",
)
エージェントの開発
LangChain、LangGraph、AG2、CrewAIなどのフレームワークを使用してエージェントを開発します。
今回は以前に作成したLangGraphでの簡易エージェントを使用します。
以下に全体のコードを記載しています。
全体のコード
LangGraphを構成する要素を定義します。
import os
os.environ["GOOGLE_API_KEY"] = GOOGLE_API_KEY

from typing import Annotated, Literal
from typing_extensions import TypedDict
from langgraph.graph import START ,END
from langgraph.graph import StateGraph
from langchain_core.tools import tool
from langchain_core.messages import HumanMessage, SystemMessage, ToolMessage
from langgraph.graph.message import add_messages
from langgraph.prebuilt import ToolNode
from langchain_google_genai import ChatGoogleGenerativeAI

# Stateを宣言
class State(TypedDict):
    messages: Annotated[list, add_messages]

@tool
def get_weather(location: str):
    """天気に関する情報を返す関数"""
    return f"{location}は晴れです。"

@tool
def get_population(location: str):
    """人口に関する情報を返す関数"""
    return f"{location}の人口は100人です。"

def should_continue(state: State) -> Literal["tools", END]:
    messages = state['messages']
    last_message = messages[-1]

    if last_message.tool_calls:
        return "tools"
    # Otherwise, we stop (reply to the user)
    return END
次にAgent Engine のエージェントテンプレートがあるので、それに沿ってクラスを定義します。
https://cloud.google.com/vertex-ai/generative-ai/docs/agent-engine/develop/custom?hl=ja
class LangGraphApp:
    def __init__(self, project: str, location: str) -> None:
        self.project_id = project
        self.location = location

    def set_up(self) -> None:
        def agents(state: State):
            state["messages"].append(model_with_tools.invoke(state["messages"]))
            return state

        tools = [get_weather, get_population]
        model = ChatVertexAI(model='gemini-1.5-flash', temperature=0)
        model_with_tools = model.bind_tools(tools)

        # Graphの作成
        graph = StateGraph(State)

        # Nodeの追加
        graph.add_node("agent", agents)
        tool_node = ToolNode(tools)
        graph.add_node("tools", tool_node)

        graph.add_edge("tools", 'agent')

        # Graphの始点を宣言
        graph.set_entry_point("agent")

        graph.add_conditional_edges(
            "agent",
            should_continue
        )

        self.runnable = graph.compile()

    def query(self, message: str):
        chat_history = self.runnable.invoke(message)

        return chat_history
serializeに関するエラーが発生したので、set_upメソッドに内部関数として定義したらエラー回避できました。
ローカルテスト
定義したAgent Engine のエージェントのインスタンスからローカルテスト実行できます。
agent_app = LangGraphApp(project=PROJECT_ID, location=LOCATION)
agent_app.set_up()

agent_app.query(message={"messages": "東京の天気は?"})

# AIMessage(content='東京は晴れです。'
期待する結果が返ってくることを確認できました。
デプロイ
エージェントオブジェクトを指定して、デプロイします。
パッケージの依存関係なども指定することもできます。
from vertexai import agent_engines

remote_agent = agent_engines.create(
    LangGraphApp(project=PROJECT_ID, location=LOCATION),
    requirements=[
        "google-cloud-aiplatform[agent_engines,langchain]",
        "cloudpickle>=3.0.0",
        "langgraph>=0.2.76",
        "pydantic>=2.10",
    ],
    display_name="LangGraphによるAgent Engine",
    description="Agent Engineのテスト",
    extra_packages=[],
)
デプロイ完了まで数分かかります。
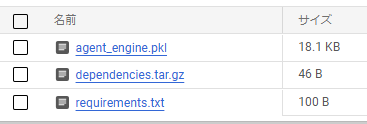
設定したCloud Storageのバケットにpickle化されたファイルとパッケージの依存関係のファイルが作成されてました。
実行
デプロイされた Agent Engineのインスタンスのquery()メソッドで実行します。
今回は Tools に天気と人口に関する定型文を返すように設定しています。
- 天気のことを聞かれたら
- {地名}は晴れです。
- 人口のことを聞かれたら
- {地名}の人口は100人です。
remote_agent.query(message={"messages": "東京の天気は?"})

# 'content': '東京は晴れです。',
remote_agent.query(message={"messages": "大阪の人口は?"})

# 'content': '大阪の人口は100人です。',
期待した結果が返ってきました!
デプロイしたエージェントの管理
一覧表示
agent_engines.list()で表示できます。
filterの引数でフィルタリングできます。
from vertexai import agent_engines

agent_engines.list(filter='display_name="LangGraphによるAgent Engine"')
取得
RESOURCE_IDを使用してエージェントを取得できます。
from vertexai import agent_engines

remote_agent = agent_engines.get("RESOURCE_ID")
更新
デプロイしたときと同じ引数で、更新したいフィールドを指定する。
from vertexai import agent_engines

agent_engines.update(
    resource_name=RESOURCE_NAME,    # Required.
    ...
)
削除
remote_agent.delete()
おわりに
Vertex AI Agent Engineを使用して、AIエージェントをデプロイしてみました。
LangGraphで作成したコードを使用して、簡単にデプロイすることができました。
AIエージェント開発が加速し、様々なシーンでAIの活用が広がっていきそうな感じがしました。
今後のアップデートなどにも注目して、動向を追っていきたいと思います!