ASP.NET Core、.NET8でのJWT認証の追加 ![]()
Microsoft.AspNetCore.Authentication.JwtBearerを使用します。
パッケージを追加
dotnet add package Microsoft.AspNetCore.Authentication.JwtBearer --version 8.0.2
WeatherForecastのAPI動作確認
GETでJSONが取得できることを確認します。

JWT認証の設定を設定ファイルに記述します。
{
  "Jwt": {
    "Issuer": "https://localhost:5115",
    "Audience": "https://localhost:5115",
    "Key": "SECRET_KEY"
  }
}
エントリーポイントにJWT認証の設定を追加します。
using Microsoft.AspNetCore.Authentication.JwtBearer;
using Microsoft.IdentityModel.Tokens;
using System.Text;

var builder = WebApplication.CreateBuilder(args);

// JWT認証の設定
builder.Services.AddAuthentication(JwtBearerDefaults.AuthenticationScheme)
    .AddJwtBearer(options =>
{
    options.TokenValidationParameters =
    new TokenValidationParameters
    {
        ValidIssuer = builder.Configuration["Jwt:Issuer"],
        ValidAudience = builder.Configuration["Jwt:Audience"],
        IssuerSigningKey = new SymmetricSecurityKey
            (Encoding.UTF8.GetBytes(builder.Configuration["Jwt:Key"])),
        ValidateIssuer = true,
        ValidateAudience = true,
        ValidateLifetime = false,
        ValidateIssuerSigningKey = true
    };
});

builder.Services.AddControllers();
// Learn more about configuring Swagger/OpenAPI at https://aka.ms/aspnetcore/swashbuckle
builder.Services.AddEndpointsApiExplorer();
builder.Services.AddSwaggerGen();

var app = builder.Build();

// Configure the HTTP request pipeline.
if (app.Environment.IsDevelopment())
{
    app.UseSwagger();
    app.UseSwaggerUI();
}

// 認証と承認の機能を有効にする
app.UseAuthentication();
app.UseAuthorization();

app.MapControllers();

app.Run();
APIコントローラー側に[Authorize]アノテーションを追加します。
using Microsoft.AspNetCore.Authorizationが必要です。
using Microsoft.AspNetCore.Authorization;
using Microsoft.AspNetCore.Mvc;

namespace WebApiJwt.Controllers
{
    [ApiController]
    [Route("[controller]")]
    public class WeatherForecastController : ControllerBase
    {
        private static readonly string[] Summaries = new[]
        {
            "Freezing", "Bracing", "Chilly", "Cool", "Mild", "Warm", "Balmy", "Hot", "Sweltering", "Scorching"
        };

        private readonly ILogger<WeatherForecastController> _logger;

        public WeatherForecastController(ILogger<WeatherForecastController> logger)
        {
            _logger = logger;
        }

        [Authorize]
        [HttpGet(Name = "GetWeatherForecast")]
        public IEnumerable<WeatherForecast> Get()
        {
            return Enumerable.Range(1, 5).Select(index => new WeatherForecast
            {
                Date = DateOnly.FromDateTime(DateTime.Now.AddDays(index)),
                TemperatureC = Random.Shared.Next(-20, 55),
                Summary = Summaries[Random.Shared.Next(Summaries.Length)]
            })
            .ToArray();
        }
    }
}
これで準備OKです ![]()
WeatherForecastのAPI動作確認(認証の設定後)
今度はGETで401が返却されていることを確認します。

認証されていないので、JSONが取得できなくなっていることが分かります。
トークンの生成
このままではAPIを実行できないので、JWT認証する際のトークンを生成するクラスを用意します。
using Microsoft.IdentityModel.Tokens;
using System.IdentityModel.Tokens.Jwt;
using System.Security.Claims;
using System.Text;

namespace WebApiJwt.Services
{
    public static class TokenService
    {
        public static string GenerateToken(string key, string issuer, string audience, string userName, string email)
        {
            var securityKey = new SymmetricSecurityKey(Encoding.UTF8.GetBytes(key));
            var credentials = new SigningCredentials(securityKey, SecurityAlgorithms.HmacSha256);

            var claims = new[]
            {
                new Claim(JwtRegisteredClaimNames.Sub, userName),
                new Claim(JwtRegisteredClaimNames.Email, email),
                new Claim(JwtRegisteredClaimNames.Jti, Guid.NewGuid().ToString())
            };

            var token = new JwtSecurityToken(
                issuer: issuer,
                audience: audience,
                claims: claims,
                expires: DateTime.Now.AddHours(1),
                signingCredentials: credentials);

            return new JwtSecurityTokenHandler().WriteToken(token);
        }
    }
}
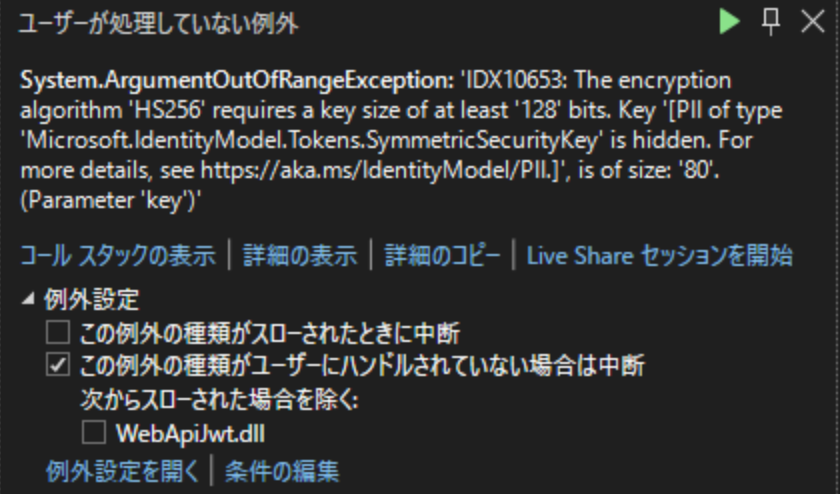
SymmetricSecurityKey(Encoding.UTF8.GetBytes(key))の引数に渡すkeyは、少なくとも128ビット(16バイト)のサイズを要求されます。短すぎるとArgumentOutOfRangeExceptionの例外が発生します。
サンプルとして、AuthControllerでログイン処理をする際に、ユーザーにトークンを返すAPIを実装します。
using Microsoft.AspNetCore.Http;
using Microsoft.AspNetCore.Mvc;
using WebApiJwt.Services;

namespace WebApiJwt.Controllers
{
    [Route("api/[controller]")]
    [ApiController]
    public class AuthController : ControllerBase
    {
        private readonly IConfiguration _configuration;

        public AuthController(IConfiguration configuration)
        {
            _configuration = configuration;
        }

        [HttpPost("login")]
        public IActionResult Login([FromBody] UserLoginModel model)
        {
            // ここでデータベース照合等のユーザー認証を行う
            // サンプルは、メールアドレスとパスワードが一致する場合に成功とします
            if (model.Email == "admin@sample.com" && model.Password == "admin")
            {
                var token = TokenService.GenerateToken(
                    _configuration["Jwt:Key"],
                    _configuration["Jwt:Issuer"],
                    _configuration["Jwt:Audience"],
                    model.UserName,
                    model.Email);

                return Ok(new { token = token });
            }
            return Unauthorized();
        }

        public class UserLoginModel
        {
            public string UserName { get; set; }
            public string Password { get; set; }
            public string Email { get; set; }
        }
    }
}
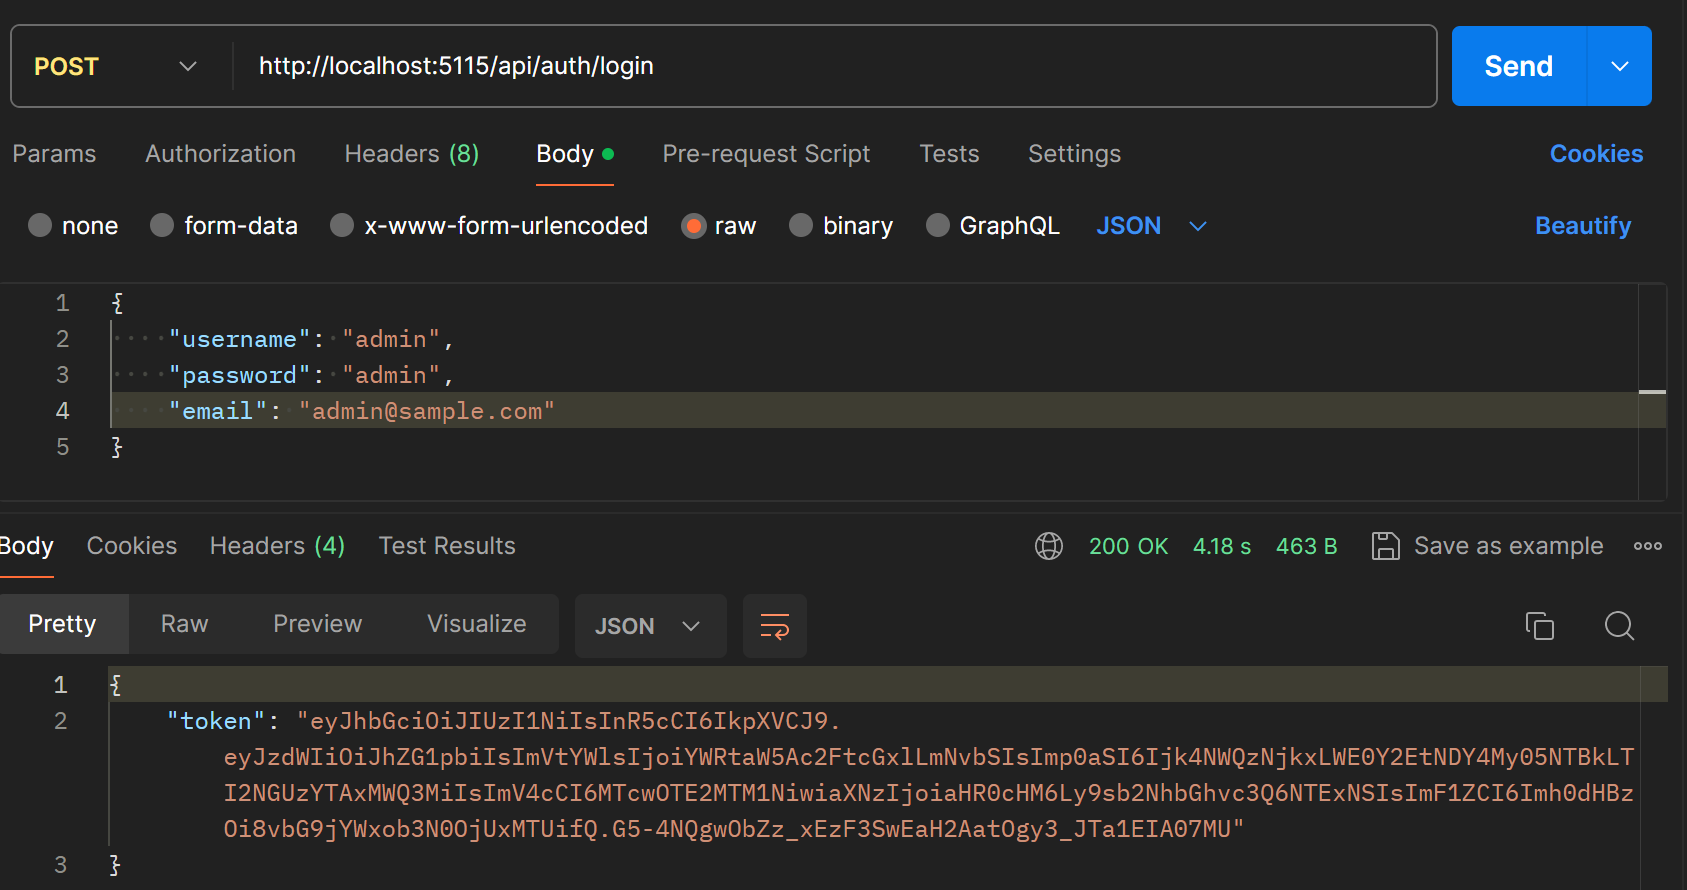
postmanで実行すると、トークンが取得できています。
取得したトークンを使って、JWT認証が必要なAPIを実行します。
postmanのAuthorizationでBearer Tokenを選択し、先ほど取得したトークンを入力した上でGETリクエストします。

トークンが認証され、JSONが取得できればOKです ![]()
curlを利用した例
curl -X GET "http://localhost:5115/WeatherForecast" -H "Authorization: Bearer {ここにトークンを貼り付け}"
TokenValidationParameters
以下、パラメータについての解説です。
ValidIssuer
トークン発行者を検証するための文字列です。トークンが信頼できる発行者によって発行されたことを確認するために使用されます。
ValidAudience
トークンの受信者を検証するための文字列です。トークンが意図した受信者(または観客)に送られていることを保証します。
IssuerSigningKey
トークンの署名を検証するためのキーです。トークンが途中で改ざんされていないことを確認するために使用されます。
ValidateIssuer
発行者の検証を有効または無効にします。trueの場合、トークンのクレームがValidIssuerと一致することを要求します。
ValidateAudience
受信者の検証を有効または無効にします。trueの場合、トークンのクレームがValidAudienceと一致することを要求します。
ValidateLifetime
トークンの有効期間(nbfとexpクレーム)の検証を有効または無効にします。ここではfalseに設定されているため、トークンの有効期間は検証されません。
ValidateIssuerSigningKey
発行者の署名キーの検証を有効または無効にします。trueの場合、トークンが指定されたIssuerSigningKeyで署名されていることを確認します。