0.はじめに
Tanzu Community Edition (以下 TCE )は Cluster API の仕組みを利用した OSS の マネージド Kubernetes ソリューションです。
TCE は複数の Cloud Infrastructure provider をサポートしており、Azure も対象となっているようなので、OSS ということもあり、ちょっとためしてみました。
1.事前準備
それでは、早速 Azure へのデプロイに向けて、上記公式ドキュメントの内容に沿って準備していきます。
環境が整っていれば、” Azure サービスプリンシパルアカウントの作成部分”以外は、特につまづくようなところは無いと思います。
General Requirements
- Ensure Tanzu Community Edition is installed locally on your bootstrap machine. See Install Tanzu Community Edition.
- Ensure the Azure CLI is installed locally. See Install the Azure CLI in the Microsoft Azure documentation.
- Your Microsoft Azure account should meet the permissions and requirements described in the Microsoft Azure account topic.
- Register Tanzu Community Edition as an Azure Client App. The full procedure is provided below: Register Tanzu Community Edition as a Microsoft Azure Client App.
- Accept the Base Image License. The full procedure is provided below: Accept the Base Image License.
- If you plan to use an existing VNET, see the Network Security Groups on Microsoft Azure topic for guidelines.
- (Optional) Create an SSH keypair. The full procedure is described below: Create an SSH Key Pair.
- (Optional) For information about the configurations of the different sizes of node instances for Microsoft Azure, for example, Standard_D2s_v3 or Standard_D4s_v3, see Sizes for virtual machines in Azure in the Microsoft Azure documentation.
- ブートストラップマシンに TCE クライアントをインストール
- Azure CLI をインストール
- TCE クライアント用の Azure サービスプリンシパルアカウントの作成
- Azure のサブスクリプションで、TCE で利用する Kubernetes 等 VM のベースイメージライセンスの同意
- その他オプションなど
1.1. ブートストラップマシンに TCE クライアントをインストール
上記公式ドキュメントの内容にしたがい、最新の Kubectl と tce クライアントアプリをローカルの Mac へインストールします。
~/azurework/tce $ docker --version
Docker version 20.10.8, build 3967b7d
~/azurework/tce $
~/azurework $ mkdir tce
~/azurework $ cd tce/
~/azurework/tce $ curl -LO "https://dl.k8s.io/release/$(curl -L -s https://dl.k8s.io/release/stable.txt)/bin/darwin/amd64/kubectl"
  % Total    % Received % Xferd  Average Speed   Time    Time     Time  Current
                                 Dload  Upload   Total   Spent    Left  Speed
100   154  100   154    0     0    911      0 --:--:-- --:--:-- --:--:--   962
100 50.6M  100 50.6M    0     0  42.0M      0  0:00:01  0:00:01 --:--:-- 65.4M
~/azurework/tce $ ls
kubectl
~/azurework/tce $ chmod +x ./kubectl
~/azurework/tce $ sudo mv ./kubectl /usr/local/bin/kubectl
Password:
~/azurework/tce $ sudo chown root: /usr/local/bin/kubectl
~/azurework/tce $ kubectl version --client
Client Version: version.Info{Major:"1", Minor:"22", GitVersion:"v1.22.4", GitCommit:"b695d79d4f967c403a96986f1750a35eb75e75f1", GitTreeState:"clean", BuildDate:"2021-11-17T15:48:33Z", GoVersion:"go1.16.10", Compiler:"gc", Platform:"darwin/amd64"}
~/azurework/tce $
~/azurework/tce $ brew install vmware-tanzu/tanzu/tanzu-community-edition
Updating Homebrew...
==> Auto-updated Homebrew!
Updated 2 taps (hashicorp/tap and homebrew/core).
==> New Formulae
libsoup@2                                rizin                                    symengine
==> Updated Formulae
Updated 271 formulae.
==> Renamed Formulae
rt-audio -> rtaudio

==> Tapping vmware-tanzu/tanzu
Cloning into '/usr/local/Homebrew/Library/Taps/vmware-tanzu/homebrew-tanzu'...
remote: Enumerating objects: 89, done.
remote: Counting objects: 100% (89/89), done.
remote: Compressing objects: 100% (71/71), done.
remote: Total 89 (delta 37), reused 44 (delta 14), pack-reused 0
Unpacking objects: 100% (89/89), done.
Tapped 1 formula (114 files, 101.3KB).
==> Downloading https://github.com/vmware-tanzu/community-edition/releases/download/v0.9.1/tce-darwin-amd64-v0.9.1.tar.gz
==> Downloading from https://github-releases.githubusercontent.com/303802332/f34557b0-acad-41d4-a12a-2447425849fd?X-Amz-Alg
######################################################################## 100.0%
==> Installing tanzu-community-edition from vmware-tanzu/tanzu
==> Thanks for installing Tanzu Community Edition!
==> The Tanzu CLI has been installed on your system
==>

==> ******************************************************************************
==> * To initialize all plugins required by Tanzu Community Edition, an additional
==> * step is required. To complete the installation, please run the following
==> * shell script:
==> *
==> * /usr/local/Cellar/tanzu-community-edition/v0.9.1/libexec/configure-tce.sh
==> *
==> ******************************************************************************
==>

==> * To cleanup and remove Tanzu Community Edition from your system, run the
==> * following script:
==> /usr/local/Cellar/tanzu-community-edition/v0.9.1/libexec/uninstall.sh
==>

🍺  /usr/local/Cellar/tanzu-community-edition/v0.9.1: 15 files, 642.6MB, built in 12 seconds
~/azurework/tce $
~/azurework/tce $ /usr/local/Cellar/tanzu-community-edition/v0.9.1/libexec/configure-tce.sh
MY_DIR: /usr/local/Cellar/tanzu-community-edition/v0.9.1/libexec
/Users/tbuchi888/Library/Application Support
Removing old plugin cache from /Users/tbuchi888/.cache/tanzu/catalog.yaml
Making a backup of your Kubernetes config files into /tmp
| initializing ✔  successfully initialized CLI
Installation complete!
~/azurework/tce $ tanzu version
version: v0.2.1
buildDate: 2021-09-29
sha: ceaa474
1.2. Azure CLIをインストール
Mac なので brew で入れます。
~/azurework/tce $ brew update && brew install azure-cli
Already up-to-date.
Warning: azure-cli 2.30.0_1 is already installed and up-to-date.
To reinstall 2.30.0_1, run:
  brew reinstall azure-cli
~/azurework/tce $
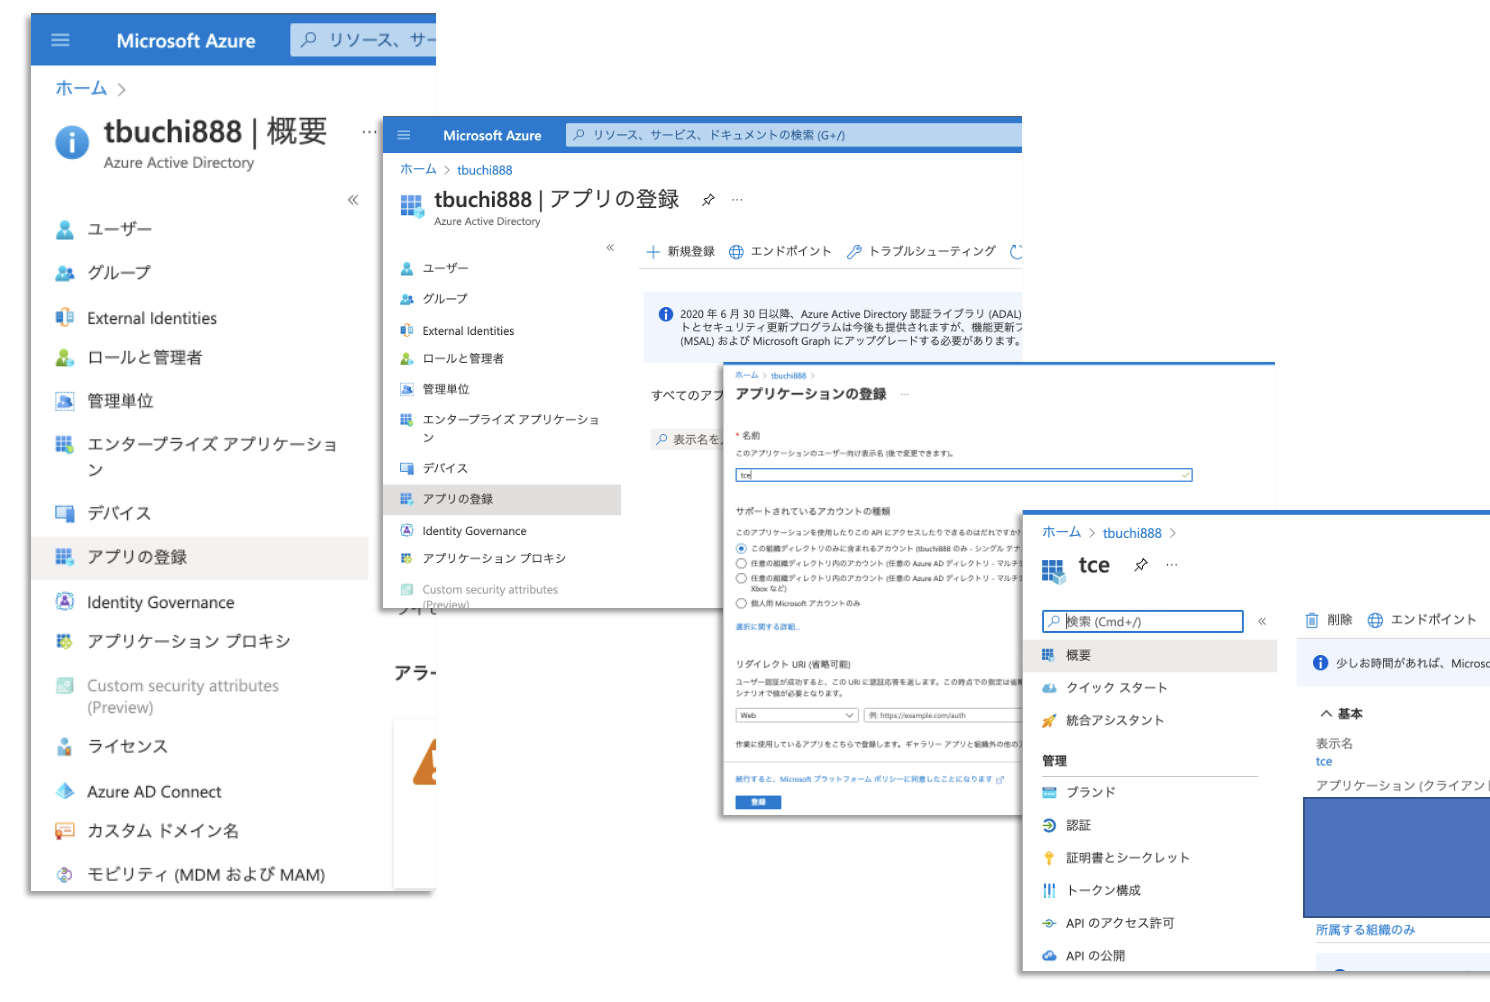
1.3. TCE クライアント用の Azure サービスプリンシパルアカウントの作成
こちらは、ちょっと慣れていないと、つまづきポイントかもしれません。
サービスプリンシパルの概念などちょっと難しいのですが、ブートストラップ k8s より、Azure 上でリソースを作成可能な TCE 専用のアカウントを作成します。
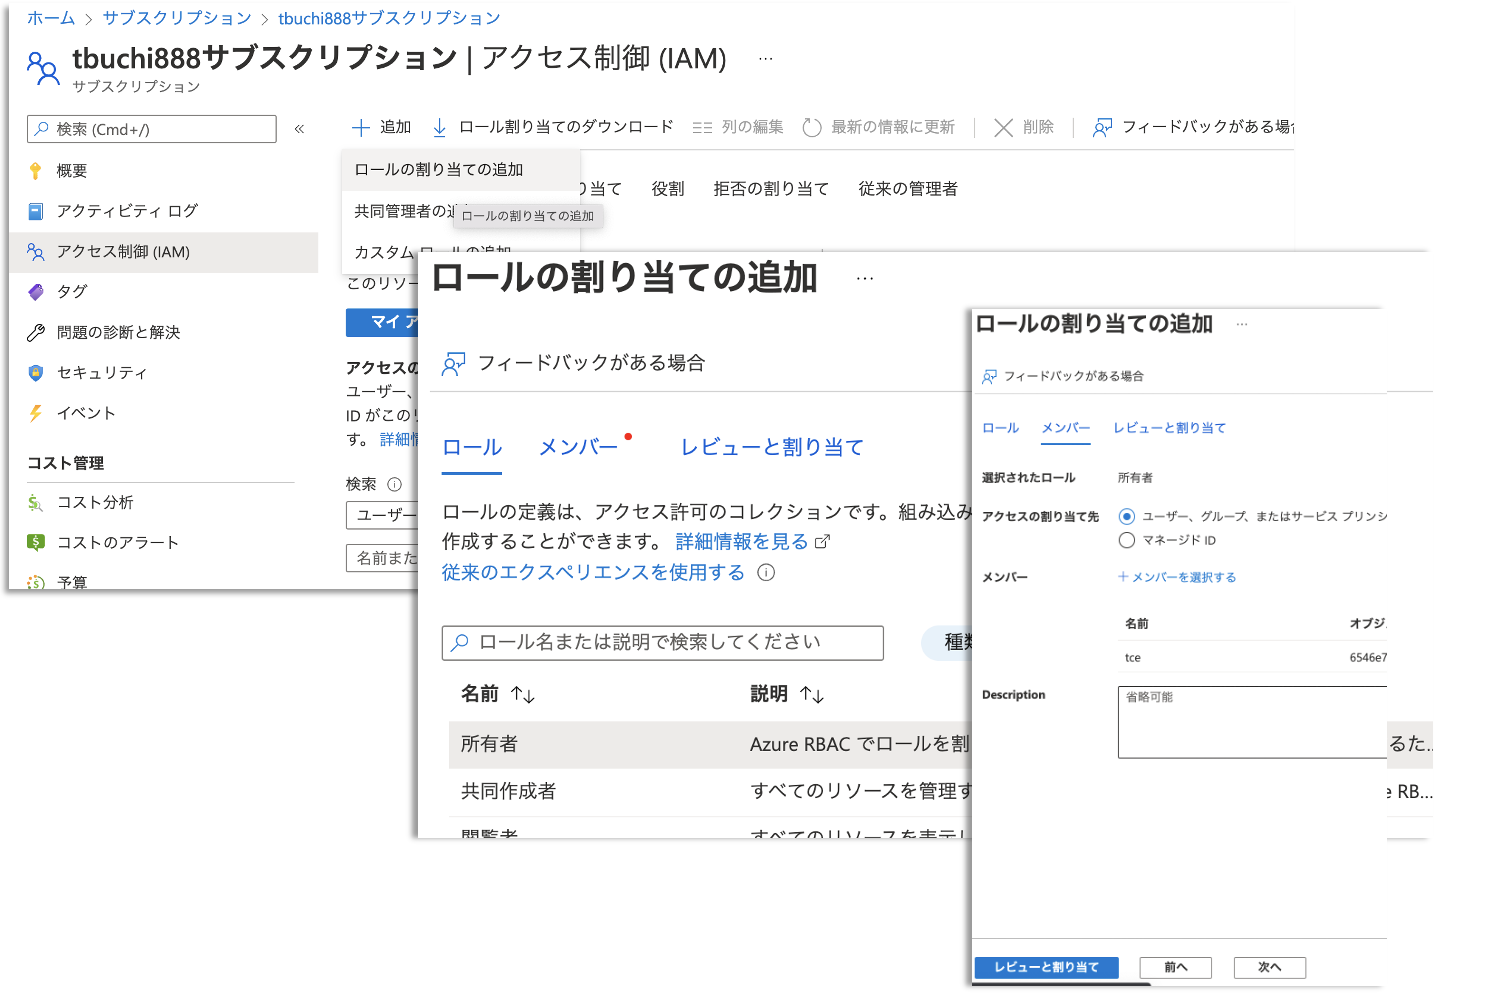
ドキュメントでは、Azure のサブスクリプションに対して、Owner権限を割り当てるようになっていますが、本来は、デプロイ対象のリソースグループへのContoributer権限ぐらいにとどめたいところです。
ただし、今回はドキュメントの指示通りに対応しました。
なお、Azure サービスプリンシパル関連については以下 MS のドキュメントが参考になるかと思います。
https://docs.microsoft.com/ja-jp/azure/active-directory/develop/howto-create-service-principal-portal
https://docs.microsoft.com/ja-jp/cli/azure/create-an-azure-service-principal-azure-cli
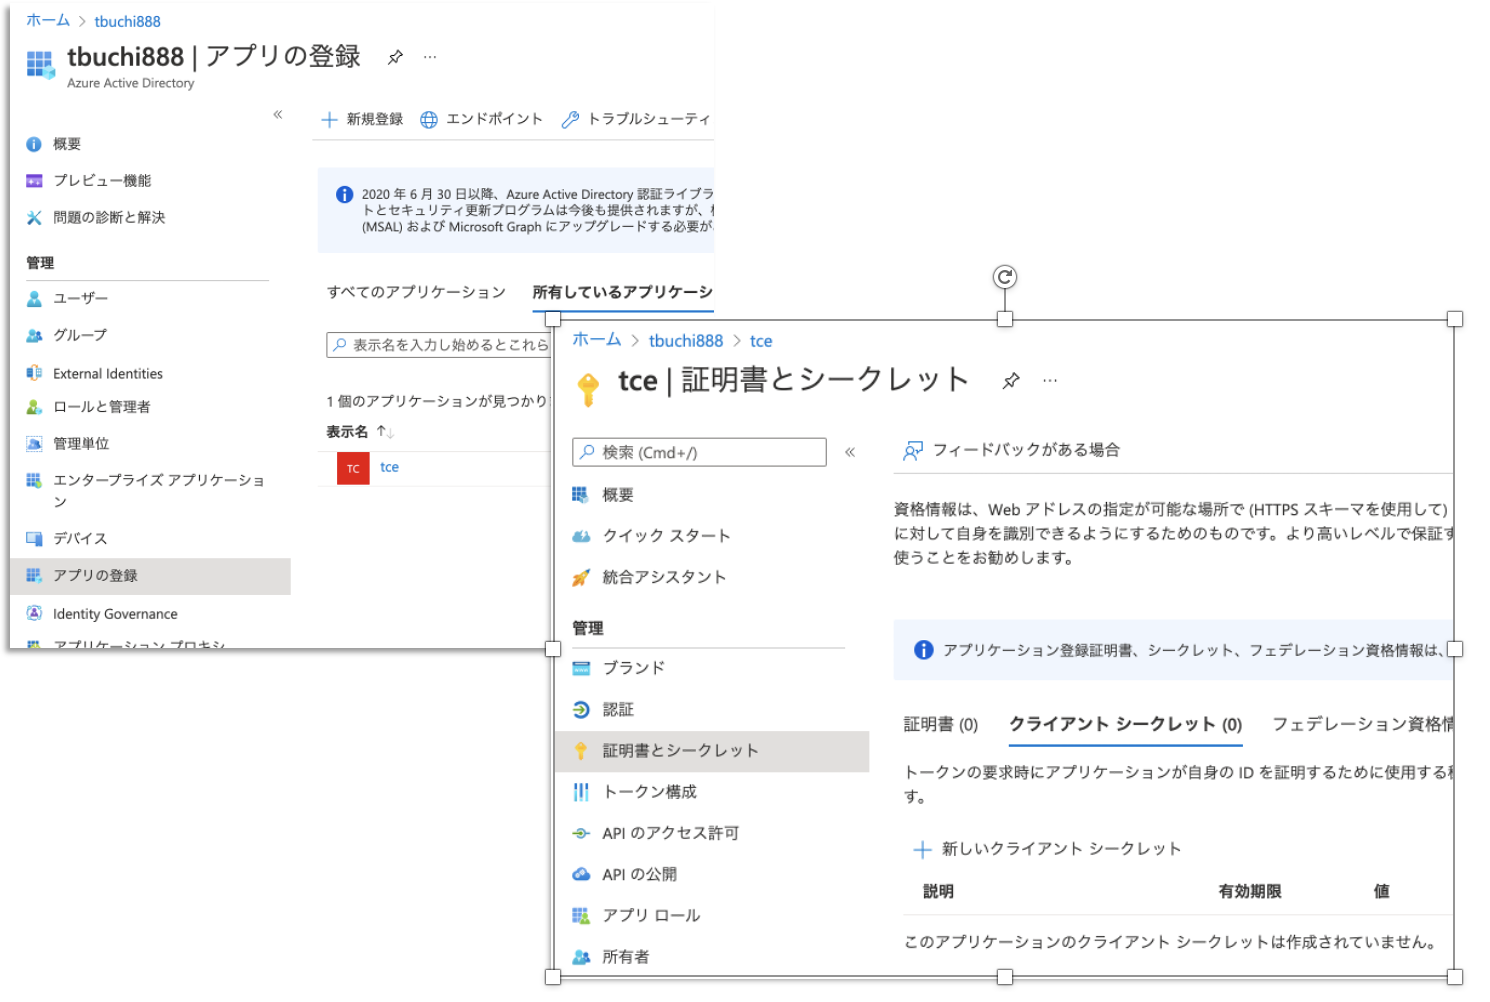
参考までに画面操作のスクリーンショットをいくつか貼っておきます。
1.4. Azure のサブスクリプションについて、 TCE で利用する Kubernetes 等 VM のベースイメージライセンスの同意
サービスプリンシパルの情報を環境変数へ設定し、 az コマンドよりログインし、VM のベースイメージのライセンスに同意します。
~/azurework/tce $ AZURE_CLIENT_ID=XXXXXXX
~/azurework/tce $ AZURE_CLIENT_SECRET=XXXXXXXXX
~/azurework/tce $ AZURE_TENANT_ID=XXXXXXX
~/azurework/tce $ az login --service-principal --username $AZURE_CLIENT_ID -p=$AZURE_CLIENT_SECRET --tenant $AZURE_TENANT_ID
[
  {
    "cloudName": "AzureCloud",
    "homeTenantId": "xxxxxxxx",
    "id": "xxxxxxxx",
    "isDefault": true,
    "managedByTenants": [],
    "name": "tbuchi888サブスクリプション",
    "state": "Enabled",
    "tenantId": "xxxxxx,
    "user": {
      "name": "xxxxxxx",
      "type": "servicePrincipal"
    }
  }
]

~/azurework/tce $ AZURE_SUBSCRIPTION_ID=xxxxx
~/azurework/tce $ az vm image terms accept --publisher vmware-inc --offer tkg-capi --plan k8s-1dot21dot2-ubuntu-2004 --subscription $AZURE_SUBSCRIPTION_ID
{
  "accepted": true,
  "id": "/subscriptions/xxxxxxxxxxxxxxxx/providers/Microsoft.MarketplaceOrdering/offerTypes/Microsoft.MarketplaceOrdering/offertypes/publishers/vmware-inc/offers/tkg-capi/plans/k8s-1dot21dot2-ubuntu-2004/agreements/current",
  "licenseTextLink": "https://mpcprodsa.blob.core.windows.net/legalterms/3E5ED_legalterms_VMWARE%253a2DINC%253a24TKG%253a2DCAPI%253a24K8S%253a2D1DOT21DOT2%253a2DUBUNTU%253a2D2004%253a24KQJXKK2NIUVNWR2B7X4J2ZWNZGFLGIQPBB46SSI4WO32VUTVGS6WFNL5JR3J6WPKJZK5YCCZV7WEHQGADEWGPC7PEJHUIA2S4ONKRFY.txt",
  "marketplaceTermsLink": "https://mpcprodsa.blob.core.windows.net/marketplaceterms/3EDEF_marketplaceterms_VIRTUALMACHINE%253a24AAK2OAIZEAWW5H4MSP5KSTVB6NDKKRTUBAU23BRFTWN4YC2MQLJUB5ZEYUOUJBVF3YK34CIVPZL2HWYASPGDUY5O2FWEGRBYOXWZE5Y.txt",
  "name": "k8s-1dot21dot2-ubuntu-2004",
  "plan": "k8s-1dot21dot2-ubuntu-2004",
  "privacyPolicyLink": "https://www.vmware.com/help/privacy/products-and-services-notice.html",
  "product": "tkg-capi",
  "publisher": "vmware-inc",
  "retrieveDatetime": "2021-11-27T02:08:00.7298649Z",
  "signature": "XXXXXXXXXXXXXXXXXXXXXXXXXXXXXXXXXXXXXXXXXXXXXXXX",
  "systemData": {
    "createdAt": "2021-11-27T02:08:04.906571+00:00",
    "createdBy": "68bb78e0-167e-4b8e-8267-c330c120174a",
    "createdByType": "ManagedIdentity",
    "lastModifiedAt": "2021-11-27T02:08:04.906571+00:00",
    "lastModifiedBy": "68bb78e0-167e-4b8e-8267-c330c120174a",
    "lastModifiedByType": "ManagedIdentity"
  },
  "type": "Microsoft.MarketplaceOrdering/offertypes"
}
~/azurework/tce $
1.5. その他オプションなど
If you plan to use an existing VNET, see the Network Security Groups on Microsoft Azure topic for guidelines.
今回は、新規作成なのでスキップします。
(Optional) Create an SSH keypair. The full procedure is described below: Create an SSH Key Pair.
こちらも既存のキーペアを利用するのでスキップします。
(Optional) For information about the configurations of the different sizes of node instances for Microsoft Azure, for example, Standard_D2s_v3 or Standard_D4s_v3, see Sizes for virtual machines in Azure in the Microsoft Azure documentation.
VM サイズについては、のちほどクラスタ作成の際に出てきますが、 AKS でのノードプールのデフォルトのノードサイズStandard_D2s_v3を参考にしてみようと思います。
以上で事前準備完了です。
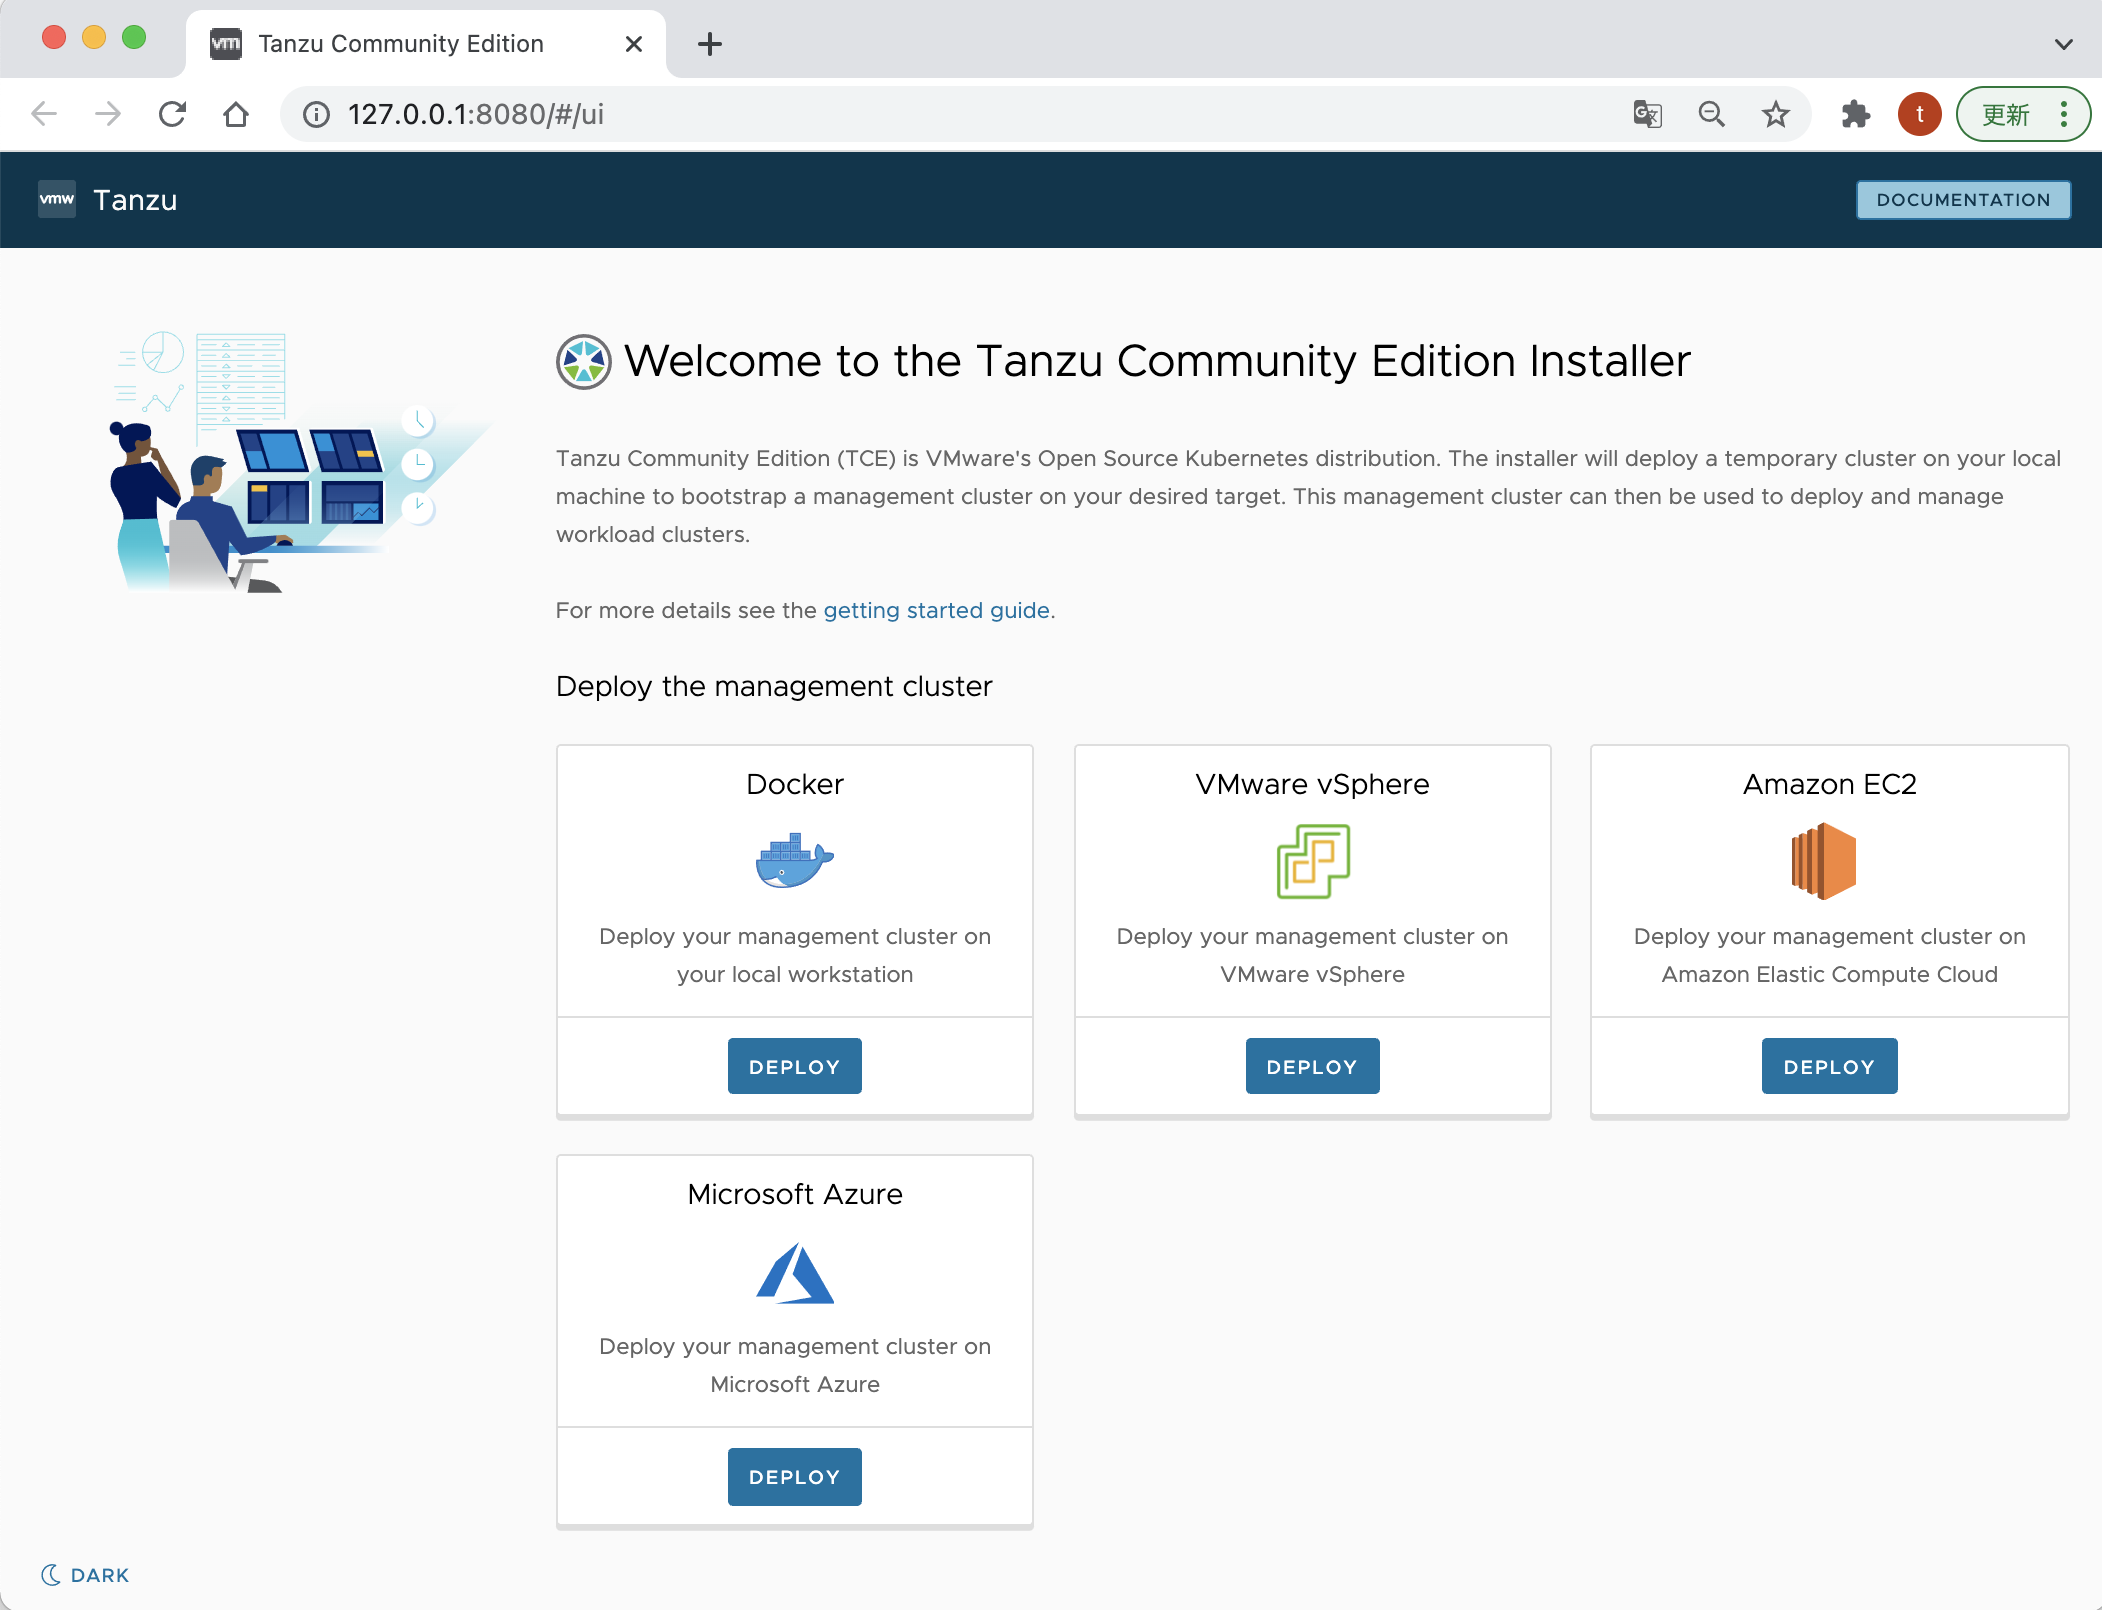
2. TCE Management Cluster を Azure へデプロイする
いよいよ、デプロイ開始です。
まずは、マネジメントクラスターと呼ばれる、K8s を管理する K8s クラスタを作成します。
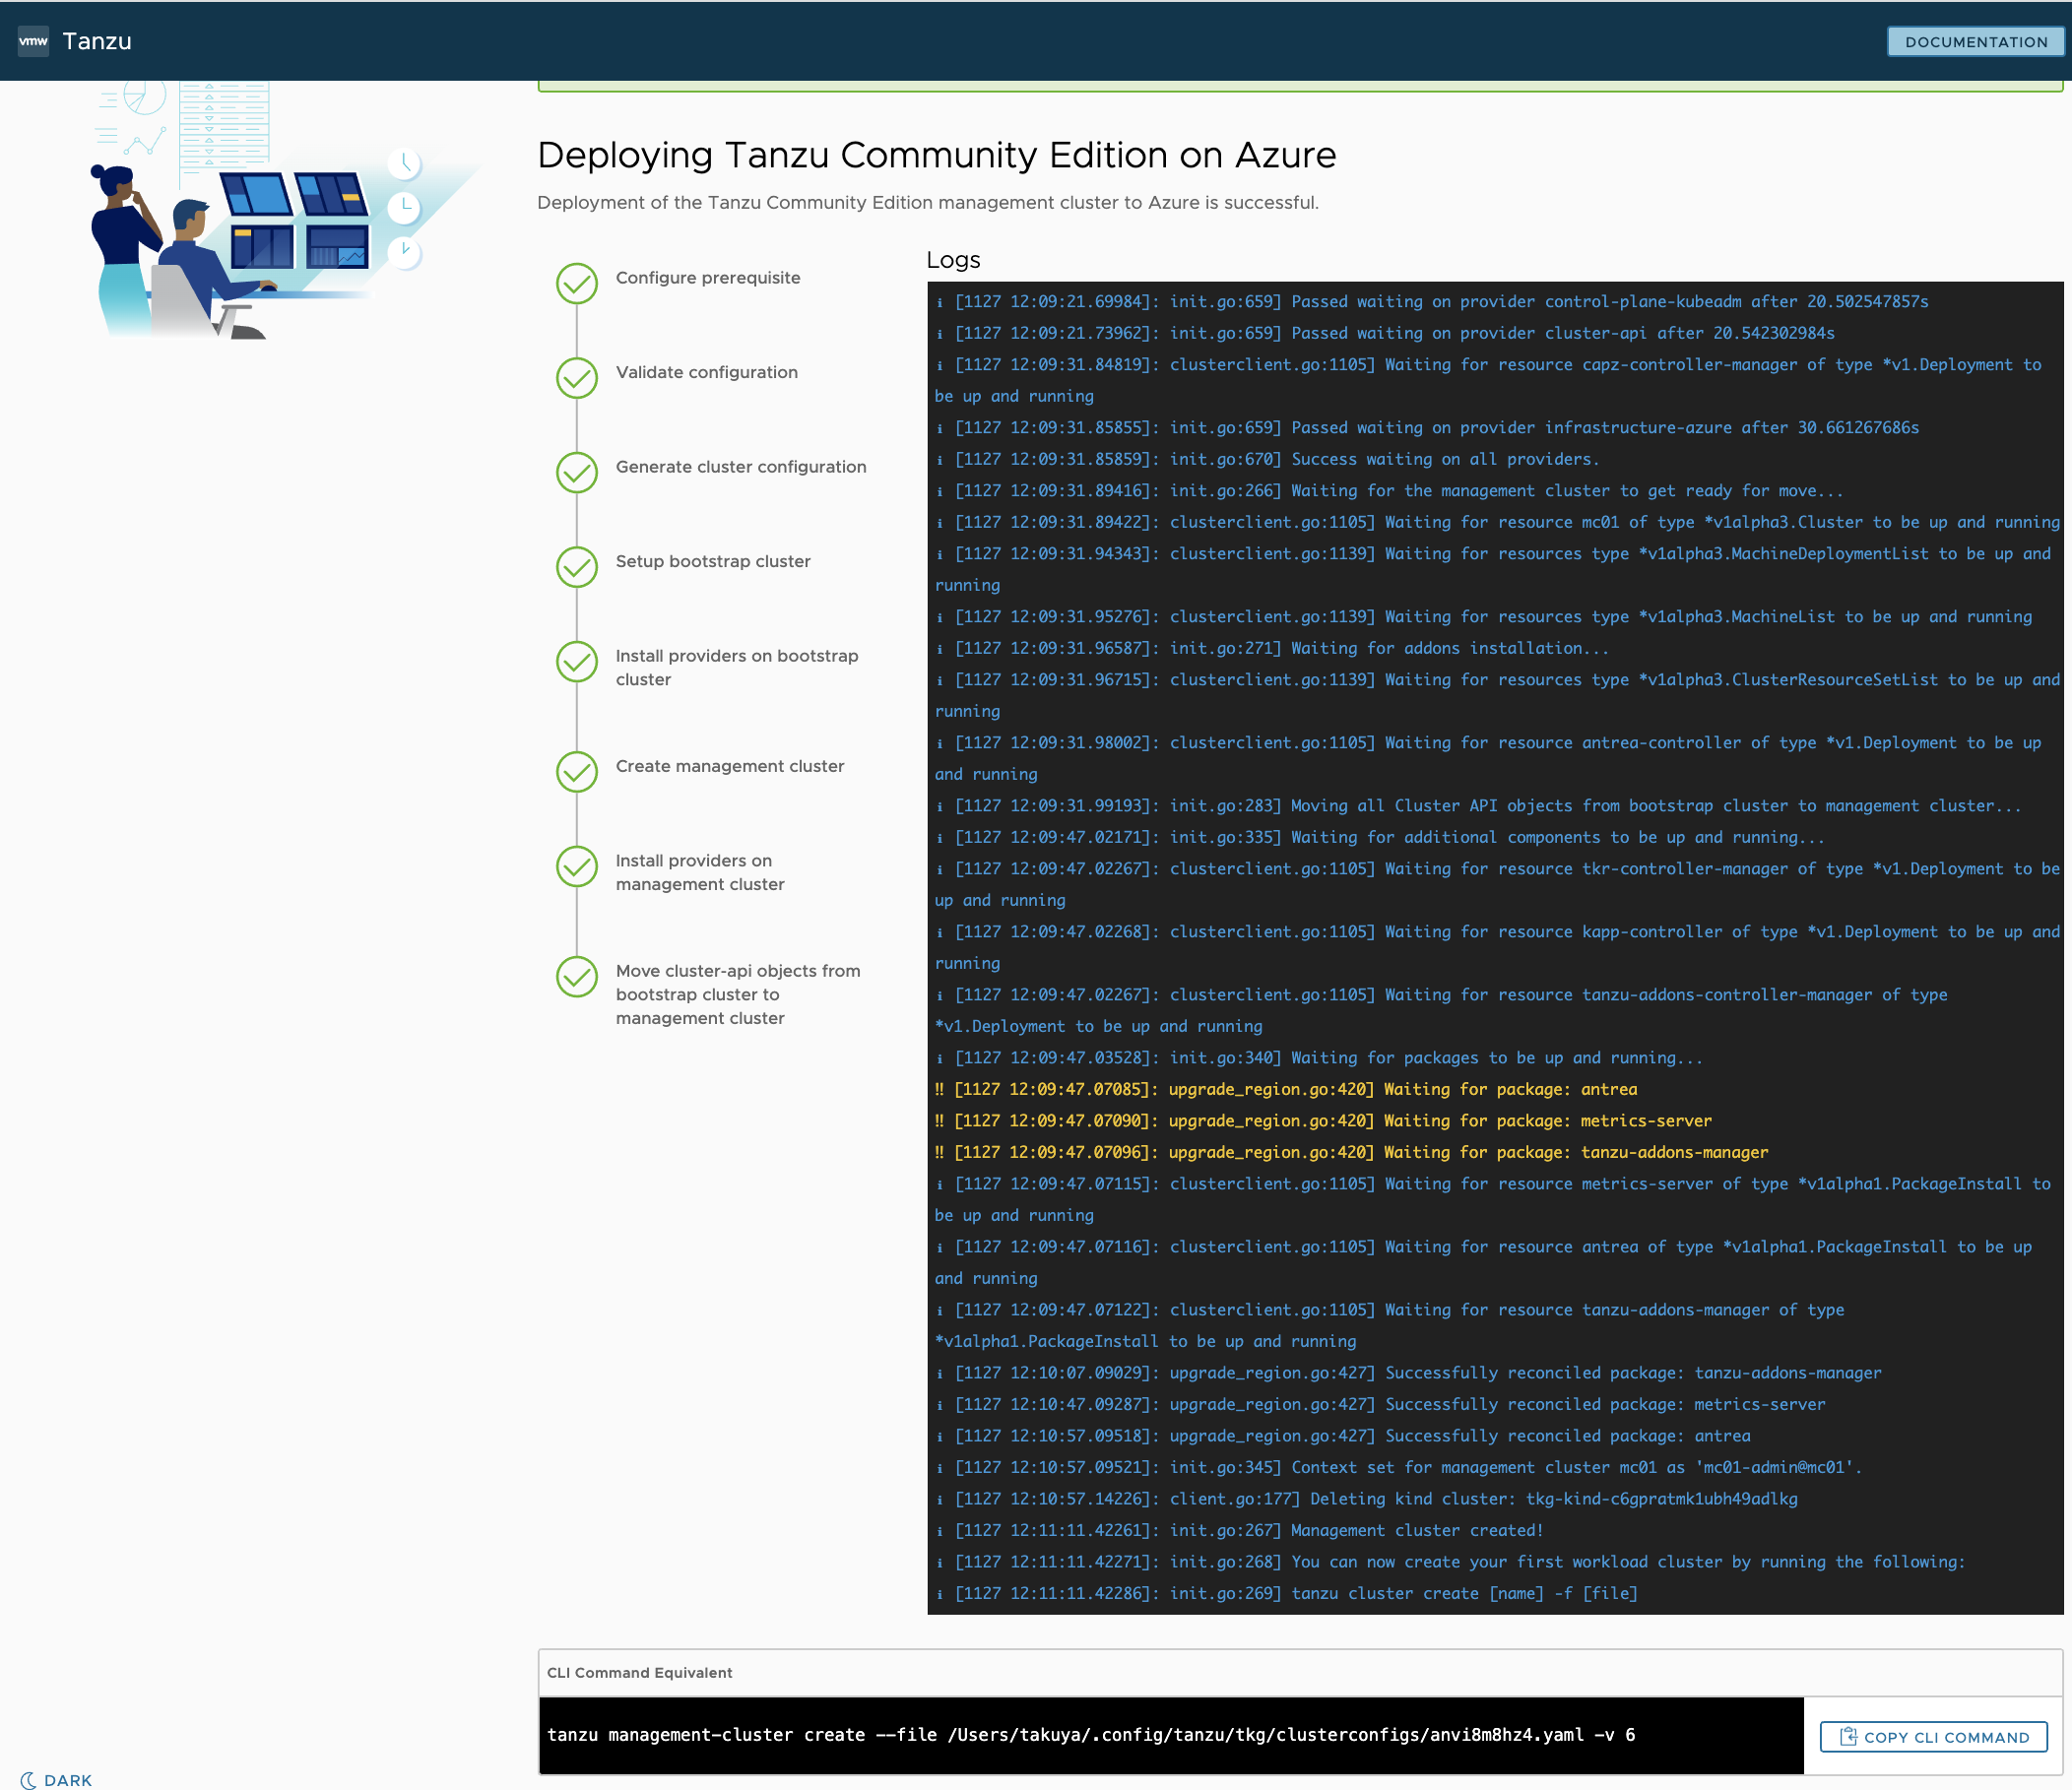
以下でインストール用の WebUI が起動しますので、ウィザードに従い、項目を入力していくと、以下のような設定ファイルが自動生成され、 WebUI または、CLI からマネジメントクラスターを Azure 上へデプロイ可能です。
個人的には、懐かしい WEBUI でした。画面もシンプルでウィザード形式なので分かりやすいと思います。
tanzu management-cluster create --file /Users/takuya/.config/tanzu/tkg/clusterconfigs/anvi8m8hz4.yaml -v 6
~/azurework/tce $ tanzu management-cluster create --ui
Downloading TKG compatibility file from 'projects.registry.vmware.com/tkg/framework-zshippable/tkg-compatibility'
Downloading the TKG Bill of Materials (BOM) file from 'projects.registry.vmware.com/tkg/tkg-bom:v1.4.0'
Downloading the TKr Bill of Materials (BOM) file from 'projects.registry.vmware.com/tkg/tkr-bom:v1.21.2_vmware.1-tkg.1'
ERROR 2021/11/27 11:36:31 svType != tvType; key=release, st=map[string]interface {}, tt=<nil>, sv=map[version:], tv=<nil>

Validating the pre-requisites...
Serving kickstart UI at http://127.0.0.1:8080
Identity Provider not configured. Some authentication features won't work.
Validating configuration...
web socket connection established
sending pending 2 logs to UI
Using infrastructure provider azure:v0.4.15
Generating cluster configuration...
Setting up bootstrapper...
Bootstrapper created. Kubeconfig: /Users/tbuchi888/.kube-tkg/tmp/config_l101jQ1s
Installing providers on bootstrapper...
Fetching providers
Installing cert-manager Version="v1.1.0"
Waiting for cert-manager to be available...
Installing Provider="cluster-api" Version="v0.3.23" TargetNamespace="capi-system"
Installing Provider="bootstrap-kubeadm" Version="v0.3.23" TargetNamespace="capi-kubeadm-bootstrap-system"
Installing Provider="control-plane-kubeadm" Version="v0.3.23" TargetNamespace="capi-kubeadm-control-plane-system"
Installing Provider="infrastructure-azure" Version="v0.4.15" TargetNamespace="capz-system"
Start creating management cluster...
Saving management cluster kubeconfig into /Users/tbuchi888/.kube/config
Installing providers on management cluster...
Fetching providers
Installing cert-manager Version="v1.1.0"
Waiting for cert-manager to be available...
Installing Provider="cluster-api" Version="v0.3.23" TargetNamespace="capi-system"
Installing Provider="bootstrap-kubeadm" Version="v0.3.23" TargetNamespace="capi-kubeadm-bootstrap-system"
Installing Provider="control-plane-kubeadm" Version="v0.3.23" TargetNamespace="capi-kubeadm-control-plane-system"
Installing Provider="infrastructure-azure" Version="v0.4.15" TargetNamespace="capz-system"
Waiting for the management cluster to get ready for move...
Waiting for addons installation...
Moving all Cluster API objects from bootstrap cluster to management cluster...
Performing move...
Discovering Cluster API objects
Moving Cluster API objects Clusters=1
Creating objects in the target cluster
Deleting objects from the source cluster
Waiting for additional components to be up and running...
Waiting for packages to be up and running...
Context set for management cluster mc01 as 'mc01-admin@mc01'.

Management cluster created!


You can now create your first workload cluster by running the following:

  tanzu cluster create [name] -f [file]

~/azurework/tce $
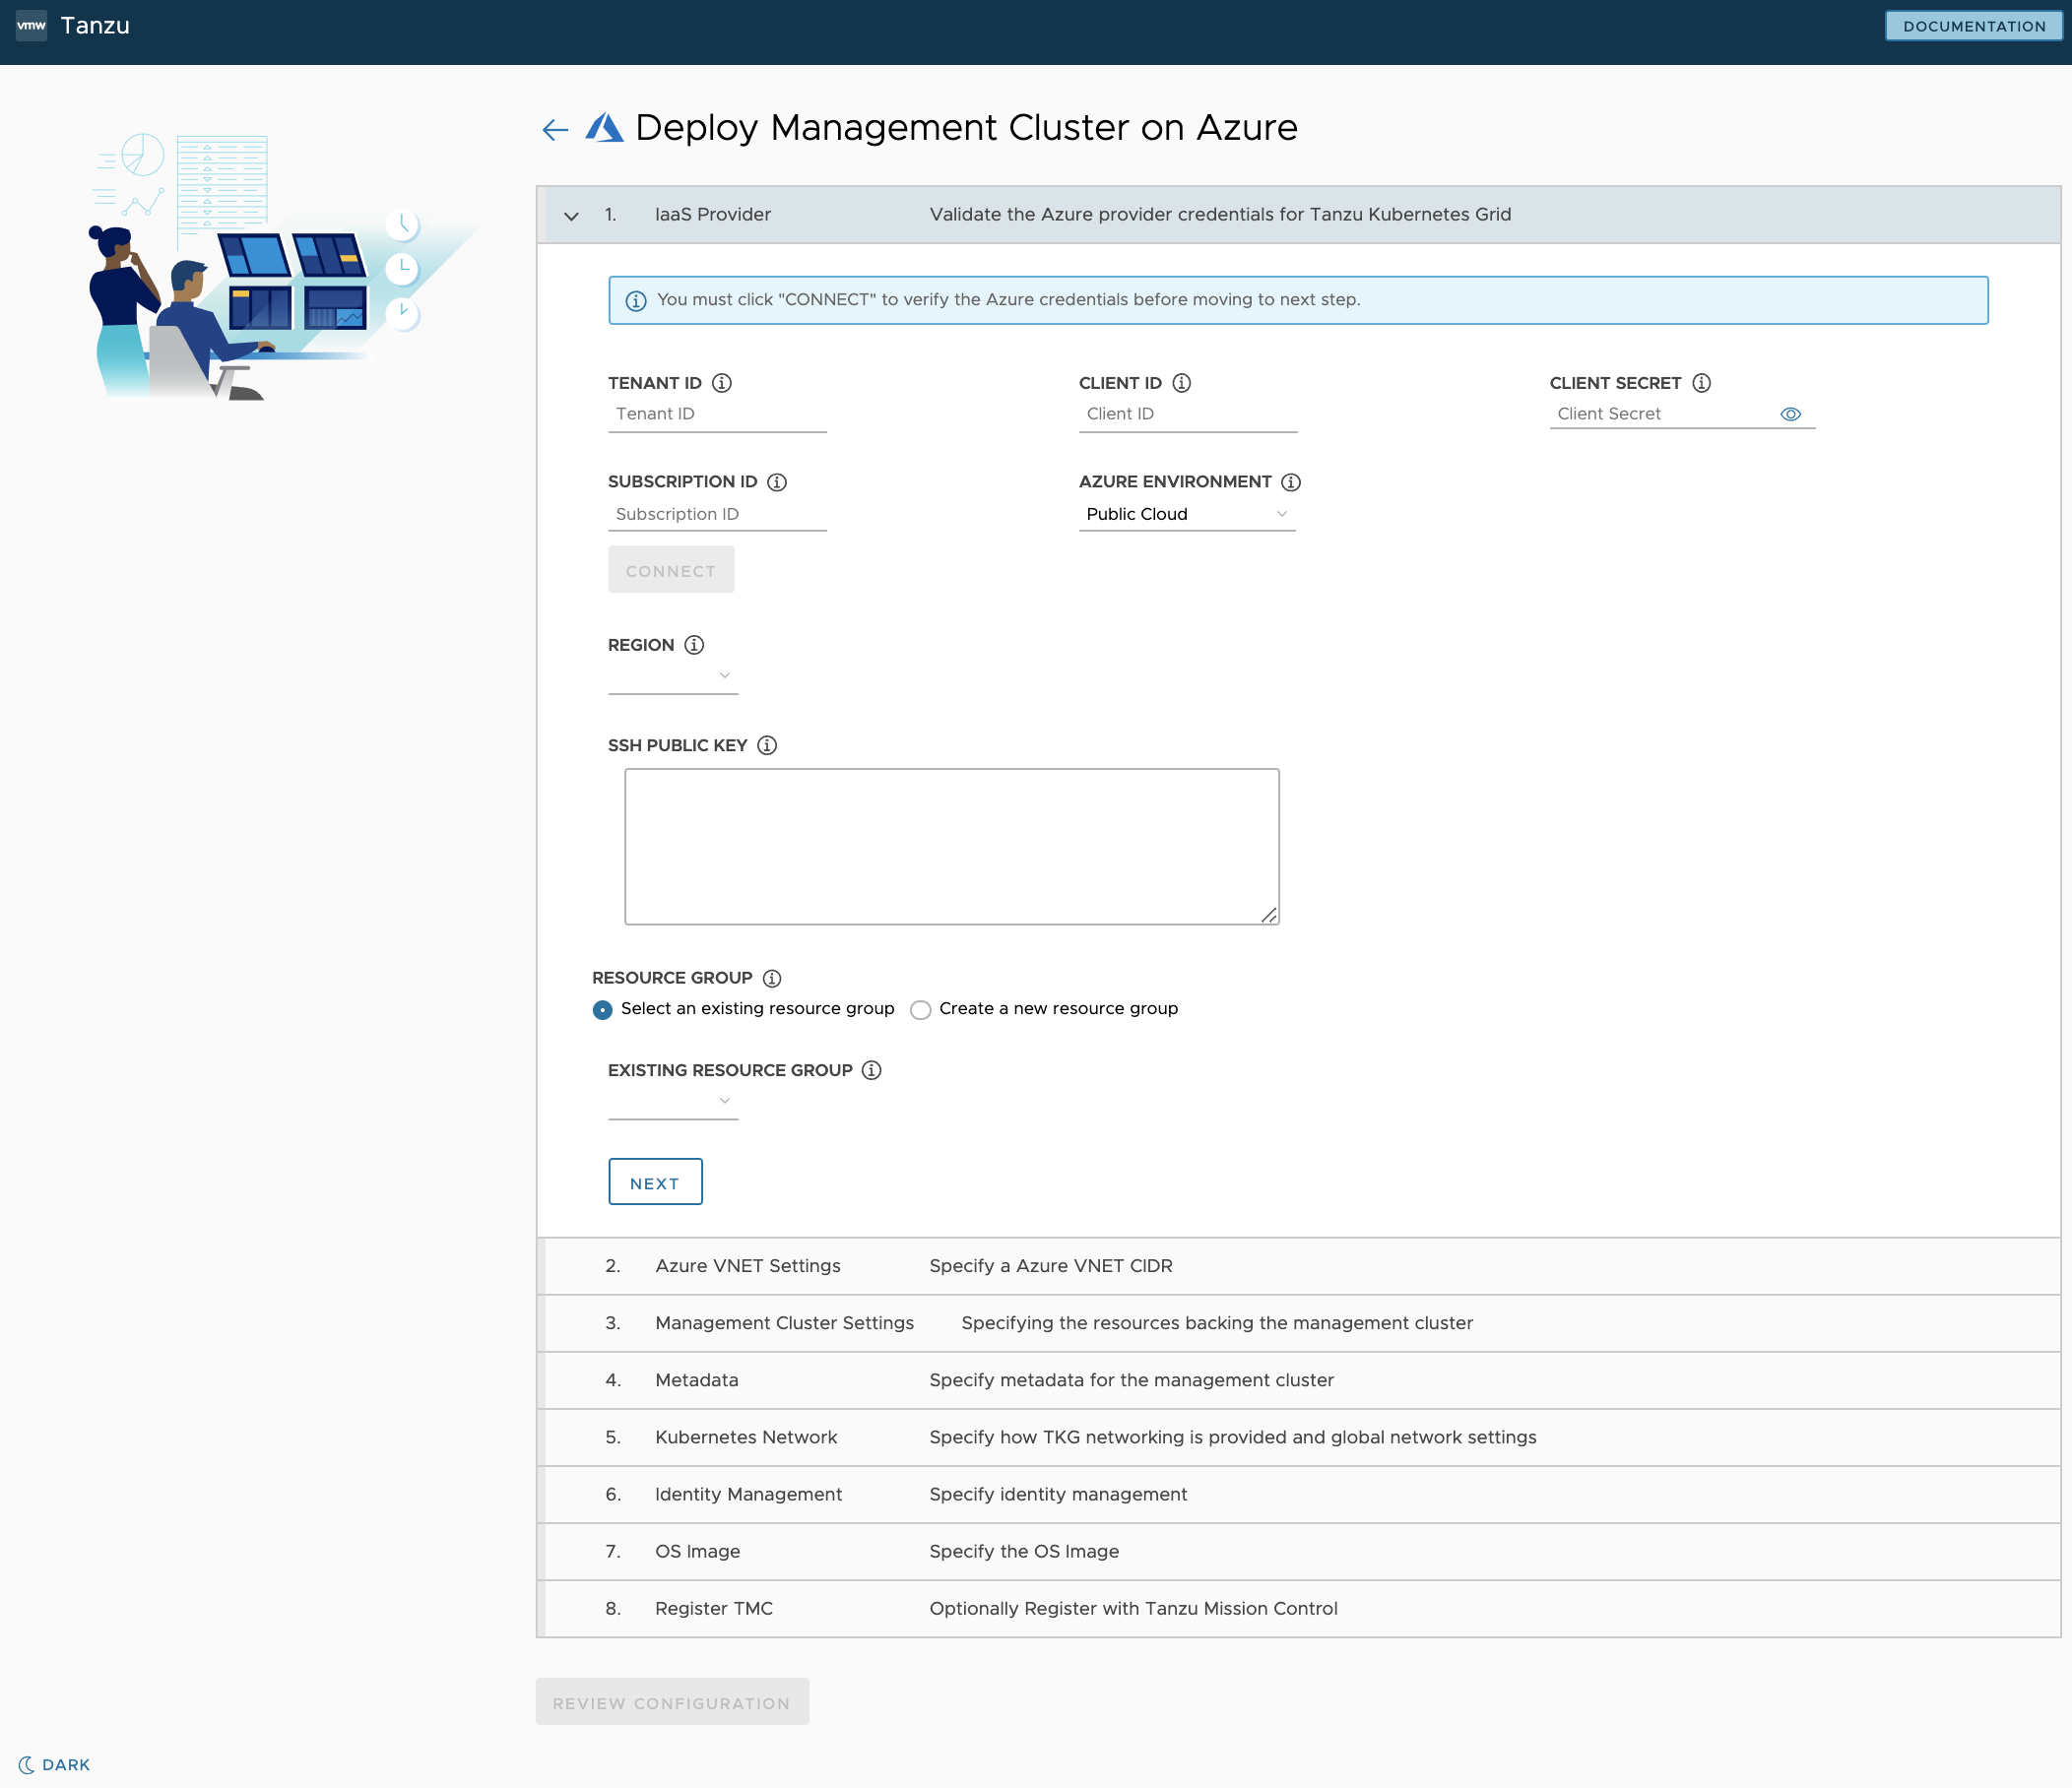
-
IaaS Provider
- テナント ID やサブスクリプション等必要情報を設定
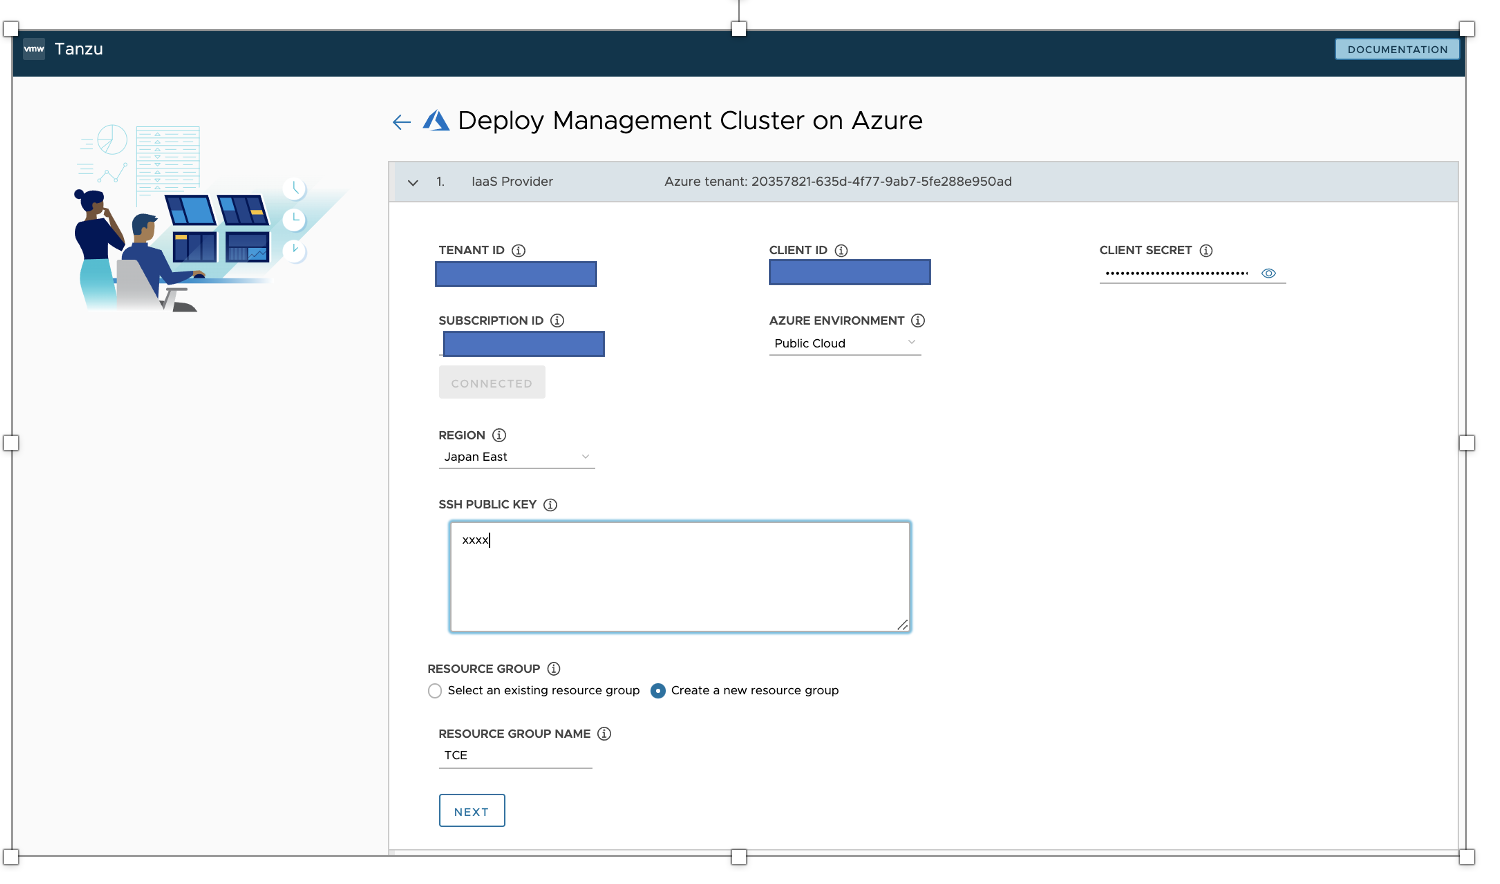
- テナント ID やサブスクリプション等必要情報を設定
-
VNet
- Vnet のリソースグループやサブネットなどを設定
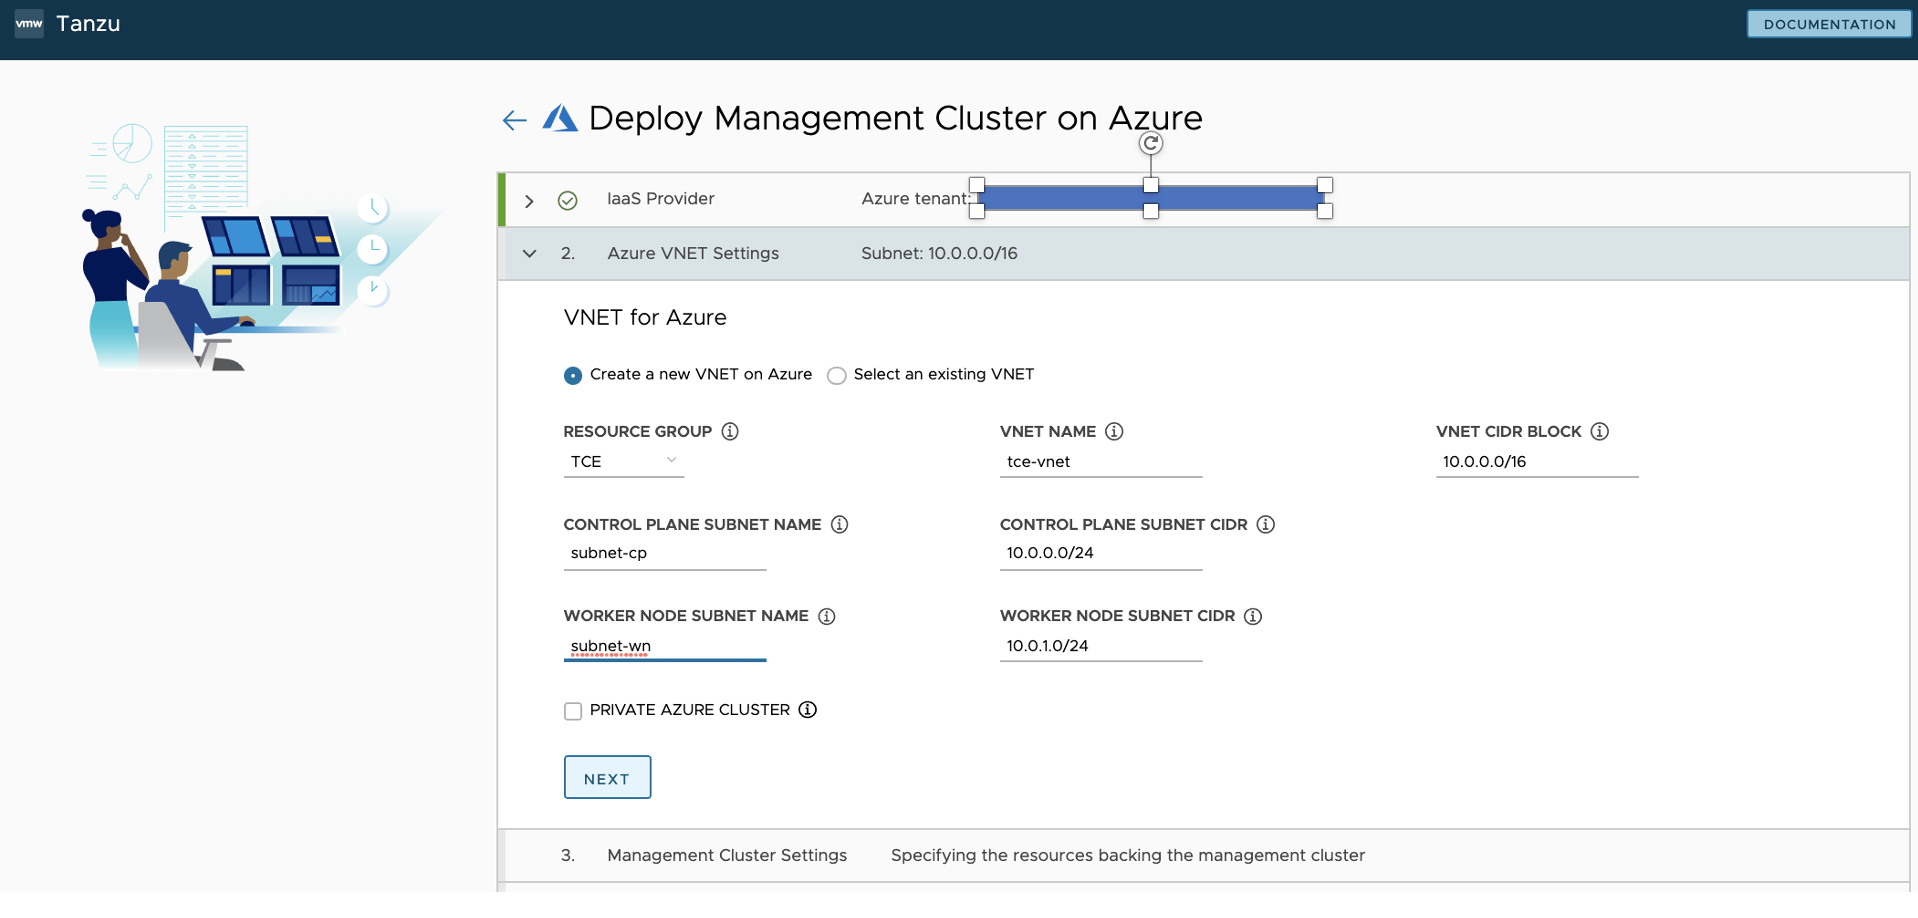
- Vnet のリソースグループやサブネットなどを設定
-
Management Cluster
- クラスター名や、VM サイズや台数( Development or Production )を設定
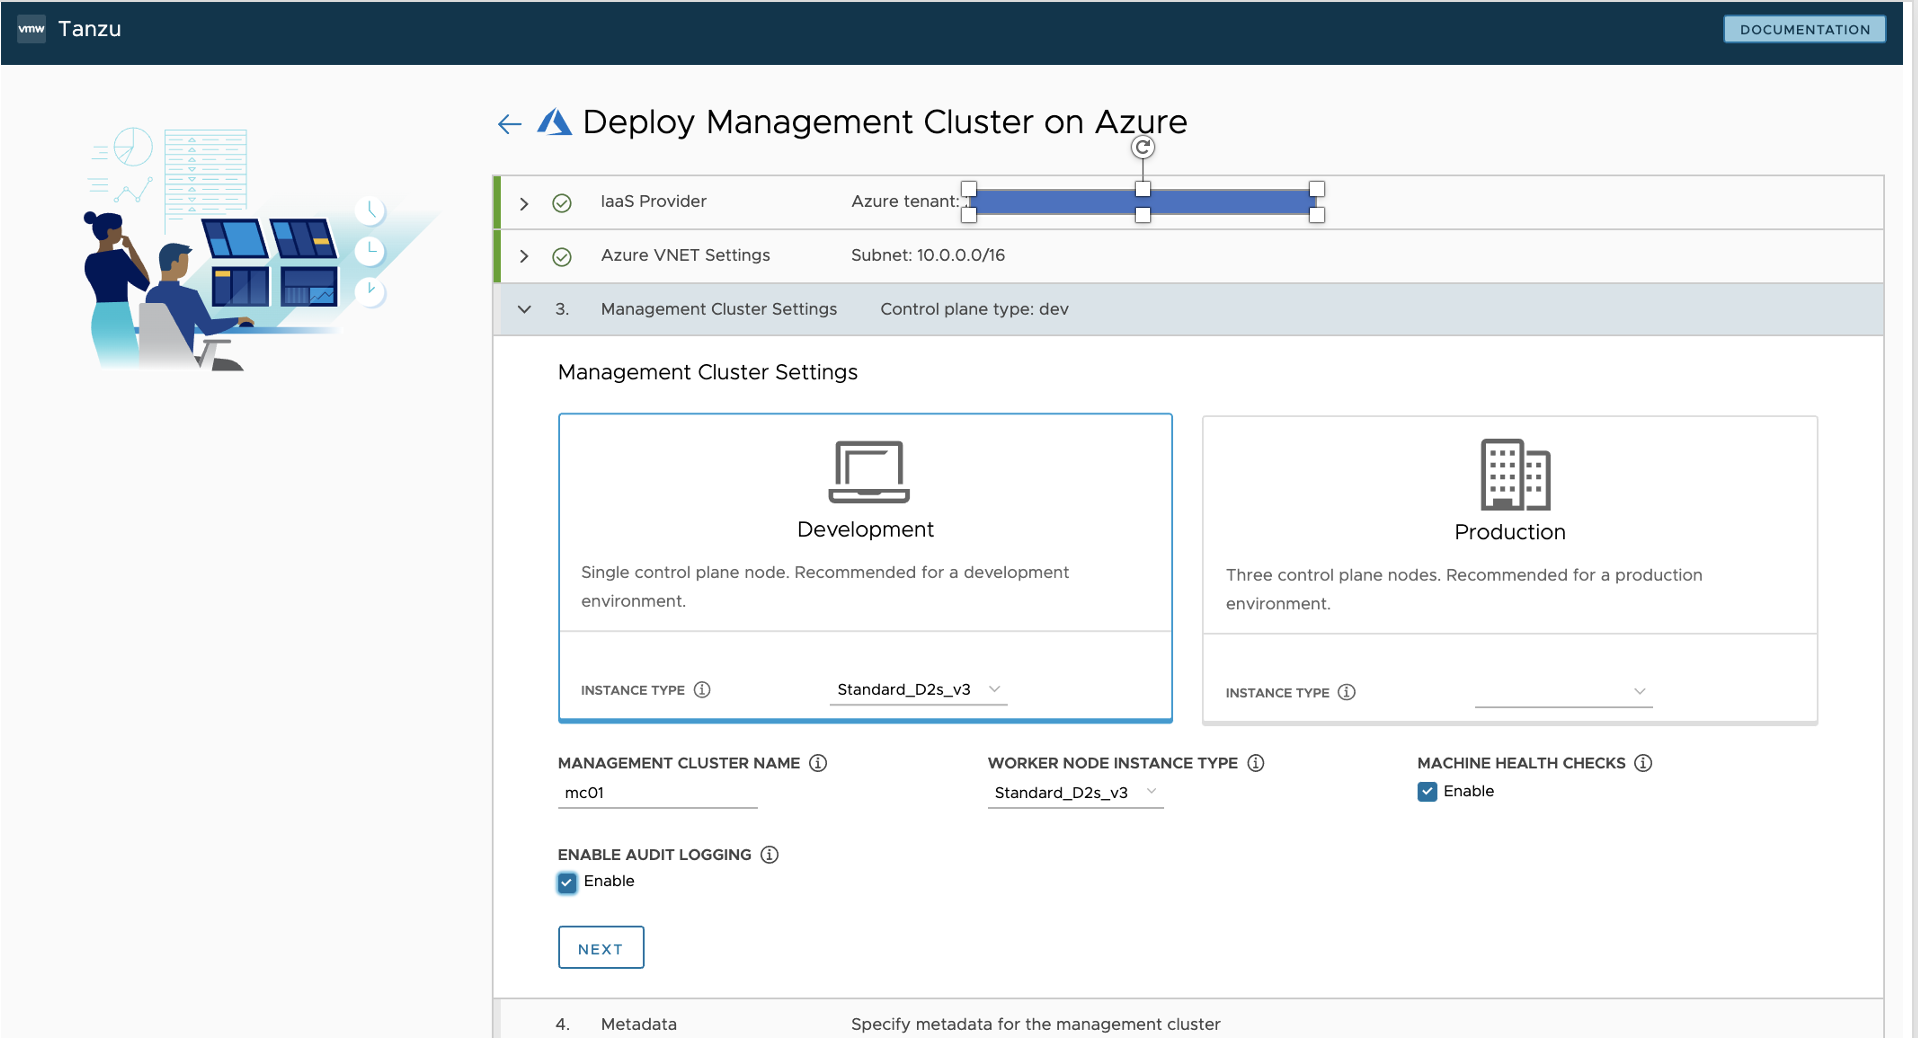
- クラスター名や、VM サイズや台数( Development or Production )を設定
-
Metadata
- 利用しないため、そのまま NEXT
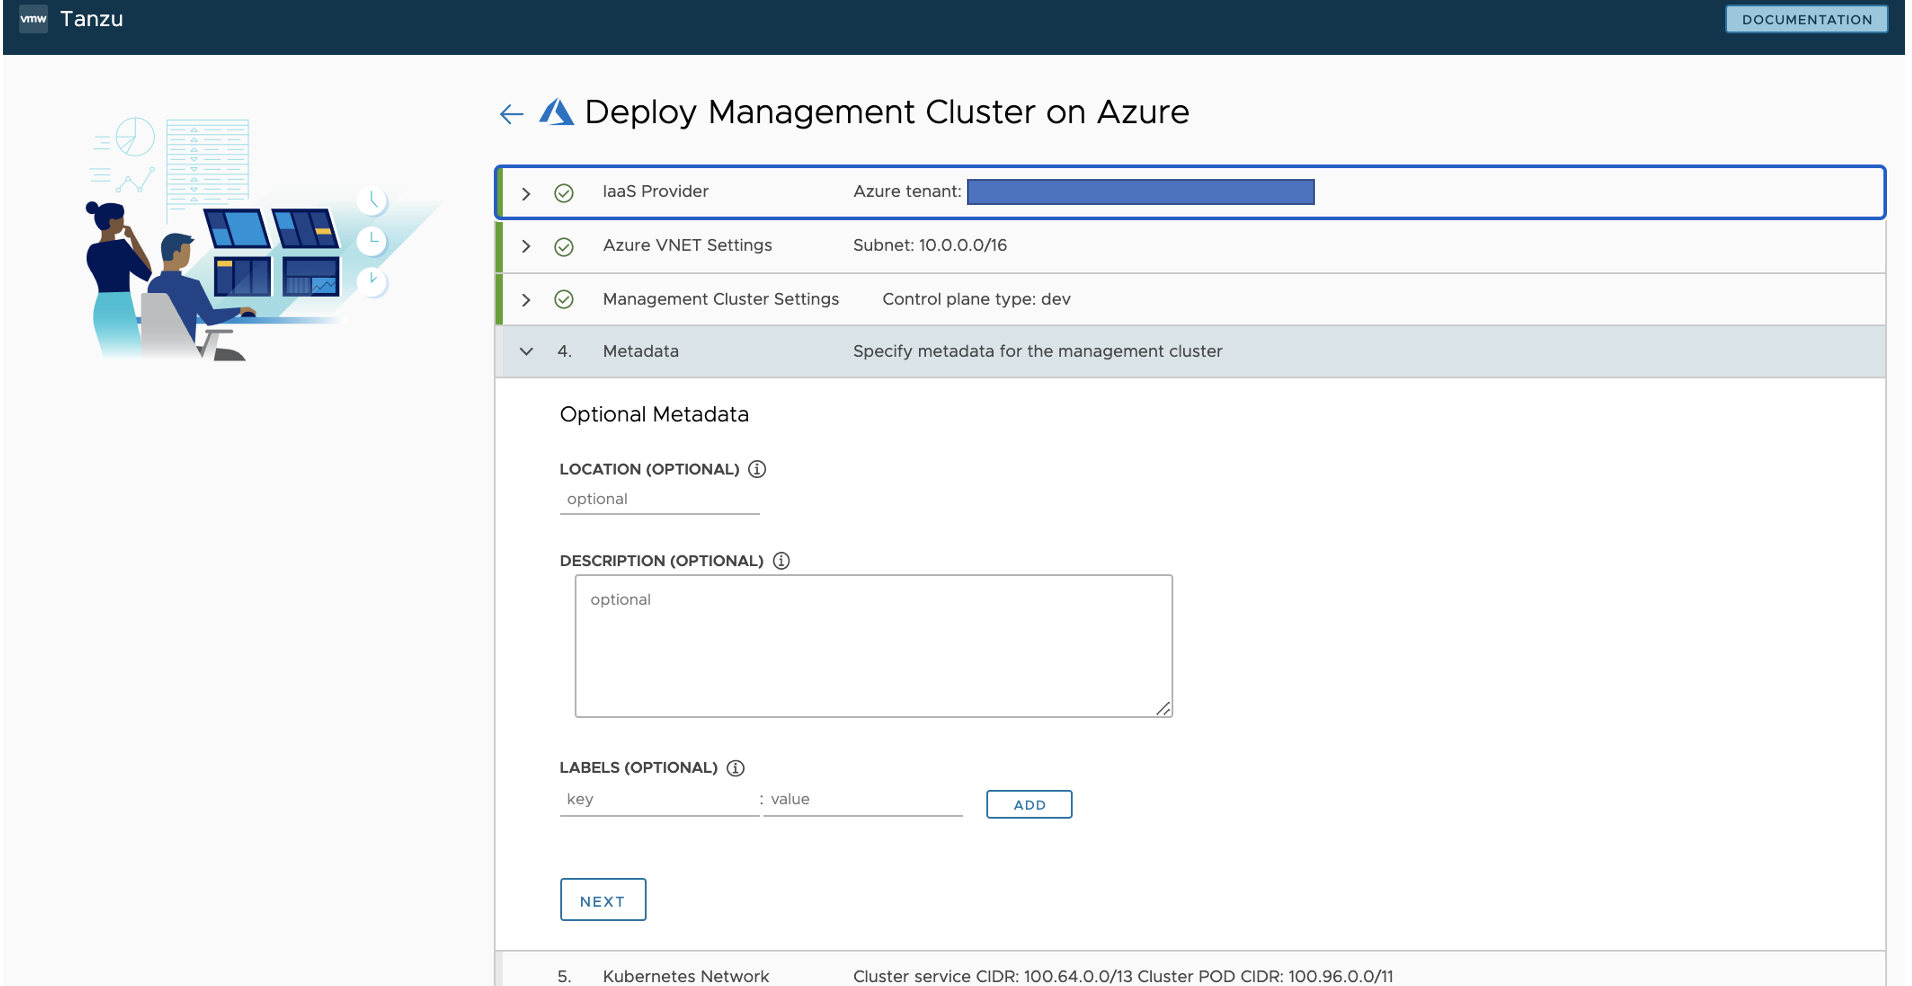
- 利用しないため、そのまま NEXT
-
Kubernetes Network
- デフォルトの値
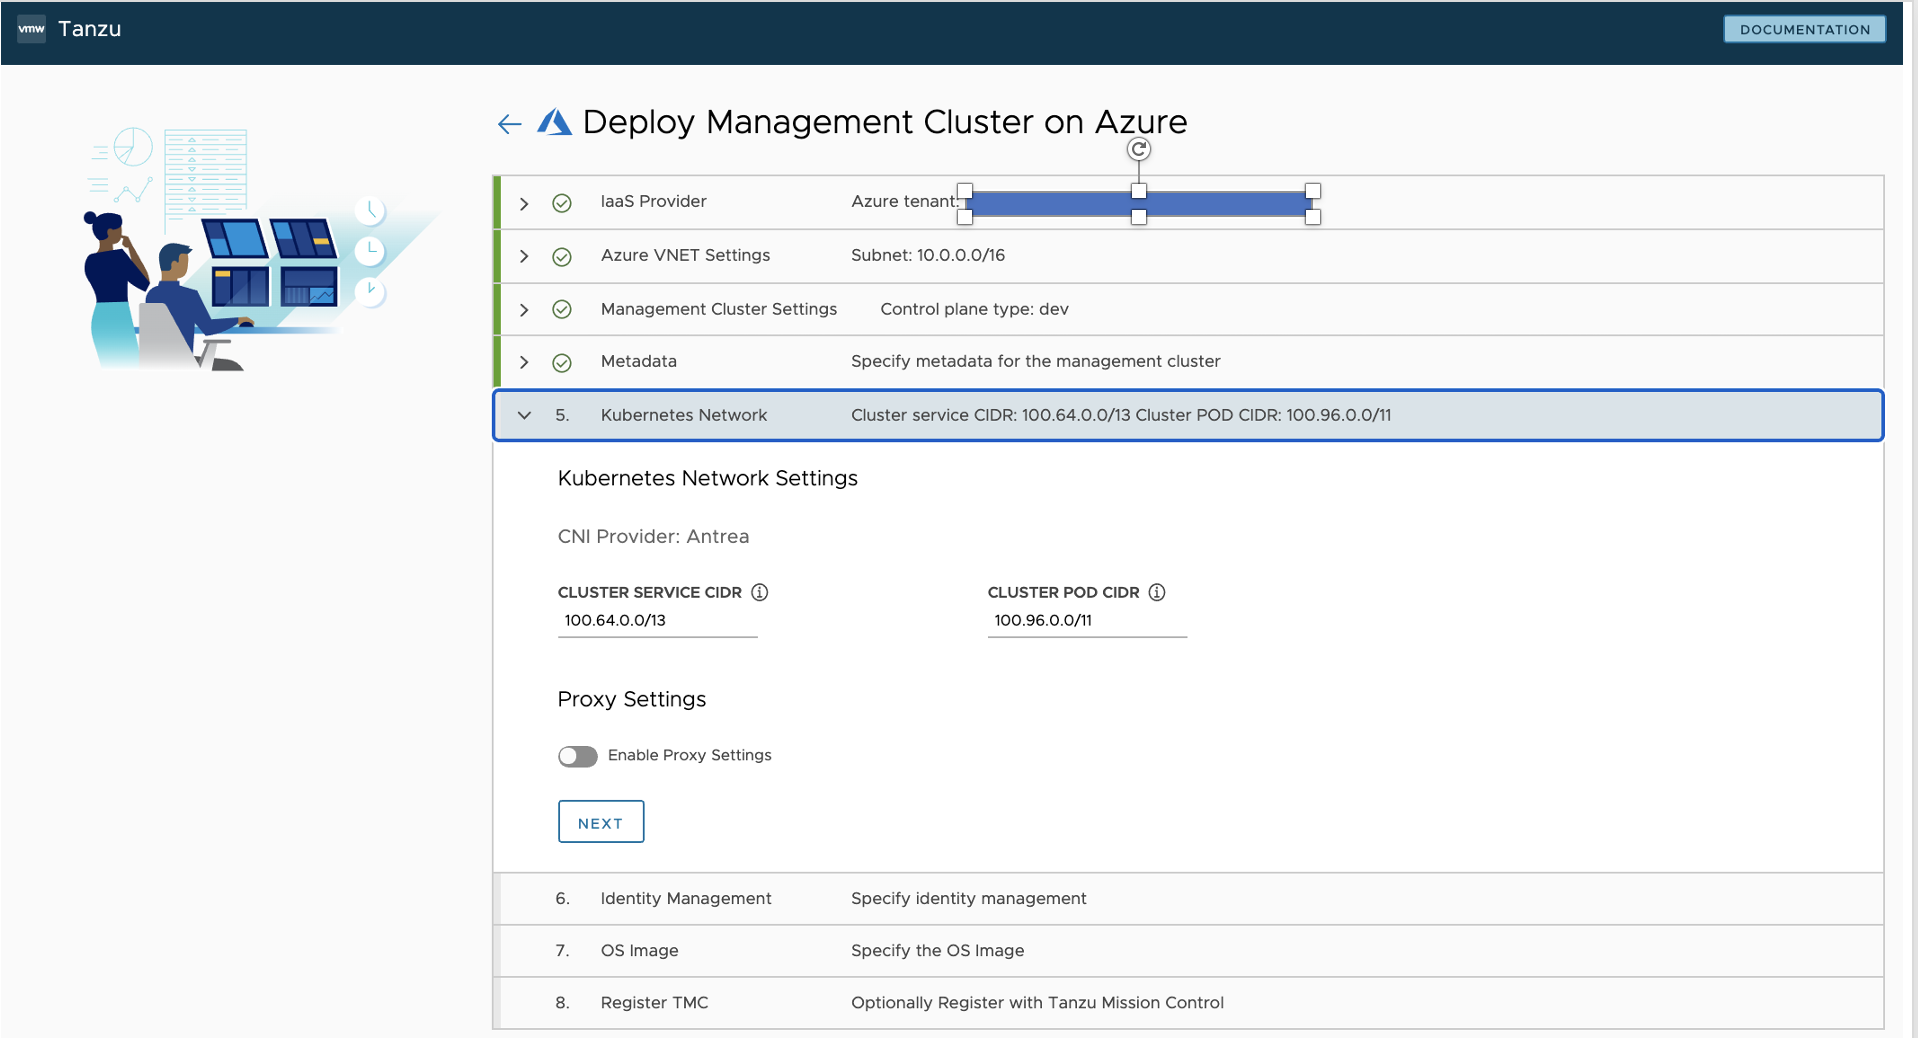
- デフォルトの値
-
Id Management
- 利用しないため、そのまま NEXT
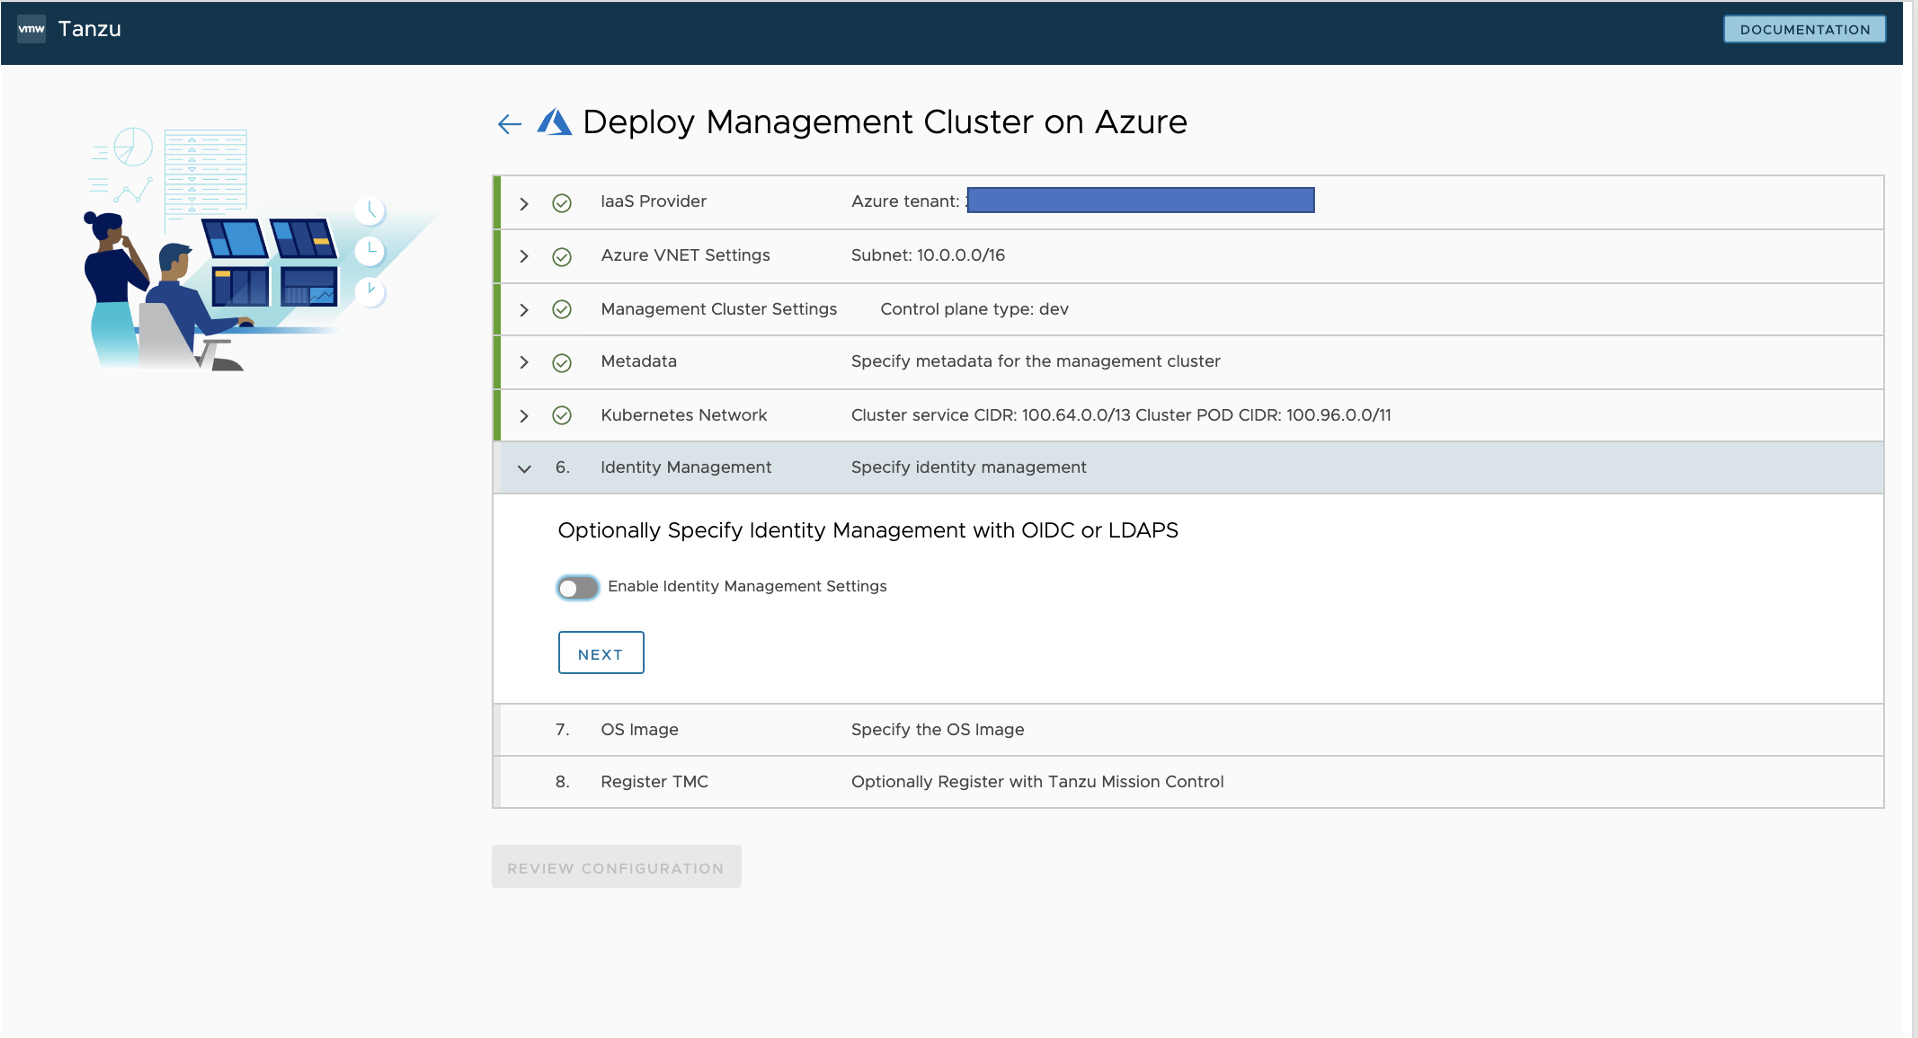
- 利用しないため、そのまま NEXT
-
OS Image
- Ubuntu 20.04を設定
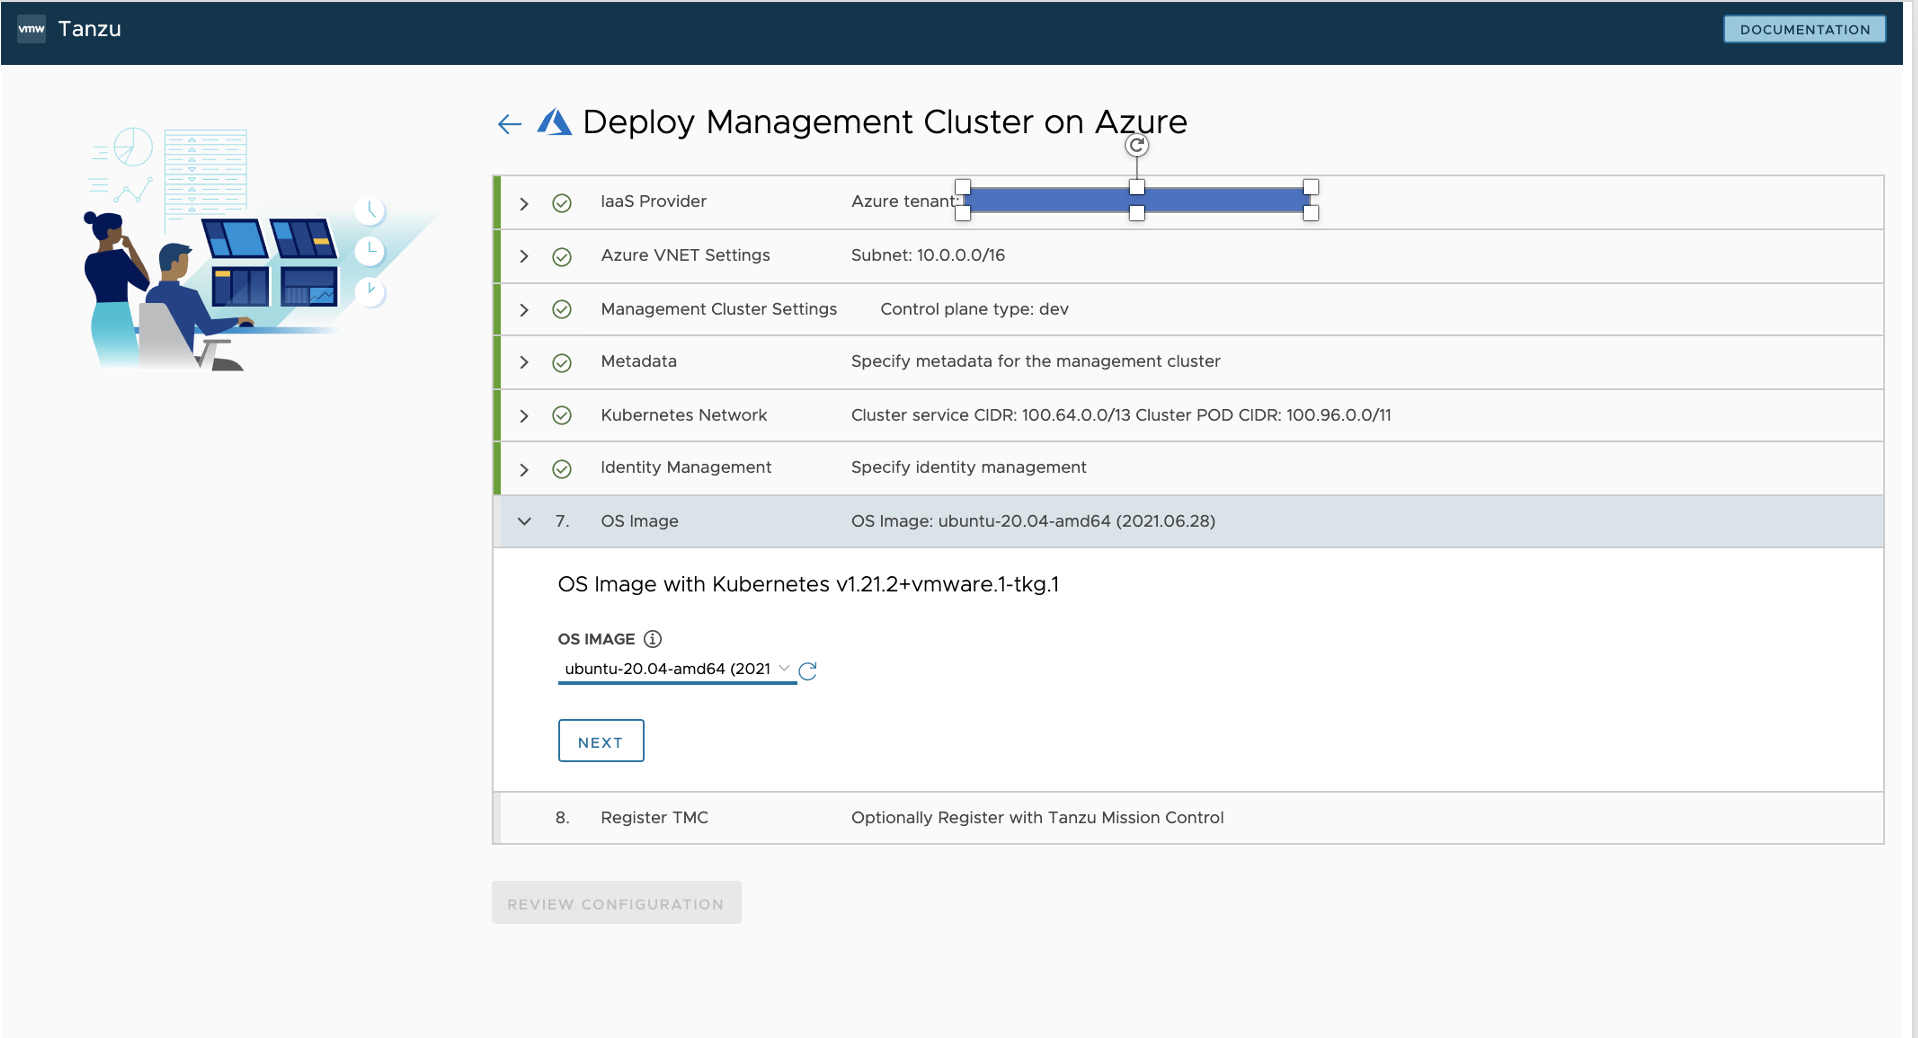
- Ubuntu 20.04を設定
-
Register TMC
- 利用しないため、そのまま NEXT
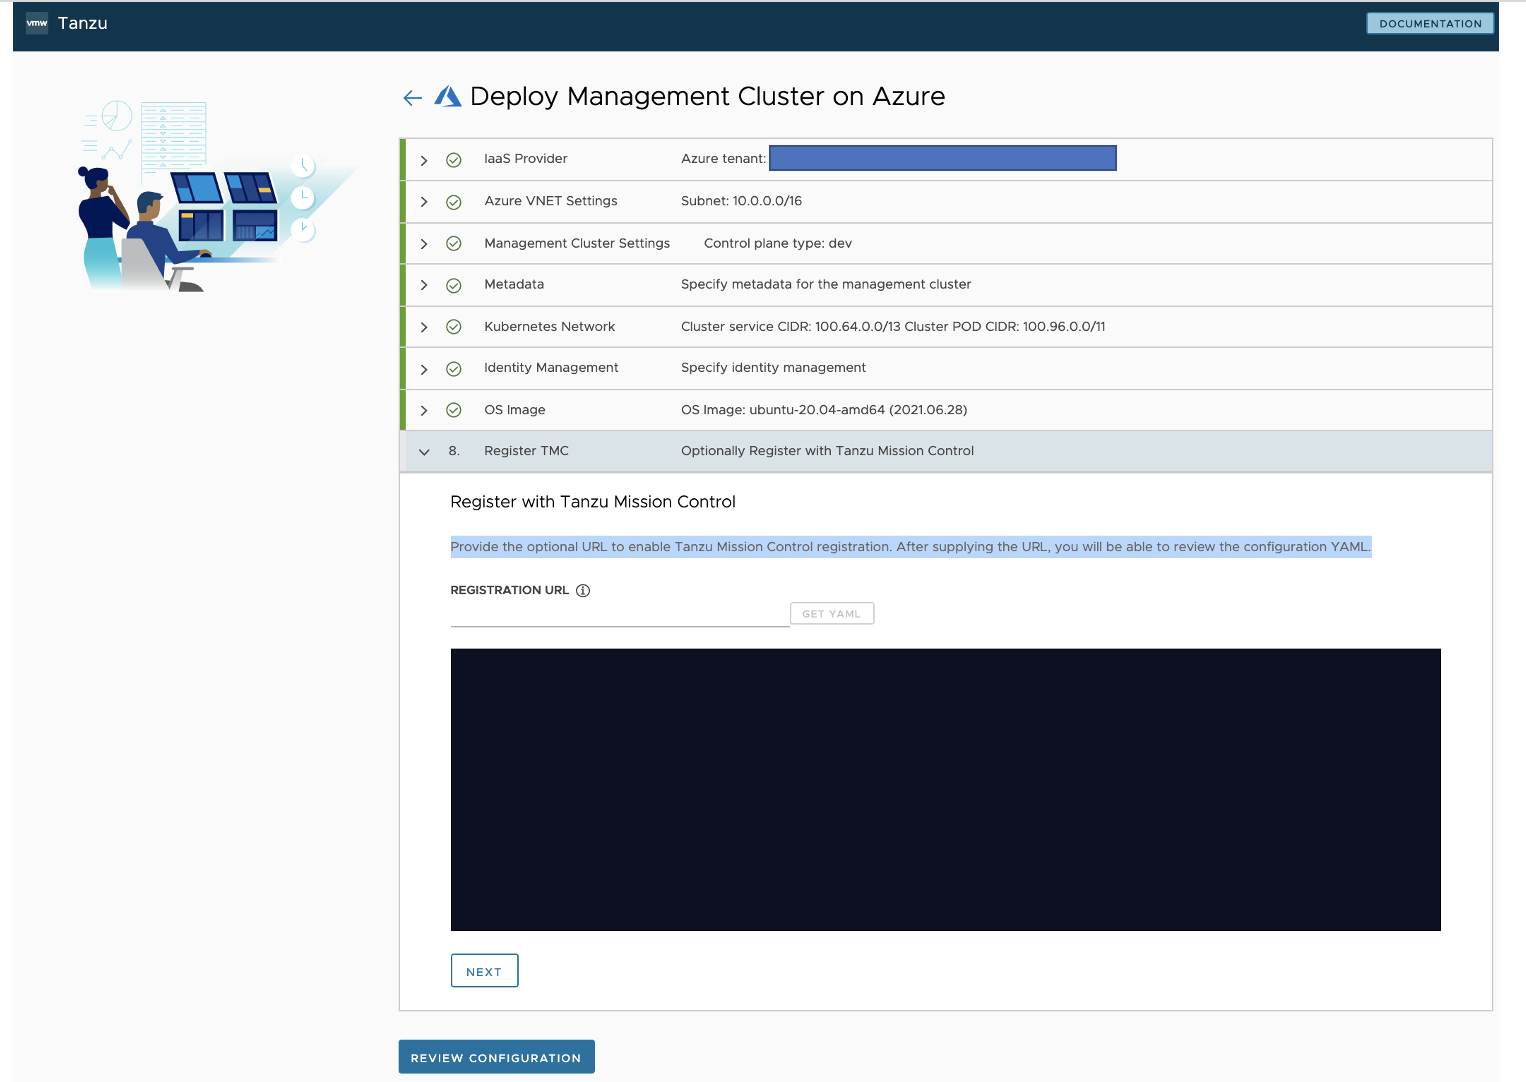
- 利用しないため、そのまま NEXT
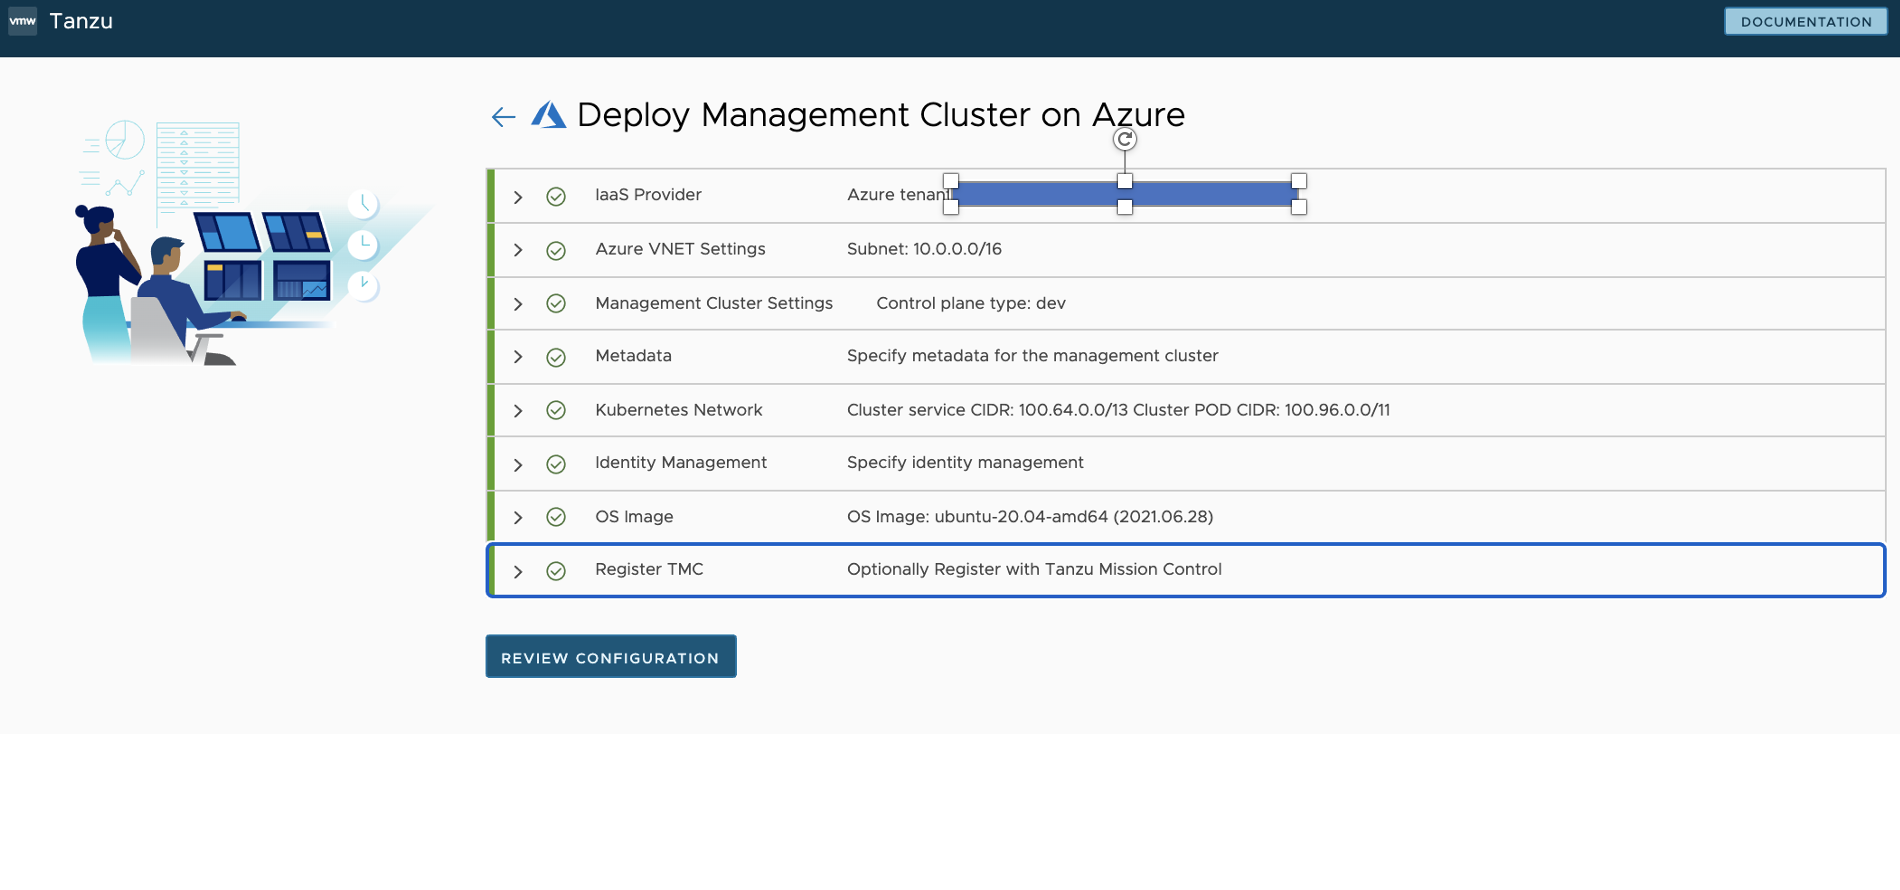
-
REVIEW CONFIGRATION
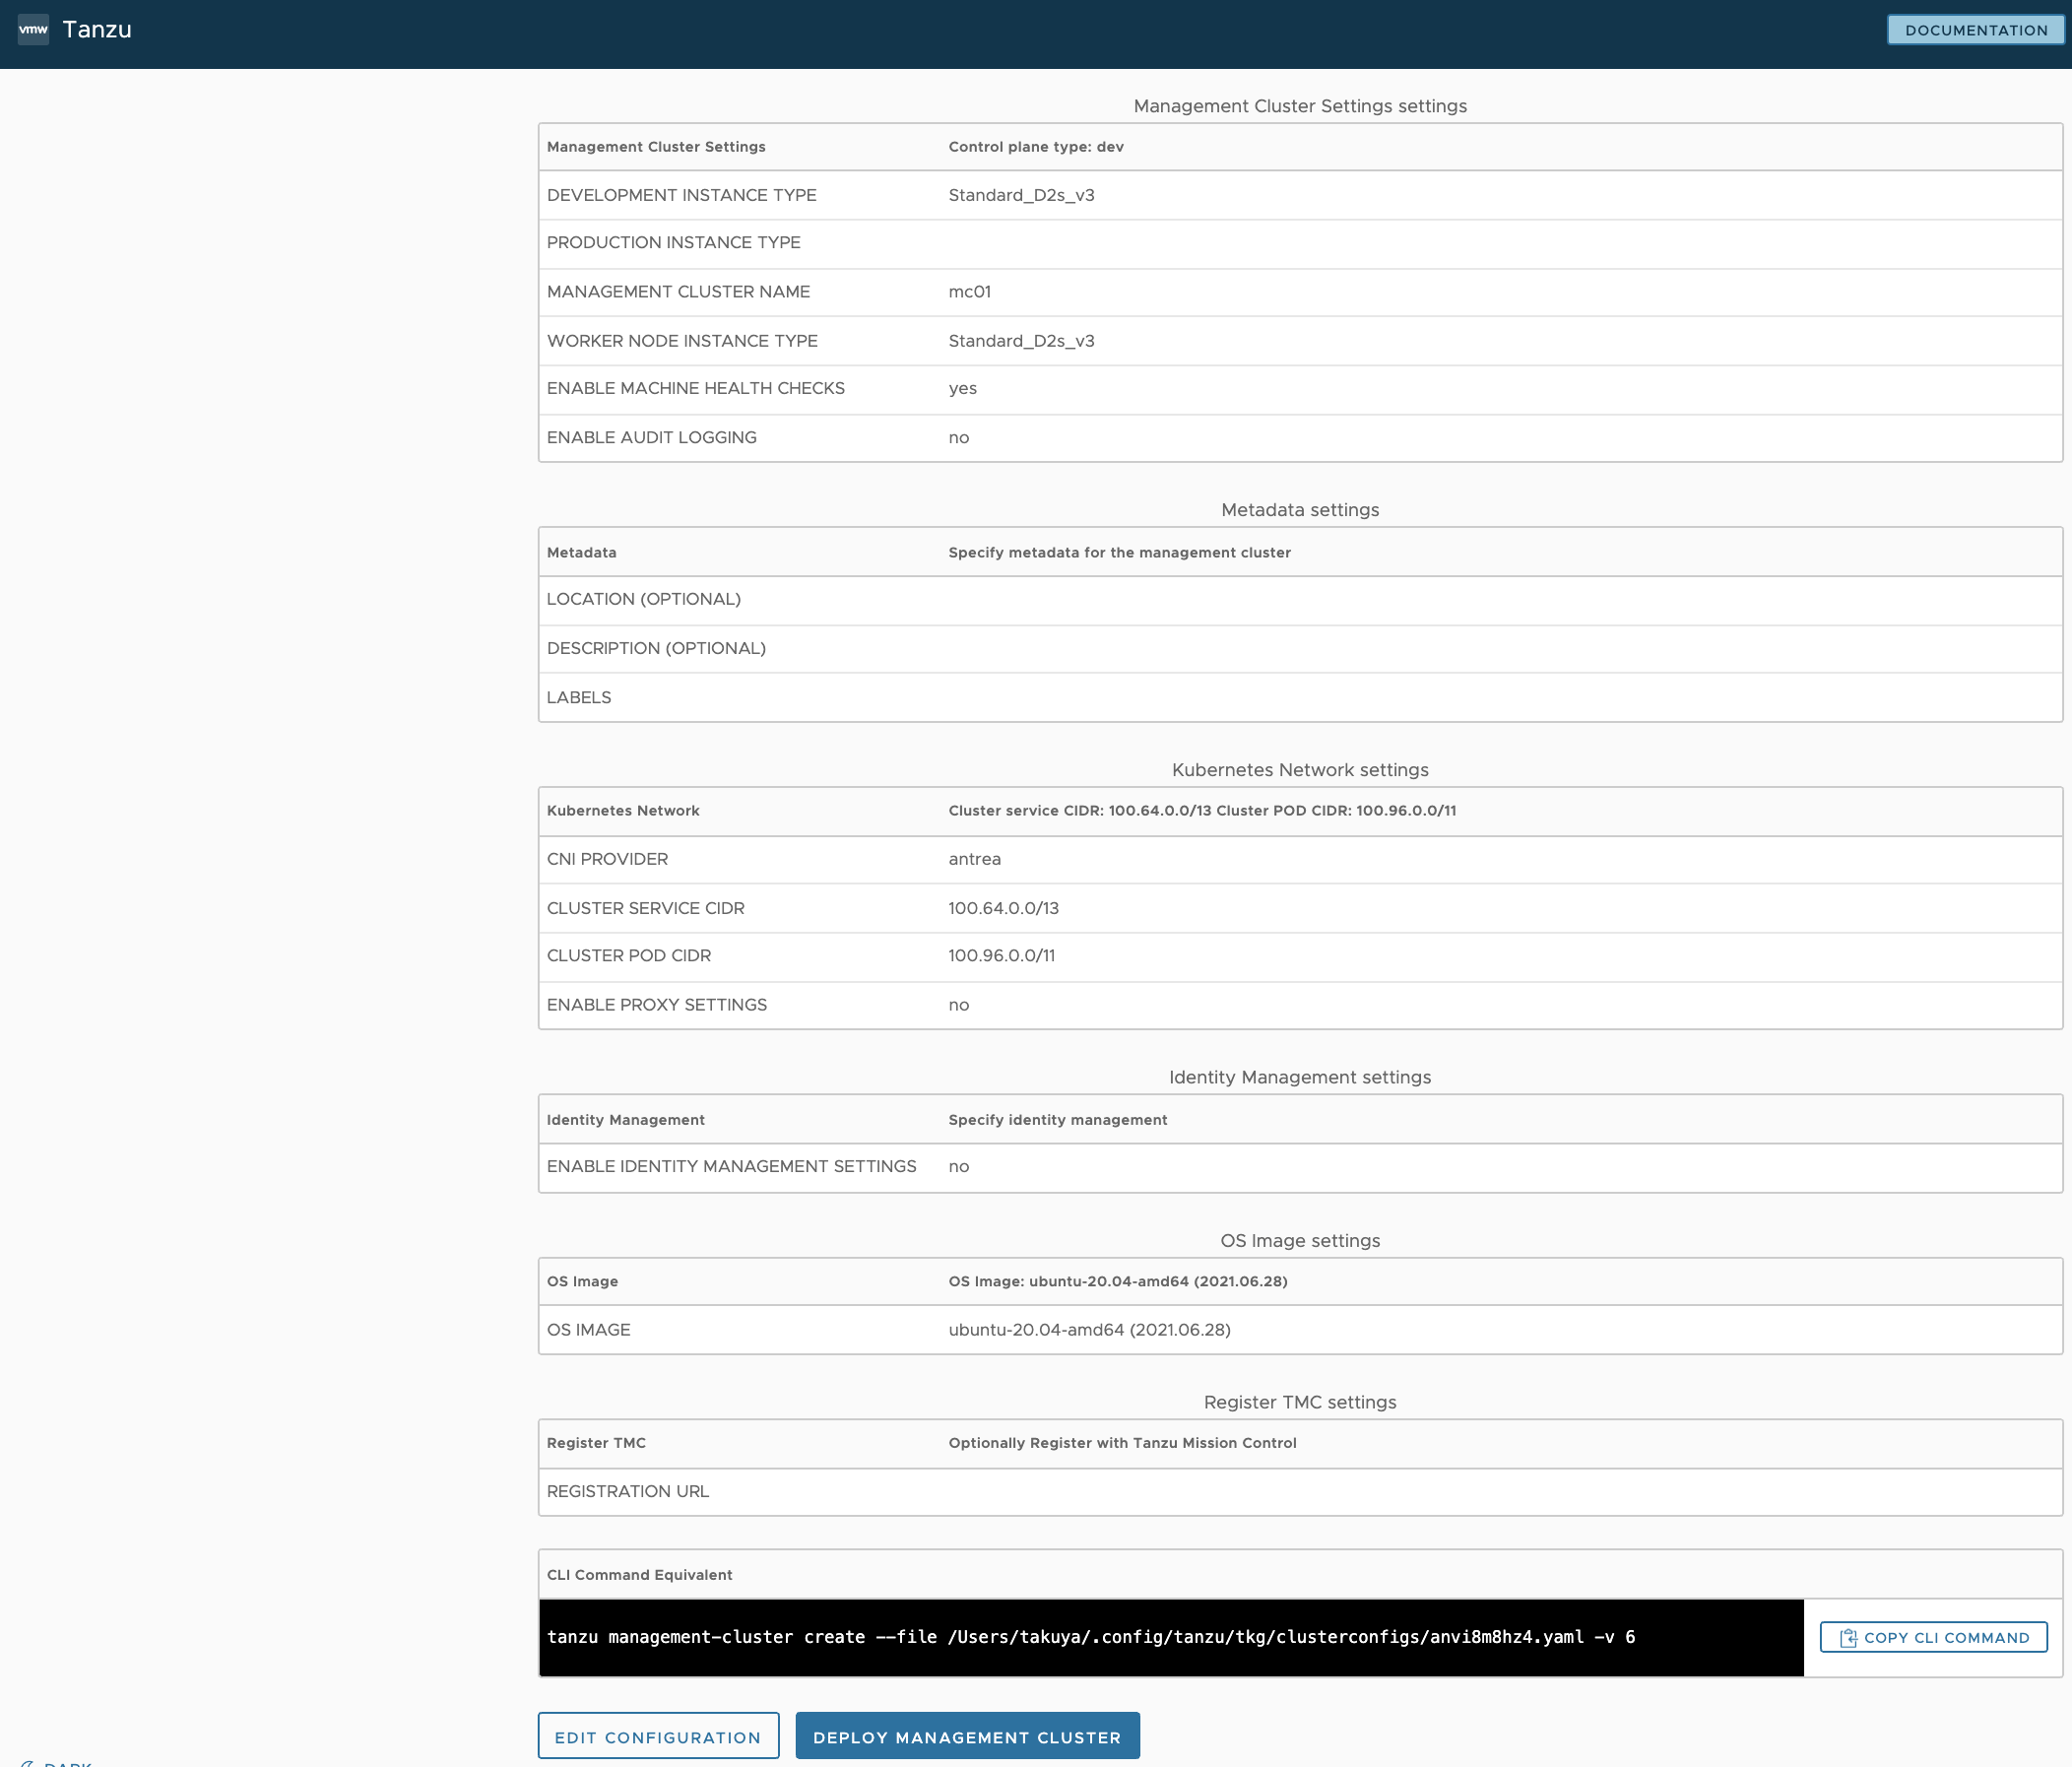
-
DEPLOY MANAGEMENT CLUSTER
- ようやくAzure へ DEPLOY です!
- 20分くらいで完了
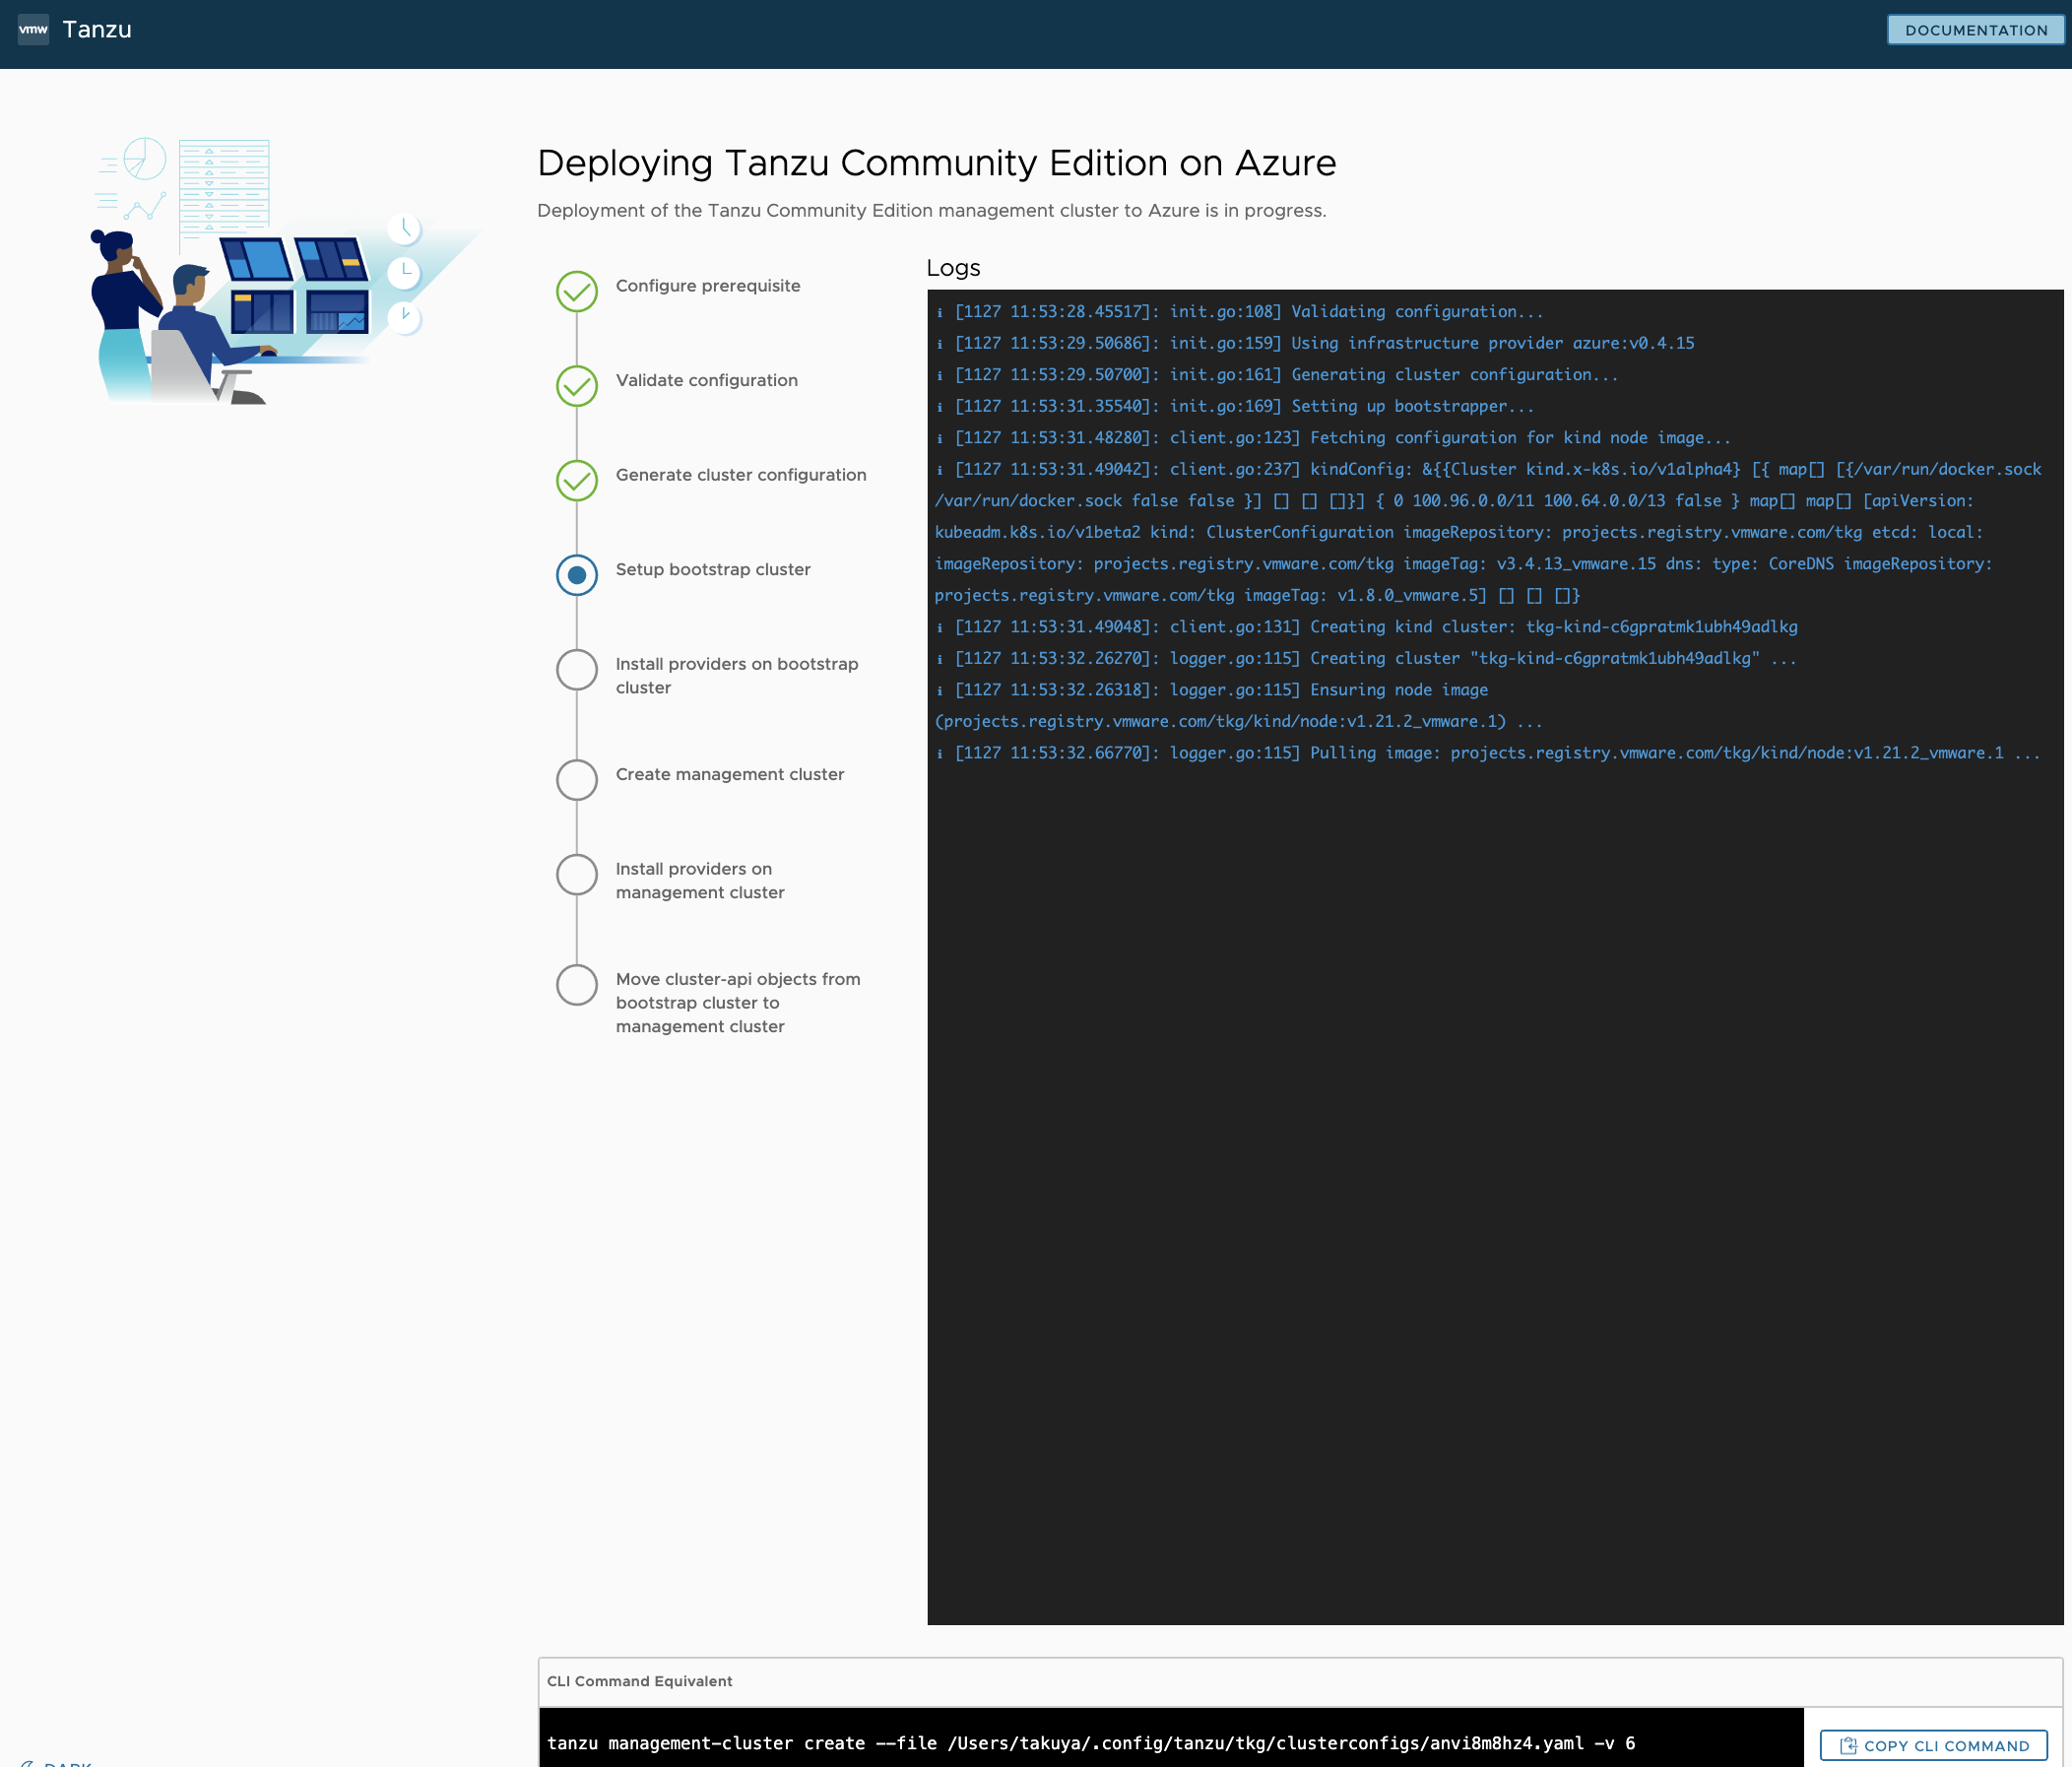
- 20分くらいで完了
- ようやくAzure へ DEPLOY です!
3. TCE Workload Cluster を Azure へデプロイする
これでやっと、TCE Management Cluster のデプロイが完了し準備が整いましたので実際のアプリケーションなどをデプロイするための TCE Workload Cluster を Azure へデプロイしていきます!
手順としては、以下となります。
- YAML ファイルの準備
-
tanzu cluster createコマンドの実行
3.1. TCE Workload Cluster の YAML ファイルを準備する
- ドキュメントによると、Management Cluster 作成時に自動生成された YAML ファイルを利用して、クラスター名や、プラン(Kubernetes Control Plane VMの台数)、Woker VM 台数などをカスタマイズした YAML ファイルを作成とありますので、以下のように変更した YAML ファイルを用意します。
~/azurework/tce $ kubectl config get-contexts
CURRENT   NAME              CLUSTER          AUTHINFO         NAMESPACE
*         docker-desktop    docker-desktop   docker-desktop
          mc01-admin@mc01   mc01             mc01-admin
~/azurework/tce $ kubectl config use-context mc01-admin@mc01
Switched to context "mc01-admin@mc01".
~/azurework/tce $
~/azurework/tce $ cp ~/.config/tanzu/tkg/clusterconfigs/anvi8m8hz4.yaml ./wc.yml
~/azurework/tce $ vi wc.yml
~/azurework/tce $ diff ~/.config/tanzu/tkg/clusterconfigs/anvi8m8hz4.yaml ./wc.yml
20,21c20,22
< CLUSTER_NAME: mc01
< CLUSTER_PLAN: dev
---
> CLUSTER_NAME: wc01
> CLUSTER_PLAN: prod
> WORKER_MACHINE_COUNT: 3
~/azurework/tce $
- 注意!! なお、こちらの YAML ファイルの内容を確認したところ、以下 config ファイルのサービスプリンシパルのシークレット値など、
base64でエンコードされているだけなので注意が必要です。
~/azurework/tce $ head -2 ~/.config/tanzu/tkg/clusterconfigs/anvi8m8hz4.yaml
AZURE_CLIENT_ID: <encoded:XXXXXXXXXXXXXXXXXXXXXX>
AZURE_CLIENT_SECRET: <encoded:XXXXXXXXXXXXXXXXXXXX>
- 特に、ドキュメントに従ってサービスプリンシパルを作成した場合、Azure のサブスクリプションに対してオーナー権限を持った強力なアカウントのシークレット情報を含むため、取扱には十分に注意してください。
- 実運用を考えると、利用者に対しては、該当のリソースグループに対する、必要最低限の権限の TCE 用アカウントを作成した方が良いと思われます。
- その他に、こちらの自動生成される Management Cluster の YAML ファイルについては
tanzuコマンドを実行したカレントディレクトリではなく、~/.config/tanzu/tkg/clusterconfigs/上に生成されている点も注意。
3.2. TCE Workload Cluster を デプロイ
-
tanzu cluster createコマンドを実行して、TCE Workload Cluster を Azure へデプロイします。- こちらは、10分くらい作成完了しました。
~/azurework/tce $ tanzu cluster create wc01 --file ./wc.yml
Validating configuration...
Warning: Pinniped configuration not found. Skipping pinniped configuration in workload cluster. Please refer to the documentation to check if you can configure pinniped on workload cluster manually
Creating workload cluster 'wc01'...
Waiting for cluster to be initialized...
Waiting for cluster nodes to be available...
Waiting for addons installation...
Waiting for packages to be up and running...

Workload cluster 'wc01' created

~/azurework/tce $
- kubectl の contexts を新規作成した "wc01" へ変更し、TCE Workload Cluster のクラスタ情報を確認
- YAML で定義した通りに Kubernetes クラスタが作成されました!
~/azurework/tce $ kubectl cluster-info
Kubernetes control plane is running at https://wc01-XXXXXXX.japaneast.cloudapp.azure.com:6443
CoreDNS is running at https://wc01-XXXXXX.japaneast.cloudapp.azure.com:6443/api/v1/namespaces/kube-system/services/kube-dns:dns/proxy

To further debug and diagnose cluster problems, use 'kubectl cluster-info dump'.
~/azurework/tce $ kubectl get node -o wide
NAME                       STATUS   ROLES                  AGE   VERSION            INTERNAL-IP   EXTERNAL-IP   OS-IMAGE             KERNEL-VERSION     CONTAINER-RUNTIME
wc01-control-plane-2q47l   Ready    control-plane,master   16m   v1.21.2+vmware.1   10.0.0.6      <none>        Ubuntu 20.04.2 LTS   5.8.0-1036-azure   containerd://1.4.6
wc01-control-plane-cc5rt   Ready    control-plane,master   14m   v1.21.2+vmware.1   10.0.0.7      <none>        Ubuntu 20.04.2 LTS   5.8.0-1036-azure   containerd://1.4.6
wc01-control-plane-gddm9   Ready    control-plane,master   18m   v1.21.2+vmware.1   10.0.0.5      <none>        Ubuntu 20.04.2 LTS   5.8.0-1036-azure   containerd://1.4.6
wc01-md-0-vszvx            Ready    <none>                 16m   v1.21.2+vmware.1   10.0.1.7      <none>        Ubuntu 20.04.2 LTS   5.8.0-1036-azure   containerd://1.4.6
wc01-md-1-l8f68            Ready    <none>                 16m   v1.21.2+vmware.1   10.0.1.5      <none>        Ubuntu 20.04.2 LTS   5.8.0-1036-azure   containerd://1.4.6
wc01-md-2-kcw98            Ready    <none>                 16m   v1.21.2+vmware.1   10.0.1.6      <none>        Ubuntu 20.04.2 LTS   5.8.0-1036-azure   containerd://1.4.6
~/azurework/tce $
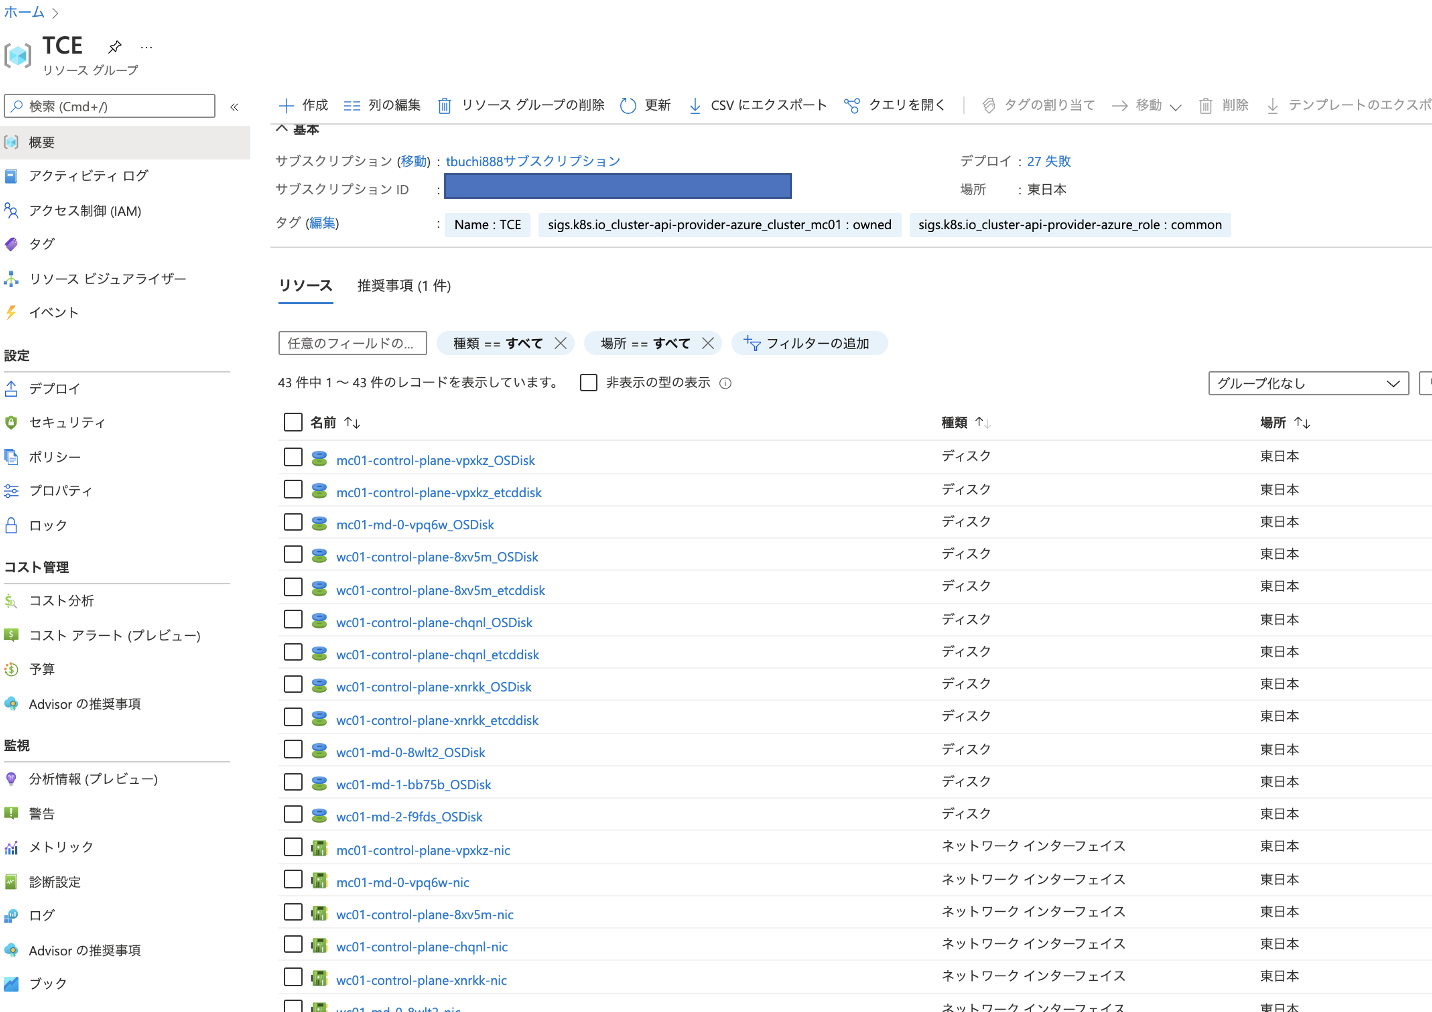
- この時点で Azure 側に作成されたリソースグループは以下のような感じでした。
4. さいごに
TCE on Azure をやってみた感想ですが
- 事前準備については、TCE クライアント用の Azure のサービス プリンシパル アカウントの作成以外は、特につまづくようなポイントは無いと思います。
- TCE Management Cluster は、 WebGUI よりウィザード形式で作成可能ですし、TCE Workload Cluster についても、Management Clusterの定義ファイルを参考に、簡易に作成することができました。
- ただし、サービス プリンシパル アカウントへ付与する、Azure 上の権限や、クラスタ作成に利用する YAML 定義ファイルには、サービス プリンシパル アカウントのシークレット情報など重要な情報が
base64エンコードのみなので、取扱には、注意が必要だと思いました。
- ただし、サービス プリンシパル アカウントへ付与する、Azure 上の権限や、クラスタ作成に利用する YAML 定義ファイルには、サービス プリンシパル アカウントのシークレット情報など重要な情報が
- なお、Azure を初めて利用の方は、以下より、30日間/最大200$ までの無料クレジットが利用可能なので、ぜひ試してみてください。
最後に、TCE on Azure の個人的な感想は、正直なところ以下ブログと同じ所感でした。。。
ですが、このように気軽に誰でも利用できるのは OSS ならではと思いますので、コミュニティのみなさん達と、引き続き何かしらの貢献ができればと思います。
1人のユーザーとしておすすめなのは、2つめと3つめのパターンとなります。1パターンめはクラスタ構築が面倒なので頻繁に利用するユーザー向きではありませんし、4パターンめはパブリッククラウドの月額利用料がそこそこかかってくるため、それなら AWS の EKS や Azure の AKS で良いと思われるからです。製品版の TKG が EKS や AKS の代わりに AWS や Azure で利用されることはよくありますが、それはどのクラウドでも同一操作体験の マネージド k8s を使いたいという要望からであり、正直なところ TCE のユーザーがそこまでやりたいというシナリオは稀有かと思います。
以上となります。