Herokuさんは有料化してしまいましたが課金してずっとお世話になっております。
HerokuにはGithubにプッシュすると自動でデプロイされる機能が備わっています。
ローカルからはHeroku Gitを使ってデプロイされることも多いでしょう。
今回「Git管理はBitbucketでオネシャス」というお達しがありました。
私はBitbucket使ったことがありません。
Herokuにデプロイできるのかな?と思いましたが
「Bitbucket Heroku デプロイ」でGoogle検索
Bitbucketサポートのヘルプ記事が出てきたのでまぁどうにかなるやろと
「Bitbucket承知ナリ~~」と返事をしていました。
その後頭を抱えることとなりました/(^o^)\
HerokuでAPIトークンを発行
ローカルにHeroku CLIをインストールしてログイン
そしてこのコマンドを実行します。
$ heroku authorizations:create
これでHerokuの APIトークンを取得することができます。
00000000-0000-0000-0000-000000000000みたいなやつです。
あとから使うのでコピーして残しておきましょう。
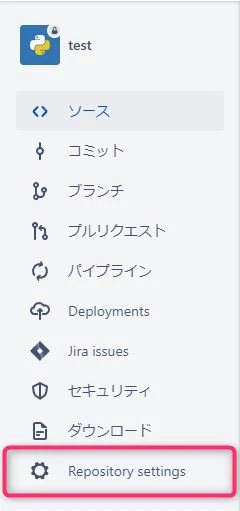
Bitbucket Pipelinesを有効化
今回は自分が管理者じゃなかったので設定してもらいました
それでは書く意味がないのでテスト環境を用意しました。
Repository settings から下の方にある PIPELINES の Settings を開いてパイプラインを有効化します
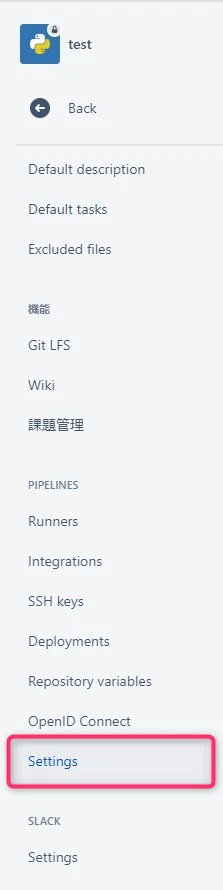
トグルスイッチになっているところをクリックして緑のチェックにしてください。
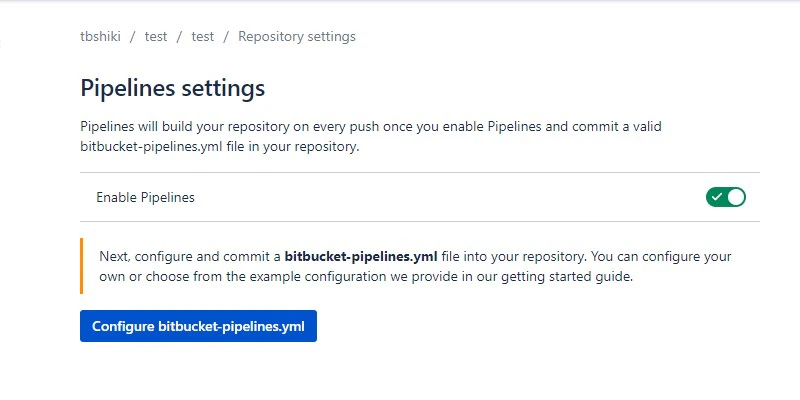
これでBitbucket Pipelinesが使えるようになります。
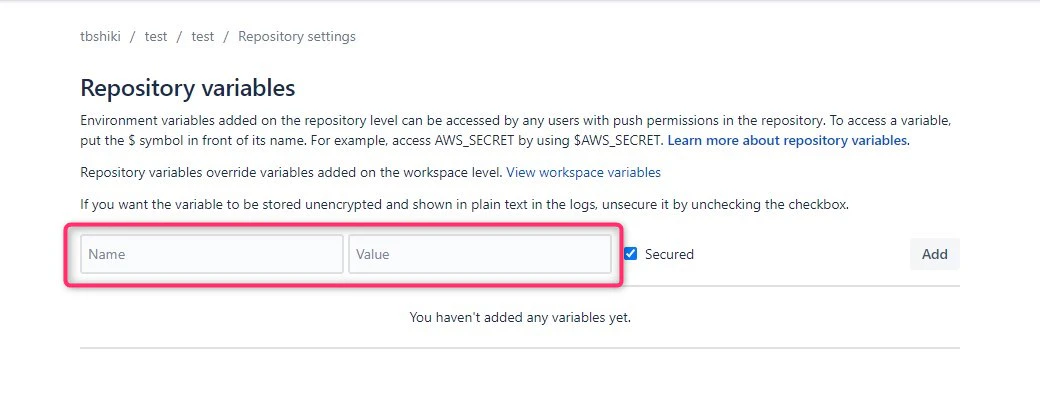
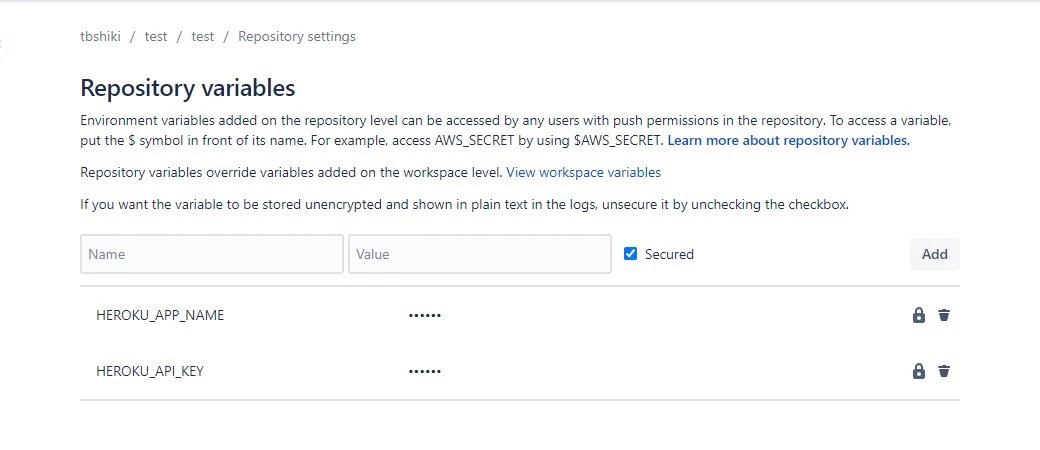
Bitbucketのリポジトリの環境変数にAPIトークンとHerokuのapp名を設定
そのままRepository settings 内で PIPELINES の Repository variables を開いて環境変数を設定します。
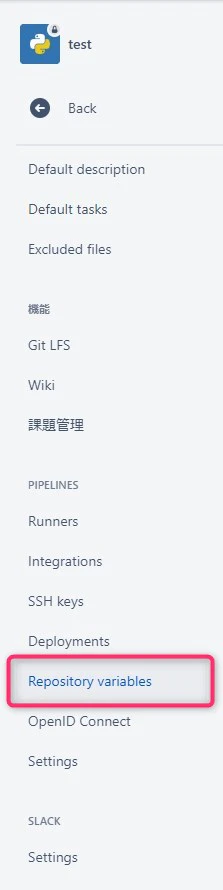
一つ目
NameにHEROKU_API_KEYとValueにHerokuのAPIキー(00000000-0000-0000-0000-000000000000みたいなやつ)を入れます。
2つ目
NameにHEROKU_APP_NAMEとValueにHeroku作ったappの名前(仮にtest-appとしておきます)を入れます。
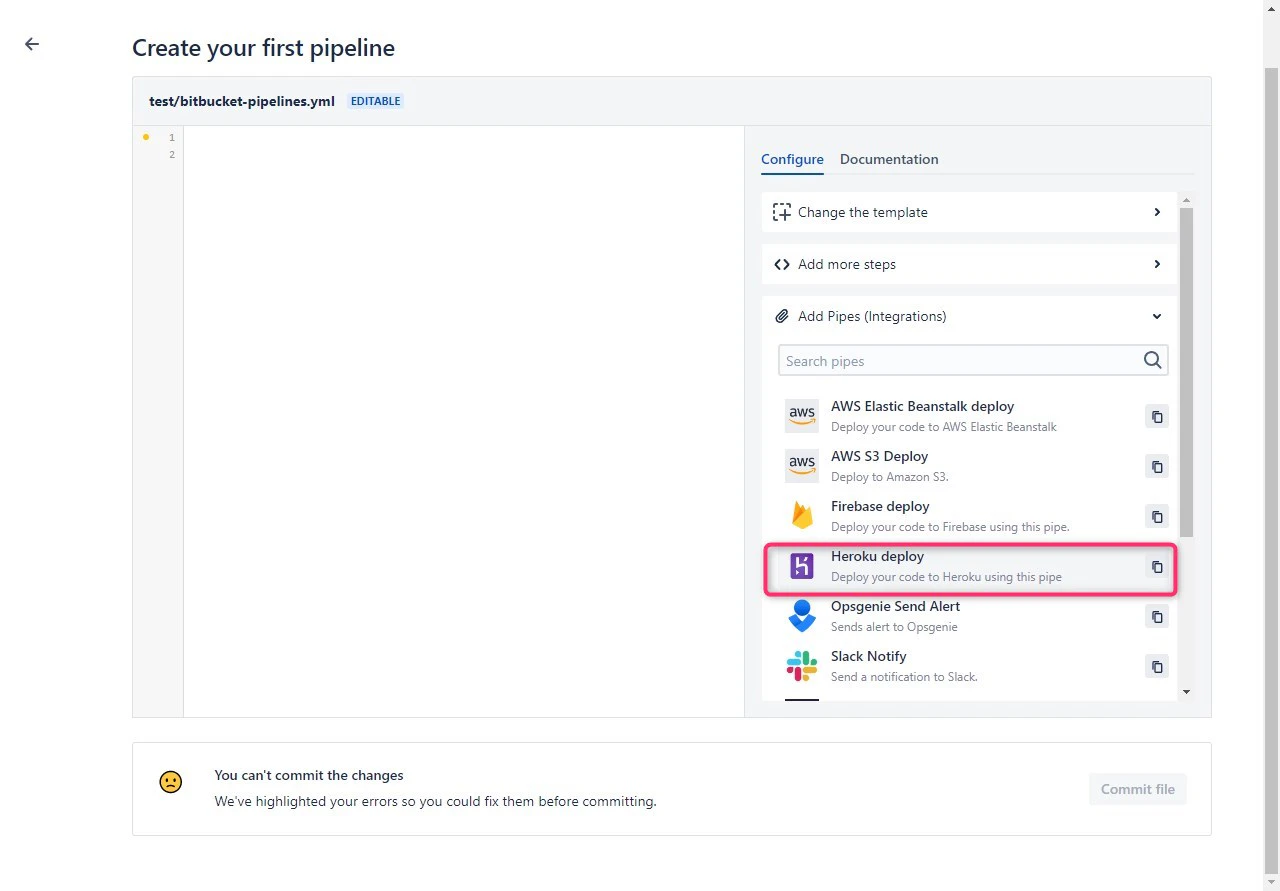
bitbucket-pipelines.yml を用意
今回デプロイしたのはPythonコードだったのでPython仕様になっていますがこんな感じで書きました。
runtime.txtで設定しるPythonのバージョンを image: に記載してください。
あとはそのままでも大丈夫だと思います。
# This is a sample build configuration for Python.
# Check our guides at https://ja.confluence.atlassian.com/x/x4UWN for more examples.
# Only use spaces to indent your .yml configuration.
# -----
# You can specify a custom docker image from Docker Hub as your build environment.
image: python:3.10.9

pipelines:
  default:

    - step:
        name: Build
        script:
          - git archive --format=tar.gz master -o sample-app.tar.gz
        artifacts:
          - sample-app.tar.gz

    - step:
        name: Deploy to production
        deployment: production
        caches:
          - pip
        script:

          - pipe: atlassian/heroku-deploy:2.0.0
            variables:
              HEROKU_API_KEY: $HEROKU_API_KEY
              HEROKU_APP_NAME: $HEROKU_APP_NAME
              ACTION: 'deploy' # Optional. 'update' or 'deploy' # Default 'deploy'.
              ZIP_FILE: 'sample-app.tar.gz' #'<string>' # Optional. 'ACTION' 'deploy' specific.
              WAIT:  'true' #'<boolean>' # Optional. 'ACTION' 'deploy' specific # Default: 'false'.
前半はBitbucketサポートの記事から
この記事を見て、testは必要無いんだなとw
後半のscript部分はBitbucketのパイプラインを作成できるページから
https://bitbucket.org/[ユーザーID]/[リポジトリ名]/pipelines
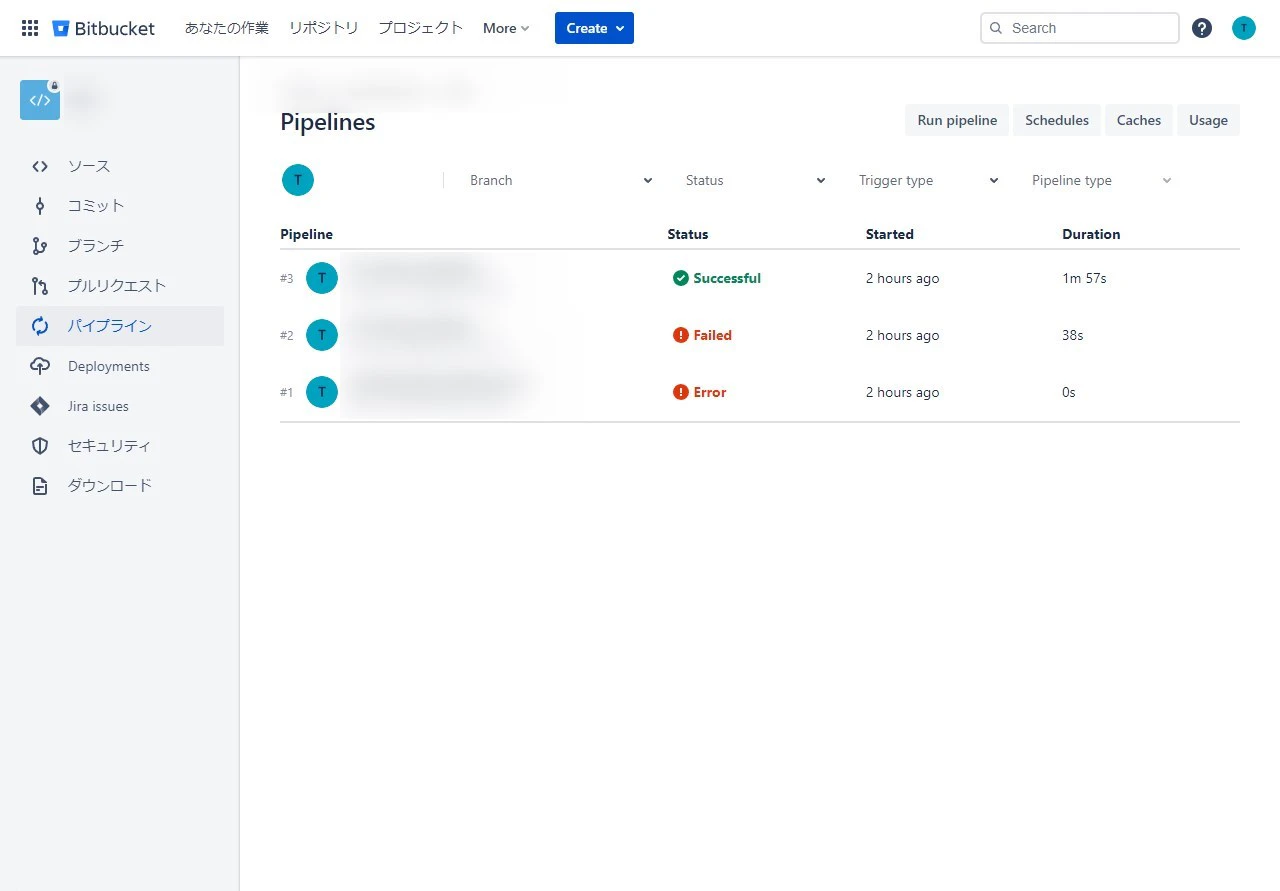
Bitbucketのリポジトリにプッシュする
作成したBitbucketのリポジトリにプッシュします。
そうするとBitbucket内でビルドが走り、Herokuにデプロイされます。やったね。
2回デプロイに失敗してるのはご愛嬌。
よかったらTwitterフォローしてください\(^o^)/
https://twitter.com/tbshiki