AWS IoTボタンを押すと動物の鳴き声を再生する2歳児向けおもちゃを作ってみました。
きっかけは動物好きな子どもが親の真似をして 「おけーぐるぐる ぞうの声」 とgoogle homeに向かって何度もしゃべっても認識できない
→親に「おけーぐるぐる ぞうの声 っていって」と何度も言われるような状況がうまれ、しんどい。。。
そこでボタン押すだけなら操作なら2歳児でもできるでしょ!と思い作成しました。
構成
構成はこんな感じです。  1.Amazon IoTボタンを押す 2.ラムダ関数が起動(ただGETメソッドを実行するだけ) 3.ローカルのサーバーが起動(ngrokを使うことでインターネット上に公開) 4.google homeがしゃべる!作成手順
作成手順はこんな感じです。 1.LAN環境でgoogle homeをしゃべらせる 2.サーバーをngrokを使ってLambdaからgoogle homeをしゃべらせる 3.Amazon IoTボタンとLambdaを連携し、google homeをしゃべらせる1.LAN環境でgoogle homeをしゃべらせる
google-home-notifierというライブラリを使ってgoogle homeをしゃべらせてみました!(windows環境)設定編
。。。。
。。。
エラーがたくさん出て長かったです。
まずは npm install google-home-notifier を実行
npm install google-home-notifier
エラーが出る
gyp ERR! find VS
gyp ERR! find VS msvs_version not set from command line or npm config
gyp ERR! find VS VCINSTALLDIR not set, not running in VS Command Prompt
gyp ERR! find VS could not use PowerShell to find Visual Studio 2017 or newer
gyp ERR! find VS looking for Visual Studio 2015
gyp ERR! find VS - not found
gyp ERR! find VS not looking for VS2013 as it is only supported up to Node.js 8
gyp ERR! find VS
gyp ERR! find VS **************************************************************
gyp ERR! find VS You need to install the latest version of Visual Studio
gyp ERR! find VS including the "Desktop development with C++" workload.
gyp ERR! find VS For more information consult the documentation at:
gyp ERR! find VS https://github.com/nodejs/node-gyp#on-windows
gyp ERR! find VS **************************************************************
gyp ERR! find VS
gyp ERR! configure error
gyp ERR! stack Error: Could not find any Visual Studio installation to use
Windows10にてNode環境構築によくあるエラーこちらを参考にしました。
→対処 PowerShellを管理者権限で起動し、下記のコマンドを発行する
npm install --global --production windows-build-tools
windows-build-toolsを入れるとよさげなのでインストール実施!※結構時間がかかります
Now configuring the Visual Studio Build Tools and Python...

All done!
こうなったら終わりです。
再度npm installを実行!
c:\github\google-home-notifier\node_modules\mdns\src\mdns.hpp(32): fatal error C1083: include ファイルを開けません。'dns_sd.h':No
such file or directory (ソース ファイルをコンパイルしています ..\src\txt_record_buffer_to_object.cpp) [C:\github\google-home-notifier\nod
e_modules\mdns\build\dns_sd_bindings.vcxproj]
はい、次のエラーが出ました。
Bonjourのインストールをします。
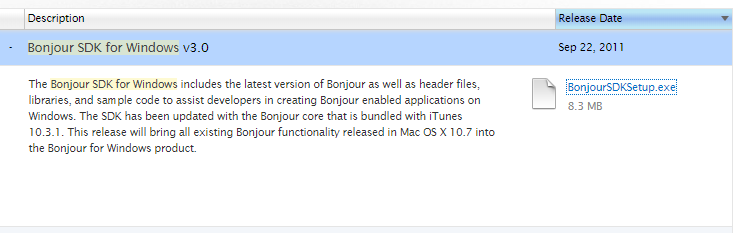
これをダウンロード&インストール
やっと環境設定が完了しました!
まずは動かしてみる。
googlehome = require('google-home-notifier');
googlehome.device('Google-Home', 'ja');
this.googlehome.notify('test', function(res) {
            console.log(res);
});
で実行!
をしてみたのですが、またもやエラー。。。
google-tts-apiのバージョンを上げないといけないらしい」です
package.json の google-tts-api を 0.0.4 に設定します。
   "bundleDependencies": false,
   "dependencies": {
     "body-parser": "^1.15.2",
     "castv2-client": "^1.1.2",
     "express": "^4.14.0",
-    "google-tts-api": "https://github.com/darrencruse/google-tts/tarball/british-voice",
+    "google-tts-api": "0.0.4",
     "mdns": "^2.3.3",
     "ngrok": "^2.2.4"
   },
そしてアップデート
npm update google-tts-api
ようやくしゃべりました!
長かった。
開発編
nodejs、expressでAPIサーバーを作りました。 ├ mp3/
├ node_modules/
├ app.js
└ googoleHomeApp.js
const express = require('express');
const app = express();
const speech=require('./googleHomeApp.js');
const conf=require('config');

const speechObj= new speech(conf.ipaddress,conf.portNo);
app.use(express.static('mp3'));
app.use(express.static('public'));
app.use(express.static('js'));

app.get('/speech', (req, res) => {
    speechObj.speech(req.query.value);
    res.send('speechOK')
});

app.get('/animalVoice', (req, res) => {
    speechObj.speechAnimalVoice();
    res.send('animalVoice')
});

app.listen(conf.portNo, () => console.log('Listening on port '+conf.portNo));
googoleHomeAppがメインのクラスです。
speechAnimalVoiceメソッドではmp3フォルダの中身をランダムに再生するようにしています。
module.exports =class {
    constructor(ipaddress,portNo){
        this.googlehome = require('google-home-notifier');
        this.fs = require('fs');
        this.language = 'ja';
        this.googlehome.device('Google-Home', this.language);
        this.rootUrl="http://"+ipaddress+":"+portNo;

      }

     speech(value) {
        this.googlehome.notify(value, function(res) {
            console.log(res);
        });
    }

    speechAnimalVoice() {
        const allDirents = this.fs.readdirSync('./mp3', { withFileTypes: true });
        const mp3value=allDirents[Math.floor(Math.random() * allDirents.length)];
        console.log(this.rootUrl);
        this.googlehome.play(this.rootUrl +'/'+ mp3value, function(res) {
            console.log(res);
        });

    }
}
2.サーバーをngrokを使ってLambdaからgoogle homeをしゃべらせる
ngrokの設定
続いてngrokを以下を参考に設定
こんなにも簡単にローカルのサーバーがインターネット公開できるとは。。。
セキュリティ面が気になりますが、いったん動かすレベルではこれでよいかなと思いました。
node.js
lambda関数の設定(ただGETメソッドを実行するだけ)
ngrokで公開されたURLにrequestを送るだけのlambda関数を作成しました。 Lambdaとか初心者なので require('request') を使うためにzipをアップロードするのに手間取りました。。。
exports.handler = async (event) => {

    const request = require('request');

    var URL = 'http://XXXXX.ngrok.io/animalVoice';

    request.get({
        uri: URL
    }, function(err, req, data){
        const response = {
            statusCode: 200,
            body: JSON.stringify('OK'),
        };
        return response;
    });

};
3.Amazon IoTボタンとLambdaを連携し、google homeをしゃべらせる
Lambda関数の設定
AWS IoT 1-Clickを選んで、プロジェクトを選択→lambda関数を指定 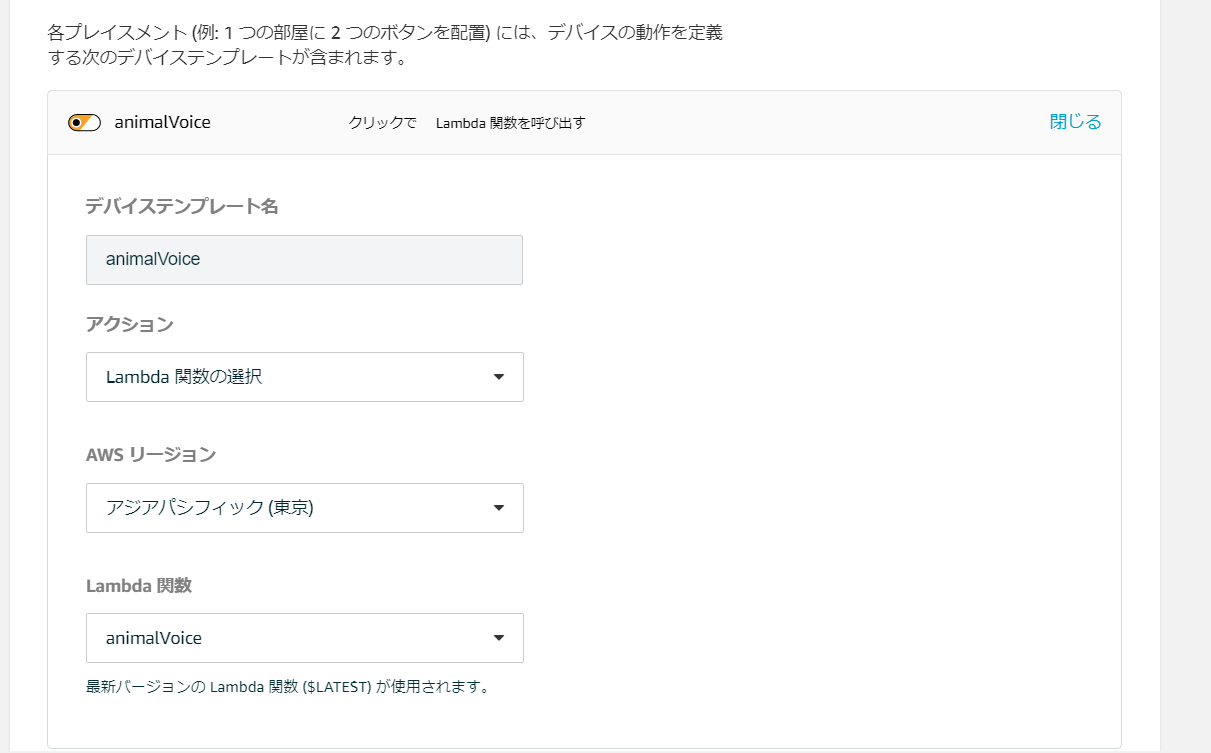
デバイスの設定
アプリをダウンロードして設定しました。 ノリと勢いで何とかなります。 android iosデバイスとプロジェクトの紐づけ
プレイスメントを選択し、デバイスとプロジェクトを紐づけます。 以上で終了です!
感想
ngrokのURLが固定じゃなかったり、ローカルPCで立ち上げているため、毎回いろいろと設定が必要なのは課題ですが、いったん作れてよかったです! AWS,nodejsなんとなく使ったことあるレベルだったので何かプロダクトを作りたい!と思いやってみました。 動くと楽しいですね!あと思いのほか子供がいい反応をしてくれてやってよかったなぁと思ってます。
ただ、ボタンを押してからしゃべるまでタイムラグがあるのがちょっといけてないなぁと思っています。
また何か思いついたらプロダクトを作りたいと思います。
あとaws,nodejsも独学なので、こうしたほうが良いよ!というご指摘等あればいただきたいです。
ソースコードは以下にあります!(実はgithubをちゃんと使うのも初めてです)
https://github.com/tayack/googlehome