ASP.NET Core 需要ってあまりない気がするので暫くは Zenn にも同じ記事を載せておきます。
はじめに
IdentityServer4 を使ったシングルサインオンをやってみたいけど、公式ドキュメントでは最初から用意してある処理が多くて理解し辛かったので、最小限のコードでシングルサインオンを実装してみました。
この記事はデモ用なのでメールの確認もしていないし、パスワードの制約も緩くしています。
また、認証・認可の専門家ではないので、色々考慮できていない部分もあるかと思います。
準備
今回は認可サーバー、APIサーバー、ウェブクライアントが必要になるので、まずは最低限のものを準備します。
ASP.NET Core のバージョンは 3.1 です。
認可サーバー
認可サーバーは「ASP.NET Core で空のプロジェクトからスキャフォールディングを使わずに Identity を実装してみる」で作成したものをプロジェクト名を変えて流用します。
APIサーバー
APIサーバーは ASP.NET Core のテンプレートから「ASP.NET Core Web API」を選択してベースとなるプロジェクトを生成します。
生成したら、ポートを6001番に変更しておきます。
また、この後出てくるウェブクライアントを localhost:7001 で動かす予定なので、接続できるように StartUp.cs で Cors の設定を入れておきます。
次にAPI /api/message/greetings と /api/message/protected の2つを用意します。
この時点ではどちらも保護されていません。
[Route("api/[controller]")]
[ApiController]
public class MessageController : ControllerBase
{
    [HttpGet("greetings")]
    public string GetMessage()
    {
        return "Hello World!";
    }

    [HttpGet("protected")]
    public string GetMessageFromProtectedApi()
    {
        return "Secret Message!";
    }
}
ウェブクライアント
ウェブクライアントは ASP.NET Core のテンプレートから「React.jsでのASP.NET Core」を選択してベースとなるプロジェクトを生成します。
生成したら、ポートを7001番に変更しておきます。
TypeScript を使いたいのと、自動生成されたコードは若干古いので、自動生成された ClientApp フォルダを削除して以下のコマンドで作り直します。
> npx create-react-app client-app --template typescript
作成し直したらフォルダ名を client-js から ClientApp に変えておきます。
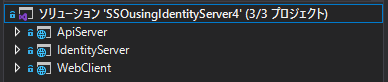
ここまでで、ソリューション構成は以下のようになります。
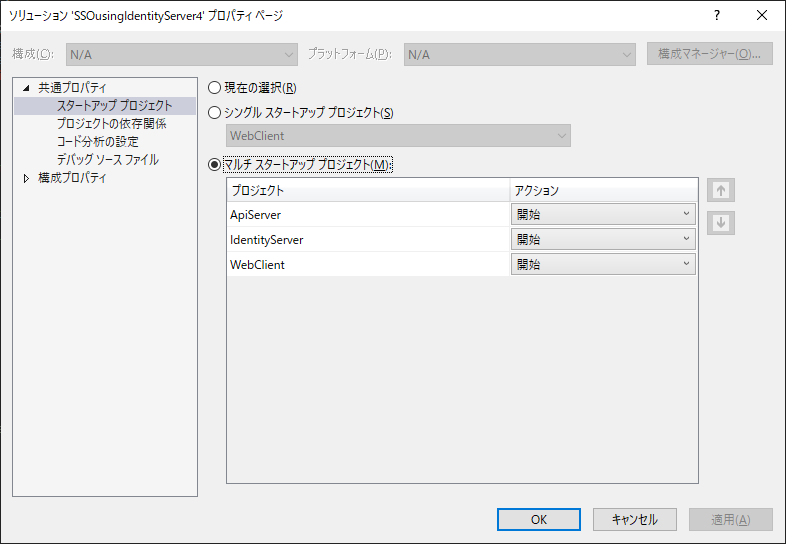
実行して確認する前に、3つのプロジェクトを同時に開始できるようにします。
ソリューション名で右クリックしてプロパティを選択します。
プロパティページから「マルチスタートアップ プロジェクト」を選択して、用意した3つのプロジェクトのアクションを「開始」に設定しておきます。
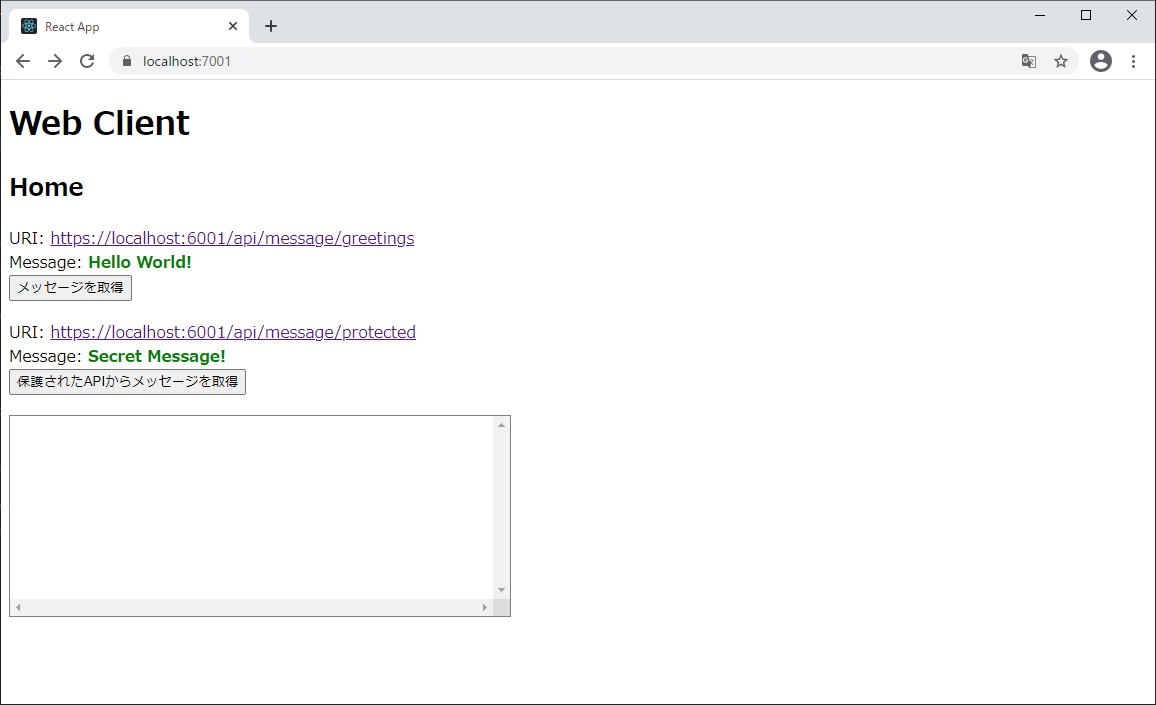
実行してウェブクライアントからAPIを叩いてメッセージが受け取れることを確認します。
ここまでのコードはこちら
https://github.com/tatsuteb/SSO-using-IdentityServer4/tree/v0.1/SSOusingIdentityServer4
https://github.com/tatsuteb/SSO-using-IdentityServer4/releases/tag/v0.1
APIサーバーのAPIを保護する
まず、APIサーバーのすべてのAPIを保護するように StartUp.cs で設定を行います。
また、この後の工程で認可サーバー https://localhost:5001 で発行されたトークンの検証も行うので、Bearerトークンを使った認証サービスも追加しておきます。
public void ConfigureServices(IServiceCollection services)
{
    // 省略
    services.AddAuthentication("Bearer")
	.AddJwtBearer("Bearer", options =>
	{
	    options.Authority = "https://localhost:5001";

	    options.TokenValidationParameters = new TokenValidationParameters
	    {
		ValidateAudience = false
	    };
	});

    services.AddAuthorization(options =>
        {
	    options.AddPolicy("ApiScope", policy =>
	    {
	        policy.RequireAuthenticatedUser();

	        // スコープによるアクセス制限を行う
    	        policy.RequireClaim("scope", "api1");
	    });
        });
    // 省略
}

public void Configure(IApplicationBuilder app, IWebHostEnvironment env)
{
    // 省略
    app.UseAuthentication();
    app.UseAuthorization();

    app.UseEndpoints(endpoints =>
    {
	endpoints.MapControllers()
	    .RequireAuthorization("ApiScope");
    });
}
このままだと保護したくないAPI /api/message/greetings まで保護されてしまうので、こちらはだれでも叩けるようにしておきます。
[AllowAnonymous]
[HttpGet("greetings")]
public string GetMessage()
{
    // 省略
}
実行して /api/message/protected だけ叩けない事を確認します。
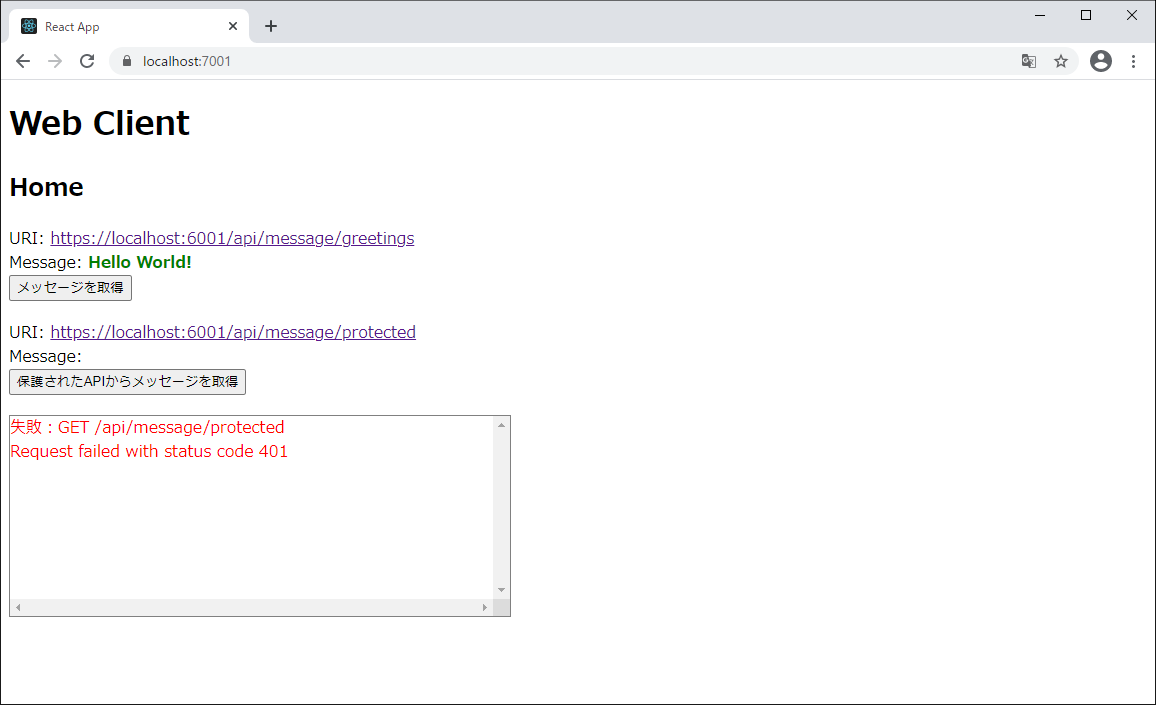
/api/message/protected を叩くと401のエラーコードが返ることが確認できました。
ここまでのコードはこちら
https://github.com/tatsuteb/SSO-using-IdentityServer4/tree/v0.2
https://github.com/tatsuteb/SSO-using-IdentityServer4/releases/tag/v0.2
認可サーバーに IdentityServer4 を導入
認可サーバーからアクセストークンを発行できるようにしていきます。
プロジェクトにパッケージ IdentityServer4 と IdentityServer4.AspNetIdentity を追加します。
次にウェブクライアントを認可サーバーに登録します。
Config.cs を作成してその中に記述していきます。
ここでは、Authorization Code With PKCE Flow を想定して登録しています。
また、IdentityResource と ApiScope も登録しておきます。
今回はプロフィール情報をもらいたいので、IdentityResource に Profile も追加しています。そのほか Email、Phone、Address と言ったリソースを追加してさらに情報を受け取ることもできます。
ここで追加している ApiScope の名前は APIサーバーの StartUp.cs で設定したものと合わせる必要があります。
public static class Config
{
    public static IEnumerable<IdentityResource> IdentityResources =>
        new List<IdentityResource>
        {
	    new IdentityResources.OpenId(),
	    new IdentityResources.Profile(),
        };

    public static IEnumerable<ApiScope> ApiScopes =>
        new List<ApiScope>
        {
	    new ApiScope("api1", "Protected API sample.")
        };

    public static IEnumerable<Client> Clients =>
        new List<Client>
        {
	    new Client
	    {
	        ClientId = "js",
	        ClientName = "JavaScript Client",
	        AllowedGrantTypes = GrantTypes.Code,
	        RequireClientSecret = false,
	        RequirePkce = true,

	        AllowOfflineAccess = true,
	        RefreshTokenUsage = TokenUsage.OneTimeOnly,

	        AccessTokenLifetime = 900, // 900秒 = 15分

	        RedirectUris =           { "https://localhost:7001/callback" },
	        PostLogoutRedirectUris = { "https://localhost:7001" },
	        AllowedCorsOrigins =     { "https://localhost:7001" },

	        AllowedScopes =
	        {
		    IdentityServerConstants.StandardScopes.OpenId,
		    IdentityServerConstants.StandardScopes.Profile,
		    "api1"
	        }
	    }
        };
}
登録情報が用意できたので、StartUp.cs で以下のように追加して、IdentityServer も有効にします。
UseIdentityServer() の中から UseAuthentication() も呼ばれるので、もともと書いていた UseAuthentication() は削除しています。
public void ConfigureServices(IServiceCollection services)
{
    // 省略

    var builder = services.AddIdentityServer(options =>
	{
	    // ログイン画面等のパスを変えたい場合はここでも指定できる
	    // options.UserInteraction.LoginUrl = "/Login";
	    // options.UserInteraction.LogoutUrl = "/Logout";
	    // options.UserInteraction.ErrorUrl = "/Error";
	})
	.AddInMemoryIdentityResources(Config.IdentityResources)
	.AddInMemoryApiScopes(Config.ApiScopes)
	.AddInMemoryClients(Config.Clients)
	.AddAspNetIdentity<IdentityUser>();

    if (!_environment.IsProduction())
    {
	builder.AddDeveloperSigningCredential();
    }

    // 省略
}

public void Configure(IApplicationBuilder app, IWebHostEnvironment env)
{
    // UseIdentityServer() の中で、UseAuthentication() も呼び出される
    app.UseIdentityServer();
    app.UseAuthorization();

    // 省略
}
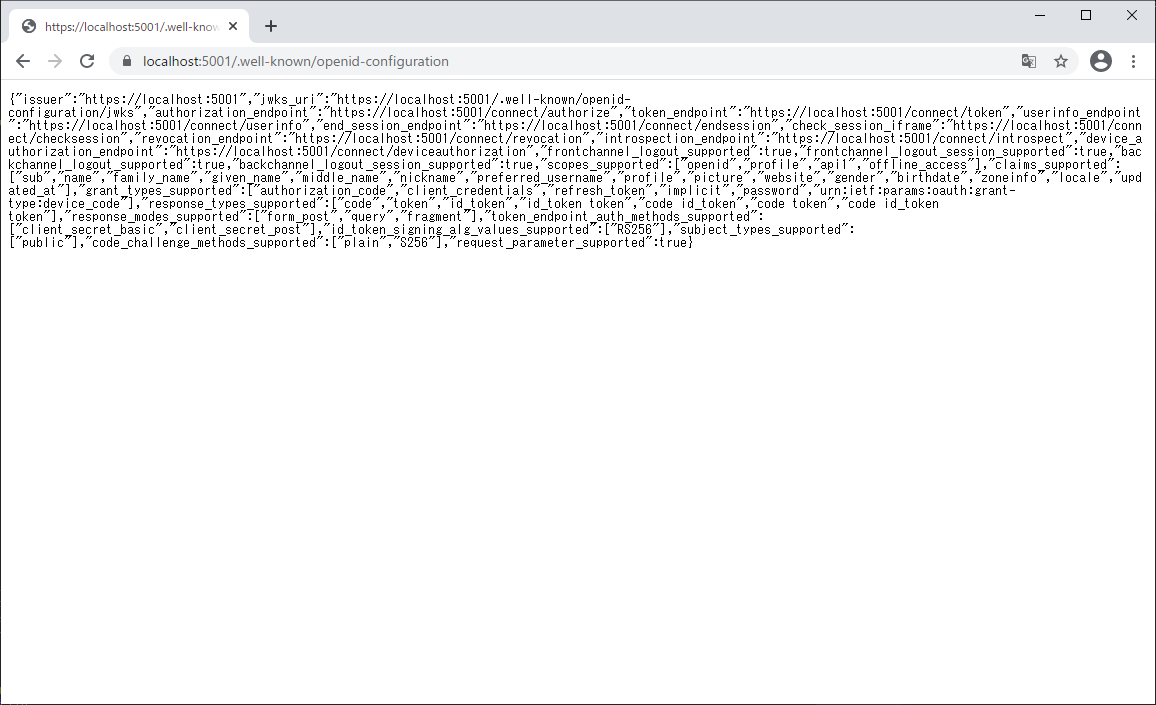
実行して https://localhost:5001/.well-known/openid-configuration にアクセスしてディスカバリードキュメントが表示されるか確認します。
ここまでのコードはこちら
https://github.com/tatsuteb/SSO-using-IdentityServer4/tree/v0.3
https://github.com/tatsuteb/SSO-using-IdentityServer4/releases/tag/v0.3
ウェブクライアントから保護されたAPIを叩けるようにする
最後にウェブクライアントからログインしてアクセストークンを受け取り、保護されたAPIを叩けるようにします。
oidc-client-js を使ってログイン、ログアウト、ユーザー取得の処理を行います。
今回はどのコンポーネントからもログイン、ログアウト、ユーザー取得の処理を行えるように、React の context を作っています。
以下にログイン、ログアウト等を実装した UserAuthProvider のコードを抜粋して載せておきます。
UserManager を生成する際に、認可サーバーや認可サーバーに登録した情報を同じものを設定するようにします。
また、ログインコールバック時の処理では、UserManager に response_mode: 'query' を設定する必要があったので、別途作成して signinRedirectCallback を呼び出しています。
import React, { createContext, useEffect, useMemo, useState } from 'react';
import { User, UserManager } from 'oidc-client';

interface UserInfo {
  // 省略
}

interface UserAuth {
  // 省略
}

const useUserAuth = (): UserAuth => {
  const userManager = useMemo(() => new UserManager({
    authority: 'https://localhost:5001',
    client_id: 'js',
    redirect_uri: 'https://localhost:7001/callback',
    response_type: 'code',
    scope: 'openid profile offline_access api1',
    post_logout_redirect_uri: 'https://localhost:7001',
    automaticSilentRenew: true,
    silentRequestTimeout: 3000,
  }), []);

  const [userInfo, setUserInfo] = useState<UserInfo | null>(null);

  useEffect(() => {
    // 省略

    userManager.getUser()
      .then(user => {
        // 省略
      });
  }, [userManager, userInfo]);

  return ({
    userInfo: userInfo,
    updateUserInfo: (user: User) => {
      // 省略
    },
    logIn: async () => {
      try {
        const user = await userManager.signinSilent({
          state: {
            returnUrl: window.location.pathname
          }
        });

        setUserInfo({
          name: user?.profile.name ?? '',
          accessToken: user.access_token
        });
      } catch (error) {
        await userManager.signinRedirect({
          state: {
            returnUrl: window.location.pathname
          }
        });
      }
    },
    logInCallback: async () => {
      const newUserManager = new UserManager({
        response_mode: 'query'
      });

      const user = await newUserManager.signinRedirectCallback()

      setUserInfo({
        name: user.profile.name ?? '',
        accessToken: user.access_token
      });

      return user.state.returnUrl;
    },
    logOut: async () => {
      await userManager.signoutRedirect();
      setUserInfo(null);
    }
  });
};

// 省略
ユーザー情報を受け取ることができたら、そこからアクセストークンを取得して API を叩く際、ヘッダーの Authorization に設定してます。
今回は axios を使って API を叩きます。
毎回トークンを設定するのが面倒だったので、前処理を入れた axios インスタンスを供給するための React コンテキストを作っています。
import axios, { AxiosInstance } from 'axios';
import React, { createContext, useContext, useEffect } from 'react';

const newAxios = axios.create({
  baseURL: 'https://localhost:6001'
});
const axiosContext = createContext<AxiosInstance>(newAxios);

export const useAxios = () => useContext(axiosContext);

export const AxiosProvider: React.FC<{ accessToken?: string }> = ({ accessToken, children }) => {

  useEffect(() => {
    if (!accessToken) {
      return;
    }

    // https://www.npmjs.com/package/axios#interceptors
    newAxios.interceptors
      .request
      .use(async config => {
        config.headers.common['Authorization'] = `Bearer ${accessToken ?? ''}`

        return config;
      });
  }, [accessToken]);

  return (
    <axiosContext.Provider value={newAxios}>
      {children}
    </axiosContext.Provider>
  );
};
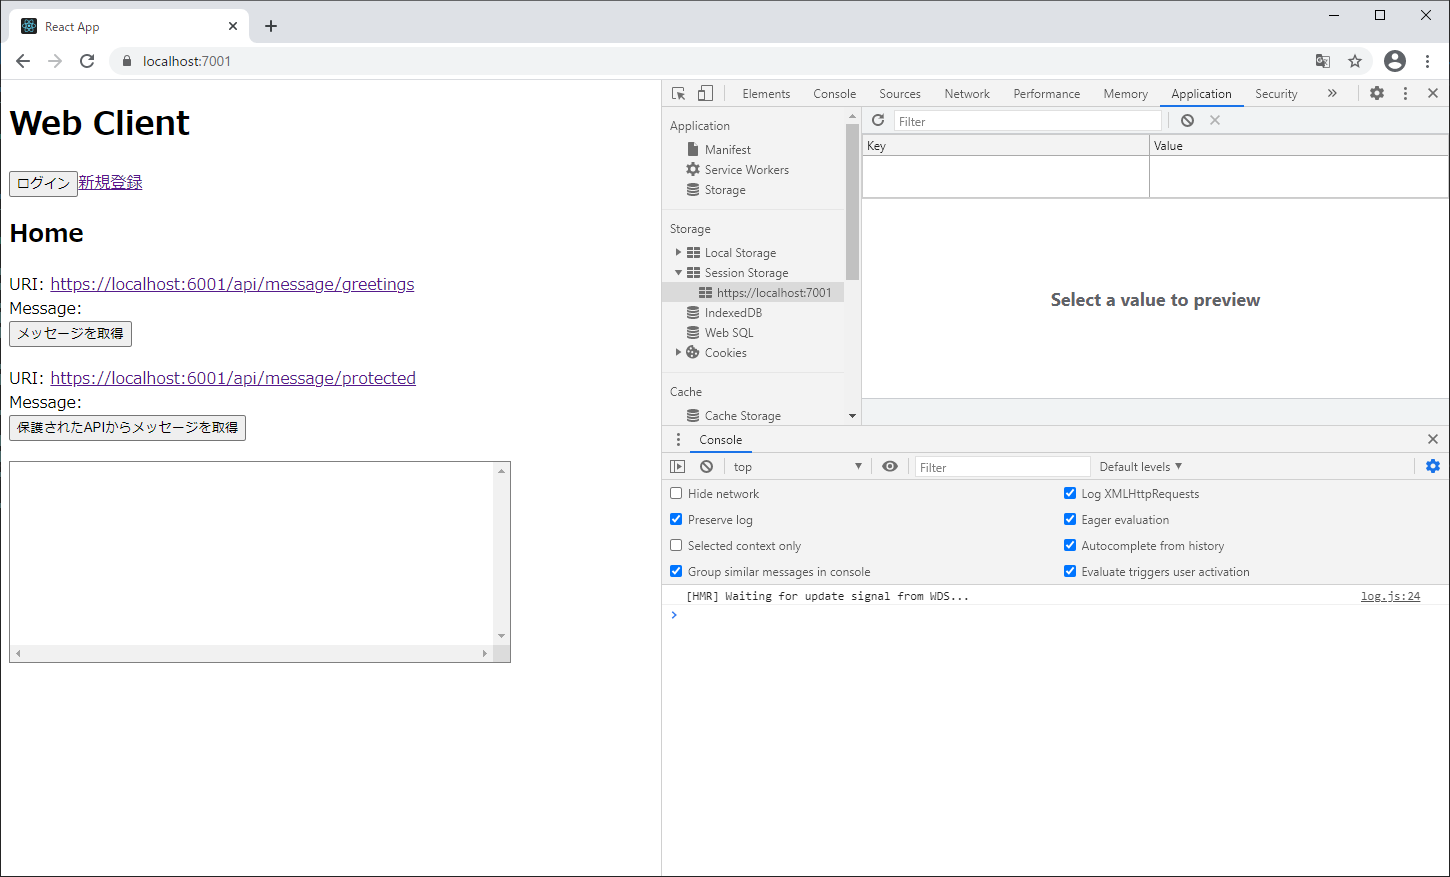
実行して動作を確認します。
先ずはログイン前の状態。
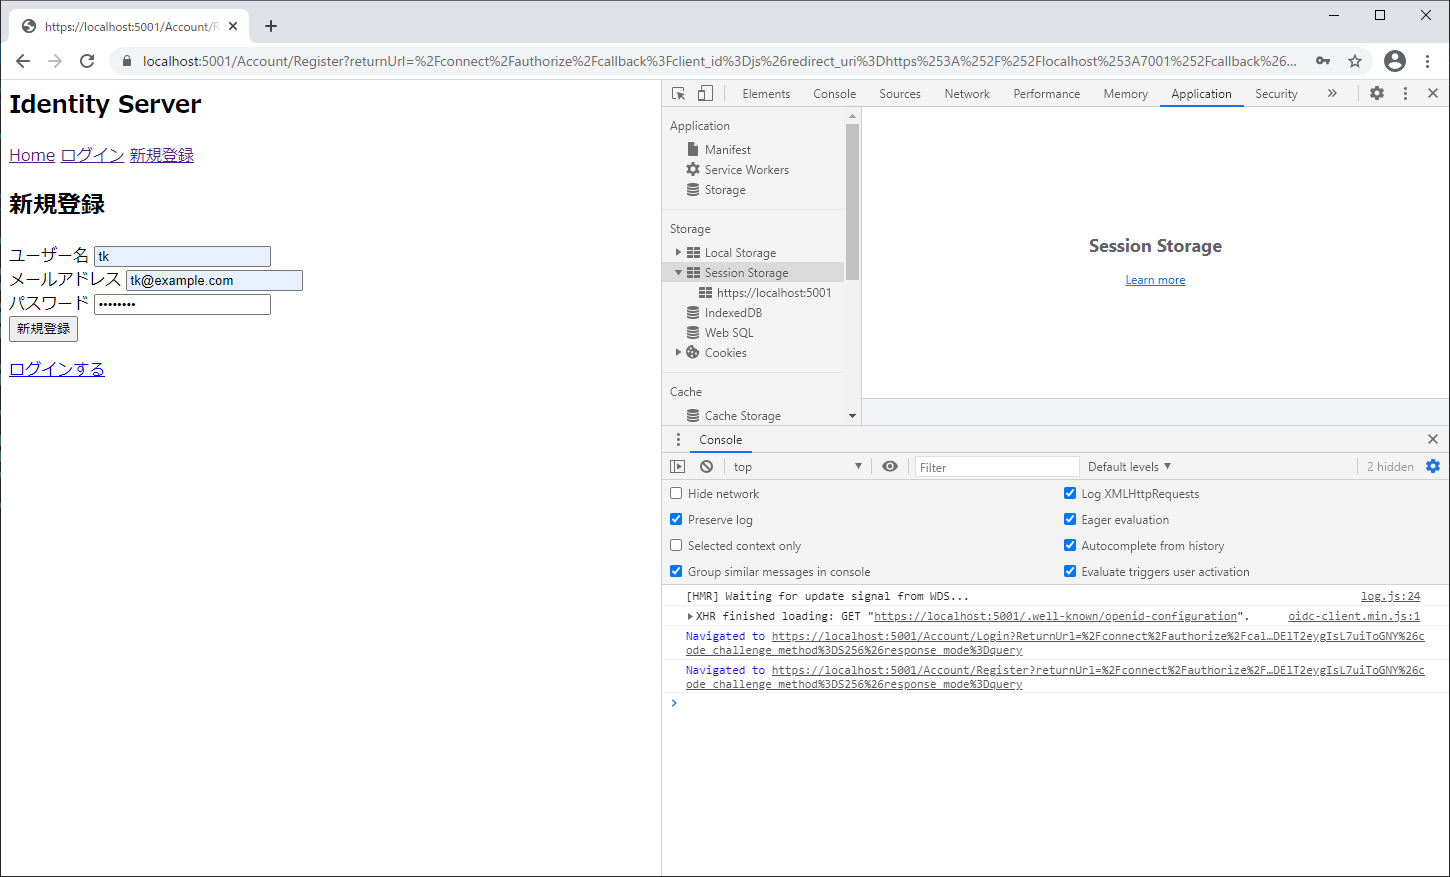
ログインをクリックして認可サーバーにリダイレクト後、新規登録へ移動。
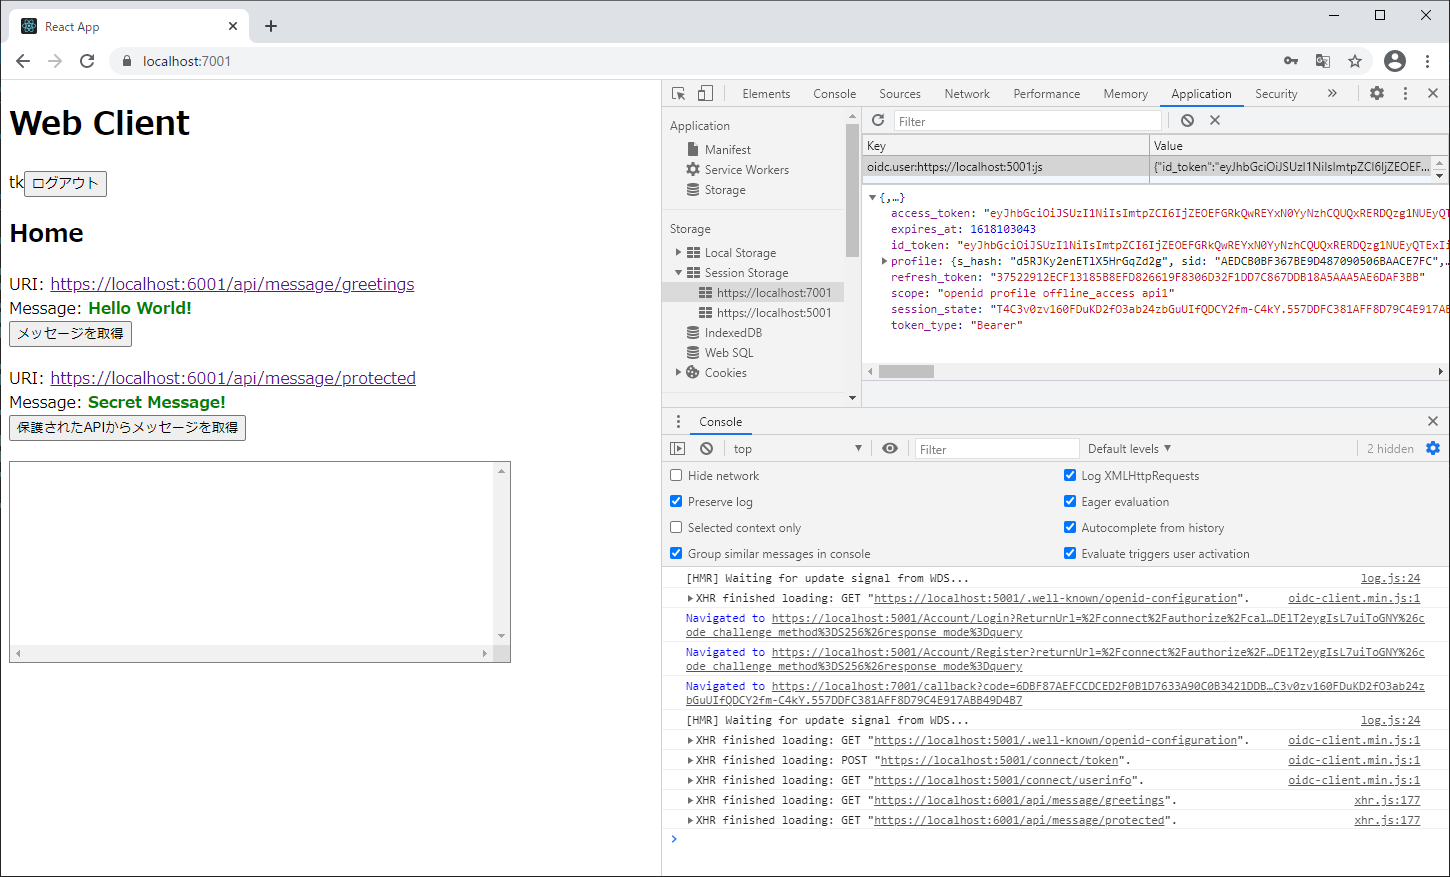
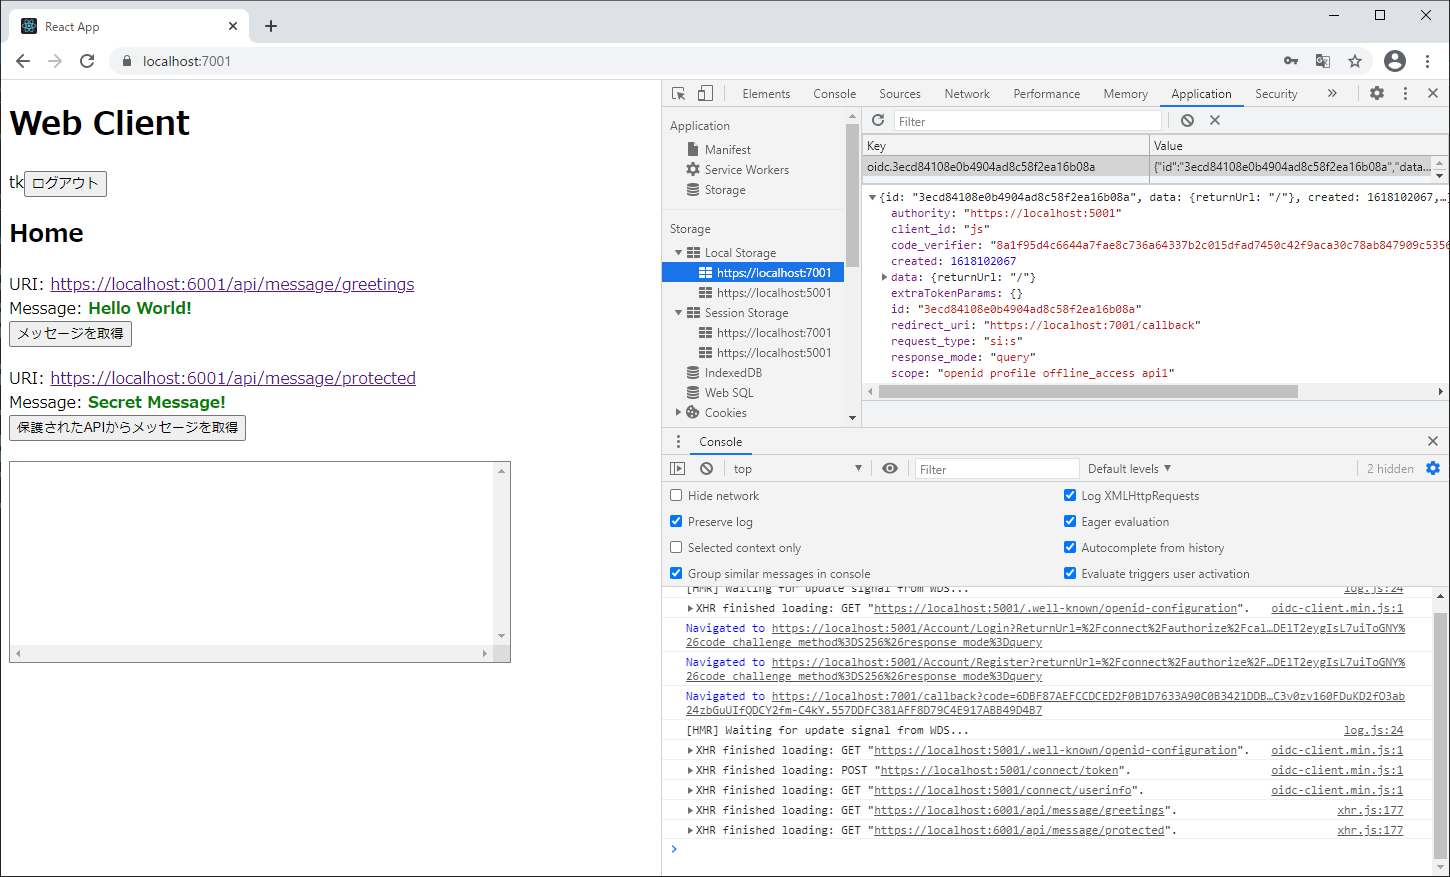
新規登録に成功して、リダイレクトされた後、APIを叩いてみます。
ちゃんと保護されたAPIも叩けるようになりました。
また、セッションにアクセストークンやリフレッシュトークン、プロフィールが入っていることが確認できます。
code_verifier も確認できます。
ログアウトして、再度保護されたAPIを叩いてみます。
401が返ってきて叩けなくなっていることが確認できます。

ここまでのコードはこちら
https://github.com/tatsuteb/SSO-using-IdentityServer4/tree/v0.4
https://github.com/tatsuteb/SSO-using-IdentityServer4/releases/tag/v0.4
IdentityServer 自身の API を保護してみる
IdentityServer 自身にあれこれAPIを実装して公開することはあまりないと思いますが、どうしてもやりたいケースがあるかもしれないのでやってみました。
先ずは API スコープと接続するクライアントに IdentityServerConstants.LocalApi.ScopeName を登録します。
IdentityServerConstants.LocalApi.ScopeName は "IdentityServerApi" という文字列が入ってます。
public static IEnumerable<ApiScope> ApiScopes =>
    new List<ApiScope>
    {
	new ApiScope("api1", "Protected API sample."),
	new ApiScope(IdentityServerConstants.LocalApi.ScopeName)
    };

public static IEnumerable<Client> Clients =>
    new List<Client>
    {
	new Client
	{
            // 省略

	    AllowedScopes =
	    {
		IdentityServerConstants.StandardScopes.OpenId,
		IdentityServerConstants.StandardScopes.Profile,
		"api1",
		IdentityServerConstants.LocalApi.ScopeName
	    }
	}
    };
次に、StartUp.cs でローカルAPIを保護するためのポリシー設定を行います。
必要であればCORSの設定も行います。
AddLocalApiAuthentication の中で AddPolicy が呼び出されて基本的が行われます。
スキーマを変更するなどカスタマイズしたい場合は、AddLocalApiAuthentication を使わずに自分で設定することもできます。
public void ConfigureServices(IServiceCollection services)
{
    // 省略
    services.AddLocalApiAuthentication();
    services.AddCors(options =>
    {
	options.AddPolicy(name: "default",
	    corsPolicyBuilder =>
	    {
		corsPolicyBuilder.WithOrigins(new []{ "https://localhost:7001" })
		    .AllowAnyHeader()
		    .AllowAnyMethod();
	    });
    });
}

public void Configure(IApplicationBuilder app, IWebHostEnvironment env)
{
    // 省略
    app.UseCors("default");
}
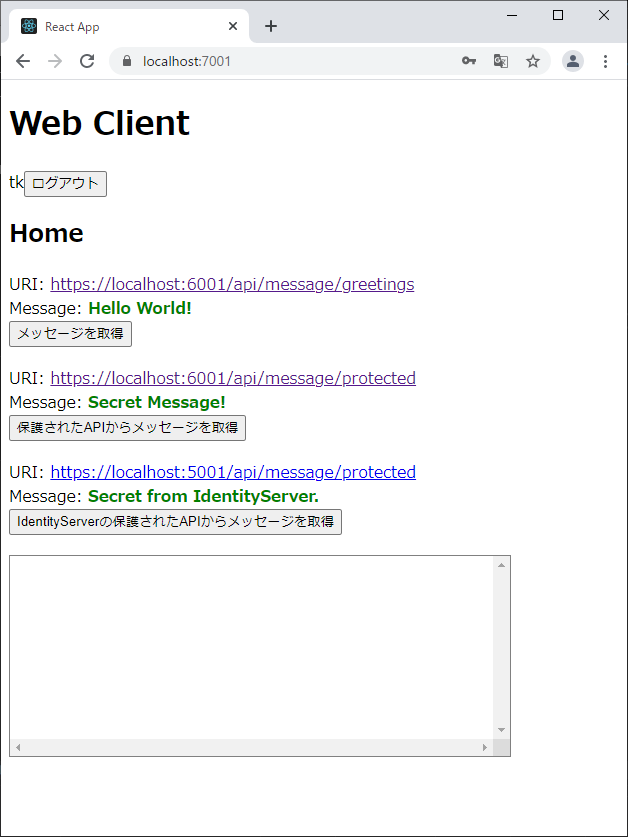
次に、保護するAPIを用意します。ここでは GET https://localhost:5001/api/message/protected で呼び出せるAPIを用意しています。
ポリシーを設定して、許可されたクライアントだけがアクセスできるようにします。
[Authorize(IdentityServerConstants.LocalApi.PolicyName)]
[HttpGet("protected")]
public string GetMessageFromProtectedApi()
{
    return "Secret from IdentityServer.";
}
このAPIをウェブクライアント(localhost:7001)から呼び出してみます。
ここまでのコードはこちら
https://github.com/tatsuteb/SSO-using-IdentityServer4/tree/v0.5
https://github.com/tatsuteb/SSO-using-IdentityServer4/releases/tag/v0.5
最後に
同様にしてクライアントを増やして、認可サーバーに登録すれば同じアカウントで認証・認可できます。
今回はできるだけ最小限の実装で IdentityServer4 を使ったシングルサインオンをやってみました。
場合によってはログイン前に同意画面を出すといった処理も必要になるかと思います。
この記事に対応するリポジトリはこちら
参考資料
IdentityServer4
axios - Interceptors
react-router-dom - Redirect(Auth)