目的
LLaVAを触って、自分のデータセットで追加学習するためには何が必要そうかを学ぶ。
2023年に作られて、更にパワーアップ中なモデルを触っていきます。
環境
GPU GeForce 3090
Ubuntu 22.04
CUDA 12.4
cuDNN 9.7.1
操作 ( JupyterLab )
追加学習させるデータセットを用意する
追加学習と言っても、操作の流れが確認できればいいので、今回は学習回数を1回にしてテストする。
チュートリアルに習い、OK-VQAというデータセットを利用する。
Hugging Faceというある種のプラットフォームから公開されている"datasets"ライブラリを用いれば、簡単にダウンロードできる。
!pip install datasets
ここで、ipywigetsもアップグレードしておく。
# 執筆時点ではipywidgets-8.1.5
!pip install --upgrade ipywidgets
LLaVAは、入力に画像と、質問(テキスト)が必要になる。これらのデータをJSONの形式にして学習できる形に整える。
# Structure for LLaVA JSON
        json_data = {
            "id": unique_id,# 事前に画像ファイル名を一意にしておく
            "image": f"{unique_id}.jpg", # ここは画像へのパス
            "conversations": [
                {
                    "from": "human",
                    "value": question
                },
                {
                    "from": "gpt",
                    "value": answer
                }
            ]
        }
このようなコードになる(参考1)
from datasets import load_dataset
from PIL import Image
from io import BytesIO
import requests
import os
import json
import uuid

def process_and_save(dataset, output_folder, subset_name):
    # Define image subfolder within output folder
    subset_folder = os.path.join(output_folder, subset_name)
    image_subfolder = os.path.join(output_folder, 'images')


    if not os.path.exists(image_subfolder):
        os.makedirs(image_subfolder)


    if not os.path.exists(subset_folder):
        os.makedirs(subset_folder)


    # Initialize list to hold all JSON data
    json_data_list = []


    # Process and save images and labels
    for item in dataset:
        # Load image if it's a URL or a file path
        if isinstance(item['image'], str):
            response = requests.get(item['image'])
            image = Image.open(BytesIO(response.content))
        else:
            image = item['image']  # Assuming it's a PIL.Image object


        # Create a unique ID for each image
        unique_id = str(uuid.uuid4())


        # Define image path
        image_path = os.path.join(image_subfolder, f"{unique_id}.jpg")


        # Save image
        image.save(image_path)


        # Remove duplicates and format answers
        answers = item['answers']
        unique_answers = list(set(answers))
        formatted_answers = ", ".join(unique_answers)


        # Structure for LLaVA JSON
        json_data = {
            "id": unique_id,
            "image": f"{unique_id}.jpg",
            "conversations": [
                {
                    "from": "human",
                    "value": item['question']
                },
                {
                    "from": "gpt",
                    "value": formatted_answers
                }
            ]
        }


        # Append to list
        json_data_list.append(json_data)


    # Save the JSON data list to a file
    json_output_path = os.path.join(output_folder, subset_name, 'dataset.json')
    with open(json_output_path, 'w') as json_file:
        json.dump(json_data_list, json_file, indent=4)


def save_dataset(dataset_name, output_folder, class_name, subset_name, val_samples=None):
    # Load the dataset from Hugging Face
    dataset = load_dataset(dataset_name, split=subset_name)


    # Filter for images with the specified class in 'question_type'
    filtered_dataset = [item for item in dataset if item['question_type'] == class_name]


    # Determine the split for training and validation
    if val_samples is not None and subset_name == 'train':
        train_dataset = filtered_dataset[val_samples:]
        val_dataset = filtered_dataset[:val_samples]
    else:
        train_dataset = filtered_dataset
        val_dataset = []


    # Process and save the datasets
    for subset, data in [('train', train_dataset), ('validation', val_dataset)]:
        if data:
            process_and_save(data, output_folder, subset)
実行はこうやる。
output_folder = 'dataset'
class_name = 'other'
val_samples = 300
save_dataset('Multimodal-Fatima/OK-VQA_train', output_folder, class_name, 'train', val_samples)
save_dataset('Multimodal-Fatima/OK-VQA_test', output_folder, class_name, 'test')
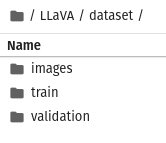
これで、画像とテキストがダウンロードされて、JSON形式に整形された訓練とテストデータが自動的に保存される。
(LLaVAフォルダがワーキングフォルダ)
LLaVA環境をインストールする
!git clone https://github.com/haotian-liu/LLaVA.git
これで、githubにあるLLaVAのワークスペースがダウンロードされる。

次に、ダウンロードしたLLaVAの中にあるpyproject.tomlを開き、自分の環境にバージョンを合わせる。
執筆時点で、torch-2.6.0+cu124, torchvision-0.21.0+cu124であったので、環境に合わせてtorch==2.6.0, torchvision==0.21.0に変更。
後のdeepspeedでのエラー回避のために、peft==0.10.0を指定した。
dependencies = [
    "torch==2.6.0", "torchvision==0.21.0",
    "transformers==4.37.2", "tokenizers==0.15.1", "sentencepiece==0.1.99", "shortuuid",
    "accelerate==0.21.0", "peft==0.10.0", "bitsandbytes",
    "pydantic", "markdown2[all]", "numpy", "scikit-learn==1.2.2",
    "gradio==4.16.0", "gradio_client==0.8.1",
    "requests", "httpx==0.24.0", "uvicorn", "fastapi",
    "einops==0.6.1", "einops-exts==0.0.4", "timm==0.6.13",
]
訓練時に利用する追加の依存関係にあるtrainプロジェクトで使うdeepspeedライブラリのバージョン(deepspeed==0.14.4)も指定しておく。(https://github.com/huggingface/alignment-handbook/issues/180)。
DeepSpeedは、Microsoftが開発した深層学習トレーニングの最適化ライブラリ。大規模な深層学習モデルを、より効率的に、より少ない計算リソースでトレーニングできるように設計されている。
wandbは学習状況を確認するために使う。バージョンは何でも良さそう。執筆時に利用したバージョンはwandb==0.1.9.6。
[project.optional-dependencies]
train = ["deepspeed==0.14.4", "ninja", "wandb"]
build = ["build", "twine"]
設定を済ませたら、LLaVAをeditモードでインストールする。筆者には、あまり馴染みのない使い方だが、editモードとやらにして、変更が動的に更新されるモードにしておくというお作法のようだ。
# The pip install -e . lets us install the repository in editable mode
!cd LLaVA && pip install --upgrade pip && pip install -e .
("pip install -e ."の部分で、ディレクトリにあるPythonプロジェクトをインストールしている。この際に、pyprojectファイルが参照される)
さらに、"train"という追加のllava依存プロジェクト(llava内に含まれている)もインストールする。
#pip install: Pythonパッケージインストーラであるpipを呼び出すコマンド
#-e または --editable: プロジェクトを編集可能モードでインストールするためのオプションです。これにより、ソースコードを変更するとすぐに変更が反映さる。
#.: 移動した先のディレクトリにあるプロジェクトをインストール
#[train]: プロジェクトの setup.py または pyproject.toml ファイルで定義された「train」という名前の追加の依存関係グループを指定。
!cd LLaVA && pip install -e ".[train]"
実行環境を整える
flash-attnは、TransformerモデルのAttentionメカニズムを高速化するライブラリ。インストールする。
!pip install flash-attn --no-build-isolation
(--no-build-isolationオプションについて)
通常、pipはパッケージをビルドする際に、独立した環境を作成する。これは、システムの依存関係とパッケージの依存関係の競合を避けるために役立つ。--no-build-isolationオプションを使用すると、pipは独立した環境を作成せずに、現在の環境でパッケージをビルドする。
wandbを使うには、事前にwandbのアカウントを作成して、APIキーを取得しておく。キーは、Webでwandbのサイトにログインすると確認できる。
以下実行するとキーを聞かれるので、入力。
import wandb
wandb.login()
LLaVAのファインチューン
以下のようにdeepspeedを使って学習させる。
'''
以下の設定が24Gで限界
メモリの容量を使いたくないのなら、
per_device_train_batch_size を下げる
per_device_eval_batch_size を下げる
gradient_accumulation_steps を増やす

bits 4オプション+4bit/llava-v1.5-7bモデルベース+zero2.jsonだと、いろいろエラーが出てしまう。ペンディング。

要点は、
--bitsオプションを使っていないこと。
deepspeed設定ファイルはzero3.json
モデルは13bだと100GiB超えるので、7bを使うこと。(liuhaotian/llava-v1.5-7b)
--versionは、llava_llama_2
--num_train_epochsは 1(ここを増やせば本格的に追加学習できる)

その他のパラメータについてはGeminiに聞いたほうが早い。
'''
!deepspeed LLaVA/llava/train/train_mem.py \
    --lora_enable True \
    --lora_r 128 \
    --lora_alpha 256 \
    --mm_projector_lr 2e-5 \
    --deepspeed LLaVA/scripts/zero3.json \
    --model_name_or_path liuhaotian/llava-v1.5-7b \
    --version llava_llama_2 \
    --data_path ./dataset/train/dataset.json \
    --image_folder ./dataset/images \
    --vision_tower openai/clip-vit-large-patch14-336 \
    --mm_projector_type mlp2x_gelu \
    --mm_vision_select_layer -2 \
    --mm_use_im_start_end False \
    --mm_use_im_patch_token False \
    --image_aspect_ratio pad \
    --group_by_modality_length True \
    --bf16 True \
    --output_dir ./checkpoints/llava-v1.5-7b-task-lora \
    --num_train_epochs 1 \
    --per_device_train_batch_size 16 \
    --per_device_eval_batch_size 4 \
    --gradient_accumulation_steps 2 \
    --evaluation_strategy "no" \
    --save_strategy "steps" \
    --save_steps 100 \
    --save_total_limit 1 \
    --learning_rate 2e-4 \
    --weight_decay 0. \
    --warmup_ratio 0.03 \
    --lr_scheduler_type "cosine" \
    --logging_steps 1 \
    --tf32 True \
    --model_max_length 2048 \
    --gradient_checkpointing True \
    --dataloader_num_workers 4 \
    --lazy_preprocess True \
    --report_to wandb
実行して、成功すると、以下のコメントが出力される。
[2025-02-20 08:29:58,604] [INFO] [launch.py:351:main] Process 14577 exits successfully.
これで、指定した場所にcheckpointが作成され、重みが保存されている状態になった。あとはこれをロードして使う。
テスト
ベースモデルの重みを今回のものにマージするには、このようにする。
# merge the LoRA weights with the full model
!python LLaVA/scripts/merge_lora_weights.py --model-path checkpoints/llava-v1.5-7b-task-lora --model-base liuhaotian/llava-v1.5-7b --save-model-path llava-ftmodel
マージはできるのだが、結局、base_modelを指定することが推奨されているようなので、今回はその方法で行く。(詳細はfrom llava.model.builder import load_pretrained_modelのところを見ていくとわかる)
run_llava.pyを使ってテストする。
!python LLaVA/llava/eval/run_llava.py --model-path checkpoints/llava-v1.5-7b-task-lora\
--model-base liuhaotian/llava-v1.5-7b\
--image-file "https://llava-vl.github.io/static/images/view.jpg"\
--query "why was this photo taken?"\
実行後、最後に、出力結果がでれば成功。
This photo was taken to capture the serene and picturesque view of a pier extending over a lake, with mountains in the background. The image showcases the beauty of nature and the tranquility of the scene, making it an appealing and visually pleasing photograph. The pier, the lake, and the mountains create a harmonious composition that highlights the peacefulness and natural beauty of the location.
チャットボット化
参考4をみて、早速トライしてみました。
少し改変しています。
from transformers import AutoTokenizer, BitsAndBytesConfig
from llava.utils import disable_torch_init
from llava.constants import (
    IMAGE_TOKEN_INDEX,
    DEFAULT_IMAGE_TOKEN,
    DEFAULT_IM_START_TOKEN,
    DEFAULT_IM_END_TOKEN,
    IMAGE_PLACEHOLDER,
)
from llava.conversation import conv_templates, SeparatorStyle
from llava.model.builder import load_pretrained_model
from llava.mm_utils import (
    process_images,
    tokenizer_image_token,
    get_model_name_from_path,
    KeywordsStoppingCriteria
)

from llava.eval.run_llava import load_image, load_images

import torch
from PIL import Image
import requests
from io import BytesIO

class LLaVAChatBot:
    '''
    See also run_llva.py
    '''
    def __init__(self,
                 model_path: str = 'liuhaotian/llava-v1.5-7b',
                 model_base: str = 'liuhaotian/llava-v1.5-7b',
                 conv_mode: str = 'llava_llama_2',
                 top_p: float = 0.8,
                 num_beams: int = 3,
                ) -> None:
        self.model = None
        self.tokenizer = None
        self.image_processor = None
        self.conv_mode = conv_mode
        self.conv = None
        self.conv_img = None
        self.img_tensor = None
        self.image_sizes = 0
        self.roles = None
        self.stop_key = None
        self.top_p=top_p # 0.7 ~ 0.9 in general
        self.num_beams=num_beams # 1 ~ 5 in general
        self.load_models(model_path,model_base)

    def load_models(self, model_path: str, model_base: str) -> None:
        """Load the model, processor and tokenizer."""
        disable_torch_init()
        model_name = get_model_name_from_path(model_path)
        self.tokenizer, self.model, self.image_processor, context_len = load_pretrained_model(
            model_path, model_base, model_name
        )

    def setup_image(self, img_paths: str, sep=',') -> None:
        '''
        img_paths = e.g., "img1.jpg,img2.jpg" (no space between paths)
        '''
        """画像のロードと処理"""
        image_files = img_paths.split(sep)
        self.conv_img = load_images(image_files)
        self.image_sizes = [x.size for x in self.conv_img]
        self.img_tensor = process_images(
            self.conv_img,
            self.image_processor,
            self.model.config
        ).to(self.model.device, dtype=torch.float16)

    def setup_query(self, query) ->str:
        image_token_se = DEFAULT_IM_START_TOKEN + DEFAULT_IMAGE_TOKEN + DEFAULT_IM_END_TOKEN
        if IMAGE_PLACEHOLDER in query:
            if self.model.config.mm_use_im_start_end:
                qs = re.sub(IMAGE_PLACEHOLDER, image_token_se, query)
            else:
                qs = re.sub(IMAGE_PLACEHOLDER, DEFAULT_IMAGE_TOKEN, query)
        else:
            if self.model.config.mm_use_im_start_end:
                qs = image_token_se + "\n" + query
            else:
                qs = DEFAULT_IMAGE_TOKEN + "\n" + query
        return qs

    def generate_answer(self,
                        temperature: float = 0.2,
                        max_new_tokens: int = 2048,
                        use_cache=True,
                        **kwargs) -> str:
        """現在の会話から回答を生成"""
        prompt = self.conv.get_prompt()
        input_ids = (
            tokenizer_image_token(prompt, self.tokenizer, IMAGE_TOKEN_INDEX, return_tensors="pt")
            .unsqueeze(0)
            .cuda()
        )

        stopping = None
        if self.stop_key is not None:
            stopping = KeywordsStoppingCriteria([self.stop_key],
                                                self.tokenizer,
                                                input_ids)

        with torch.inference_mode():
            output_ids = self.model.generate(
                input_ids,
                images=self.img_tensor,
                image_sizes=self.image_sizes,
                do_sample=True if temperature > 0 else False,
                temperature=temperature,
                top_p=self.top_p,
                num_beams=self.num_beams,
                max_new_tokens=max_new_tokens,
                stopping_criteria= stopping,
                use_cache=use_cache,
            )

        outputs = self.tokenizer.batch_decode(output_ids, skip_special_tokens=True)[0].strip()
        self.conv.messages[-1][-1] = outputs
        return outputs

    def get_conv_text(self) -> str:
        """完全な会話のテキスト"""
        return self.conv.get_prompt()

    def start_new_chat(self,
                       img_path: str,
                       prompt: str,
                       temperature=0.2,
                       max_new_tokens=2048,
                       use_cache=True,
                       **kwargs) -> str:
        """新たな画像で新規チャットを開始"""
        self.setup_image(img_path)
        first_input = self.setup_query(prompt)
        # init conv and roles
        self.conv = conv_templates[self.conv_mode].copy()
        self.roles = self.conv.roles
        self.conv.append_message(self.roles[0], first_input)
        self.conv.append_message(self.roles[1], None)
        answer = self.generate_answer(temperature=temperature,
                                      max_new_tokens=max_new_tokens,
                                      use_cache=use_cache,
                                      **kwargs)
        return answer

    def continue_chat(self,
                      prompt: str,
                      temperature=0.2,
                      max_new_tokens=2048,
                      use_cache=True,
                      **kwargs) -> str:
        """既存のチャットの継続"""
        if self.conv is None:
            raise RuntimeError("No existing conversation found. Start a new"
                               "conversation using the `start_new_chat` method.")

        self.conv.append_message(self.roles[0], prompt)
        self.conv.append_message(self.roles[1], None)
        answer = self.generate_answer(temperature=temperature,
                                      max_new_tokens=max_new_tokens,
                                      use_cache=use_cache,
                                      **kwargs)
        return answer
このように使うことができる。
chatbot = LLaVAChatBot(model_path = 'checkpoints/llava-v1.5-7b-task-lora',
                      conv_mode="llava_v1")
今回はconv_mode="llava_v1"としています。なぜかllava_llama_2だと簡潔な答えしか返ってこない印象があったので。v1のほうが自然な文章で返ってくる印象。他のモードでも試したほうがいいかも。
- conv_mode = "llava_llama_2"
- conv_mode = "mistral_instruct"
- conv_mode = "chatml_direct"
- conv_mode = "llava_v1"
- conv_mode = "mpt"
- conv_mode = "llava_v0"
一度chatbotを初期化すると、GPUメモリを結構持っていかれる。
もう一度初期化したときは、ノートブックをシャットダウンして再起動してGPUメモリを開放して再開する必要があった。
チャットを始める。
ans = chatbot.start_new_chat(img_path="https://llava-vl.github.io/static/images/view.jpg",
                             prompt="What is in this photo?",
                            temperature=0.2)
回答
'The image features a pier extending out over a body of water, possibly a lake or a river. The pier is made of wood and has a bench on it, providing a place for people to sit and enjoy the view of the water. There are mountains in the background, adding to the scenic beauty of the location.'
動いてくれて嬉しい。
続けて会話する。
ans = chatbot.continue_chat(prompt="why was this photo taken? Please ansering 3 or more statements.")
回答
'To capture scenery, to enjoy the view, to take a picture'
うまくいったようだ。
他にも試してみる。フクロウだとどうだろう。
ans = chatbot.start_new_chat(img_path="https://imagej.net/ij/images/owl.png",
                             prompt="What is in this ?",
                            temperature=0.2)
回答
'Owl, eyes, eyesight, eyes'
脳梗塞の画像とかはどうだろう。
ans = chatbot.start_new_chat(img_path = "https://prod-images-static.radiopaedia.org/images/4848287/a00f7d6ca92fd400cecbb9cf964f97_big_gallery.jpg",
                             prompt="This is a MRI head brain image. Could you explain any finddings?")
回答
'The image shows a close-up of a brain, specifically focusing on the frontal lobe, which is the area of the brain responsible for emotions, decision-making, and motor control. The frontal lobe is visible in the center of the image, with the left and right sides of the brain visible as well. There is a noticeable white spot in the middle of the frontal lobe, which could be an indication of a lesion, tumor, or other abnormality in the brain. The presence of this white spot suggests that the person might have a neurological condition or injury affecting the frontal lobe. It is important to consult a medical professional for a proper diagnosis and treatment plan.'
結構いい感じの回答だったが、設定をかえたりすると全然違う回答になった。
入力した画像を確認するときはこのようにできる。(画像は複数入力できるので、リストの配列のインデックスは画像の順番を指定する)
display(chatbot.conv_img[0])
画像を複数入力しても、回答は一つになる(はず)。","で半角スペース無しで続けてパスを入力。
ans = chatbot.start_new_chat(img_path = "https://prod-images-static.radiopaedia.org/images/4848287/a00f7d6ca92fd400cecbb9cf964f97_big_gallery.jpg,https://prod-images-static.radiopaedia.org/images/4848459/258e374c8c43de170618974390d69e_big_gallery.jpg",
                             prompt="Are there any findings? Could you explain ?")
すべての会話を文字列で取得するにはこうする。
all_conv = chatbot.get_conv_text()
References
- LLaVA:https://github.com/haotian-liu/LLaVA
- https://wandb.ai/byyoung3/ml-news/reports/How-to-Fine-Tune-LLaVA-on-a-Custom-Dataset--Vmlldzo2NjUwNTc1
- https://colab.research.google.com/github/brevdev/notebooks/blob/main/llava-finetune.ipynb?utm_source=chatgpt.com#scrollTo=330f3d47-8daa-480a-acd7-6517bac50c9b
- https://qiita.com/taka_yayoi/items/23cdbd25a9d1cb684c23
- https://colab.research.google.com/drive/1tq9K3utBJ4VeMmuUarMEFCmaekMUG_Zd?usp=sharing