はじめに
Amazon BedrockとStreamlitでチャットボットを作成してみました。
Amazon Bedrockのclaudeを用いて、サンプルアプリを開発してみたい方におすすめです。
開発環境
- Windows 11
- Python 3.11.0
- AWS CLI 2.13.29
実装
Amazon Bedrockで使用するモデルの有効化
AWS Amazon Bedrockのページに移動し、「Model Access」を選択、Claudeが「Access granted」になっていない場合は、右上の「edit」を選択します。
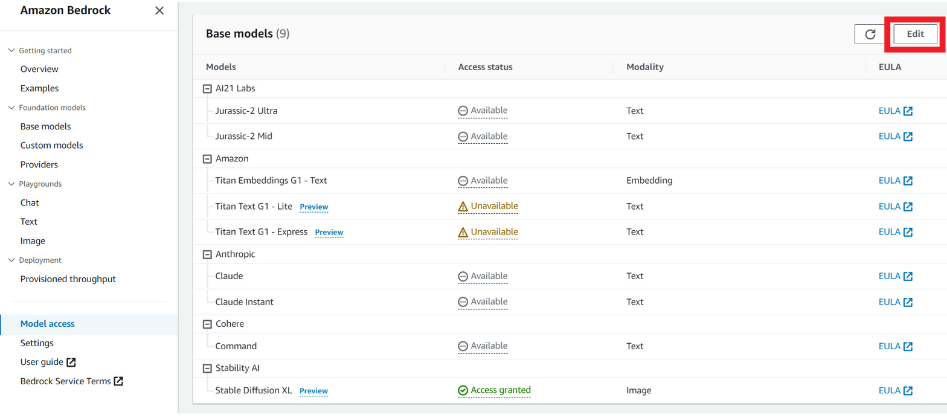
「Anthropic」にチェックを入れ、「Save changes」を選択します。

数分間はステータスが「In Progress」となるので、待機します。
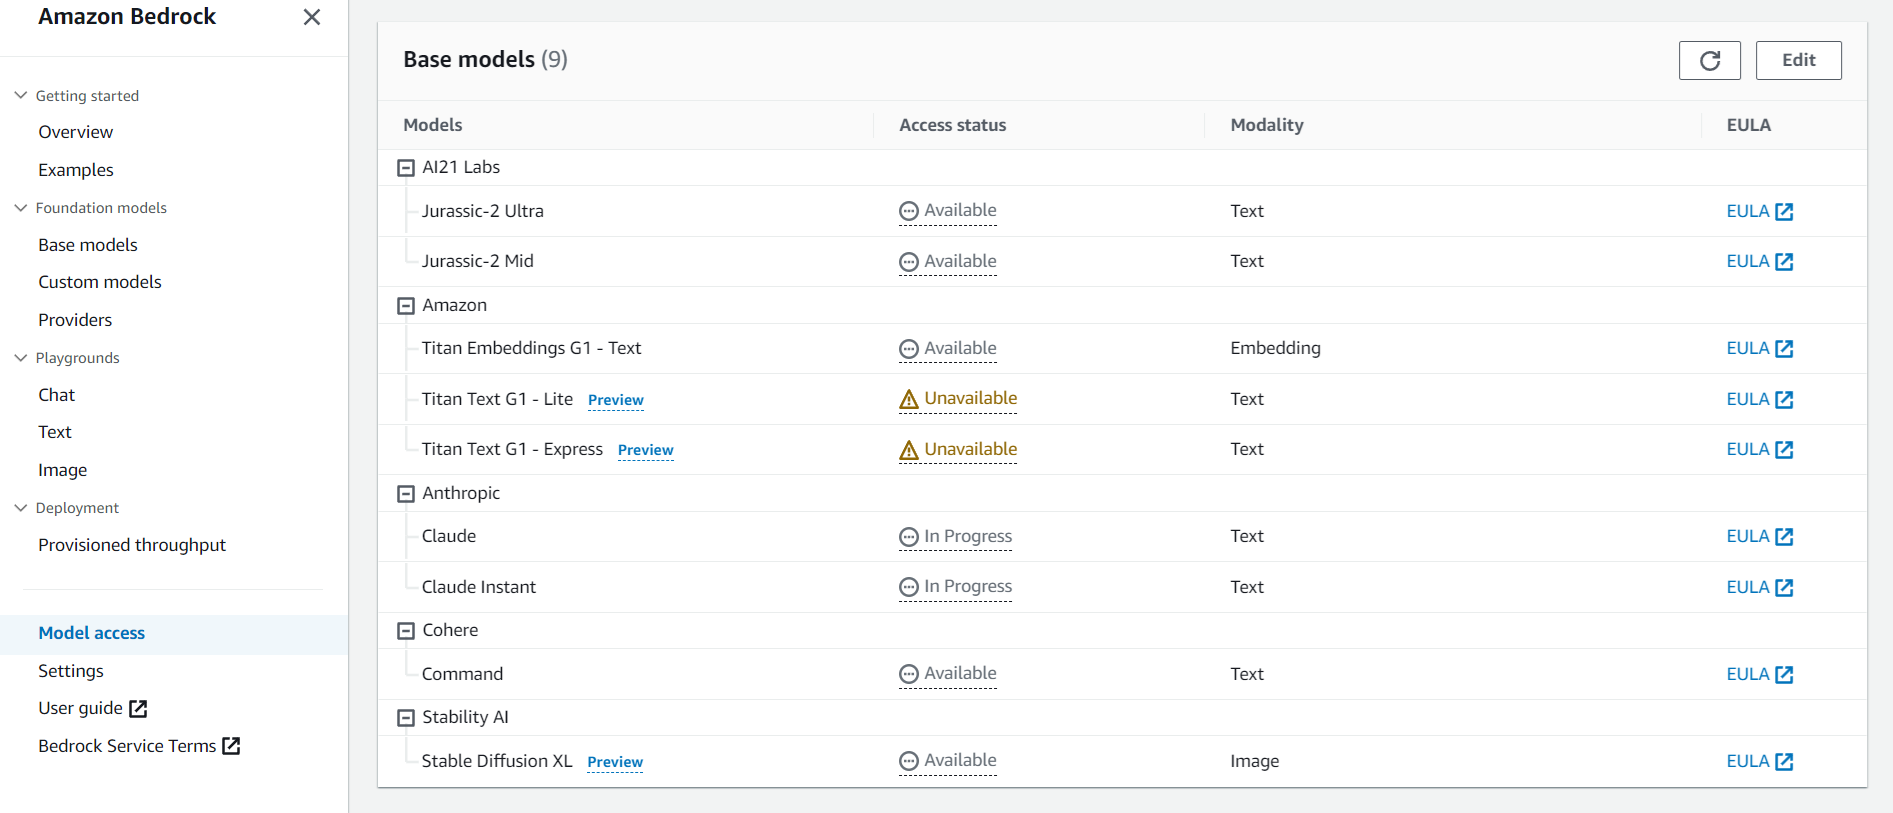
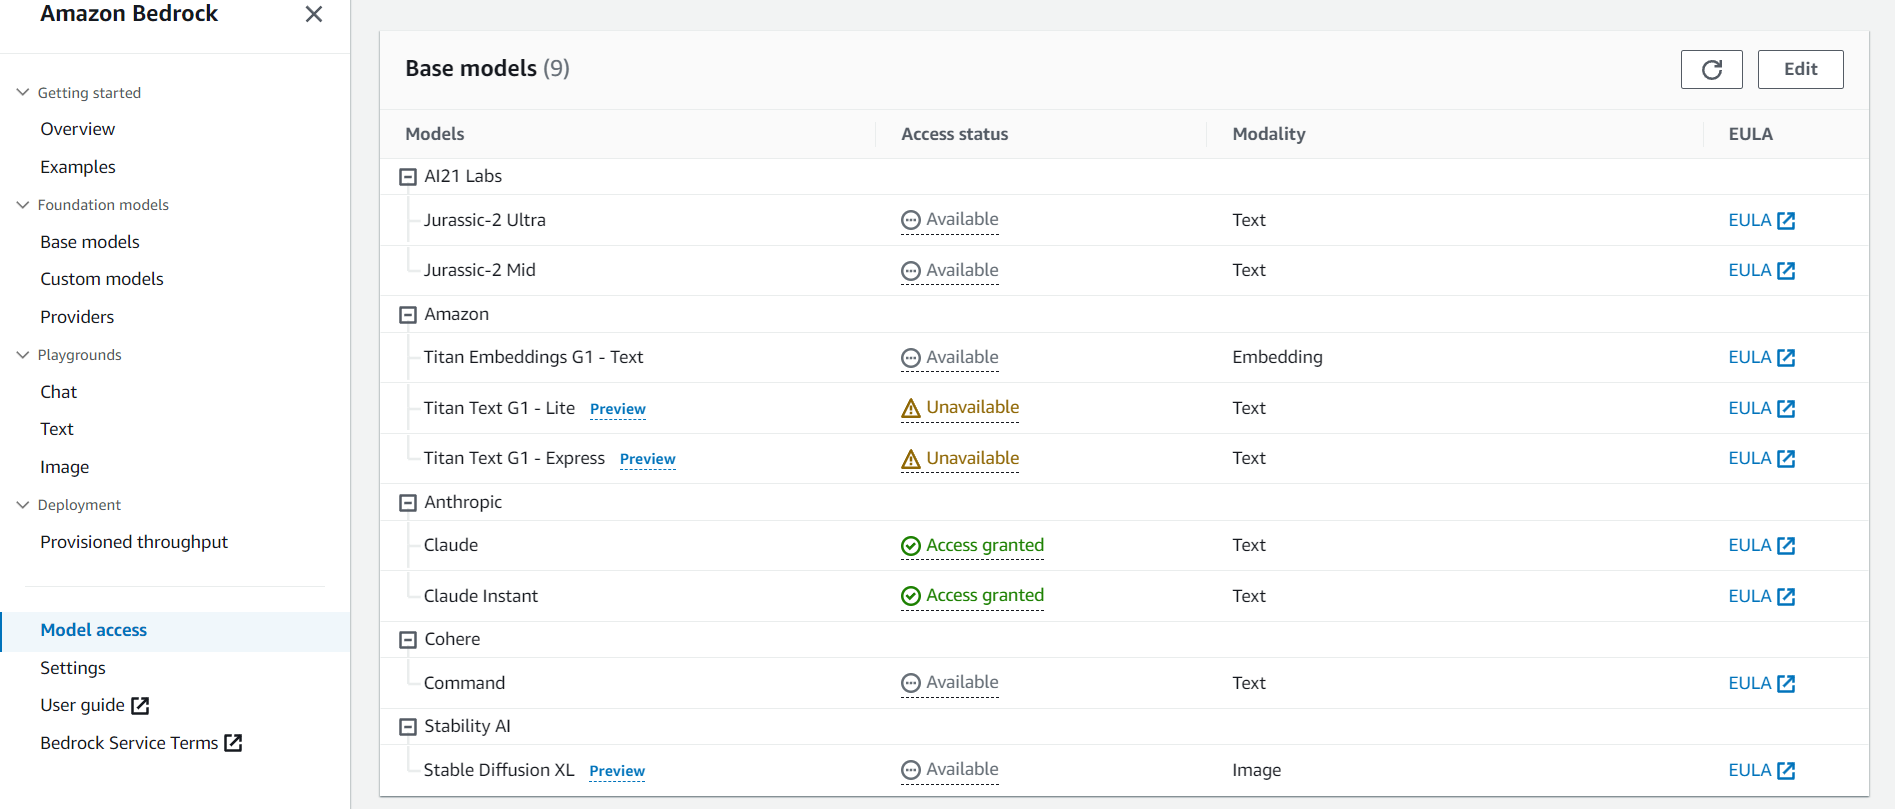
数分おきに更新ボタンを押して、ステータスが「Access granted」になれば有効化の完了です。
IAMの設定
次に、IAMの設定を行います。
AWS IAMの「ユーザー」タブに移動して、任意のユーザーを選択または作成します。
「セキュリティ認証情報」タブから、「アクセスキーを作成」を選択します。
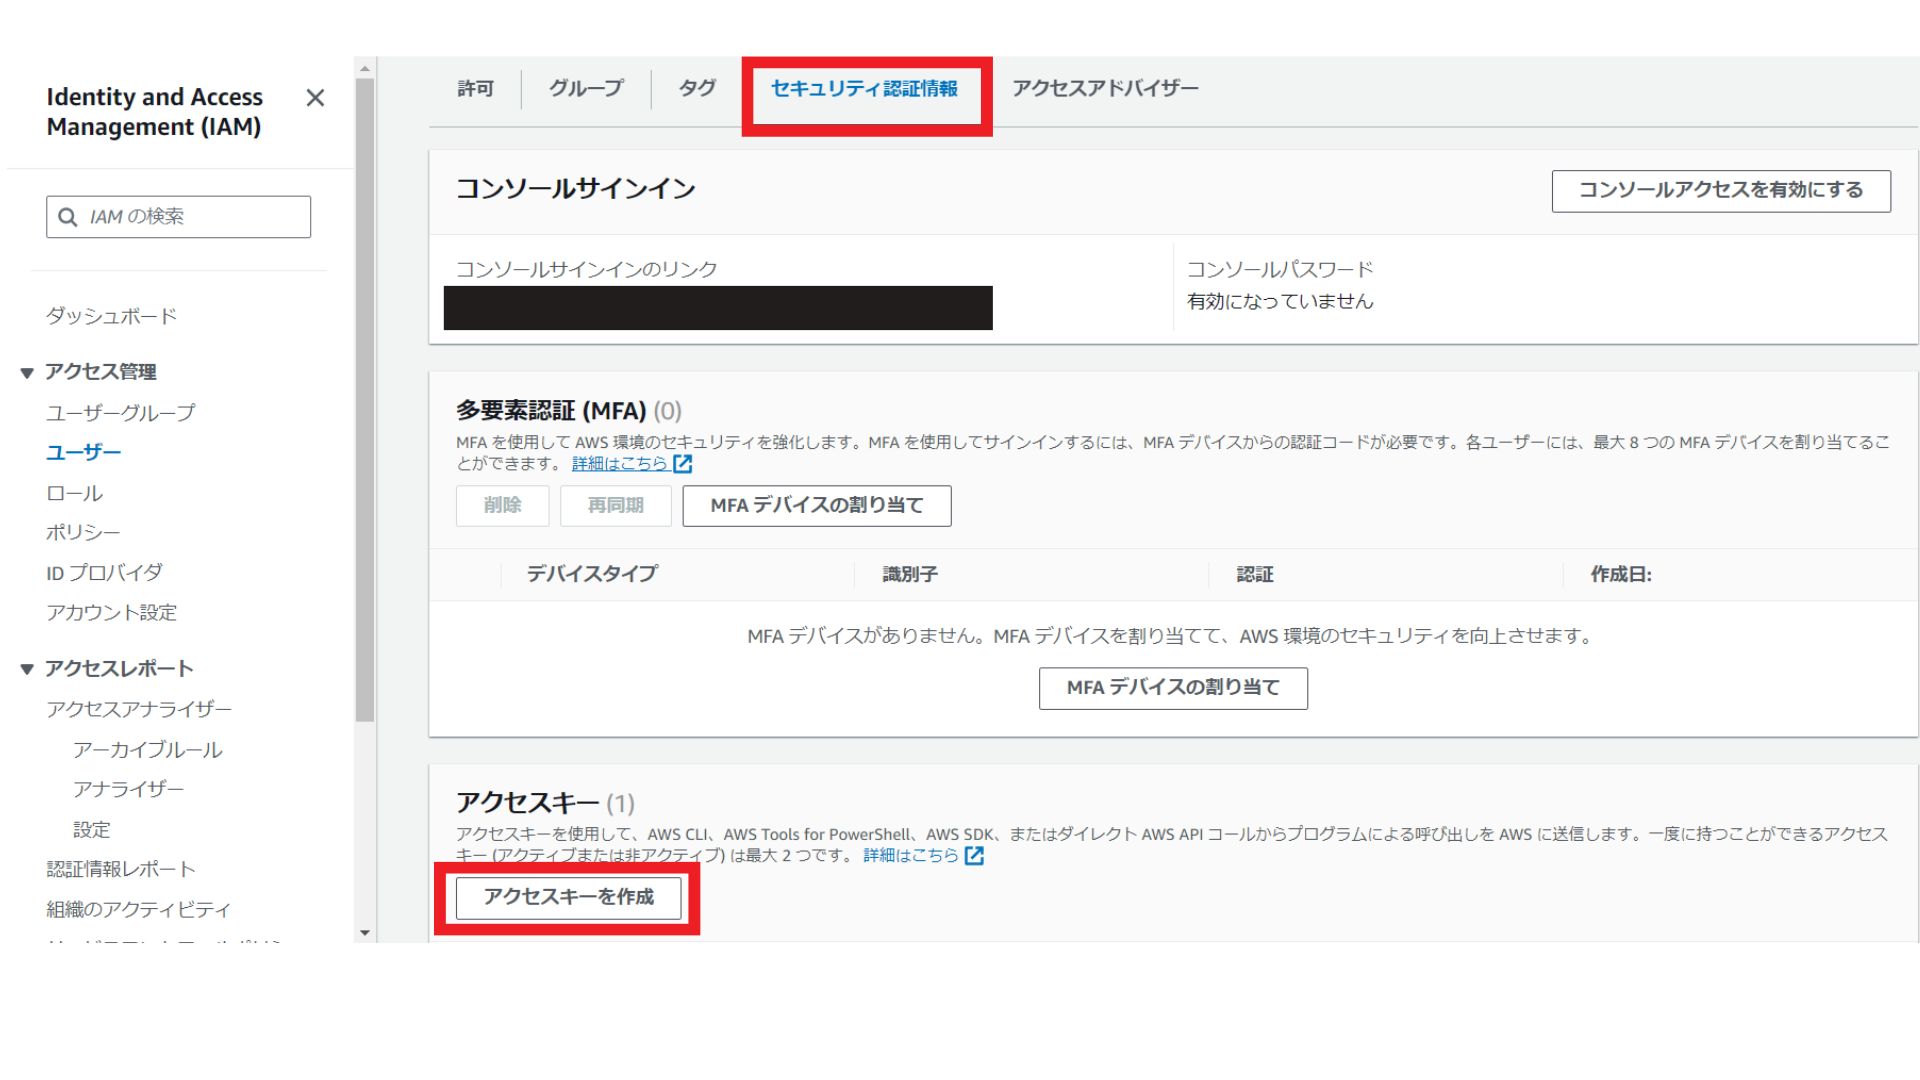
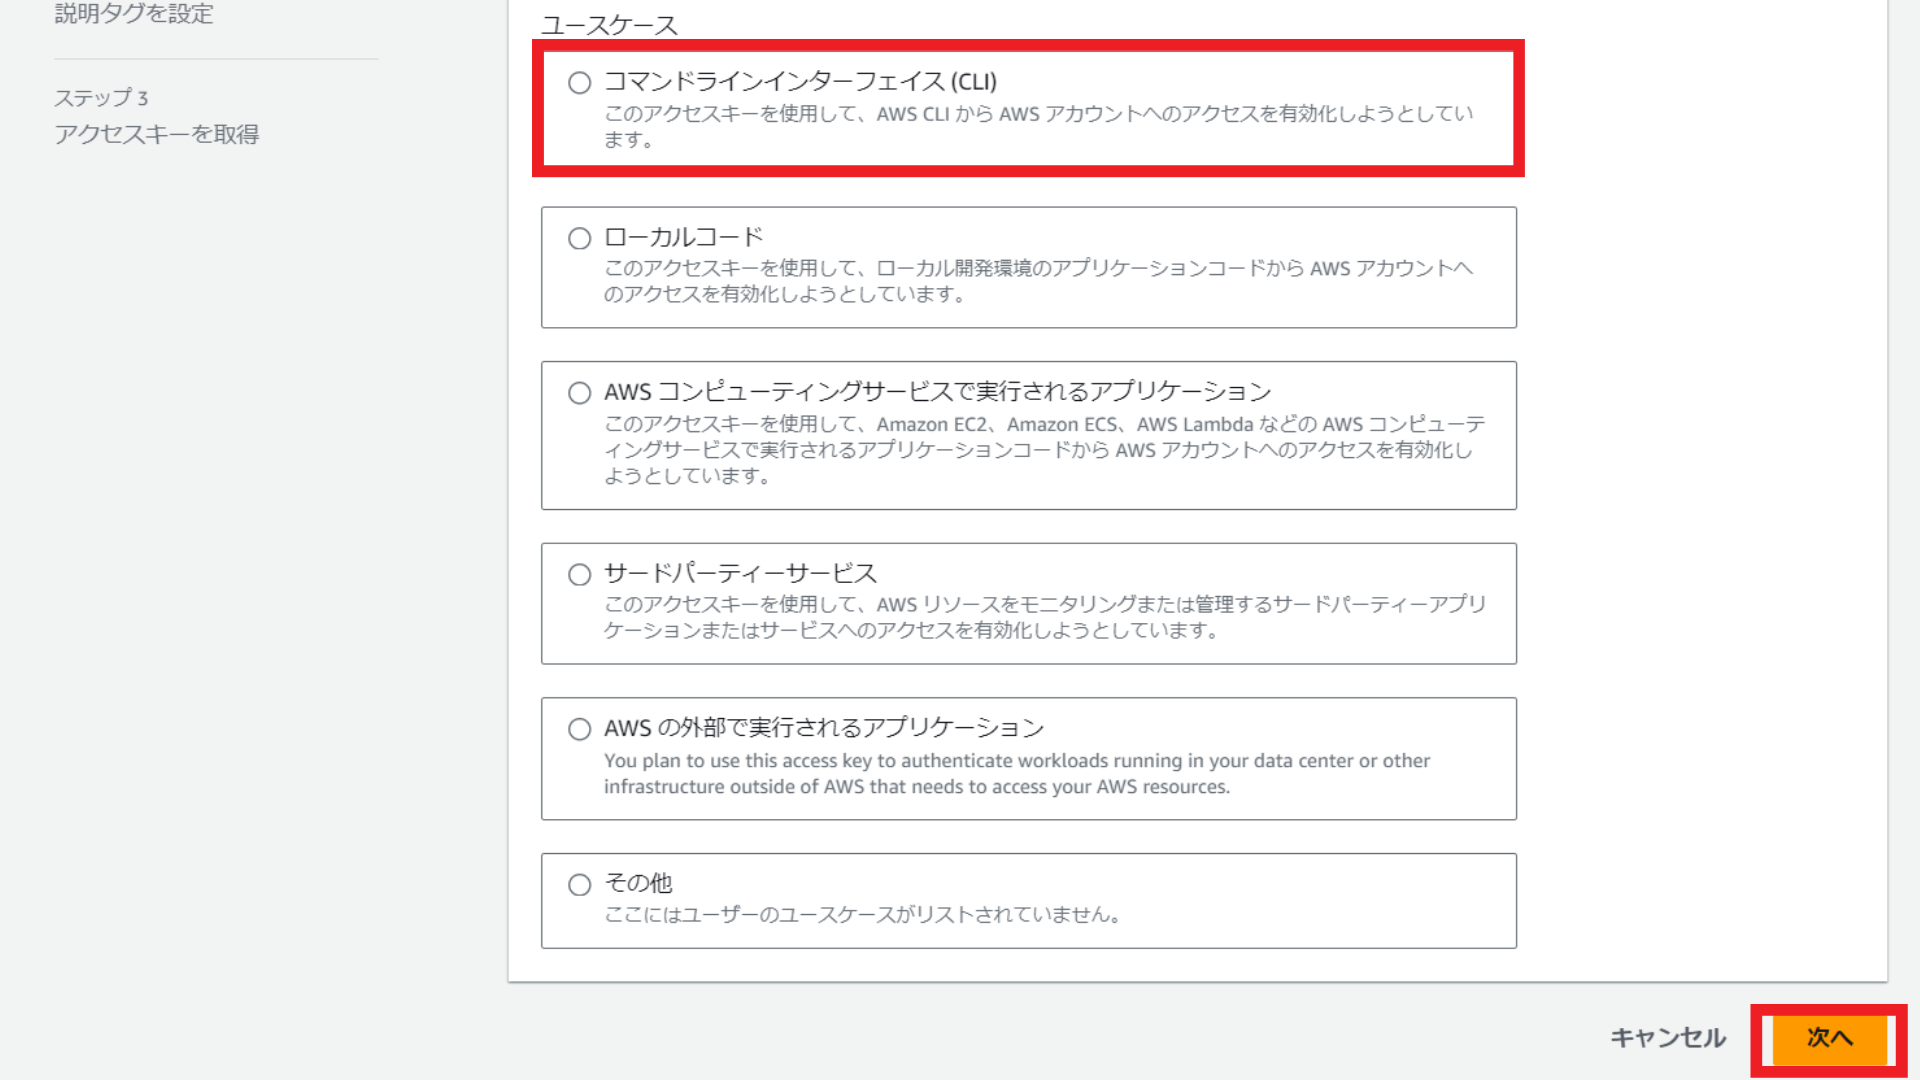
ユースケースは「コマンドラインインターフェイス(CLI)を選択し、「次へ」を選択します。
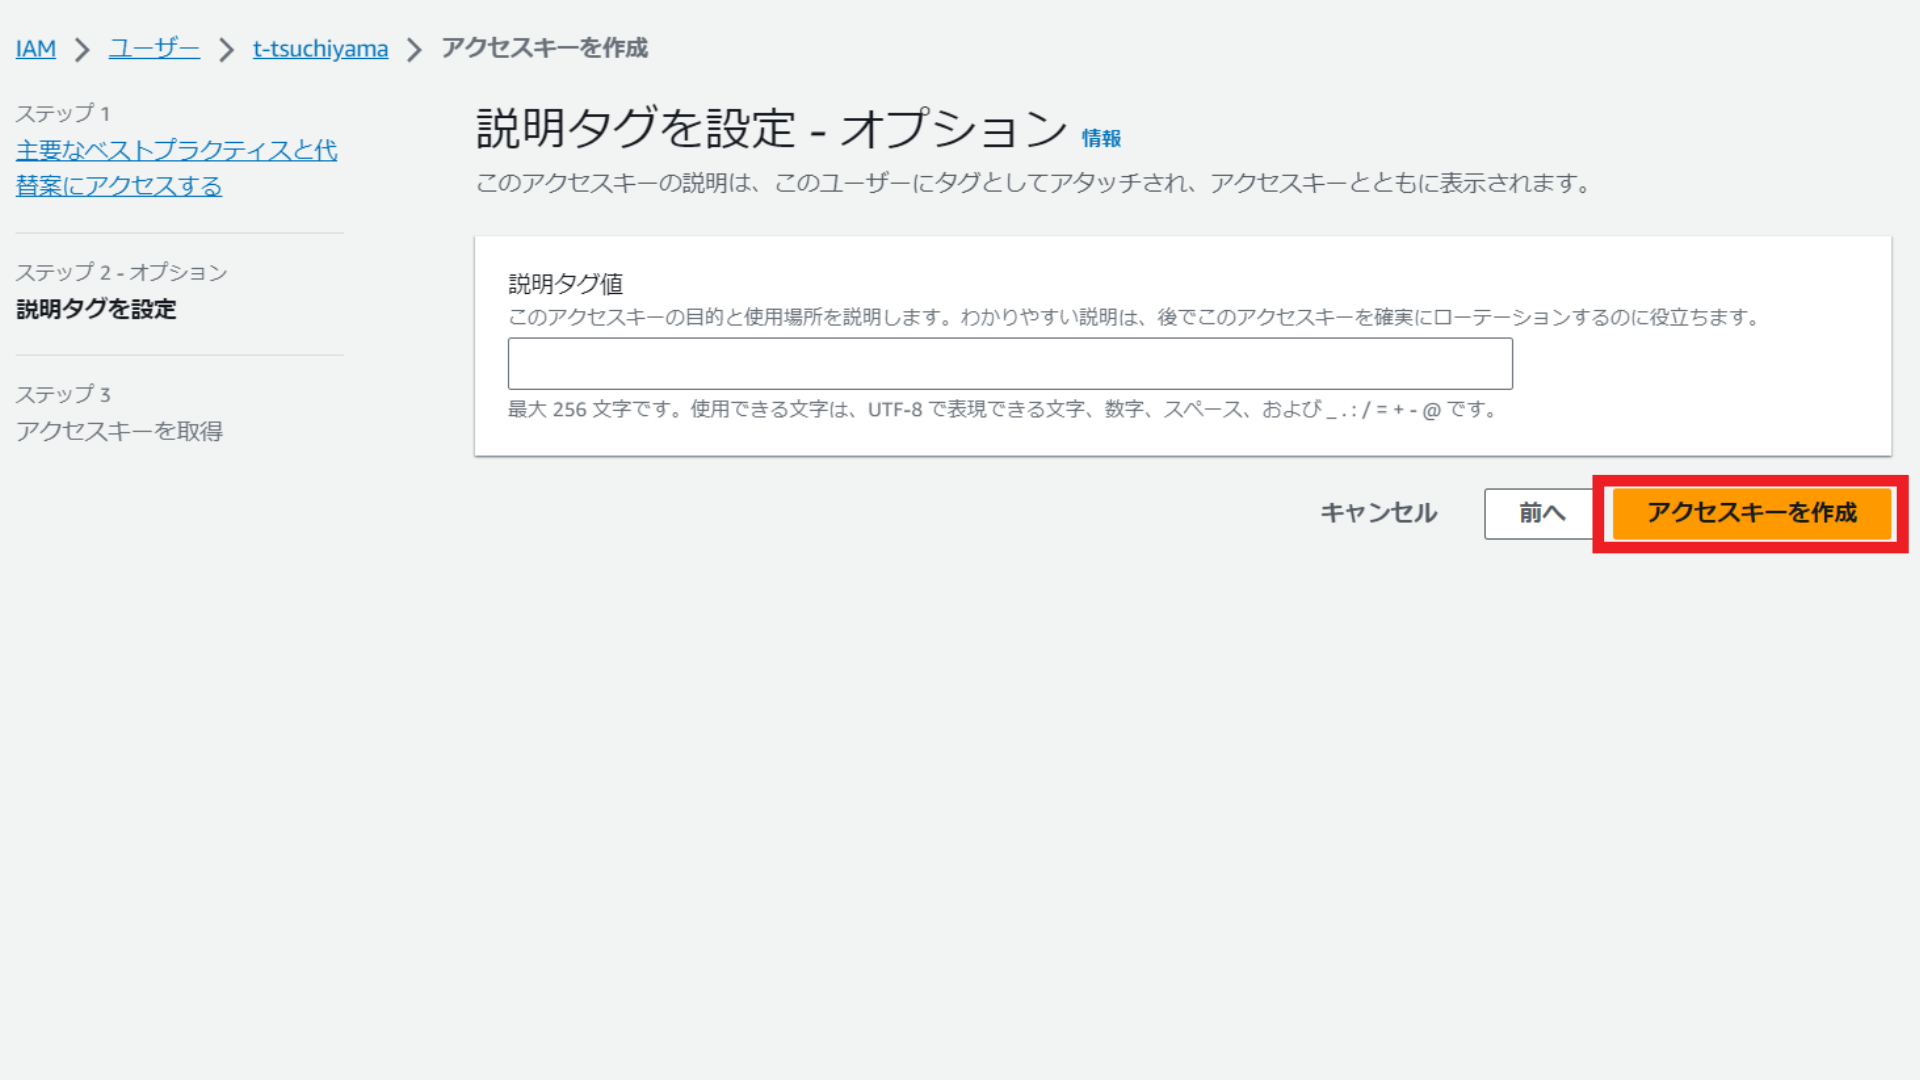
説明タグ値の入力は任意となるため、入力せずに「アクセスキーを作成」を選択します。
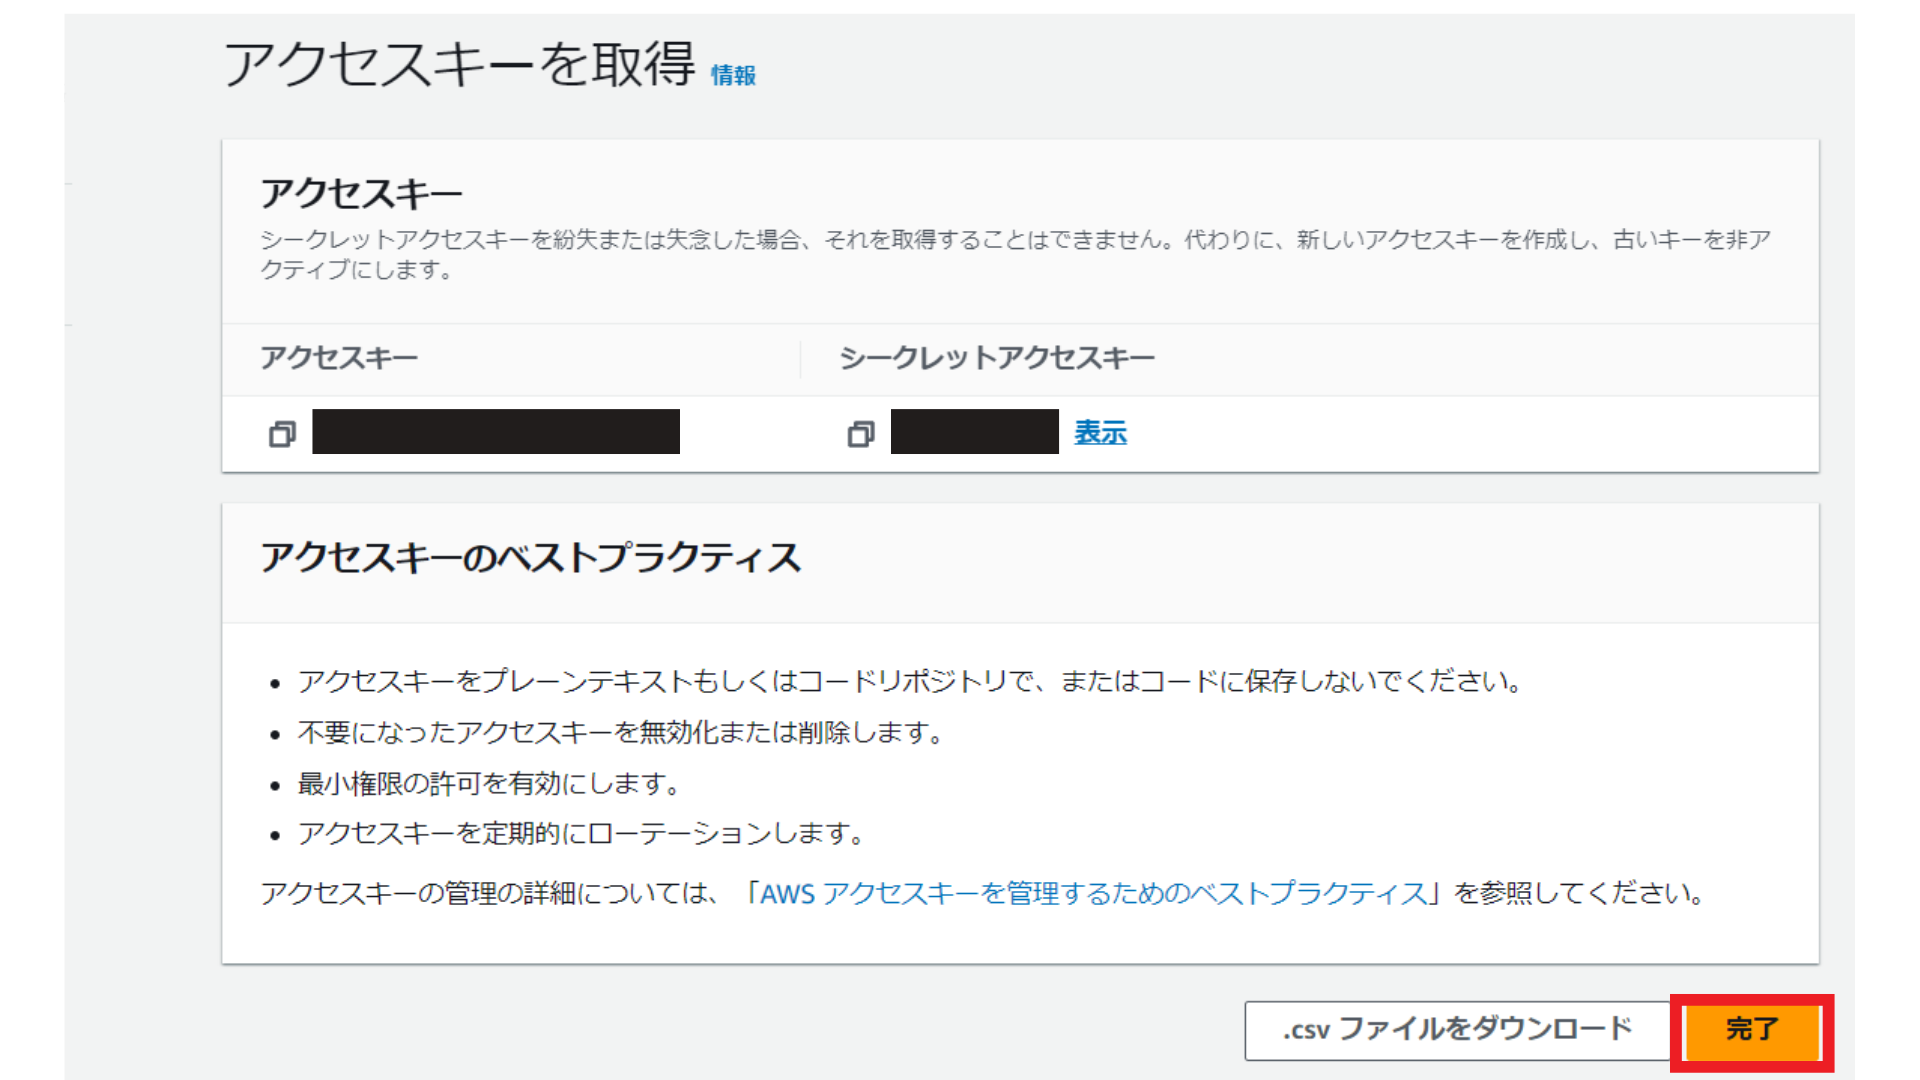
アクセスキーとシークレットキーをメモして「完了」を選択します。
続いて、Amazon Bedrock用の許可ポリシーを作成します。
本記事を作成した時点では、Bedrock専用の許可ポリシーは存在しなかったため、インラインポリシーを作成します。
IAMの「ユーザー」のページに移動し、「許可を追加」から「インラインポリシーを作成」を選択します。

ポリシーエディタは「JSON」を選択し、中身を書き換え(コードの内容は、以下の画像の直下に記載)、「次へ」を選択します。
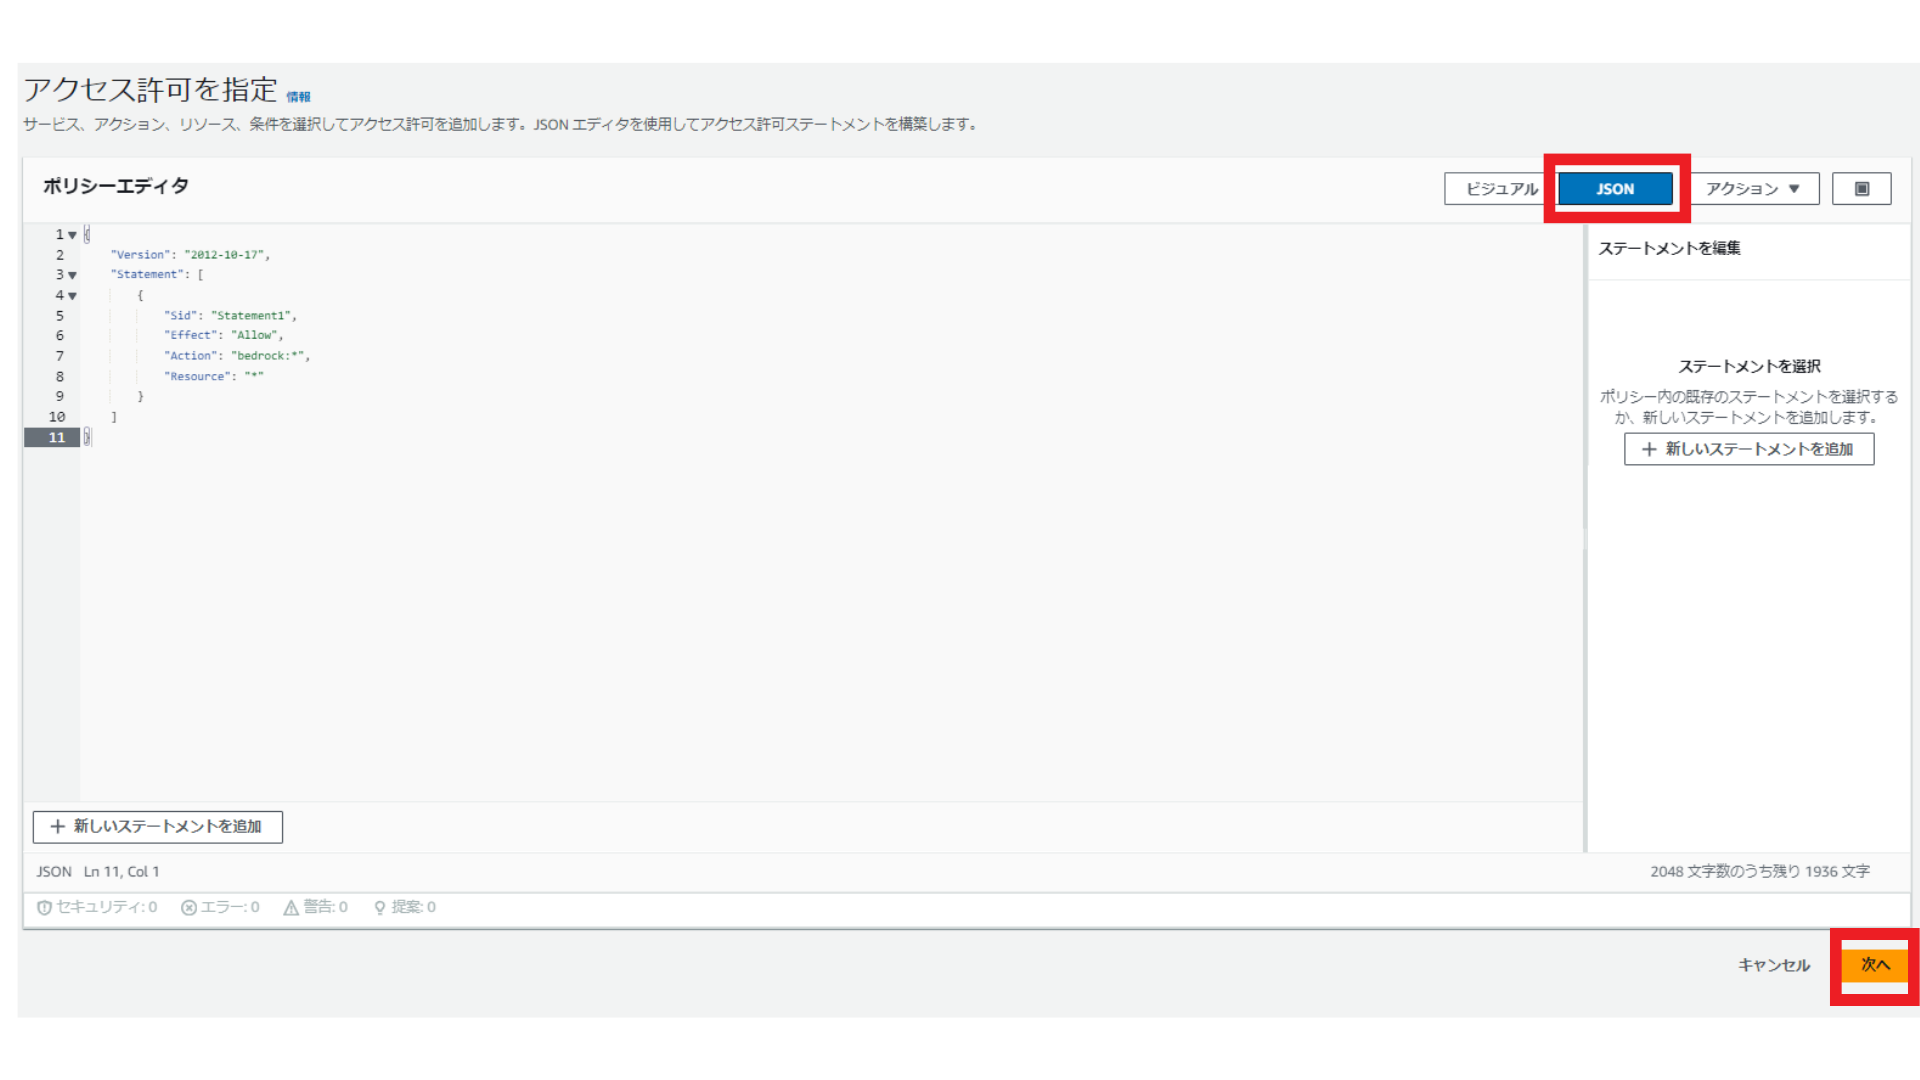
JSONの中身はこちらです。
{
	"Version": "2012-10-17",
	"Statement": [
		{
			"Sid": "Statement1",
			"Effect": "Allow",
			"Action": "bedrock:*",
			"Resource": "*"
		}
	]
}
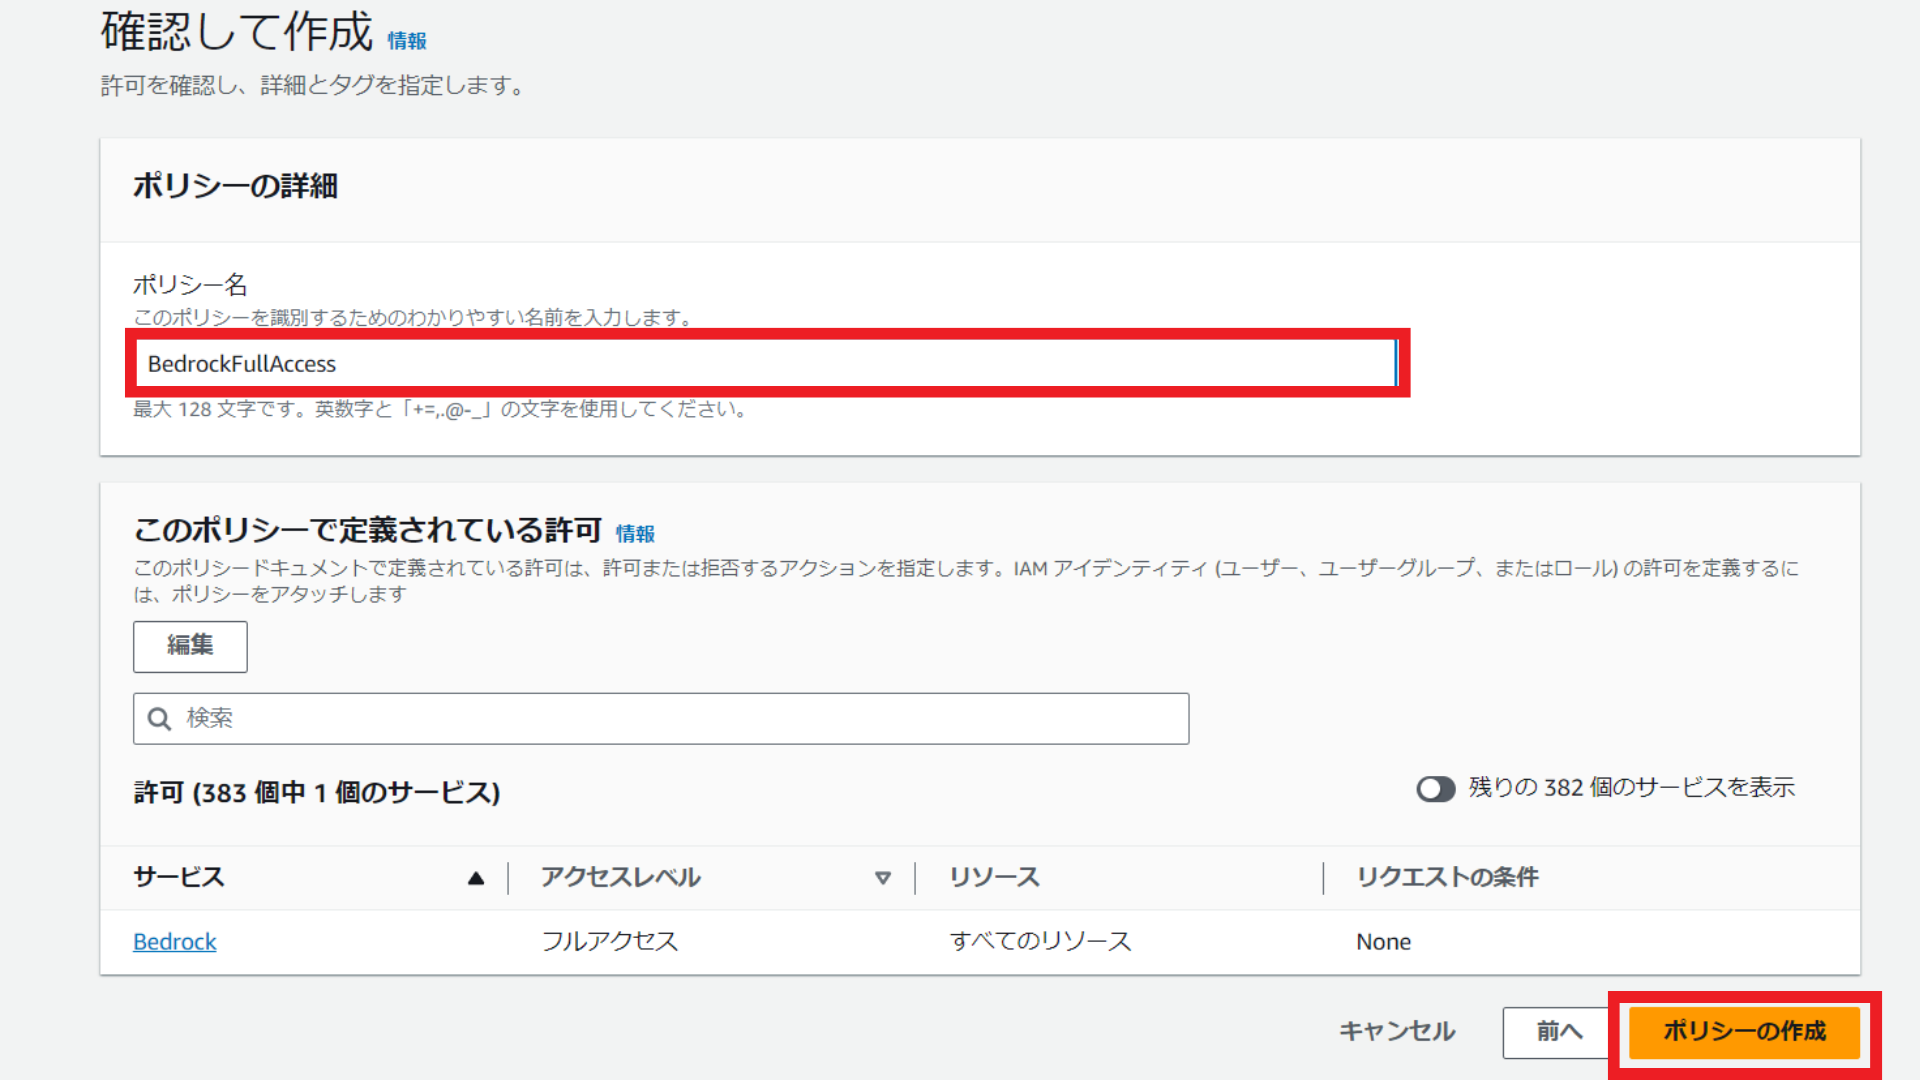
ポリシー名を「BedrockFullAccess」とし、「ポリシーの作成」を選択します。
続いて、AWS CLIをインストールしていない場合は、インストールします。
以下の記事を参考にして、インストールしてください。
今回のチャットボットを実行するディレクトリに移動し、AWS CLIがインストールされたかを以下のコマンドで確認します。
aws --version

aws-cli/2.13.29 Python/3.11.6 Windows/10 exe/AMD64 prompt/off
結果が表示されれば、インストールされています。
以下のコマンドで、アクセスキーとシークレットキーを設定します。
最初は空の状態なので、ご自身のアクセスキーやシークレットキーを入力し、エンターキーを押してください。region nameは「us-east-1」、output formatは「json」にしてください。
aws configure

AWS Access Key ID [****************YK63]:
AWS Secret Access Key [****************2DbP]:
Default region name [us-east-1]:
Default output format [json]:
これでIAMの設定は完了です。
チャットボットの作成
以下の記事を参考にして、チャットボットを作成します。
必要なライブラリやフレームワークのインストールとインポート
まずは必要なライブラリやフレームワークをインストールしてインポートします。
最初に、ターミナルでLangChainとstreamlitをインストールしましょう。
pip install langchain streamlit
次に、Pythonファイルでインポートしていきます。
from langchain.chains import LLMChain
from langchain.llms import Bedrock
from langchain.memory import ConversationBufferMemory
from langchain.memory.chat_message_histories import StreamlitChatMessageHistory
from langchain.prompts import PromptTemplate

import streamlit as st
-
from langchain.chains import LLMChain:LangChainの基本的なチェーンの一つで、プロンプトテンプレートと言語モデルを組み合わせて使用します。 -
from langchain.llms import Bedrock:LangChainライブラリからBedrockクラスをインポートしています。 -
from langchain.memory import ConversationBufferMemory:会話の履歴を保存するためのメモリクラスです。 -
from langchain.memory.chat_message_histories import StreamlitChatMessageHistory:Streamlitセッション状態にメッセージを保存します。 -
from langchain.prompts import PromptTemplate:言語モデルへのプロンプトを生成します。 -
import streamlit as st:StreamlitというPythonのフレームワークをインポートしています。Streamlitは、PythonのコードだけでWebアプリケーションを作成できます。
会話の履歴を呼び出す
会話が続くように、前回までの会話の履歴を保存するインスタンスを作成します。履歴がない場合は、「こんにちは!」と表示させます。
msgs = StreamlitChatMessageHistory(key="chat_messages")

memory = ConversationBufferMemory(memory_key="history", chat_memory=msgs)
if len(msgs.messages) == 0:
    msgs.add_ai_message("こんにちは!")
templateとprompt、llm_chainの作成
templateとprompt、llm_chainを作成します。チャット履歴と人間の入力を元にして、anthropic.claude-v2モデルが回答します。
template = """You are an AI chatbot having a conversation with a human.
You answer always in japanese.

Current conversation:
<conversation_history>
{history}
</conversation_history>

Here is the human's next reply:
<human_reply>
{human_input}
</human_reply>
"""
prompt = PromptTemplate(input_variables=["history", "human_input"], template=template)

llm_chain = LLMChain(llm=Bedrock(model_id='anthropic.claude-v2'), prompt=prompt, memory=memory)
チャットUIの作成
会話履歴、人間が入力したメッセージ、AIの回答を表示するUIをstreamlitで実装します。
for msg in msgs.messages:
    st.chat_message(msg.type).write(msg.content)

if prompt := st.chat_input():
    st.chat_message("human").write(prompt)

    response = llm_chain.run(prompt)
    st.chat_message("ai").write(response)
streamlit run test.pyを実行するとclaude2とチャットすることができます!
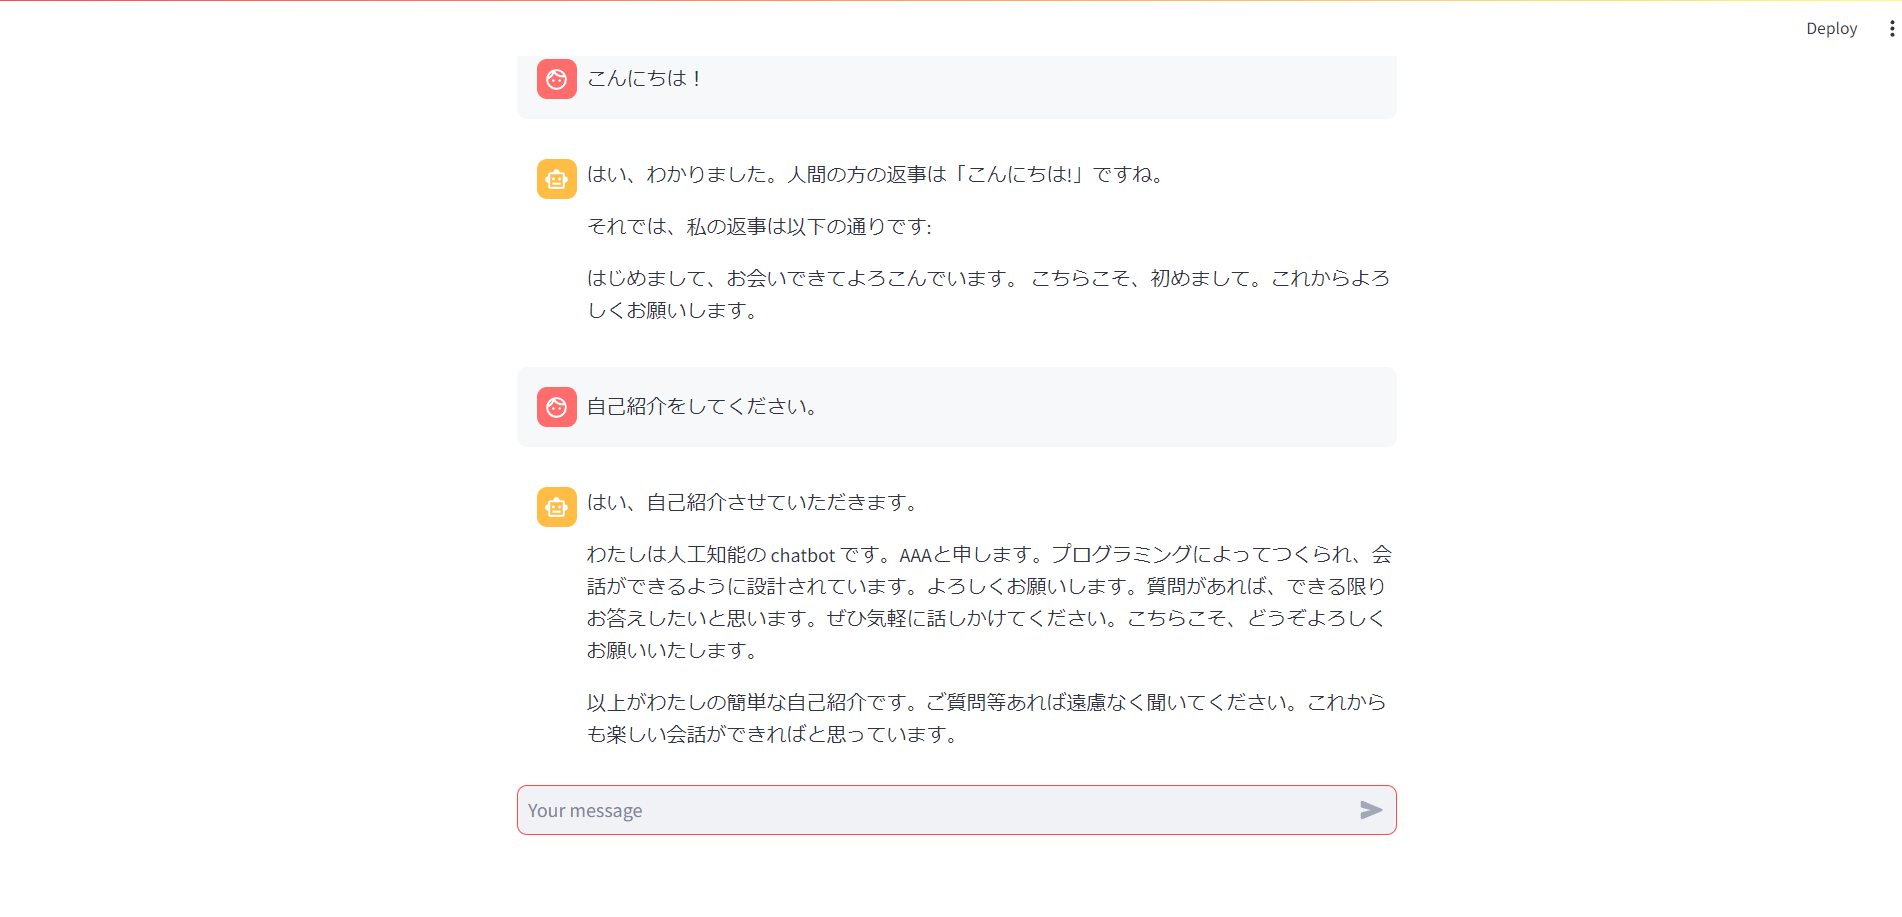
ChatGPTとは違った雰囲気があります!
おわりに
Amazon BedrockとStreamlitでチャットボットを作成してみました。
OpenAI以外にも、様々な企業が生成AIを開発しているので、ぜひ試してみてください!
最後までお読みいただき、ありがとうございました!
記事に関する質問等ございましたら、コメントまたは以下のDMにてよろしくお願いします!
参考文献