はじめに
GPT-4 Turbo with Vision を使用して、Web ページのスクリーンショットから Next.js × Tailwind CSS のコードを生成してみました。
開発環境
- OS: Windows 11
- 言語: Python 3.11.5
- ライブラリ: Azure OpenAI
実装
では、早速実装していきます!
1. 環境設定
まず、必要なライブラリをインストールします。dotenvとopenaiを使用します。これらは、以下のコマンドでインストールできます。
pip install python-dotenv openai
2. Azure OpenAI の設定
Azure OpenAI を使用するためには、Azure ポータルで Azure OpenAI リソースを作成し、API キーとエンドポイント URL を取得する必要があります。
本記事では省略します。
取得した情報を.envファイルに保存します。
AZURE_OPENAI_ENDPOINT=<エンドポイントURLを指定>
AZURE_OPENAI_API_KEY=<APIキーを指定>
AZURE_OPENAI_API_VERSION=<APIのバージョンを指定>
3. 画像の準備
次に、コードを生成したい Web ページのスクリーンショットをwebpage.pngという名前でプロジェクトのルートディレクトリに保存します。
本記事では、以下のスクリーンショットを使用します。
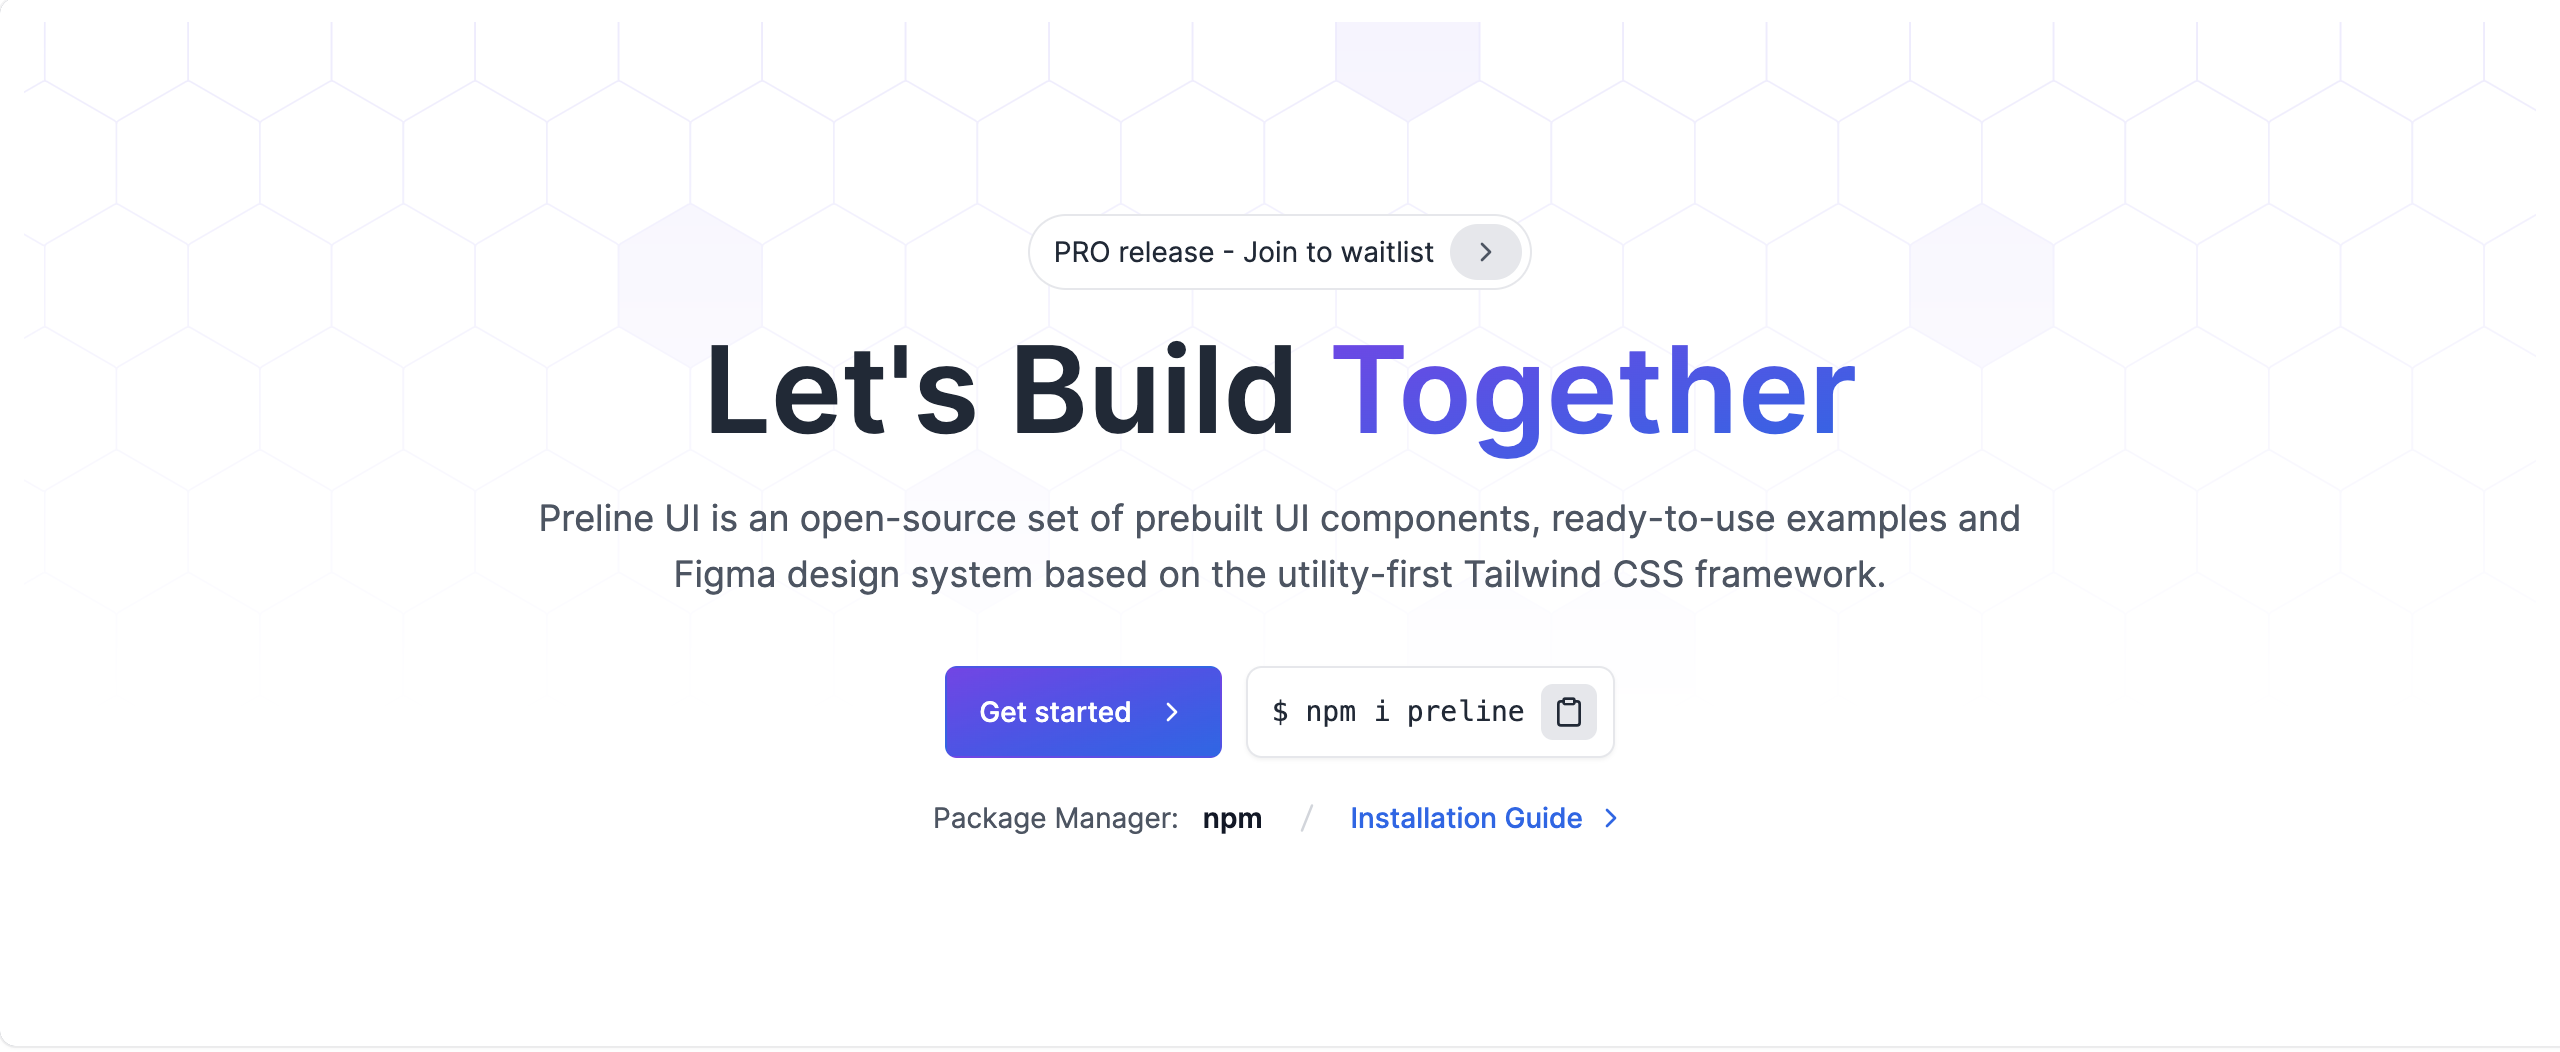
引用元 : https://preline.co/examples/hero-sections.html#hero-with-polygon-bg-element
4. コードの実装
以下の Python スクリプトをtest.pyとして保存し、実行します。
import os
from dotenv import load_dotenv

load_dotenv()
from openai import AzureOpenAI
import base64
from mimetypes import guess_type

api_base = os.getenv("AZURE_OPENAI_ENDPOINT")
api_key = os.getenv("AZURE_OPENAI_API_KEY")
deployment_name = "gpt-4-vision"
api_version = os.getenv("AZURE_OPENAI_API_VERSION")

client = AzureOpenAI(
    api_key=api_key,
    api_version=api_version,
    base_url=f"{api_base}/openai/deployments/{deployment_name}",
)


def local_image_to_data_url(image_path):
    mime_type, _ = guess_type(image_path)
    if mime_type is None:
        mime_type = "application/octet-stream"

    with open(image_path, "rb") as image_file:
        base64_encoded_data = base64.b64encode(image_file.read()).decode("utf-8")

    return f"data:{mime_type};base64,{base64_encoded_data}"


image_path = "./webpage.png"

response = client.chat.completions.create(
    model="gpt-4",
    messages=[
        {
            "role": "system",
            "content": "You are a professional ront-end engineer who is proficient in Next.js (TypeScript)/Tailwind CSS.",
        },
        {
            "role": "user",
            "content": [
                {
                    "type": "text",
                    "text": """
                        # Task
                        You will receive a "screenshot of a reference web page" from a "user" and build a single page application using Next.js (TypeScript) and Tailwind CSS.

                        # Constraints
                            - Must have the same look and feel as the "screenshot of a reference web page"
                            - Exactly reproduce the style of the background color, text color, font size, font family, padding, margin, border, etc.
                            - Use the exact text from the screenshot
                            - Accurately reproduce the alignment of elements and line breaks in the screenshot
                            - Provide complete code, without omitting any code content
                            - Provide only the content of the code, without including "```", "```tsx", or a description of the code at the beginning or end

                        screenshot of a reference web page:
                    """,
                },
                {
                    "type": "image_url",
                    "image_url": {"url": local_image_to_data_url(image_path)},
                },
            ],
        },
    ],
    temperature=0,
    max_tokens=2000,
)

print(response.choices[0].message.content)
local_image_to_data_url関数は、ローカルの画像パスをbase64に変換します。
プロンプトは日本語よりも英語の方が効果的な傾向が見られたため、英語にしています。
プロンプトの日本語訳は以下のとおりです。
システムプロンプト:あなたは、Next.js(TypeScript)/Tailwind CSSに精通したフロントエンドエンジニアです。
ユーザープロンプト:
# タスク
ユーザー」から「参照Webページのスクリーンショット」を受け取り、Next.js(TypeScript)とTailwind CSSを使ってシングルページのアプリケーションを構築する。
# 制約事項
- "参照Webページのスクリーンショット "と同じ外観や雰囲気であること
- 背景色、文字色、フォントサイズ、フォントファミリー、パディング、マージン、ボーダーなどのスタイルを正確に再現すること
- スクリーンショットのテキストを正確に使用すること
- スクリーンショット内の要素の配置や改行を正確に再現すること
- コードの内容を省略することなく、完全なコードを提供すること
- コードの先頭や末尾に"```"や"``tsx"、コードの説明を含めず、コードの内容のみを提供すること
参考Webページのスクリーンショット:
プロンプトは、以下のScreenshot to Code の GitHub リポジトリのシステムプロンプトなどを参考に作成しました。
5. 結果の確認
レスポンスは以下のようになりました。
import type { NextPage } from 'next';
import Head from 'next/head';

const Home: NextPage = () => {
  return (
    <div className="bg-gradient-to-r from-blue-100 to-blue-50 h-screen flex justify-center items-center">
      <Head>
        <title>Let's Build Together</title>
        <link rel="icon" href="/favicon.ico" />
      </Head>

      <main className="text-center">
        <h1 className="text-6xl font-bold mb-4">
          Let's Build <span className="text-blue-600">Together</span>
        </h1>
        <p className="text-lg mb-6">
          Preline UI is an open-source set of prebuilt UI components, ready-to-use examples and
          <br />
          Figma design system based on the utility-first Tailwind CSS framework.
        </p>
        <div className="space-x-4">
          <button className="bg-blue-600 text-white px-6 py-2 rounded-md shadow-md hover:bg-blue-700 transition">
            Get started
          </button>
          <span className="bg-gray-100 text-gray-700 px-4 py-2 rounded-md shadow-inner">
            $ npm i preline
          </span>
        </div>
        <div className="text-sm text-gray-600 mt-4">
          Package Manager: <span className="text-blue-600">npm</span> /{' '}
          <a href="#" className="text-blue-600 hover:underline">
            Installation Guide
          </a>
        </div>
      </main>
    </div>
  );
};

export default Home;

/* Tailwind CSS */
@tailwind base;
@tailwind components;
@tailwind utilities;

@layer components {
  /* Custom styles can be added here */
}
/* Tailwind CSS */より上の部分をNext.jsで作成したプロジェクトのapp/page.tsxに貼り付けて表示した結果は以下のとおりです。
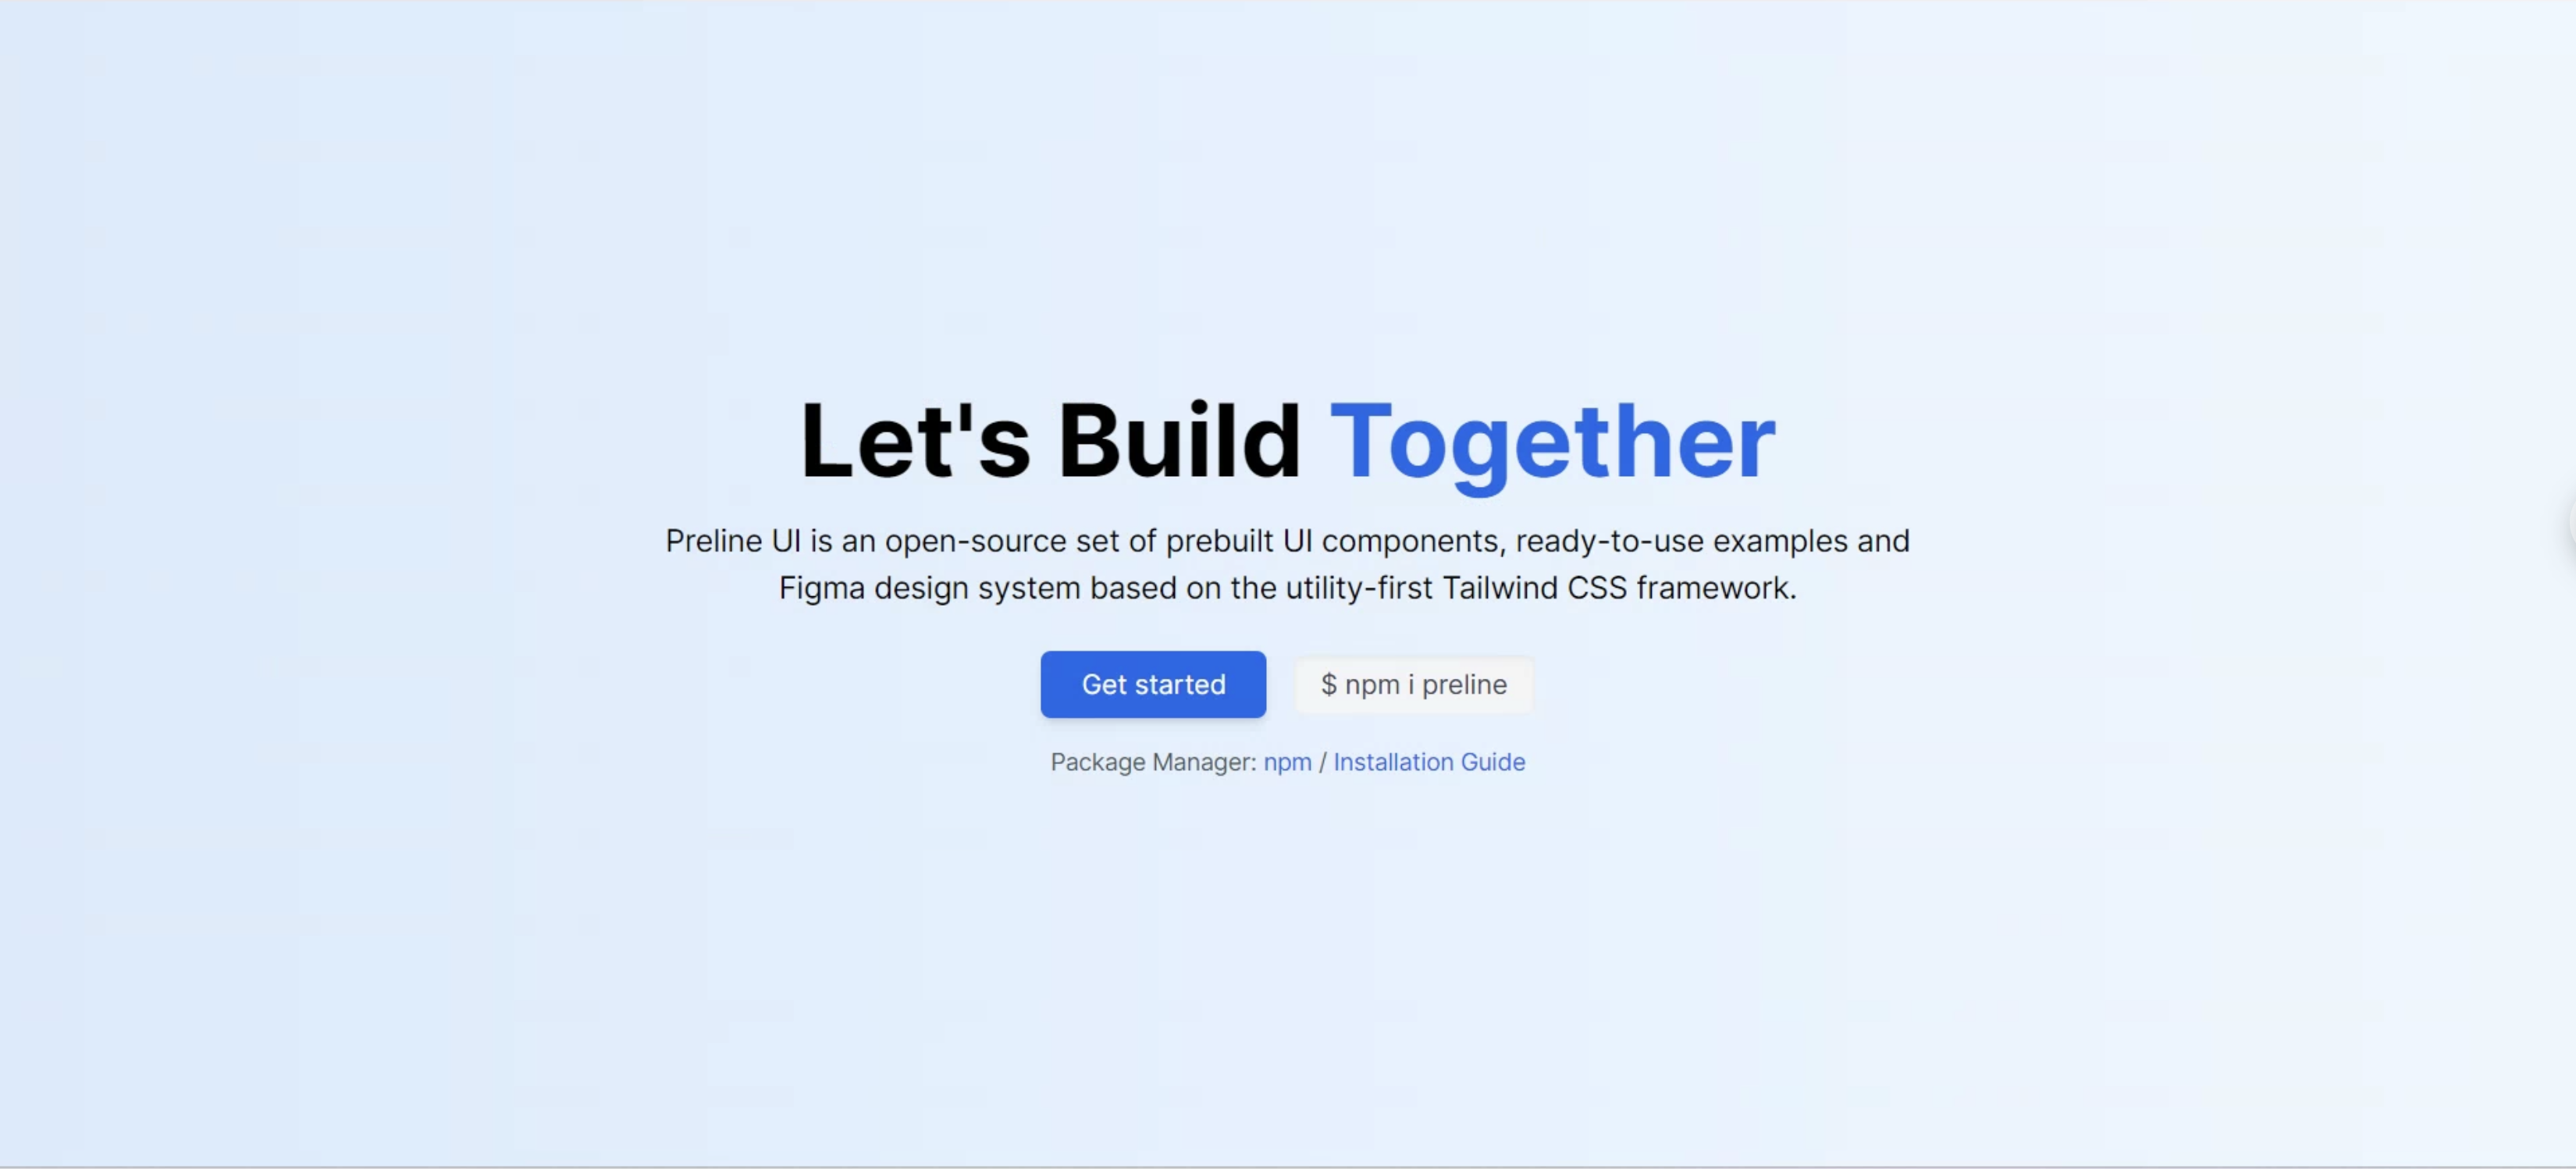
完全な再現はできていませんが、文字や改行のポイント、配置などはほぼ正確ですね。
これを更に洗練するプロンプトは難易度が高そうですが、あとは人間が少し手を加えれば再現できそうなレベルです。
フロントエンドの開発に変化が起きそうです。
なお、プロンプトを日本語にして実行した結果は以下のとおりです。
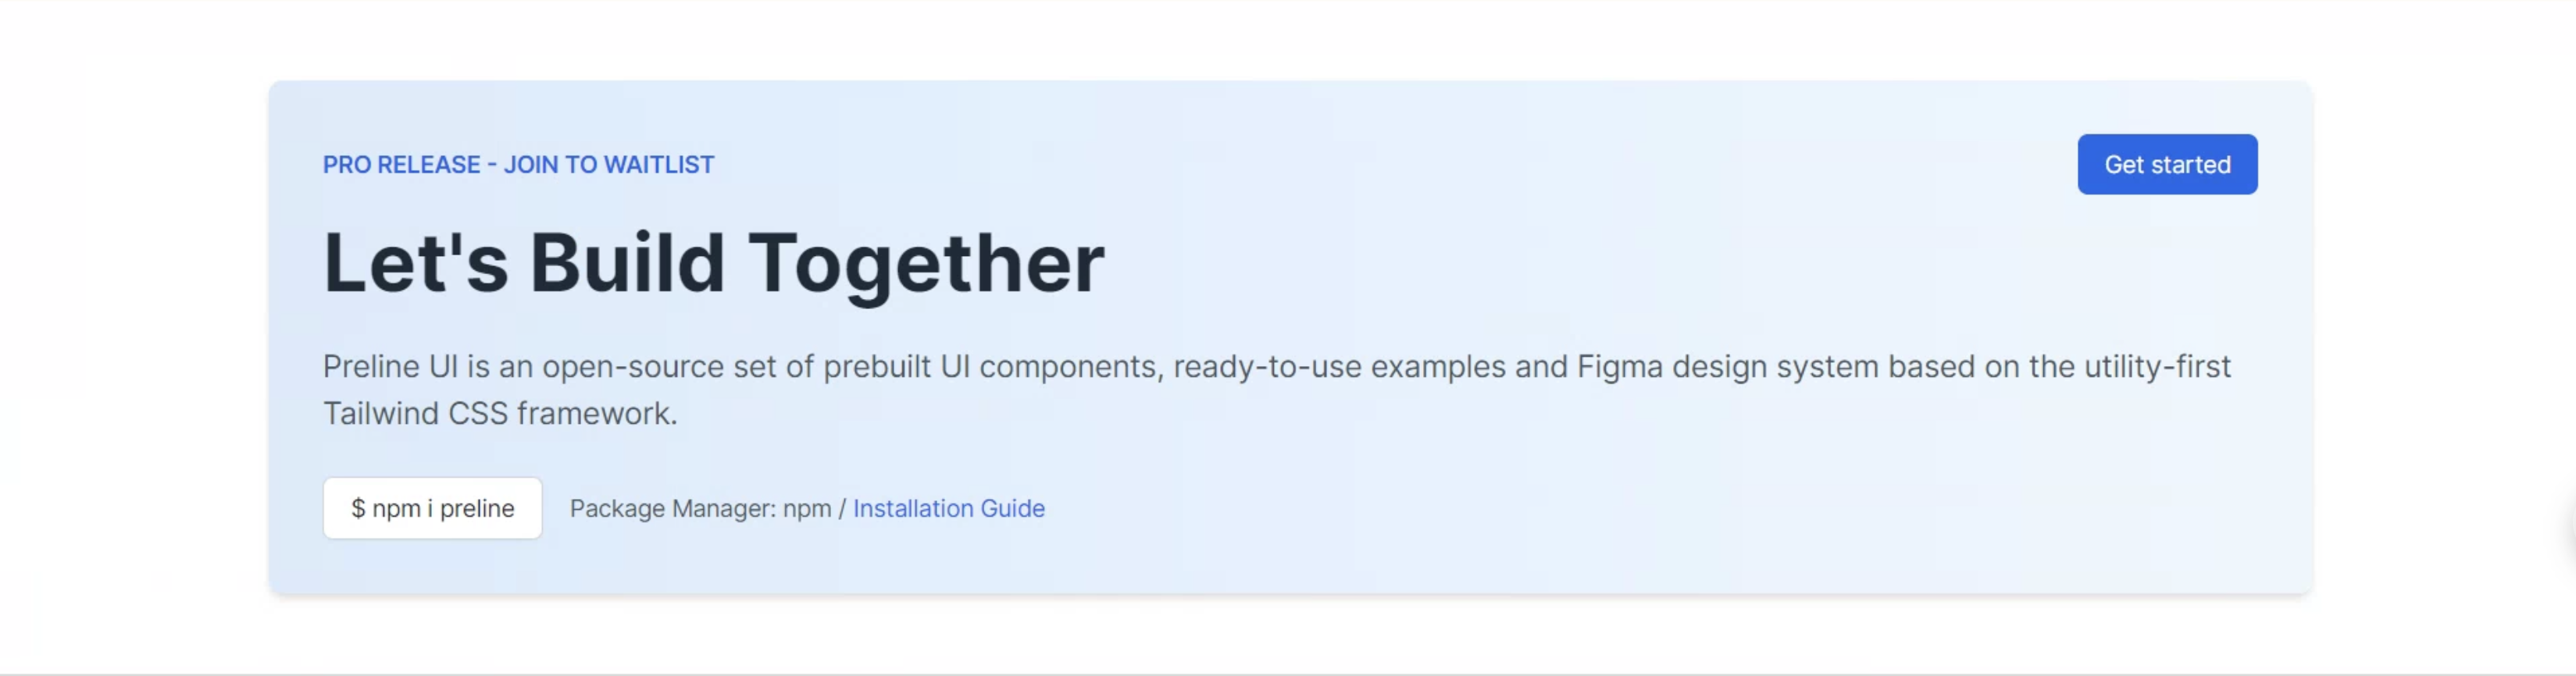
配置などがかなり崩れていることが確認できます。
日本語より英語のほうが効果的なのでしょうか?
以上になります!
最後まで読んでいただき、ありがとうございました!
参考文献