やりたいこと
ラズパイにAndroid ThingsのOSを入れて、WiFi経由でビルド&実行する。
Setup
準備
- Raspberry Pi 3 Model B, SDカードなど
- 注意:2018-09-24時点で、
Model B+はAndroid Thingsのイメージがサポートしてないようです。ハマりました。
ここでProductを登録
適当でOK
https://partner.android.com/things/console/#/
Setup Utility
https://partner.android.com/things/console/#/tools
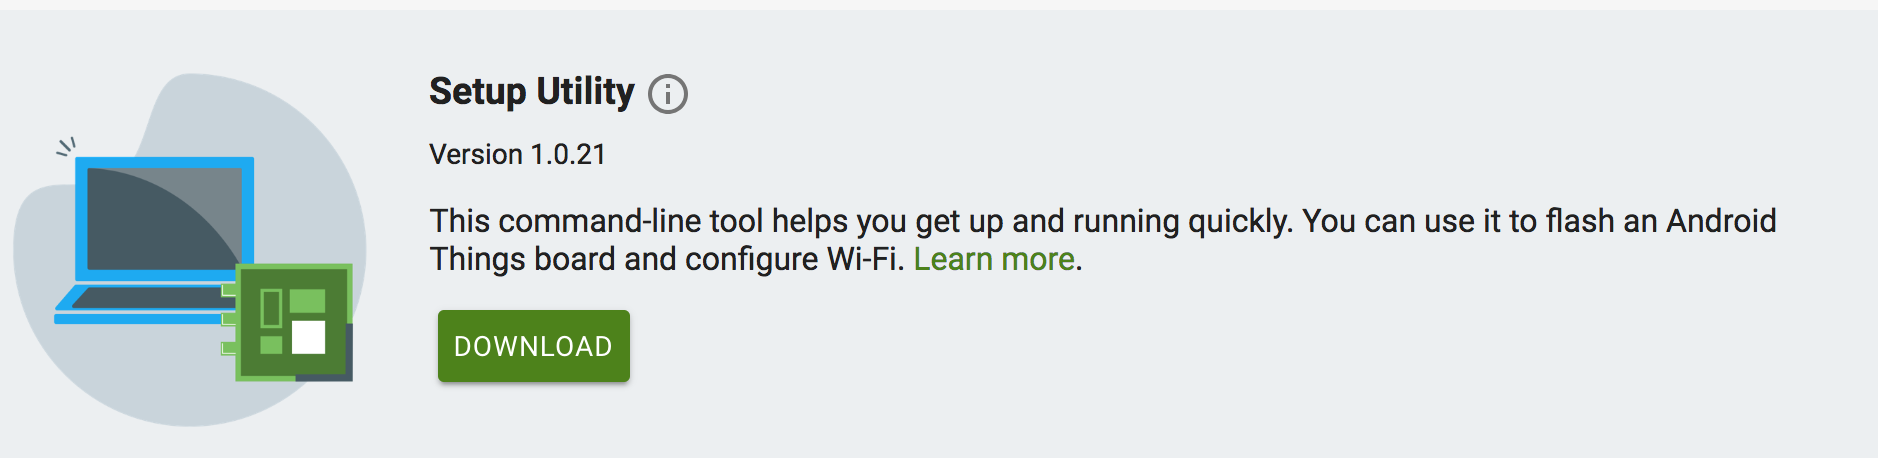
ダウンロードしたら、右クリックでOpen(mac)

起動するといろいろ質問されるので、答えていく。
Android Things Setup Utility (version 1.0.21)
============================
This tool will help you install Android Things on your board and set up Wi-Fi.

What do you want to do?
1 - Install Android Things and optionally set up Wi-Fi
2 - Set up Wi-Fi on an existing Android Things device
1
What hardware are you using?
1 - Raspberry Pi 3
2 - NXP Pico i.MX7D
1
You chose Raspberry Pi 3.

Setting up required tools...
Fetching additional configuration...
Downloading platform tools...
5.45 MB/5.45 MB
Unzipping platform tools...
Finished setting up required tools.

Raspberry Pi 3
Do you want to use the default image or a custom image?
1 - Default image: Used for development purposes. No access to the Android
Things Console features such as metrics, crash reports, and OTA updates.
2 - Custom image: Upload your custom image for full device development and
management with all Android Things Console features.
1
Downloading Android Things image...
342 MB/342 MB
Unzipping image...

Downloading Etcher-cli, a tool to flash your SD card...
20.5 MB/20.5 MB
Unzipping Etcher-cli...

Plug the SD card into your computer. Press [Enter] when ready

Running Etcher-cli...
This should should be run with root/administrator permissions.

This tool requires special permissions to write to external drives
Error: error running etcher-cli: did not flash successfully
Stopping adb server...
Stopped adb server...

If you are having trouble using the Setup Utility, please file a ticket at
https://issuetracker.google.com/issues/new?component=192720.
いきなりエラー。sudo でやってやる必要がありそう。
sudo ~/Downloads/android-things-setup-utility/android-things-setup-utility-macos
で無事成功。
iot_rpi3.img was successfully written to Mass-Storage (/dev/disk3)
Checksum: 67737a7a

If you have successfully installed Android Things on your SD card, you can now
put the SD card into the Raspberry Pi and power it up. Otherwise you can abort
and run the tool again.

Would you like to set up Wi-Fi on this device? (y/n) y

Please plug your Raspberry Pi to your router with an Ethernet cable, then press [Enter].

Attempting to connect to your Raspberry Pi at Android.local...
Connected to device through Ethernet.
Enter the Wi-Fi network name: EthWirelessNetworkC
Enter the Wi-Fi network password (leave empty if no password):
Connecting to Wi-Fi network EthWirelessNetworkC...
Looking for device... This can take up to 3 minutes.
Device found.
Waiting...
Successfully connected to Wifi
Stopping adb server...
Stopped adb server...

Now that you’re set up, try sample projects in Android Studio or in the sample
repository here: https://developer.android.com/things/sdk/samples.html

To learn more about features like over-the-air updates, visit the Android Things
Console: https://partner.android.com/things/console

Press [Enter] to quit.
無事セットアップできたようだ。
Android Studio のインストール
プロジェクト作成
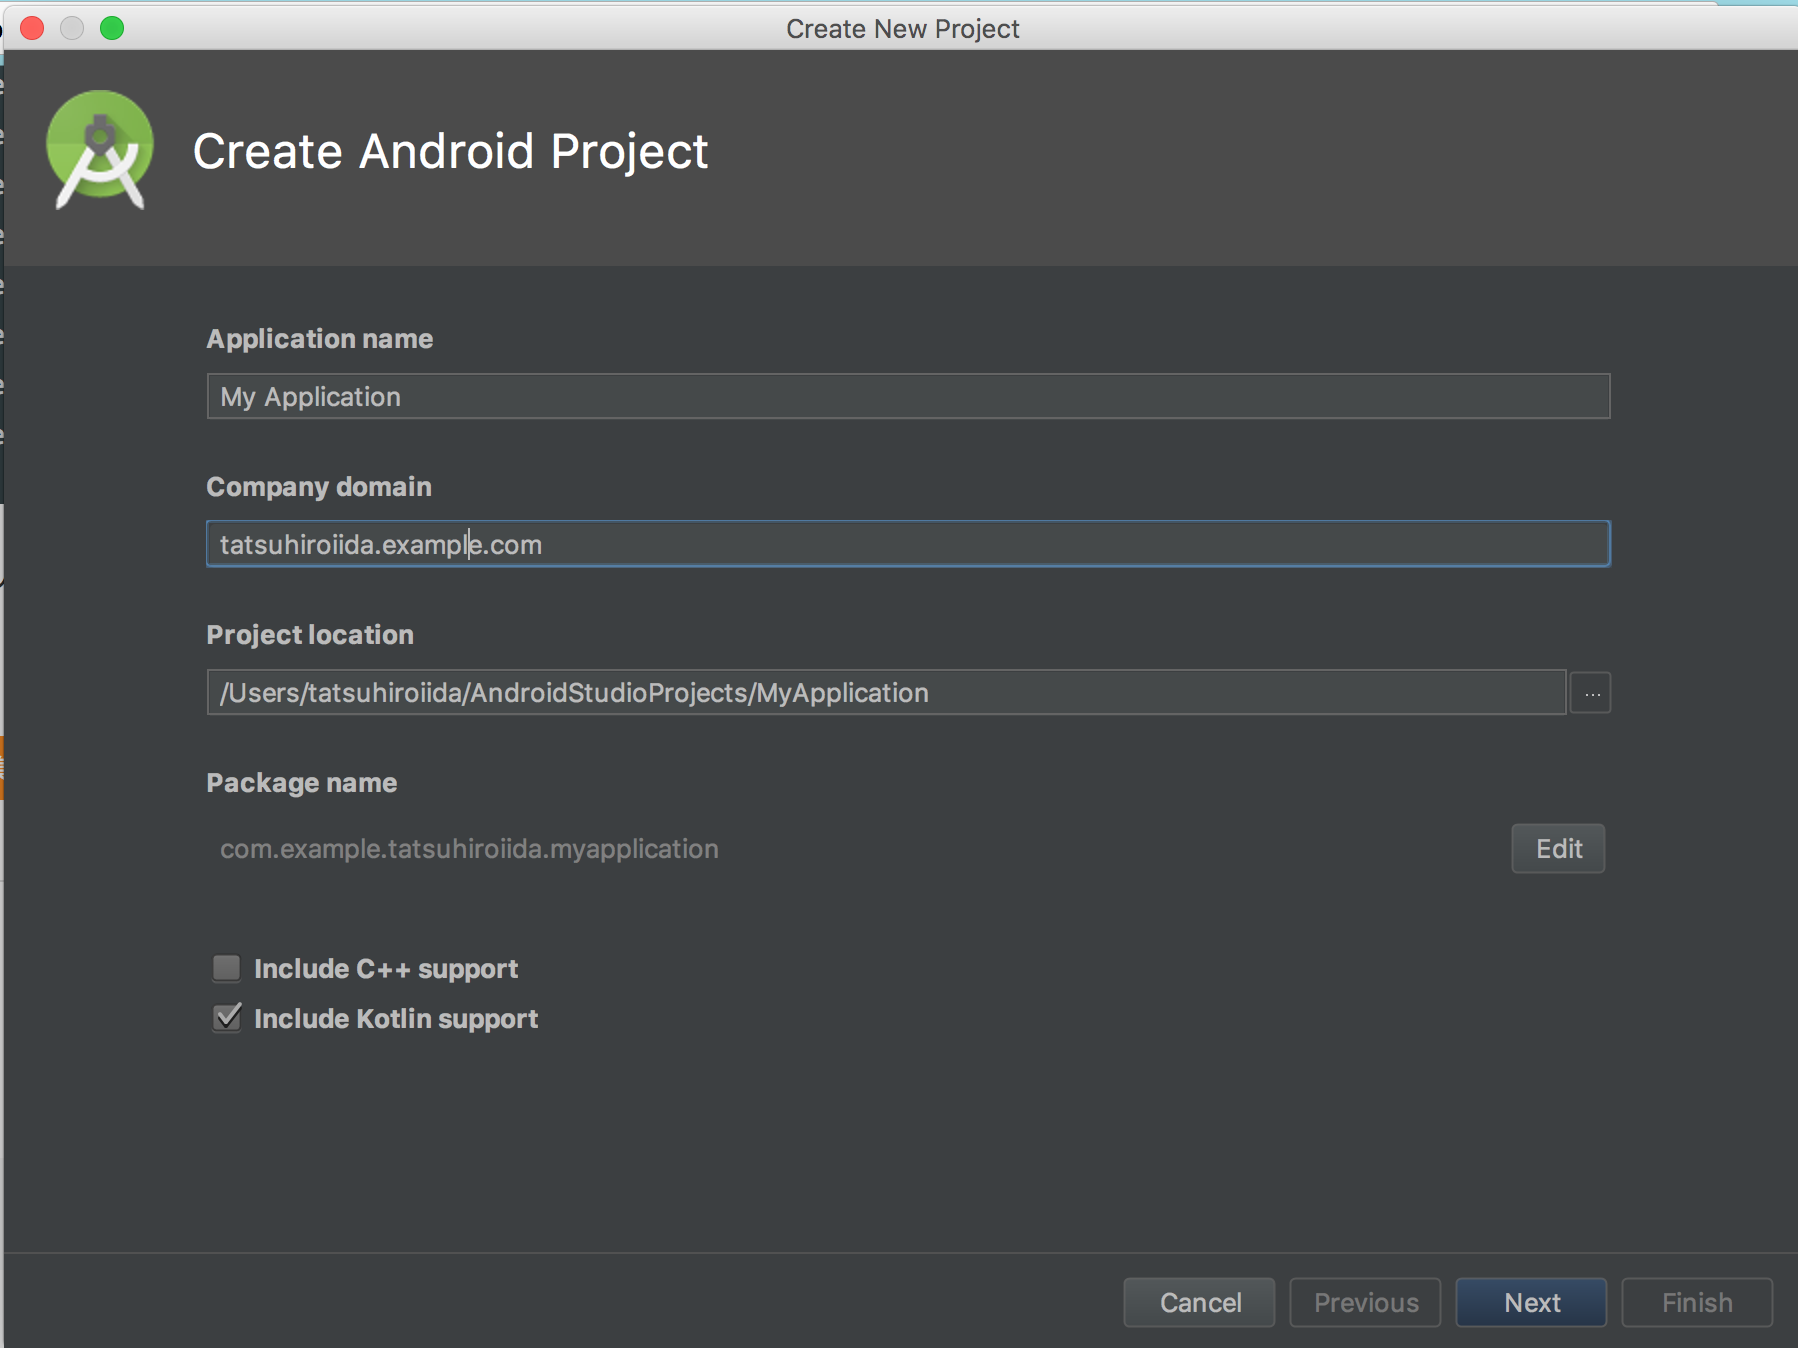
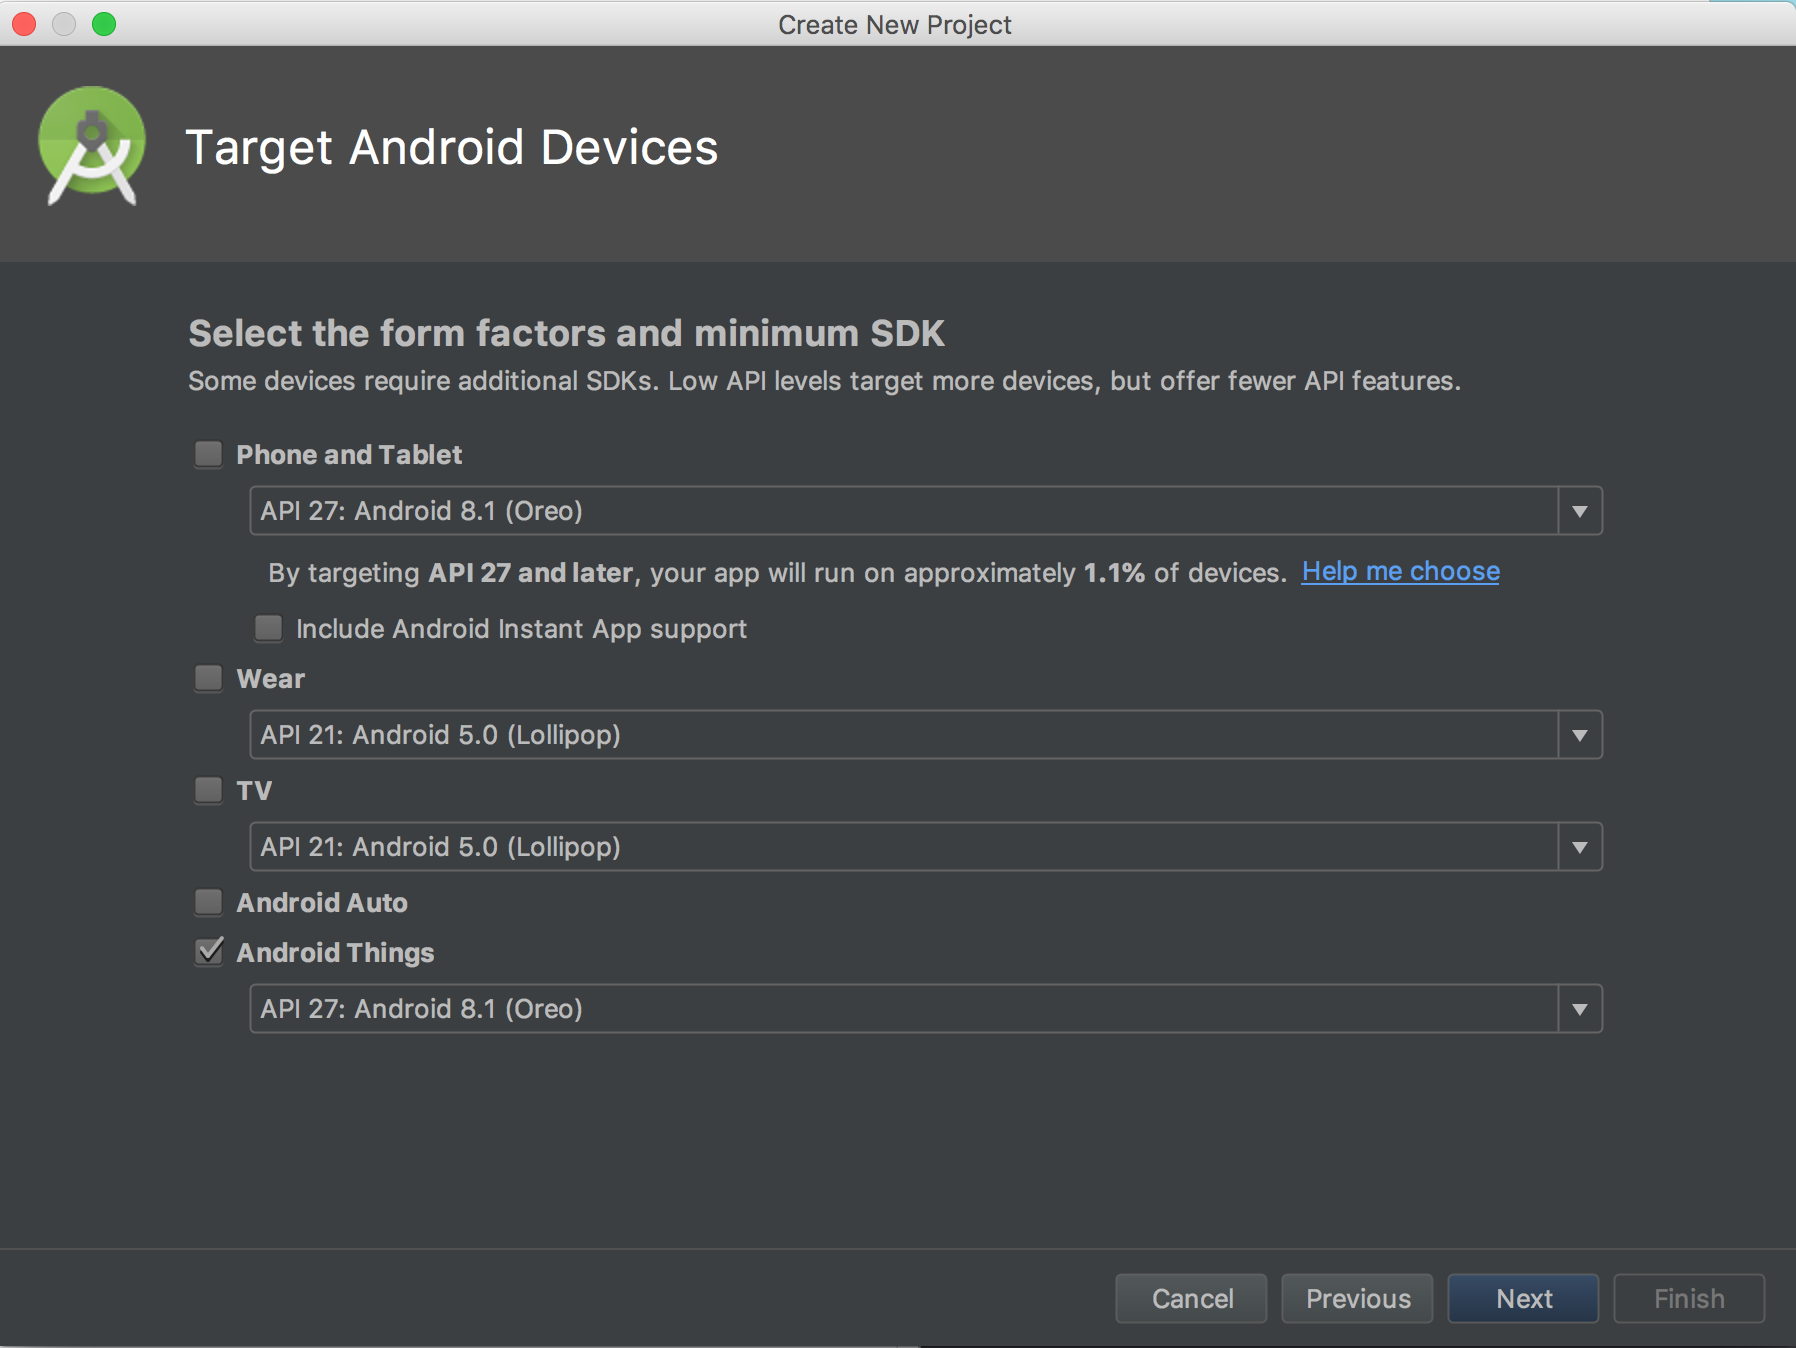
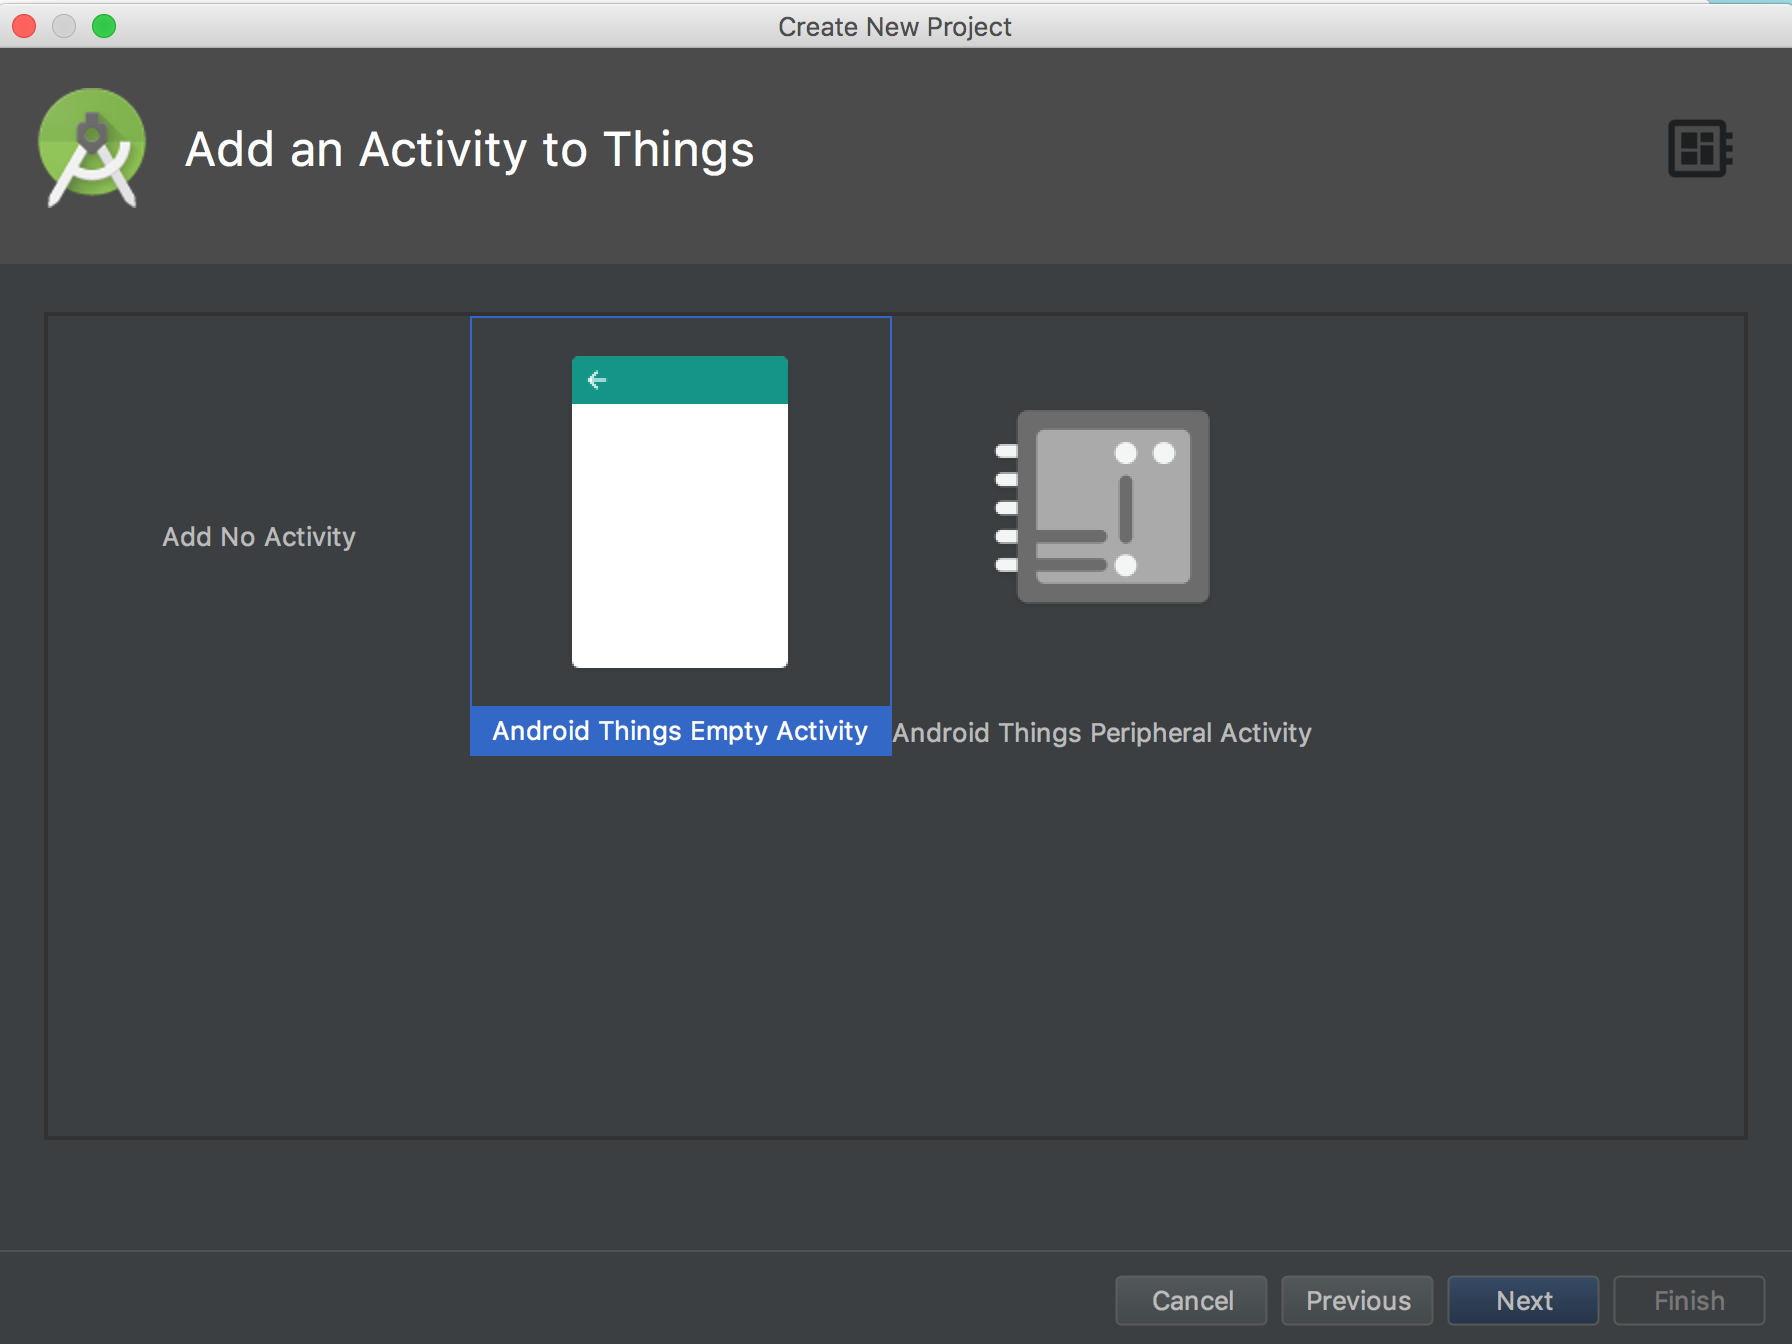
ここではAndroid Thingsを選択
コード修正
ビルドができたことを確認するために、一行だけいれる
class MainActivity : Activity() {

    override fun onCreate(savedInstanceState: Bundle?) {
        super.onCreate(savedInstanceState)
        setContentView(R.layout.activity_main)
        Log.d("test", "Hello Things") // この行を追加
    }
}
ビルド
Wi−Fi経由でのビルドを試します。
とりあえずRunする。

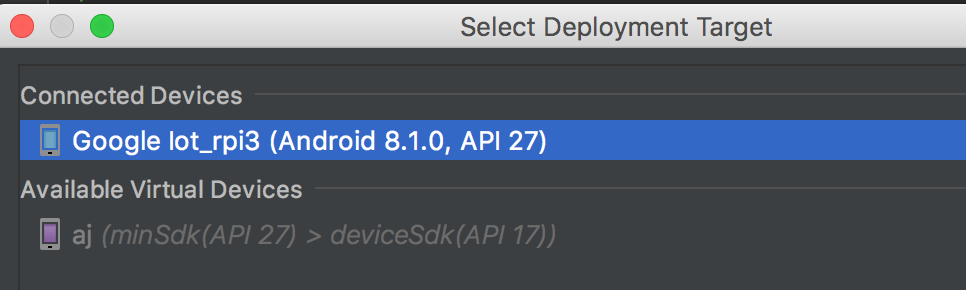
ビルドには成功しますが、Targetのデバイスが、デバイスリストに見つからない。
どうやら、adb のConnectをしてやる必要がありそう。
https://medium.com/@shivrajp130/connect-android-things-powered-raspberry-pi-3-to-wifi-36aaf2ced174
なのでまず、以下を参考にadbのパスを通して、
https://qiita.com/furusin_oriver/items/f956848788c7a63922bd
で、Android StudioのTerminalを再起動して、adb接続する。
$ adb connect Android.local
connected to Android.local:5555
無事つながったので、もう一度、Runすると、以下のように表示されました。
LogCatを見ると、追加したログが表示されていました。
