この記事はFUJITSU Advent Calendar 2018の12日目の記事です。
記事の内容は全て個人の見解であり、執筆内容は執筆者自身の責任です。所属する組織は関係ありません。
はじめに
私事で恐縮ですが、先週いっぱいメキシコのカンクンへ新婚旅行へ行ってきまして
時差ボケ&仕事ボケがまだ抜けません。笑
カンクン非常によかったのでみなさんもよかったらぜひ行ってみてください!
こんな綺麗なセノーテに出会えます!
※なんと加工なしでこの美しさ!!

はじめに その2
さて、本題にはいります。
本稿では、Cisco Nexusシリーズを紹介いたします。
Cisco Nexusシリーズは、データセンター向けのスイッチです。
物理アプライアンスのみならず仮想アプライアンスもあるのはご存知でしょうか?
仮想アプライアンスはESXiやVirtualbox,VMwareFusion等さまざまな環境に対応しております。
今回はESXi上にNexus9000v(Nexus9000の仮想マシン)を立ててみました。
Nexus9000vの詳細については、下記ガイドをご覧ください。
Cisco Nexus 9000v
環境
今回の環境は下記になります。
ESXiのバージョン :ESXi6.7
Nexus9000vのバージョン :nxosv.9.2.2.ova
・4 vCPUs
・8 GB RAM
・8 GB Disk
・6 vNICs (First is Management)
手順
備忘録含め、記載いたします。
1. ESXi上に仮想マシンをデプロイ
今回はOVFで仮想マシンを作成します。
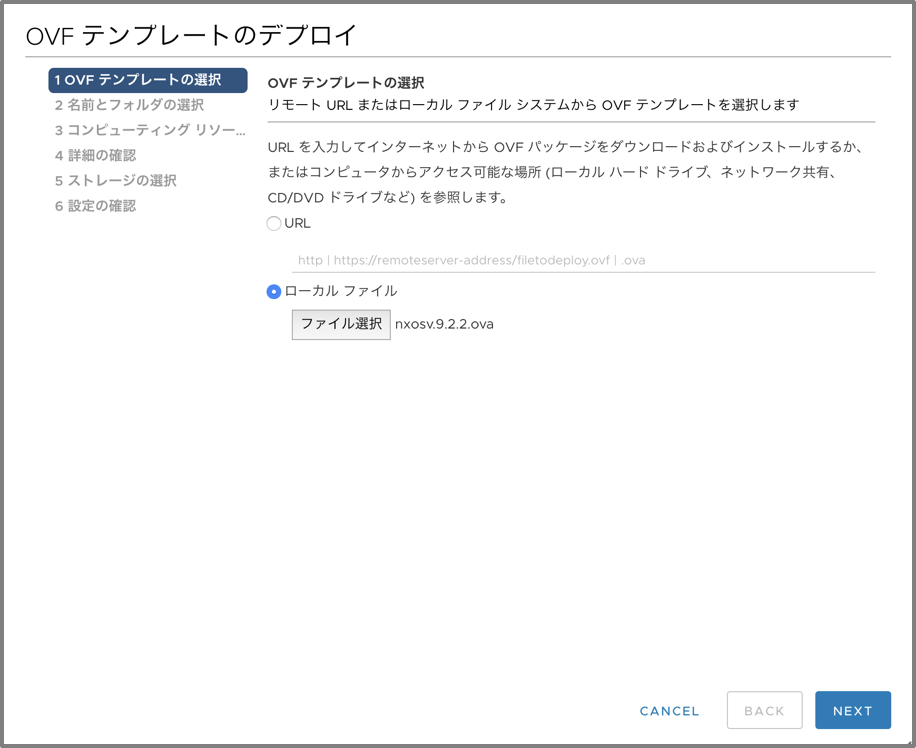
"OVFテンプレートをデプロイ"をクリックします。

次に、今回作成するイメージを選択し、NEXTをクリックします。
仮想マシン名と展開する場所を指定し、NEXTをクリックします。

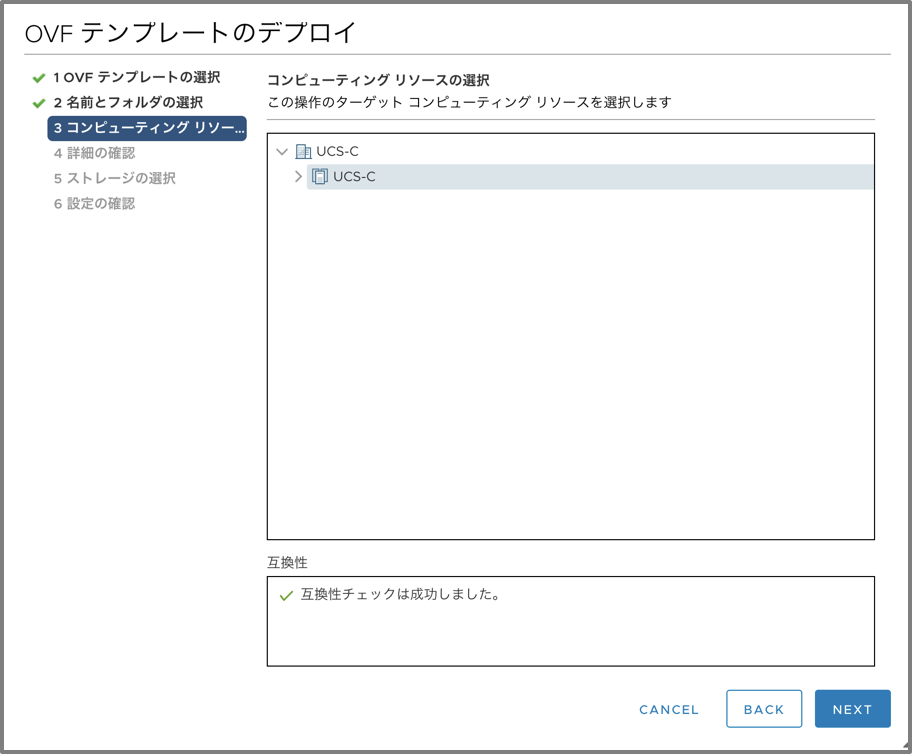
コンピューティングリソースを選択し、NEXTをクリックします。
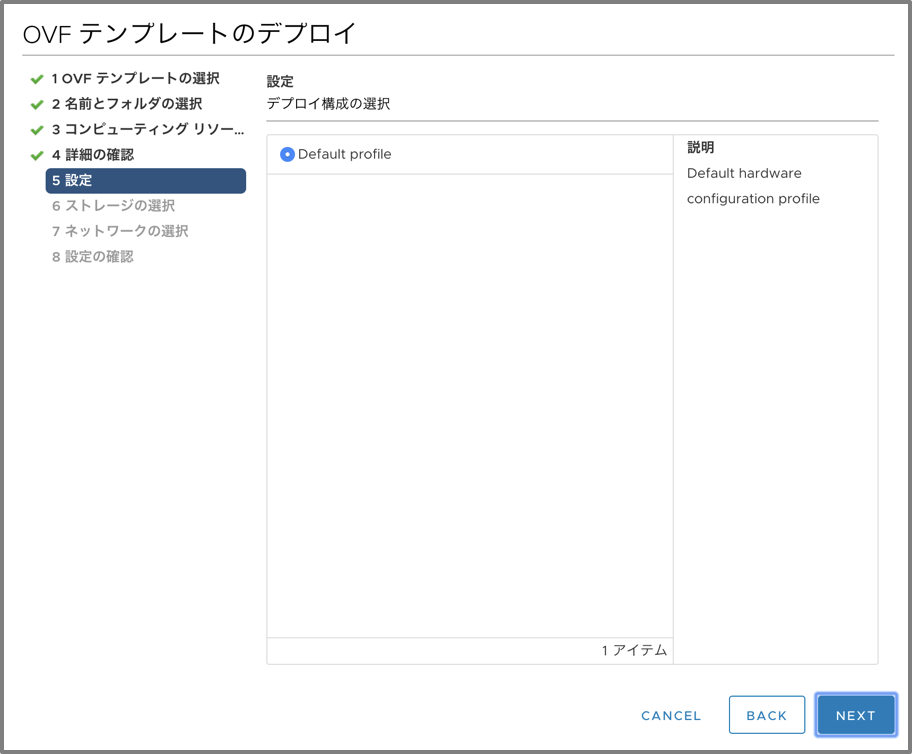
テンプレートを確認します。

デフォルトのままで大丈夫です。
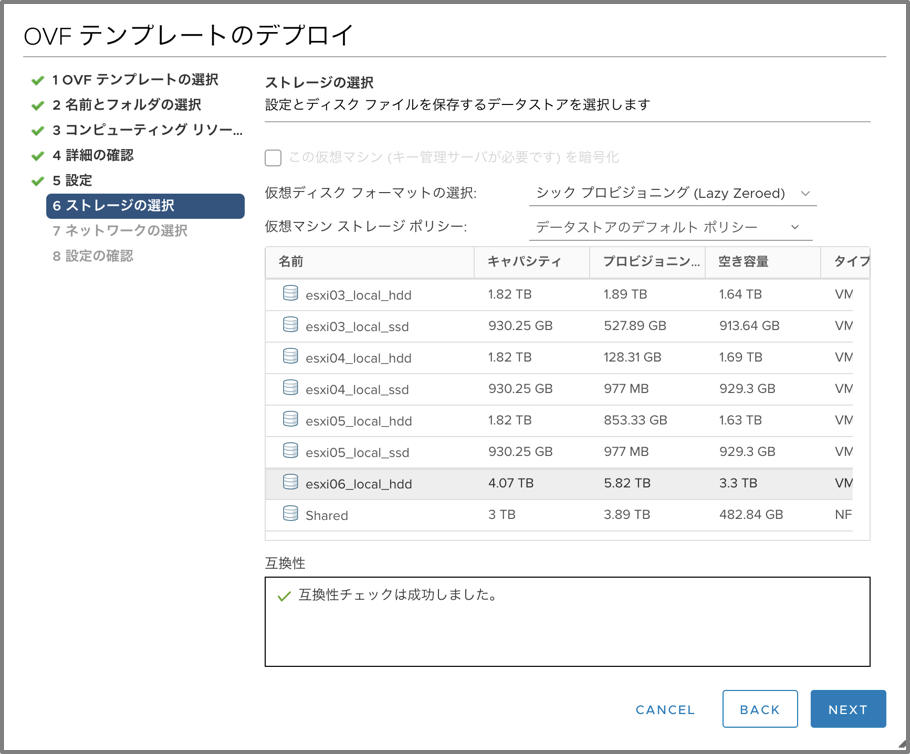
仮想マシンのディスクフォーマットや保存するデータストアを選択します。
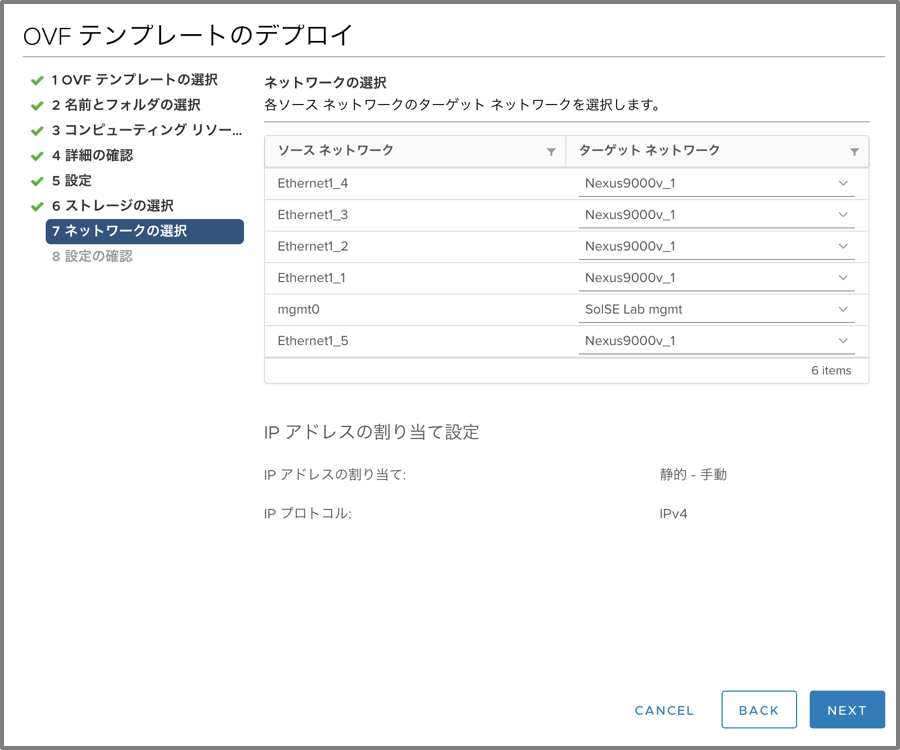
ターゲットネットワークを選択します。
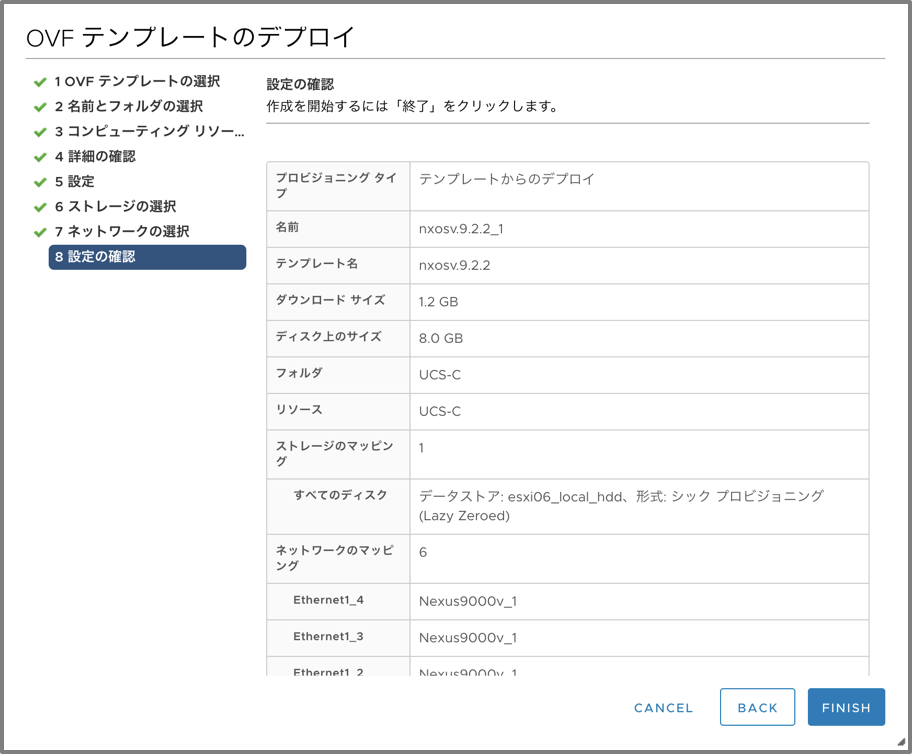
内容を確認し、FINISHを押します。
2. 仮想マシンの起動
仮想マシンを起動する前に、設定が少し必要になります。
仮想マシンを起動してもリモートコンソール上では下記画像で止まってしまいます。
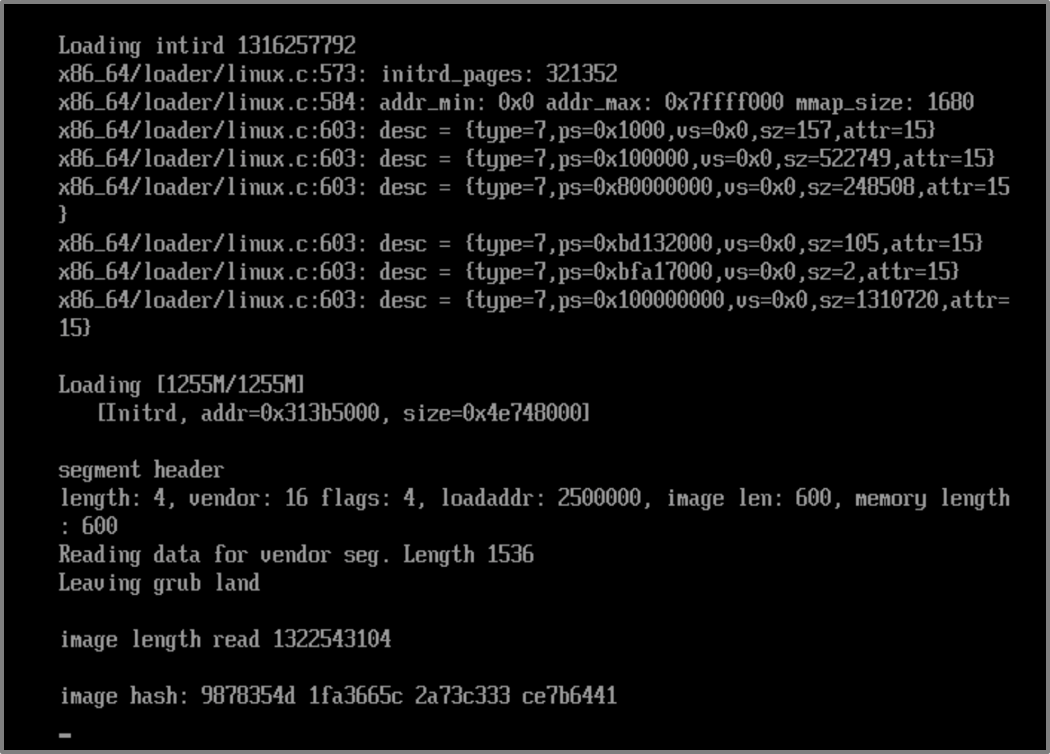
Nexus9000vの場合、コンソール接続だとキーボードの入力を受け付けてくれません。
CiscoのマニュアルによるとESXi上でリモートシリアルポートへの接続を許可する設定が必要になります。
GUI、CLIの両方で設定が可能ですが、今回はCLIで設定をします。
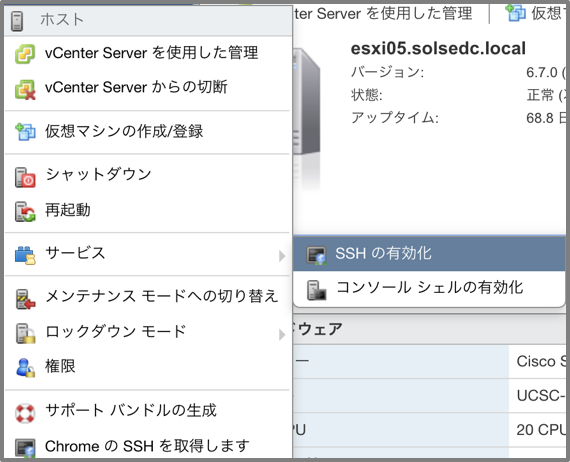
はじめに、ESXiのSSH接続を有効化します。
ホストを右クリック→”サービス”→”SSHの有効化”
その後、ターミナルよりESXiホストにSSHアクセスをします。
TATSAITO-M-80UF:~ tatsaito$ ssh -l root 172.16.99.15
Password:
The time and date of this login have been sent to the system logs.

WARNING:
   All commands run on the ESXi shell are logged and may be included in
   support bundles. Do not provide passwords directly on the command line.
   Most tools can prompt for secrets or accept them from standard input.

VMware offers supported, powerful system administration tools.  Please
see www.vmware.com/go/sysadmintools for details.

The ESXi Shell can be disabled by an administrative user. See the
vSphere Security documentation for more information.
[root@esxi05:~]
現在はリモートシリアルポートは"false"になっています。
[root@esxi05:~] esxcli network firewall ruleset list | grep remoteSerialPort
remoteSerialPort            false
[root@esxi05:~]
リモートシリアルポートを有効化します。
コマンド"esxcli network firewall ruleset set --enabled true --ruleset-id=remoteSeri
alPort"
[root@esxi05:~] esxcli network firewall ruleset set --enabled true --ruleset-id=remoteSeri
alPort
[root@esxi05:~] esxcli network firewall ruleset list | grep remoteSerialPort
remoteSerialPort             true
[root@esxi05:~]
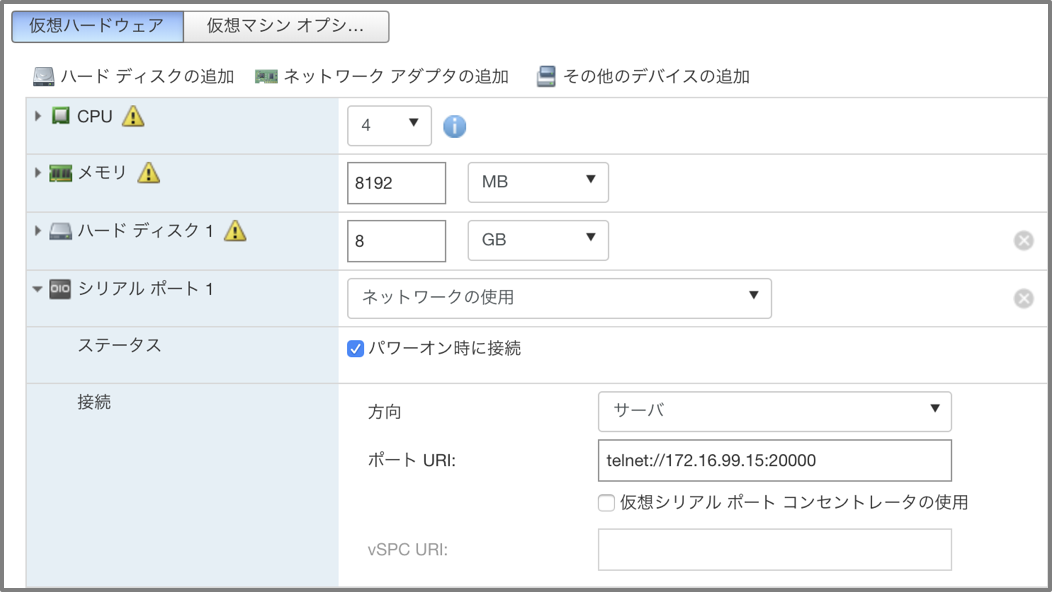
次に、仮想マシンにシリアルポートの設定をします。
※仮想マシンの電源を落とした状態で行ってください。
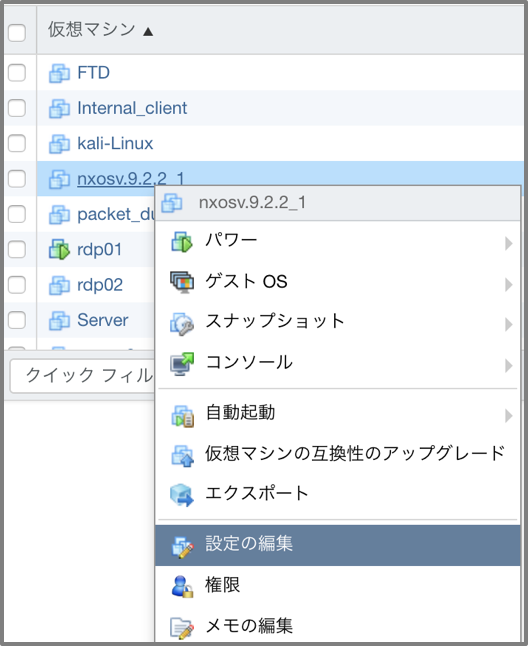
仮想マシンを右クリック→"設定の編集"をクリック
シリアルポート1:ネットワークの使用
ポート URI:telnet://ESXiの管理アドレス:20000
その後、仮想マシンの電源を再度ONしてください。
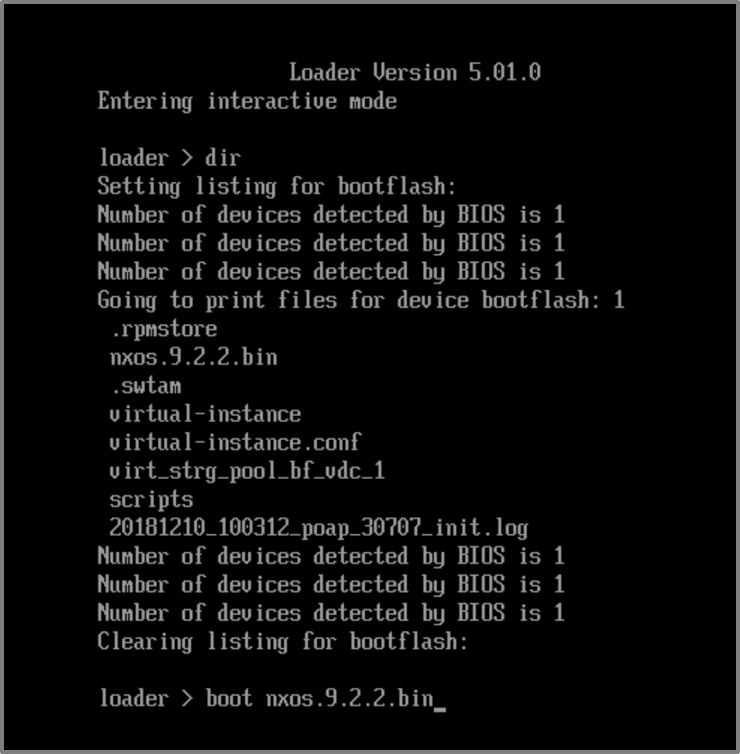
仮想マシンのコンソールを見てみると、loaderの画面が表示されました。
dirコマンドでbootするイメージを確認し、bootを実施してください。
インストールが走ったら、ターミナルでtelnetを実施してください。
接続までに多少時間がかかります。。
インストーラが走ったらゴールは目前です。
TATSAITO-M-80UF:~ tatsaito$ telnet 172.16.99.15 20000
Trying 172.16.99.15...
Connected to esxi05.solsedc.local.
Escape character is '^]'.
Installing klm_card_index
done
umount: /torissusda5: not mounted
Linking n9k flash devices
creating flash devices BOOT_DEV= sda
INIT: version 2.88 booting
Installing ata_piix module ... done.
Unsquashing rootfs ...
Total size needed in bootflash is 146196
check bootflash : OK
Total size needed in bootflash is 35504
check bootflash : OK
Enabling 8250 serial driver spurious INTs workaround
Installing isan procfs ... done.
is_lxc: is_stby: suffix:
Installing ftrace in non-lxc mode done
Installing SSE module ... done.
Creating SSE device node 247 ... done.
Loading I2C driver ... done.
Loading MEM scrub driver ... done.
Installing CCTRL driver for card_type 29 on a VM without NEED_GEM ... done.
19.68: Interrupt throttling disabled. No cctrl irq detected.
Loading IGB driver ... done.
Cannot change large-receive-offload
Not Micron SSD...
POAP(Power On Auto Provisioning)が走るので"yes"を入力し停止させてください。
その後、パスワードを設定すると無事ログイン画面が出てきました!!
2018 Dec 10 11:22:15 switch %$ VDC-1 %$ %POAP-2-POAP_INFO:   - Abort Power On Auto Provisioning [yes - continue with normal setup, skip - bypass password and basic configuration, no - continue with Power On Auto Provisioning] (yes/skip/no)[no]:
yes
Disabling POAP.......Disabling POAP
2018 Dec 10 11:22:29 switch %$ VDC-1 %$ poap: Rolling back, please wait... (This may take 5-15 minutes)


         ---- System Admin Account Setup ----


Do you want to enforce secure password standard (yes/no) [y]: 2018 Dec 10 11:22:47 switch %$ VDC-1 %$ %VMAN-2-ACTIVATION_STATE: Successfully activated virtual service 'guestshell+'
2018 Dec 10 11:22:47 switch %$ VDC-1 %$ %VMAN-2-GUESTSHELL_ENABLED: The guest shell has been enabled. The command 'guestshell' may be used to access it, 'guestshell destroy' to remove it.


  Enter the password for "admin":
  Confirm the password for "admin":

         ---- Basic System Configuration Dialog VDC: 1 ----

This setup utility will guide you through the basic configuration of
the system. Setup configures only enough connectivity for management
of the system.

Please register Cisco Nexus9000 Family devices promptly with your
supplier. Failure to register may affect response times for initial
service calls. Nexus9000 devices must be registered to receive
entitled support services.

Press Enter at anytime to skip a dialog. Use ctrl-c at anytime
to skip the remaining dialogs.

 Would you like to enter the basic configuration dialog (yes/no): no
 login: admin
Password:

Cisco NX-OS Software
Copyright (c) 2002-2018, Cisco Systems, Inc. All rights reserved.
Nexus 9000v software ("Nexus 9000v Software") and related documentation,
files or other reference materials ("Documentation") are
the proprietary property and confidential information of Cisco
Systems, Inc. ("Cisco") and are protected, without limitation,
pursuant to United States and International copyright and trademark
laws in the applicable jurisdiction which provide civil and criminal
penalties for copying or distribution without Cisco's authorization.

Any use or disclosure, in whole or in part, of the Nexus 9000v Software
or Documentation to any third party for any purposes is expressly
prohibited except as otherwise authorized by Cisco in writing.
The copyrights to certain works contained herein are owned by other
third parties and are used and distributed under license. Some parts
of this software may be covered under the GNU Public License or the
GNU Lesser General Public License. A copy of each such license is
available at
http://www.gnu.org/licenses/gpl.html and
http://www.gnu.org/licenses/lgpl.html
***************************************************************************
*  Nexus 9000v is strictly limited to use for evaluation, demonstration   *
*  and NX-OS education. Any use or disclosure, in whole or in part of     *
*  the Nexus 9000v Software or Documentation to any third party for any   *
*  purposes is expressly prohibited except as otherwise authorized by     *
*  Cisco in writing.                                                      *
***************************************************************************
switch#
3. さいごに
最後まで読んでいただきありがとうございました!
csr1000vやCentOS等のovaなら簡単に立ち上がりますが、Nexus9000vは若干癖があるなあと感じました。
もし、効率のよいやり方がありましたらぜひ教えてください。。涙
ですが、Nexusの実機を揃えるのはとてつもなく高価なので仮想環境で検証できるのは素晴らしいですね!
さくっとコンフィグ確認したりできそうですね。
Nexus9000vのサポート機能については下記をご覧ください。
Cisco Nexus 9000v Guide Release 9.x
今後はNexus9000vでプログラミング絡みの記事を書いてみようかなあと思います。