はじめに
先日のTouchDesignerもくもく会にて発表したものです。
TouchDesignerで音生成しているのってあんまりみたことないので、軽く解説してみます。
インタクティブミュージックの入門としても良いかも。
動画:
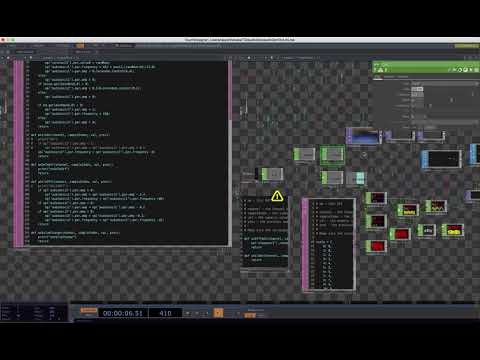
チップチューンっぽい音をTouchDesignerで鳴らしてみたいと思って作ってみたもの。

ダウンロード
発音部分だけ切り出した
toxファイルはこちら
https://github.com/tatmos/chiptuneRnd
説明
ほとんどpythonで書いています。
3つの音源を AudioOscillatorで用意し
メロ、ノイズ、バスドラ
という感じで鳴らし分けています。
これくらい鳴っていると音楽っぽくなるかなと。
8ステップのゲートシーケンサー
それぞれ8stepの発音テーブルを持っていて、1だと発音します。
melo = {
    0: 1,
    1: 0,
    2: 0,
    3: 0,
    4: 1,
    5: 0,
    6: 0,
    7: 0,
}
noise = {
    0: 1,
    1: 1,
    2: 0,
    3: 1,
    4: 1,
    5: 1,
    6: 0,
    7: 1,
}
bd = {
    0: 1,
    1: 0,
    2: 0,
    3: 0,
    4: 1,
    5: 0,
    6: 0,
    7: 0,
}
メロディーはscaleをもっていて、音楽的に外れない感じの音になるようにしています。
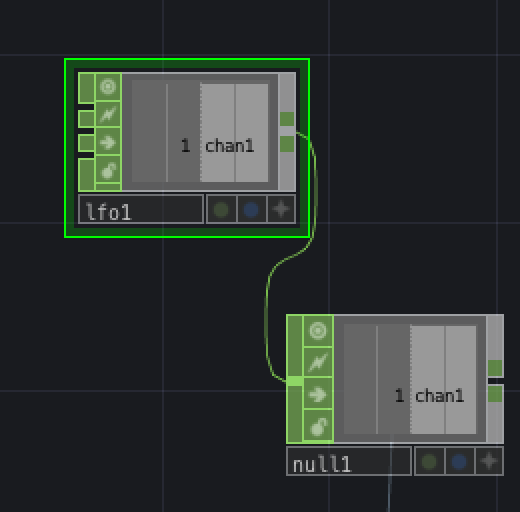
メトロノームのようなもの
LFOからくる信号で
onOffToOn
になった時にステップが進むようになっています。
音程を決めるもの
周波数指定なので、MIDIノート的に指定できるように少し変えてあります。
op('audioosci1').par.frequency = 442 * pow(2,(randNum-69)/12.0)
音量変化なもの
音量をランダムにつけています。
op('audioosci1').par.amp = 0.2*random.randint(0,4);
ピッチエンベロープ
whileOnのところでエンベロープ的なことも このfrequency - 8 とかを変更するとピッチの変化が変わります
def whileOn(channel, sampleIndex, val, prev):
#   print("On")
#   if op('audioosci1').par.amp < 1:
#       op('audioosci1').par.amp = op('audioosci1').par.amp + 0.1
    op('audioosci3').par.frequency = op('audioosci3').par.frequency -8;
    return
エンベロープリリース
def whileOff(channel, sampleIndex, val, prev):
#   print("whileOff")
    if op('audioosci1').par.amp > 0:
        op('audioosci1').par.amp = op('audioosci1').par.amp - 2.4
        op('audioosci1').par.frequency = op('audioosci1').par.frequency -60;
徐々に音が小さくなるような処理や
バスドラムは音程が下がっていくようなこともしています。
ノイズの変化量とかを変えると面白いです。(ハイハットやシンバルといった感じに変化)
ボタンを押すと
それぞれの発音テーブルをランダムにします。
def onOnToOff(channel, sampleIndex, val, prev):
	mod('chopexec2').randomTable()
	return
他のchopexecの関数呼べる! これ便利。
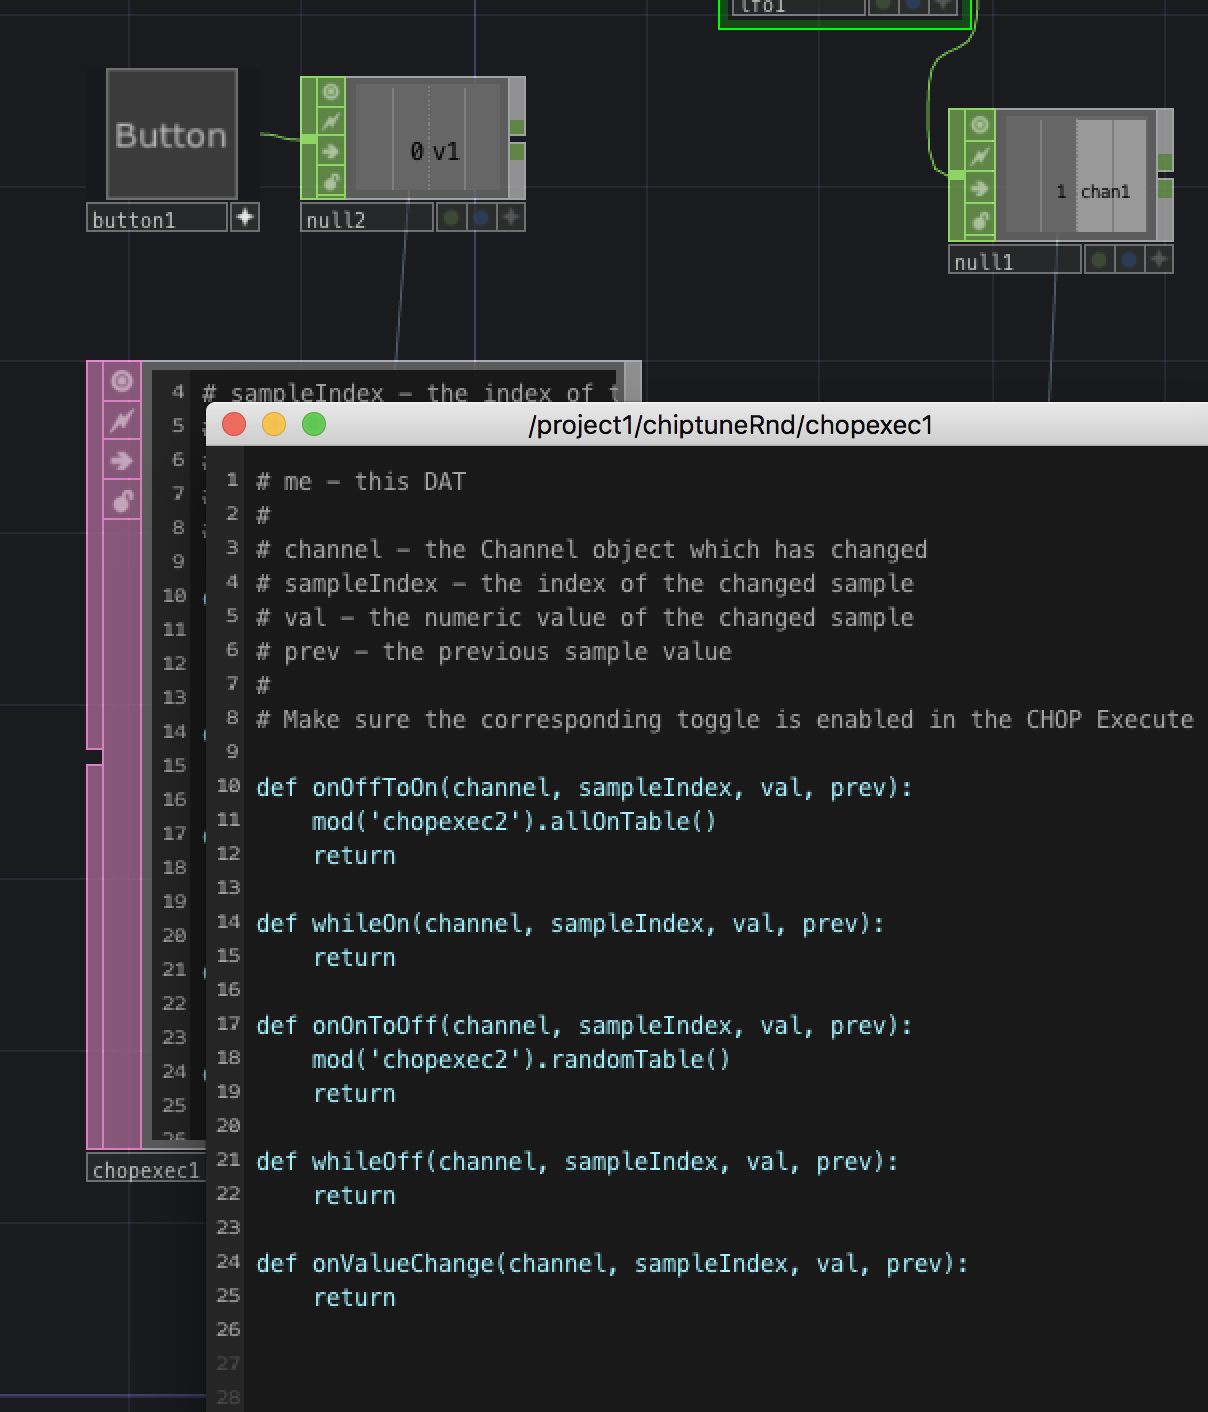
def randomTable():
	for i in range(0, 8):
		melo[i] = random.randint(0,1)
		noise[i] = random.randint(0,1)
		bd[i] = random.randint(0,1)
	return
シンプルにランダム。
音色を変える
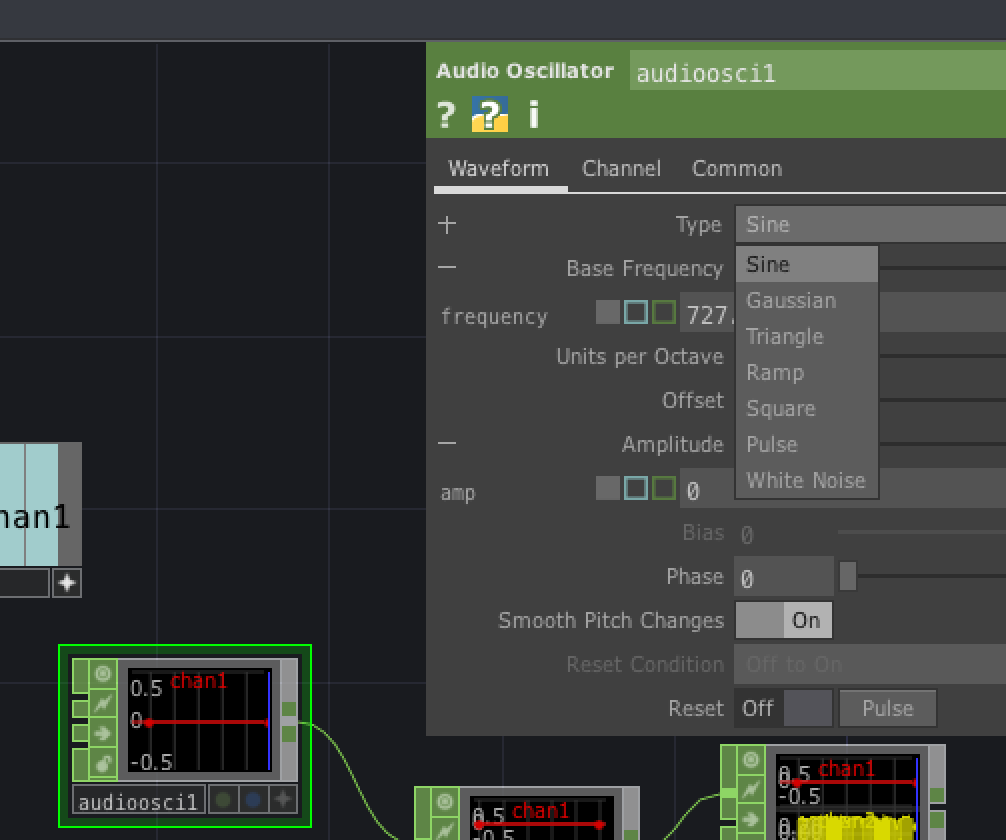
AudioOcillatorのTypeを変えるといろいろ音を変えられる。
Sinとかうまく組み合わせてFMっぽいのもできるのだろうか・・・
コアとなるソース
# me - this DAT
#
# channel - the Channel object which has changed
# sampleIndex - the index of the changed sample
# val - the numeric value of the changed sample
# prev - the previous sample value
#
# Make sure the corresponding toggle is enabled in the CHOP Execute DAT.

scale = {
    0: 0,
    1: 0,
    2: 2,
    3: 2,
    4: 4,
    5: 5,
    6: 5,
    7: 7,
    8: 7,
    9: 9,
    10: 9,
    11: 12,
}

melo = {
    0: 1,
    1: 0,
    2: 0,
    3: 0,
    4: 1,
    5: 0,
    6: 0,
    7: 0,
}
noise = {
    0: 1,
    1: 1,
    2: 0,
    3: 1,
    4: 1,
    5: 1,
    6: 0,
    7: 1,
}
bd = {
    0: 1,
    1: 0,
    2: 0,
    3: 0,
    4: 1,
    5: 0,
    6: 0,
    7: 0,
}

beatNo = 0;

import random

def allOnTable():
	for i in range(0, 8):
		melo[i] = 1;
		noise[i] = 1;
		bd[i] = 1;
	return

def randomTable():
	for i in range(0, 8):
		melo[i] = random.randint(0,1)
		noise[i] = random.randint(0,1)
		bd[i] = random.randint(0,1)
	return

def onOffToOn(channel, sampleIndex, val, prev):
	global beatNo
	#if beatNo%32 == 0:
	#	randomTable()
	beatNo+=1
	randNum = random.randint(60,72)
	randNum = scale.get(randNum%12,0)
	randNum += 60+12
	print("onOffToOn")
	if melo.get(beatNo%8,0) > 0:
		op('constant1').par.value0 = randNum;
		op('audioosci1').par.frequency = 442 * pow(2,(randNum-69)/12.0)
		op('audioosci1').par.amp = 0.2*random.randint(0,4);
	else:
		op('audioosci1').par.amp = 0;
	if noise.get(beatNo%8,0) > 0:
		op('audioosci2').par.amp = 0.0+0.2*random.randint(0,2);
	else:
		op('audioosci2').par.amp = 0;

	if bd.get(beatNo%8,0) > 0:
		op('audioosci3').par.amp = 1;
		op('audioosci3').par.frequency = 150;
	else:
		op('audioosci3').par.amp = 0;
	return

def whileOn(channel, sampleIndex, val, prev):
#	print("On")
#	if op('audioosci1').par.amp < 1:
#		op('audioosci1').par.amp = op('audioosci1').par.amp + 0.1
	op('audioosci3').par.frequency = op('audioosci3').par.frequency -8;
	return

def onOnToOff(channel, sampleIndex, val, prev):
	#print("onOnToOff")
	return

def whileOff(channel, sampleIndex, val, prev):
#	print("whileOff")
	if op('audioosci1').par.amp > 0:
		op('audioosci1').par.amp = op('audioosci1').par.amp - 2.4
		op('audioosci1').par.frequency = op('audioosci1').par.frequency -60;
	if op('audioosci2').par.amp > 0:
		op('audioosci2').par.amp = op('audioosci2').par.amp - 0.08
	if op('audioosci3').par.amp > 0:
		op('audioosci3').par.amp = op('audioosci3').par.amp -0.1;
		op('audioosci3').par.frequency = op('audioosci3').par.frequency -30;
	return

def onValueChange(channel, sampleIndex, val, prev):
	print("onValueChange")
	return
地味にハマりどころ
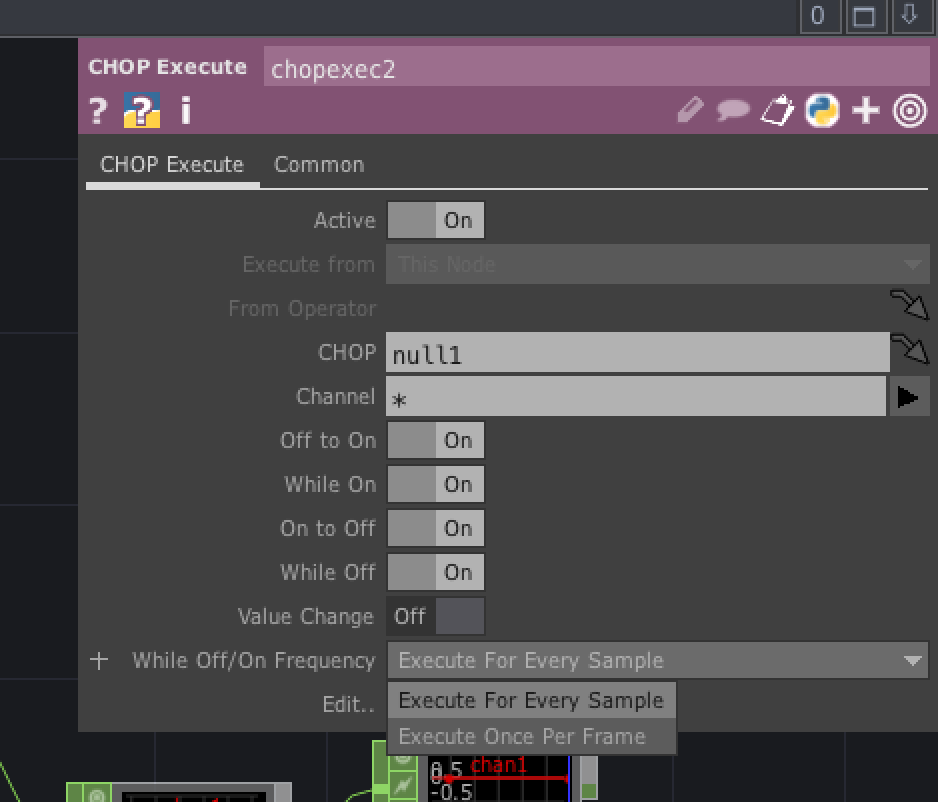
chopExecuteの関数はパラメータのところでOnにしておかないと呼ばれません。
あと、オーディオの処理を滑らかに行いたい場合は
「Execute For Every Sample」にしておくと良いかも。
Frame単位だとガクガクするかもしれない。(それはそれでチップチューンぽいかもですが)