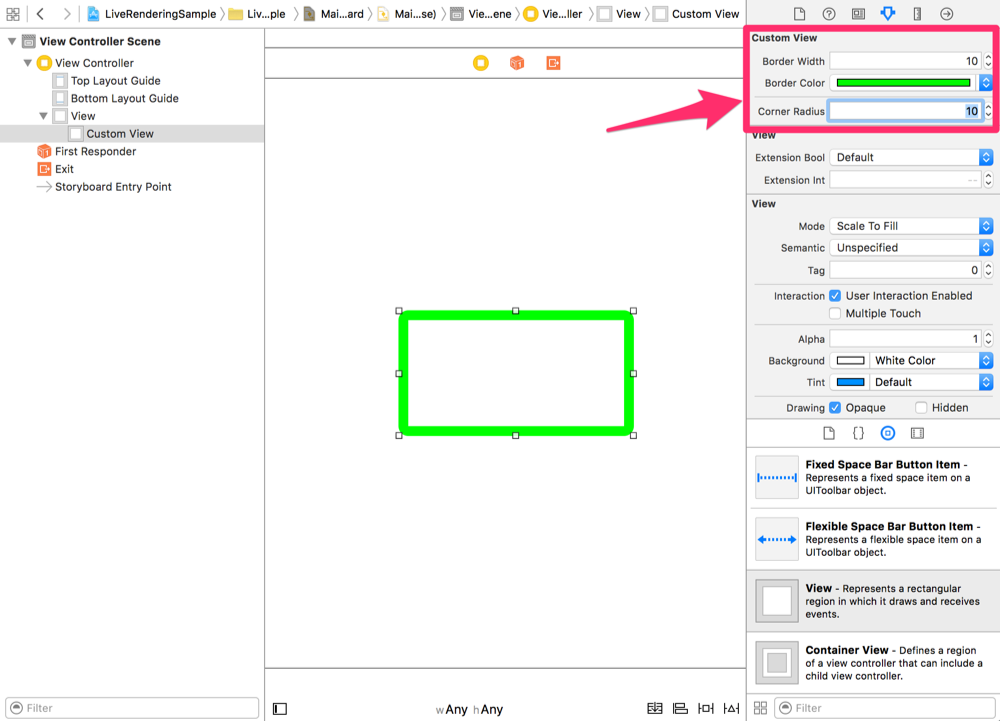
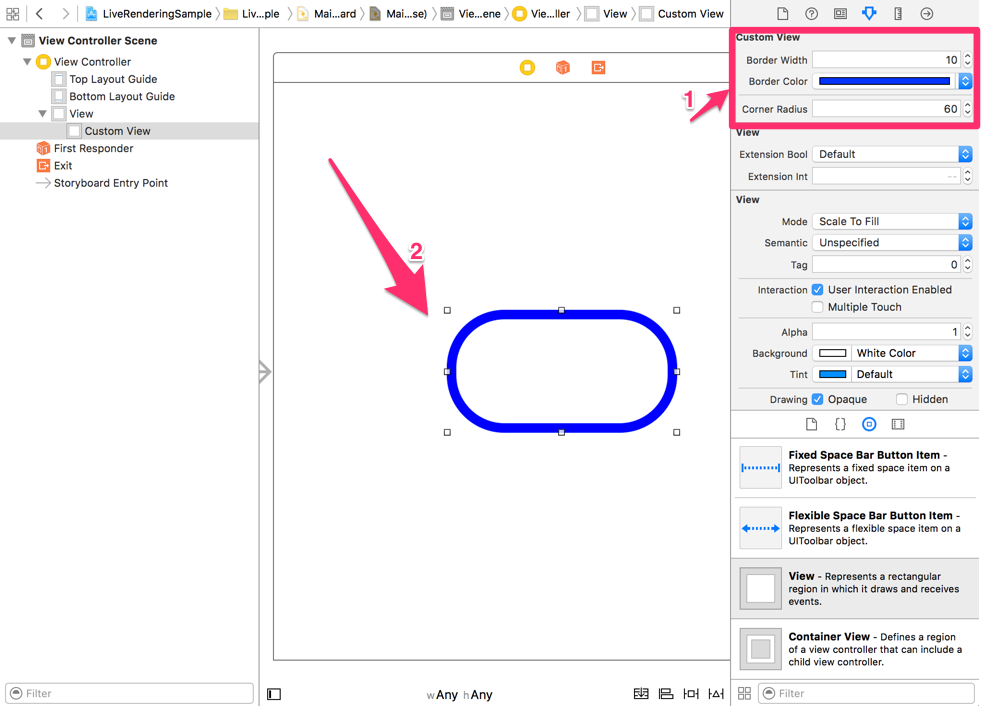
はじめに
Storyboardを使って枠線をいじるとき、こんなことしてませんか?
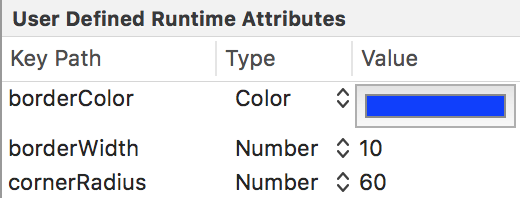
謎のKeyPathとTypeを設定する方法しかなかったと思います。
自分もこの方法を使って実現させていました。
しかし!!
もうこんな不毛な作業をやる必要がなくなる便利機能があります!
というわけで@IBInspectableと@IBDesignableという便利な機能について紹介します!
これらはXcode6以上で使えるようになったものです。
@IBInspectableについて
@IBInspectableとは、これを指定したプロパティは
IBを表示した時の右カラムにプロパティとして表示されることが出来ます。
例として、UIViewのサブクラスのCustomViewにプロパティ定義してみました。
import UIKit

class CustomView: UIView {
    @IBInspectable var customBool   : Bool      = false
    @IBInspectable var customInt    : Int       = 0
    @IBInspectable var customFloat  : CGFloat   = 0.0
    @IBInspectable var customDouble : Double    = 0.0
    @IBInspectable var customString : String    = ""
    @IBInspectable var customPoint  : CGPoint   = CGPointZero
    @IBInspectable var customSize   : CGSize    = CGSizeZero
    @IBInspectable var customRect   : CGRect    = CGRectZero
    @IBInspectable var customColor : UIColor   = UIColor.clearColor()
    @IBInspectable var customImage  : UIImage   = UIImage()
}
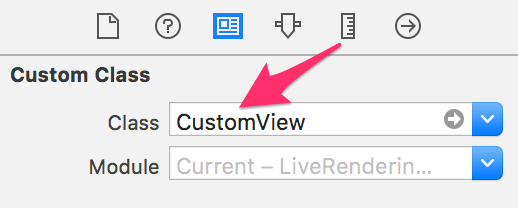
IB上でCustomView.swiftをCustomClassに入れると、、、
このように表示されます。
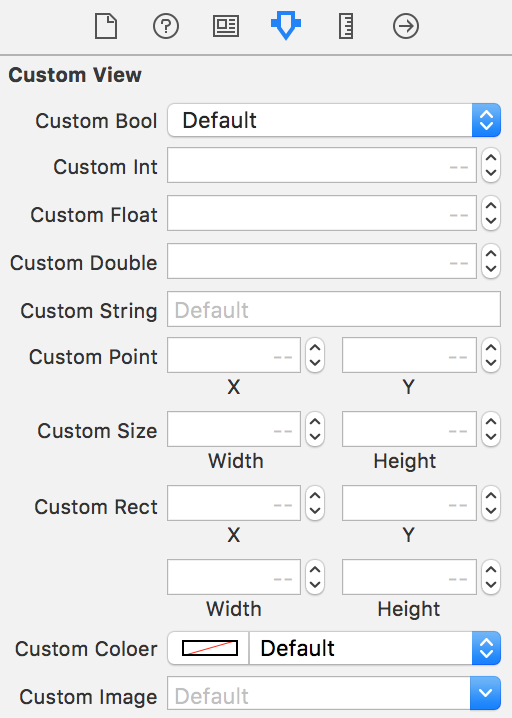
ちなみに追加出来る型はコチラです。
- Bool
- Int
- CGFloat
- Double
- String
- CGPoint
- CGSize
- CGRect
- UIColor
- UIImage
これはExtensionクラスでも出来ます。
ただしComputed Propertyのみに限られます(getとsetがあるプロパティです)
こんな感じでやれば、、、
import UIKit

extension UIView {
    @IBInspectable var extensionBool : Bool {
        get {
            return self.extensionBool
        }
        set (newValue) {
            self.extensionBool = newValue
        }
    }
    @IBInspectable var extensionInt : Int {
        get {
            return self.extensionInt
        }
        set (newValue) {
            self.extensionInt = newValue
        }
    }
}
IB上からプロパティの値をいじりたい時は重宝しますね!
@IBDesignableについて
@IBDesignableは@IBInspectableと併用して使うことで
いちいちビルドしてUI確認する作業を減らすことが出来ます!
IB上に出てきたプロパティをいじるとライブレンダリングしてくれるからです!
使い方は簡単。
こんな感じでクラスの前に@IBDesignableをつけるだけです。
このクラスはViewの枠線や色のプロパティをIB上でいじれるようになってます。
import UIKit

@IBDesignable
class CustomView : UIView {
    @IBInspectable var borderWidth : CGFloat = 0 {
        didSet {
            layer.borderWidth = borderWidth
        }
    }

    @IBInspectable var borderColor : UIColor = UIColor.clearColor() {
        didSet {
            layer.borderColor = borderColor.CGColor
        }
    }

    @IBInspectable var cornerRadius : CGFloat = 0 {
        didSet {
            layer.cornerRadius = cornerRadius
        }
    }
}
例の如くCustom ClassにCustomViewを設定します。
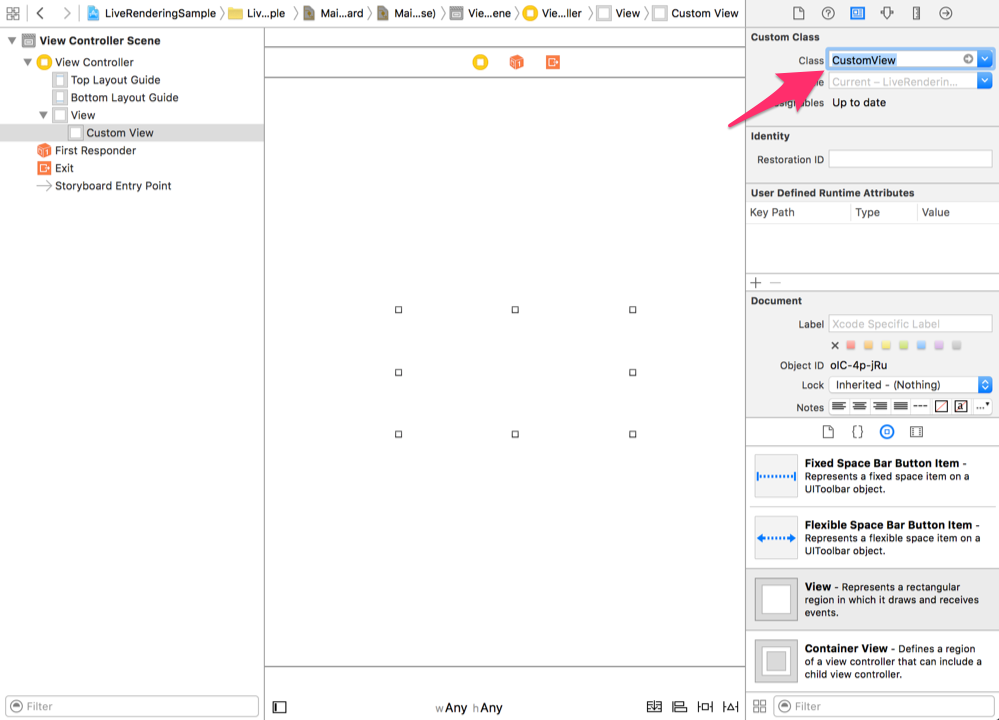
と、いうわけでこれで便利にStoryboardを使った開発ができますね!
終わりに
今まではIB上でlayer系の作業をするときはKeyPathとTypeを指定していた
or
そこだけコードで定義していたかと思います。
今回のこの方法を使えば、いちいちビルドしてUI確認をすることなく、
IB上でプロパティをいじるだけでUI確認が出来るのです!
難しくないので是非、使ってみてください!
サンプルコード
Githubにサンプルプロジェクトを置いておきました。
ご自由にお使い下さい。
https://github.com/AcaiBowl/LiveRenderingSample
質問や指摘があればコメントでお待ちしております!

