概要
仕事でMVPを使用し開発する場が増えてきているので、
自分の練習としてMVPを使用しAPIを叩いています。
Alamofire・Codable等あまり慣れていないため、
下にある参考文献の記事を見て、自分なりに作成いたしました。
こう書いた方がより良いですよ等ありましたら、ご指摘いただけるとありがたいです。
またQiitaに投稿するのが初めてのため、読みにくかったら申しわけございません。
環境
- xcode10.0
- swift4.2
- ライブラリ
- Alamofire 4.7.3
- SVProgressHUD (見栄えをよくするため)
- API
- Qiitaのやつ
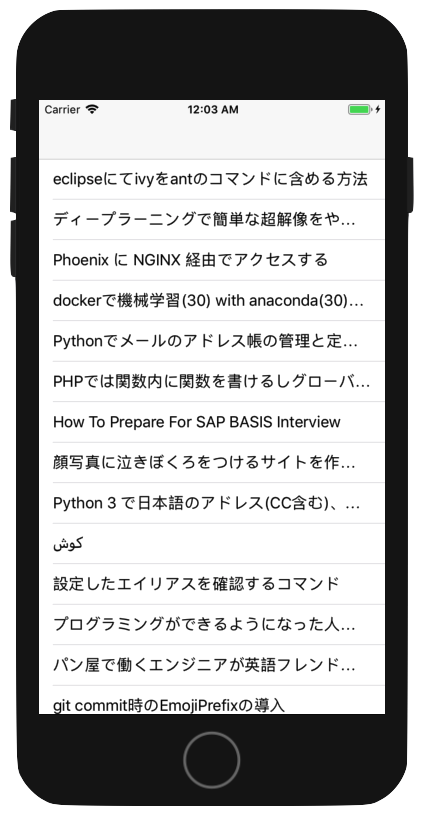
実行結果
| APIListViewController | APIInformationViewController |
|---|---|
 |
 |
作成ファイルの説明
- View
- APIListViewController ・・・ 取得した情報をTableViewに表示
- APIInformationViewController ・・・ 取得したurlをもとに情報をWKWebViewに表示
- Presenter
- APIListPresenter ・・・ ModelのAPI情報を取得処理を呼び出し、取得した情報をViewに通知する
- Model
- APIOperater ・・・ 実際にAPIを叩いて情報を取得している
- APIInformationModel ・・・ 取得した情報用の構造体
View
APIListViewController
ここではPresenterにあるAPI取得処理を呼び、
Presenterから通知された情報を表示するのみ。
viewDidLoad()で
APIListPresenterのapiListViewプロパティにselfを設定する、
APIListPresenterのAPI情報を取得する処理を呼ぶ。
final class APIListViewController: UIViewController {

    private let apiListPresenter = APIListPresenter()
    private var articleList = [APIInformationModel]()
    private var url = ""

    @IBOutlet private weak var apiListTableview: UITableView!

    override func viewDidLoad() {
        super.viewDidLoad()

        apiListPresenter.apiListView = self
        apiListPresenter.requestAPIInformations()

        // インジケータの設定
        SVProgressHUD.show(withStatus: "取得中...")
        SVProgressHUD.setDefaultMaskType(.black)
    }
}
拡張してAPIListViewを継承させている。
Presenterから通知が飛んできて、それぞれのプロトコルメソッドが実行される。
extension APIListViewController: APIListView {

    /// Presenterから通知されてきた情報をTableviewで使用する配列に格納
    ///
    /// - Parameter article: api取得情報
    func responseAPIInformations(article: [APIInformationModel]) {
        // インジケータを止める
        SVProgressHUD.dismiss()

        articleList = article
        // tableviewをリロードし、情報をtableviewに表示する
        apiListTableview.reloadData()
    }

    /// 情報の取得に失敗したとき
    func errorResponseAPI() {
        // インジケータを止める
        SVProgressHUD.dismiss()
        print("エラー")
    }
}
Tableview表示の処理
extension APIListViewController: UITableViewDelegate, UITableViewDataSource {

    /// セルの数を指定
    ///
    /// - Parameters:
    ///   - tableView: TableView
    ///   - section: 対象セクション番号
    /// - Returns: セル数
    public func tableView(_ tableView: UITableView, numberOfRowsInSection section: Int) -> Int {
        return articleList.count
    }

    /// セルの内容を指定
    ///
    /// - Parameters:
    ///   - tableView: TableView
    ///   - indexPath: 対象セクション及びセル番号情報
    /// - Returns: セル
    public func tableView(_ tableView: UITableView, cellForRowAt indexPath: IndexPath) -> UITableViewCell {
        let cell = tableView.dequeueReusableCell(withIdentifier: "cell", for: indexPath)
        cell.textLabel?.text = articleList[indexPath.row].title

        return cell
    }

    /// セル選択時
    ///
    /// - Parameters:
    ///   - tableView: TableView
    ///   - indexPath: 対象セクション及びセル番号情報
    public func tableView(_ tableView: UITableView, didSelectRowAt indexPath: IndexPath) {
        url = articleList[indexPath.row].url
        self.performSegue(withIdentifier: "APIInformationViewControllerPush", sender: nil)

        tableView.deselectRow(at: indexPath, animated: true)
    }
}
APIInformationViewController
ここではAPIListViewControllerから遷移した際、値渡しで取得した
urlを渡し、それを元にWKWebViewに表示しています。
コードは特に変わったことはしていないので省きます。。。
Persenter
APIListPresenter
ModelのAPI取得処理を呼び出し、戻ってきた情報をViewcontrollerに通知する。
// 委譲する処理をプロトコルメソッドとして宣言する。
protocol APIListView: NSObjectProtocol {
    func responseAPIInformations(article: [APIInformationModel])
    func errorResponseAPI()
}
final class APIListPresenter {

    weak var apiListView: APIListView?

    /// APIOperater.getAPIInformationsを呼び出し、情報を取得する
    func requestAPIInformations() {

        APIOperater.getAPIInformations(callback: { [weak self] (articles) in
            guard let strongSelf = self else { return }

            // 情報が取得できているか判定
            if let articleValue = articles {
                // 取得成功の場合は、成功パターンのプロトコルメソッドの引数に取得した情報を渡し呼び出し
                strongSelf.apiListView?.responseAPIInformations(article: articleValue)
            } else {
                // 取得失敗の場合、失敗パターンのプロトコルメソッドを呼び出し
                strongSelf.apiListView?.errorResponseAPI()
            }
        })
    }
}
Model
APIOperater
API取得の処理を行う。
ここでは取得に成功した際、情報をcallbackの引数に設定している。
struct APIOperater {

    /// APIを呼び出し
    ///
    /// - Parameter callback: callbackメソッドの引数に、取得した情報を構造体で渡す
    static func getAPIInformations(callback: @escaping ([APIInformationModel]?) -> Void) {

        Alamofire.request("https://qiita.com/api/v2/items").validate().responseJSON { response in
            guard let data = response.data else {
                return
            }
            do {
                // JSONのマッピング
                let articles = try JSONDecoder().decode([APIInformationModel].self, from: data)
                callback(articles)

            } catch {
                callback(nil)
            }
        }
    }
}
APIInformationModel
JSONのマッピングで使用するためCodableを継承させている。
色々定義できるが、今回は使うものだけ定義している。
struct APIInformationModel: Codable {
    var title: String
    var user: User
    var url: String
    struct User: Codable {
        var id: String
    }
}
最後に。。。
今回は本当に簡単な感じの実装になりましたが、
おそらくもっとMVPの利点が見られる場面や、
もっと良い書き方などがあると思います。
それらに出会うためにも、
これからも勉強していきます。。。。。
またメソッド名・ファイル名・変数名も、
よりわかりやすい名前がかけるよう努力していきます!!
参考文献
Codableのところを参考にさせていただきました。
http://www.cl9.info/entry/2017/10/06/134510
https://hfoasi8fje3.hatenablog.com/entry/2018/07/05/185348