Nextremer Advent Calendar 2016 の8日目の記事です。
本記事は、3日目の記事「3時間で自動作曲プログラムを作る」の続編になります。
Web Audio API と並んで強力な API に Web MIDI API があります。Web MIDI API は、MIDI (Musical Instrument Digital Interface) とよばれるプロトコルを用いて Web ブラウザと MIDI 機器との間で通信を行うための API です。
本記事では Web MIDI API を利用して、3日目のブラウザ上で音が鳴るプログラムを、DAW 上で音が鳴るプログラムに書き換えてみます。
DAW に落とし込むメリットは次の2点だと思います。
- 生成された曲を保存できる
- 音色の調整がしやすい(ソフトウェアシンセが使える)
Web ブラウザから DAW に MIDI メッセージを送信するには
「仮想 MIDI ポート」を使って、Web ブラウザから DAW へ MIDI メッセージを渡します。具体的な方法は次の記事にまとめてあるので、そちらをご参照ください。
Web MIDI API による Web アプリと DAW の連携
MIDI メッセージを送信する
3日目の記事のデモ6をもとに、次のコードを作成します。
<!DOCTYPE html>
<html lang="ja">
<head>
    <meta charset="UTF-8">
    <title>自動作曲 デモ</title>
</head>
<body>
    <h1>3時間で自動作曲プログラムを作る</h1>
    <p>
        <label for="output_selector">MIDI Output Port: </label>
        <select name="output_selector" id="output_selector"></select>
    </p>
    <p>
        <label for="bpm">BPM</label>
        <input type="number" id="bpm_field" value="120"/>
    </p>
    <p>
        <button id="play_button">Play</button>
    </p>
    <script src="index.js"></script>
</body>
</html>
// Setting

let bpm = 120;

let barLength = 2; // 一小節当たりの秒数
let beatLength = barLength / 4; // 一拍当たりの秒数

let timer = null;

// BPM を調節できるようにした
function updateBpm(newBpm) {
    bpm = newBpm;
    barLength = 4 * 60 / bpm;
    beatLength = barLength / 4;
}

function play() {
    // Play ボタンを押す度に演奏を初期化できるようにした
    if (timer) {
        clearInterval(timer);
    }

    const barGen = nextBar(0.5);

    // 1小節ごとに新たな note を生成
    timer = setInterval(() => {
        barGen.next();
    }, barLength * 1000);
}

function* nextBar(time) {
    const chordGen = nextChord();

    while (1) {
        const {root, type} = chordGen.next().value;

        // メロディ
        for (let j = 0; j < 4; ++j) {
            note(0, beatLength * j, randGet(chordNotes(root, type)) + 12, beatLength);
        }

        // コード
        chord(root, type, barLength);

        yield;
    }
}

function* nextChord() {
    const rootTable = {
        C: 60, D: 62, E: 64, F: 65, G: 67, A: 69, B: 71
    };
    const chordProgs = [
        'Cmajor Eminor7 Fmajor G7',
        'Fmajor G7 Eminor7 Aminor',
        'Aminor Fmajor Gmajor Cmajor',
        'Fmajor Eminor7 Dminor7 Cmajor',
        'Cmajor Gmajor Aminor Eminor Fmajor Eminor Fmajor Gmajor',
    ].map(x => x.split(' ').map(y => {
        return {
            root: rootTable[y[0]],
            type: y.substr(1)
        };
    }));

    while (1) {
        yield* randGet(chordProgs);
    }
}

function note(channel, offset, nn, dur) {
    // note on の登録
    setTimeout(() => {
        output.send([channel + 0x90, nn, 100]);
    }, offset * 1000);

    // note off の登録
    setTimeout(() => {
        output.send([channel + 0x90, nn, 0]);
    }, (offset + dur) * 1000 - 10);     // 次の on が off よりも先を越さないように -10
}

function chordNotes(root, type) {
    const ds = {
        'major':   [0, 4, 7],
        'minor':   [0, 3, 7],
        '7':       [0, 4, 7, 10],
        'minor7':  [0, 3, 7, 10],
    }[type];
    return ds.map((x) => x + root);
}

function chord(root, type, dur) {
    for (const nn of chordNotes(root, type))
        note(1, 0, nn, dur);
}

function randGet(arr) {
    return arr[Math.random() * arr.length | 0];
}


// Event Handling

function getSelectedOutput(selector) {
    const index = selector.selectedIndex;
    const portId = selector[index].value;
    return midiOutputs.get(portId);
};

const outputSelector = document.getElementById('output_selector');
const bpmField = document.getElementById('bpm_field');
const playButton = document.getElementById('play_button');

outputSelector.addEventListener('change', () => {
    output = getSelectedOutput(outputSelector);
});

bpmField.addEventListener('input', () => {
    updateBpm(Number.parseInt(bpmField.value));
})

playButton.addEventListener('click', () => {
    play();
});


// MIDI Access

let midiOutputs = [];
let output = null;

navigator.requestMIDIAccess()
    .then(midiAccess => {
        midiOutputs = midiAccess.outputs;
        for (const input of midiOutputs.values()) {
            const optionEl = document.createElement('option');
            optionEl.text = input.name;
            optionEl.value = input.id;
            outputSelector.add(optionEl);
        }
        output = getSelectedOutput(outputSelector);
    });
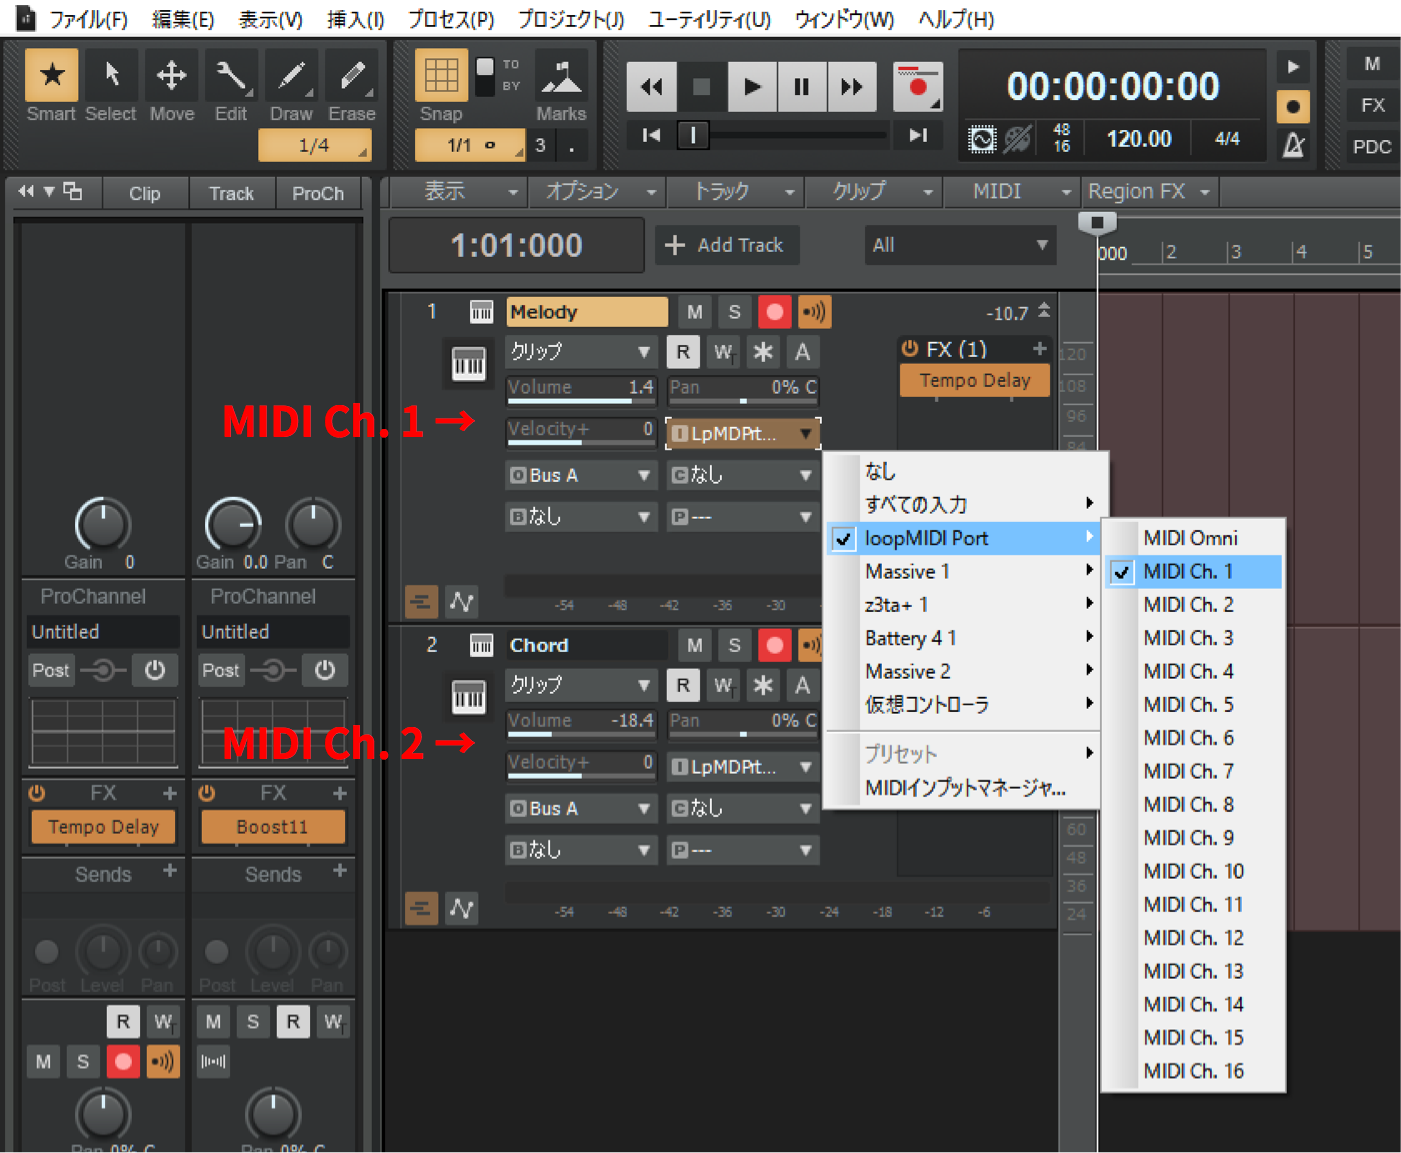
ここでは、MIDI channel 1 からメロディ、channel 2 からコード (○Chord ×Code。ややこしい)の MIDI ノートが出力されるようになっています。
3時間クオリティなので、 MIDI メッセージの時間管理がまずいことになっています。厳密な時間管理をするには、こちらの記事 の「Web MIDIにまつわる時刻」の説明が大変参考になります。(余力があれば上記ソースコードを修正しようと思います)
また、ソース後半部分でいろいろと処理を追加していますが、これは 前述の記事 のサンプルソースをほぼそのまま使用しています。
DAW で音を鳴らす
ここまでできたら、実際に DAW で音を鳴らしてみます(※当然ですが、DAW と仮想 MIDI ポートがインストールされている必要があります)。
デモページ (Chrome 最新版 推奨)
まずは、次の手順で音を鳴らす準備をします。
- DAW の環境設定で、仮想 MIDI ポートを使えるようにする
- DAW 上で2つの MIDI トラックを作成する
- 各トラックの MIDI Input にブラウザ側の MIDI Output と同一のポートを指定する
- 1つめのトラックの MIDI channel を 1 にし、2つめのトラックの MIDI channel を 2 にする
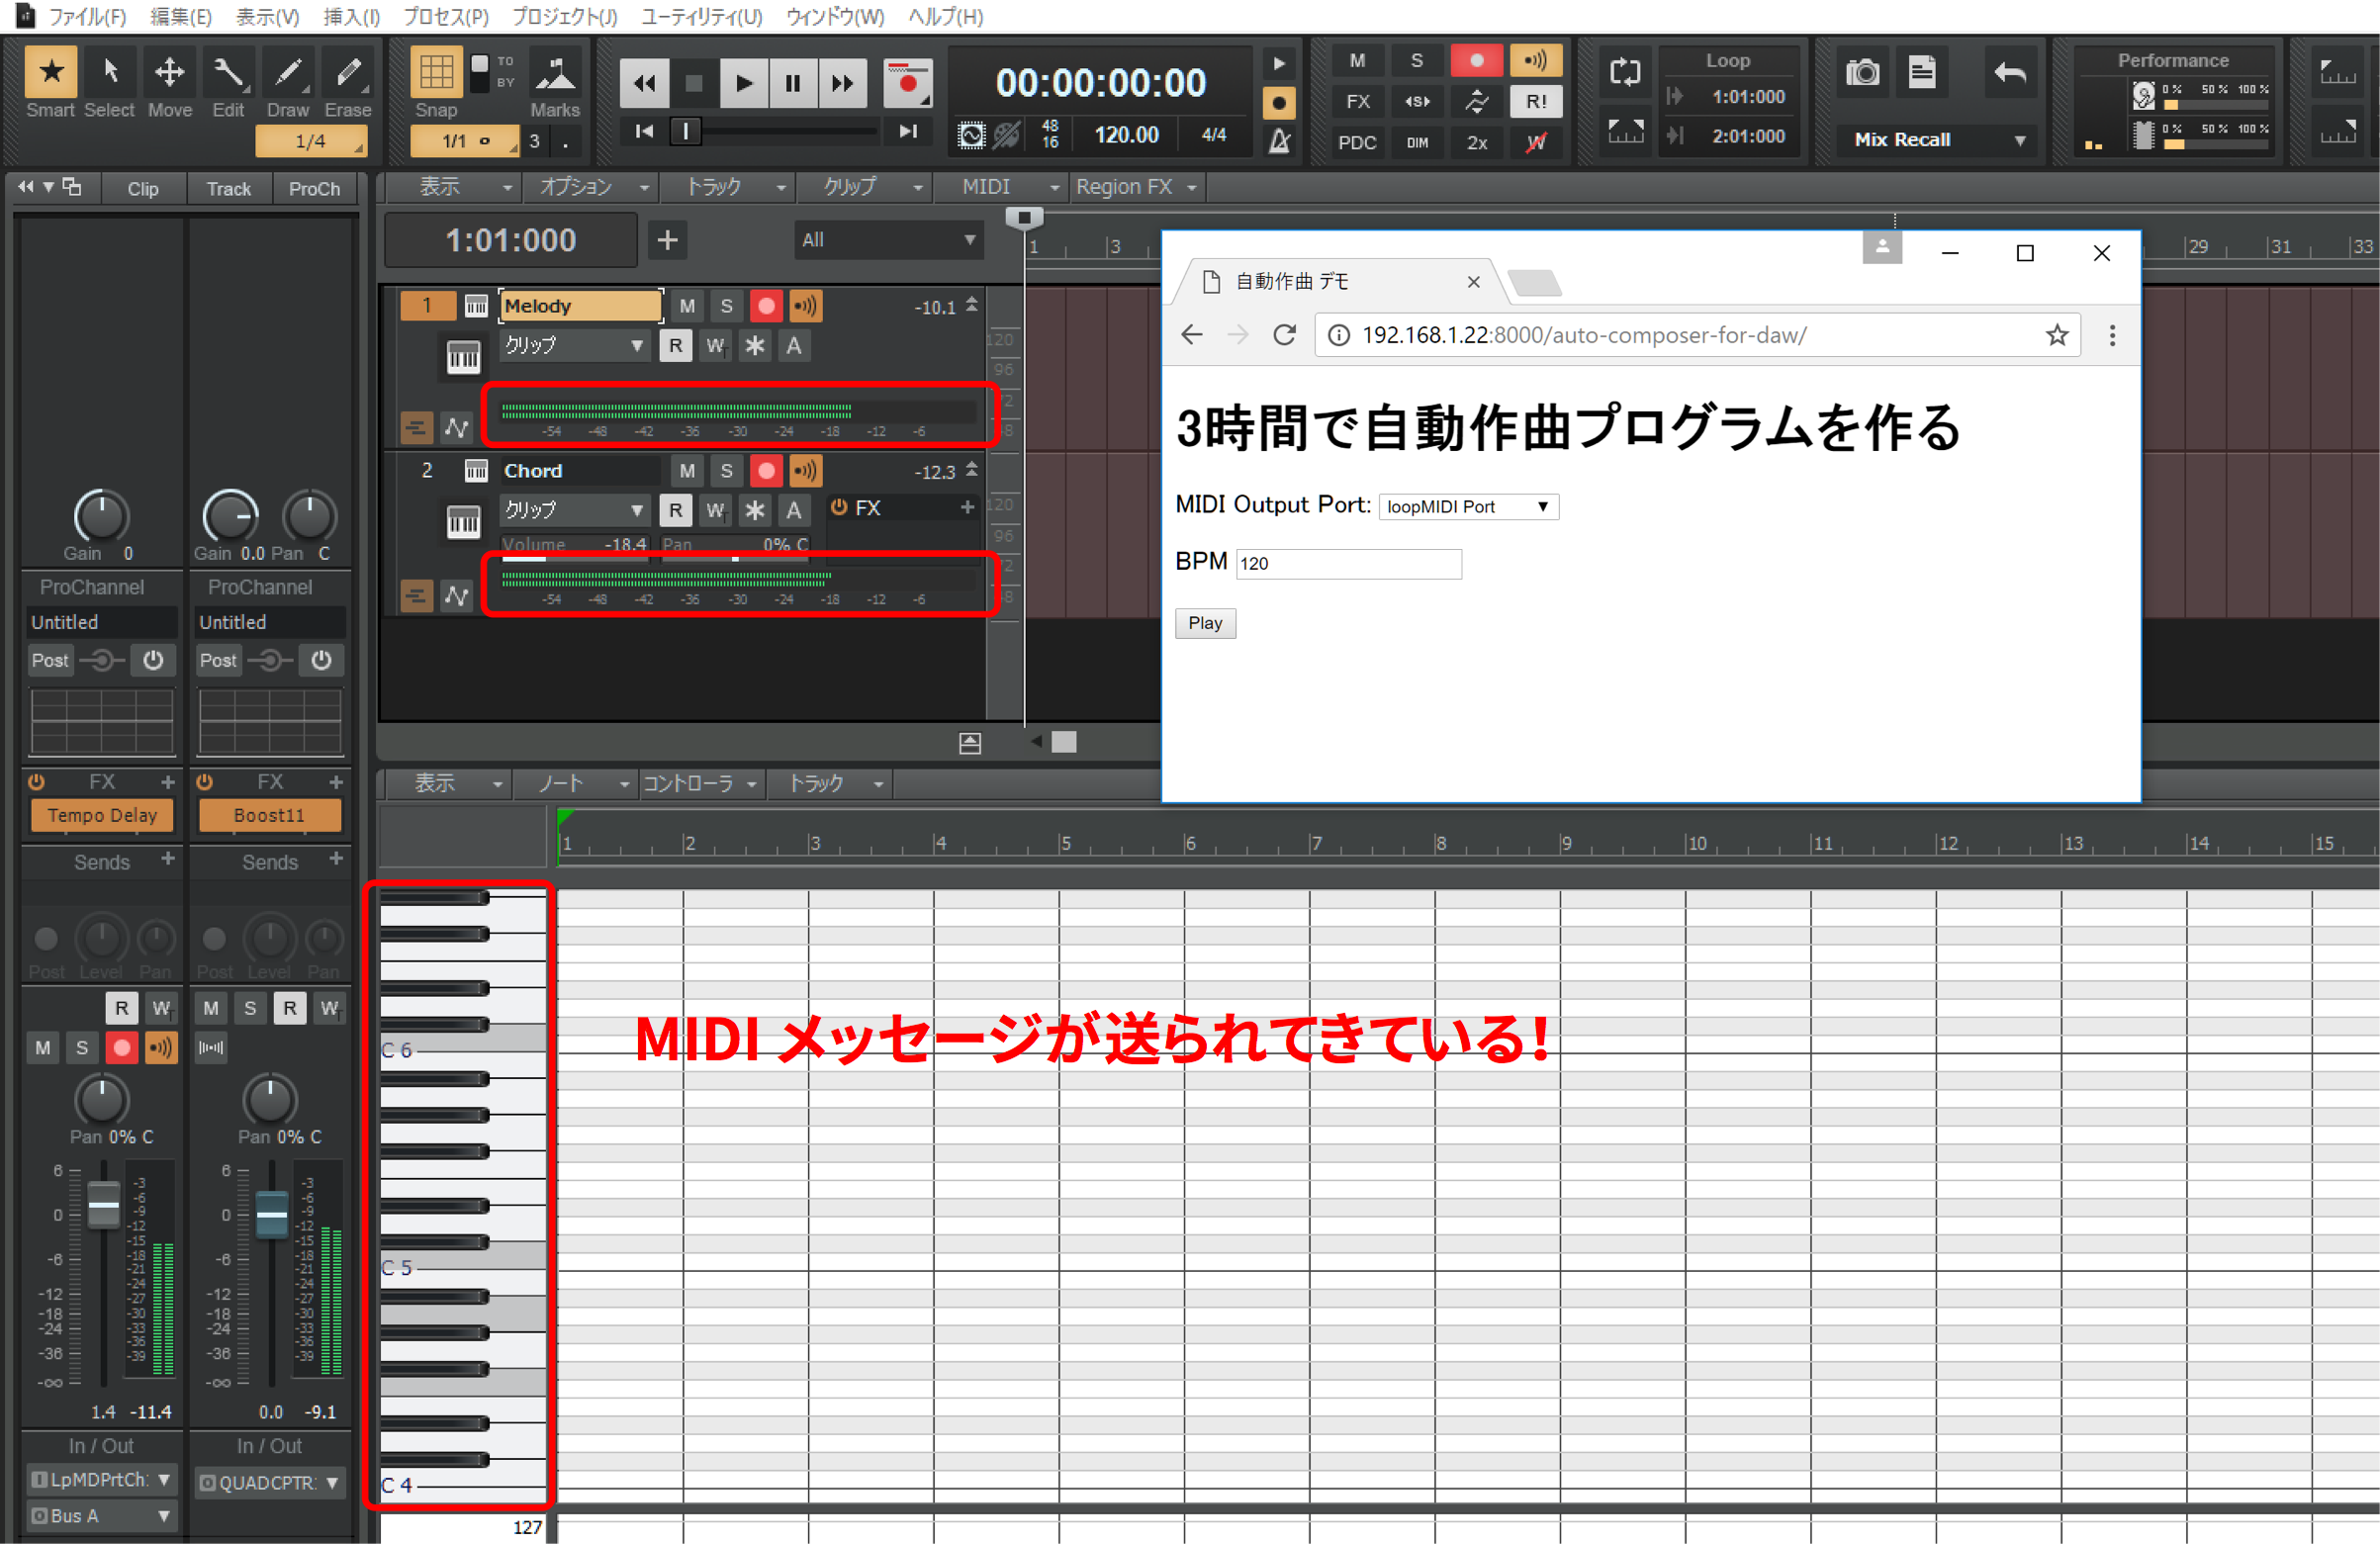
これで準備は整いました。ブラウザ上の Play ボタンを押してみましょう。
DAW に MIDI メッセージが送られてきました。
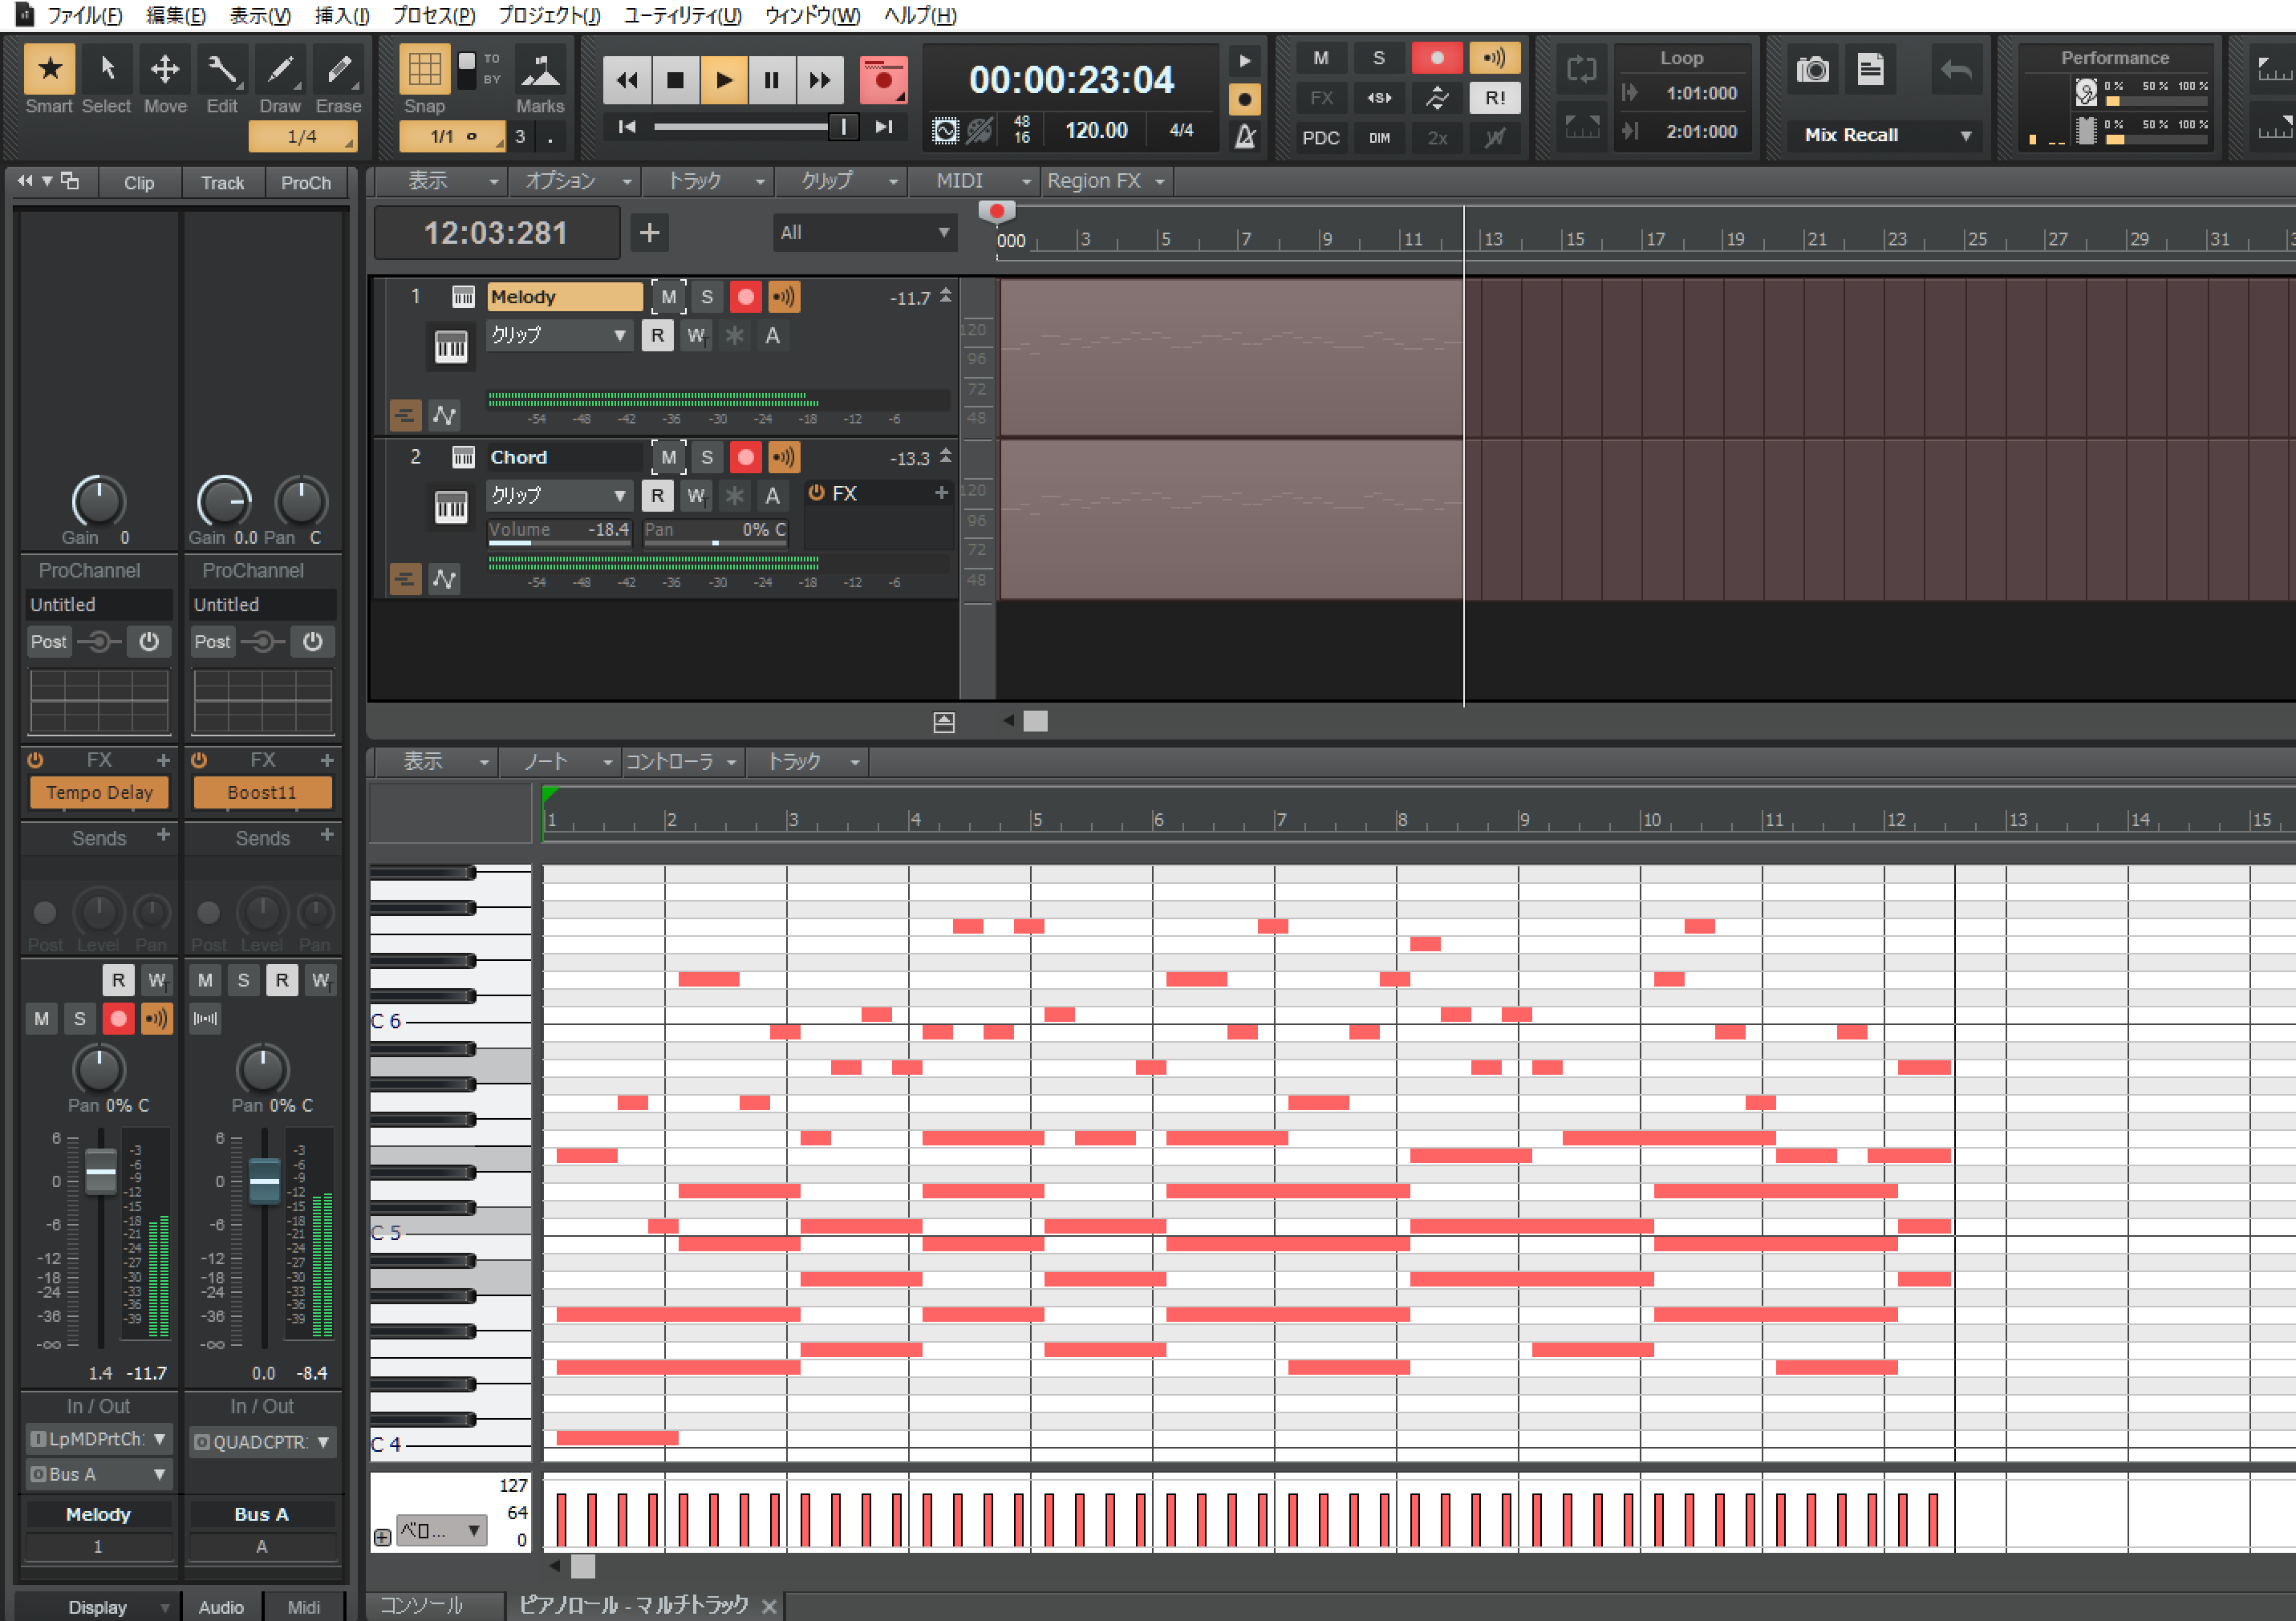
録音もこの通り可能です(超ずれているけど!!)。

記念に、自動作曲プログラムさんに1曲作ってもらいました。
終わりに
プログラムを書くのは3時間もかかりませんでしたが、曲を書き出したり、記事を書いていたら10時間はかかりました。

