概要
- SpringBootで簡易的なWebアプリをつくってみる
- この記事では、まずはHello World的なものを
- 開発未経験の人でも気軽に始められる
そもそもSpringBootって何?
- Java開発におけるフレームワークの1つ
- 必要な初期設定が少なく、使い始めやすいことが特徴
開発環境
| 環境 | サービス/バージョン |
|---|---|
| OS | Mac |
| 言語 | Java8 |
| IDE(統合開発環境) | IntelliJ IDEA |
| フレームワーク | SpringBoot 2.2.1 |
- 開発環境には必ずJavaのインストールが必要
- https://eng-entrance.com/java-install-jdk-mac
- Windowsの人も適宜読み替えれば、上記方法でインストール可能
- IDEはなんでもOK(Eclipseとか)
雛形作成
Spring Initializrを利用する
- SpringBootの雛形アプリケーションを作成することができるWebサービス
- ビルドツール(Maven/Gradle)や言語(Java/Kotlin/Groovy)を選択することが可能
- https://start.spring.io/
手順
以下を指定する
- ビルドツール
- どちらもよく利用されているのでどちらでも良いが、今回はGradleにする
- 言語
- SpringBootのバージョン
- プロジェクト名
- なんでも良い。今回は
spring-studyとする - 利用ライブラリ
-
Spring Web(MVCアプリケーションを簡単に構築できる)を追加する - 後からでも追加可能

- Generateボタンを押下すると、雛形アプリがzipでダウンロードできる
雛形アプリを確認してみる

-
SpringStudyApplication.javaやapplication.propertiesといったファイルがデフォルトで作成されている -
SpringStudyApplicationTests.javaは不要なので削除する
Hello Worldをやってみる
- 雛形のままだと動かないので、まずはHello World
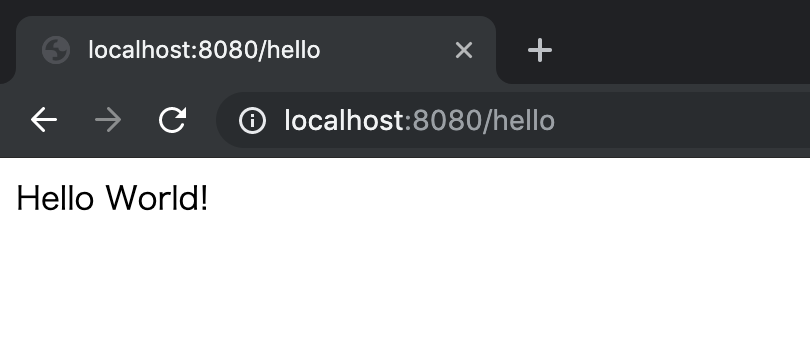
- http://localhost:8080/hello にアクセスすると、Hello World!と表示されるようにする
手順
- リクエストを受け付けて、文字列を返却するクラスをつくる
HelloRestController.java
-
com.examle.springstudyにHelloRestController.javaを作成する
com.examle.springstudy.HelloRestController.java
package com.example.springstudy;

import org.springframework.web.bind.annotation.GetMapping;
import org.springframework.web.bind.annotation.RestController;

@RestController // ①
public class HelloRestController {
    @GetMapping("/hello") // ②
    public String hello() {
        return "Hello World!";
    }
}
- 2つのアノテーションがポイント(
@XXX) - ①:リクエストを受け付け、レスポンスを返却するコントローラであることを示す
- ②:リクエストURLとロジックを紐づける
動作確認
- 起点となるクラス(SpringStudyApplication)を選択して、実行(
⌃+⌥+R)する

- 起動すると以下のような内容がコンソールに出力される
11:46:44: Executing task 'bootRun'...

> Task :compileJava
> Task :processResources
> Task :classes

> Task :bootRun

  .   ____          _            __ _ _
 /\\ / ___'_ __ _ _(_)_ __  __ _ \ \ \ \
( ( )\___ | '_ | '_| | '_ \/ _` | \ \ \ \
 \\/  ___)| |_)| | | | | || (_| |  ) ) ) )
  '  |____| .__|_| |_|_| |_\__, | / / / /
 =========|_|==============|___/=/_/_/_/
 :: Spring Boot ::        (v2.2.1.RELEASE)

2019-12-01 11:46:59.590  INFO 43520 --- [           main] c.e.springstudy.SpringStudyApplication   : Starting SpringStudyApplication on MacBookPro with PID 43520 (/Users/tanibuchi/Desktop/spring-study/spring-study/build/classes/java/main started by tanibuchi.kosuke in /Users/tanibuchi/Desktop/spring-study/spring-study)
2019-12-01 11:46:59.595  INFO 43520 --- [           main] c.e.springstudy.SpringStudyApplication   : No active profile set, falling back to default profiles: default
2019-12-01 11:47:00.598  INFO 43520 --- [           main] o.s.b.w.embedded.tomcat.TomcatWebServer  : Tomcat initialized with port(s): 8080 (http)
2019-12-01 11:47:00.612  INFO 43520 --- [           main] o.apache.catalina.core.StandardService   : Starting service [Tomcat]
2019-12-01 11:47:00.612  INFO 43520 --- [           main] org.apache.catalina.core.StandardEngine  : Starting Servlet engine: [Apache Tomcat/9.0.27]
2019-12-01 11:47:00.680  INFO 43520 --- [           main] o.a.c.c.C.[Tomcat].[localhost].[/]       : Initializing Spring embedded WebApplicationContext
2019-12-01 11:47:00.680  INFO 43520 --- [           main] o.s.web.context.ContextLoader            : Root WebApplicationContext: initialization completed in 1037 ms
2019-12-01 11:47:00.915  INFO 43520 --- [           main] o.s.s.concurrent.ThreadPoolTaskExecutor  : Initializing ExecutorService 'applicationTaskExecutor'
2019-12-01 11:47:01.089  INFO 43520 --- [           main] o.s.b.w.embedded.tomcat.TomcatWebServer  : Tomcat started on port(s): 8080 (http) with context path ''
2019-12-01 11:47:01.098  INFO 43520 --- [           main] c.e.springstudy.SpringStudyApplication   : Started SpringStudyApplication in 2.169 seconds (JVM running for 3.005)
- 最後に
Startedが表示されていれば正常に起動できている - http://localhost:8080/hello にアクセスすると、以下の画面が表示される
最後に
- こんな感じでSpringBootを使ったアプリ開発は気軽に始めることができる
- 今回は概要レベルでの記載なので、次回もう少し丁寧に解説します