Docker Composeを使ったRails環境を作る場合、Quickstart: Compose and Rails | Docker Documentationがとても参考になります。ただし、このドキュメントはRails5を前提として書かれており、現時点(2020-05-28)で最新のRails6を使う場合には一部修正が必要です。
そこでこの記事では、Rails6を使う場合について記載します。また、この記事の対象読者は下記を想定しており、環境構築は下記の方針と前提に基づいて行ないます。
![]() 想定読者
想定読者
- Rails環境構築でいつも躓くの方(丁寧めに説明します)
- 未来の自分(思い出せるように書きます)
![]() 方針
方針
- Quickstart: Compose and Rails | Docker Documentationに準拠する(DBはPostgreSQLを使う)
- Ruby2.7とRails6の環境を作る
- できる限りRails6の初期装備を使う(Webpackerを使う、turbolinksを使う、など)
![]() 前提
前提
- dockerをインストール済みである
- gitをインストール済みである
なお、今回の作業内容はこちらのプルリクエスト https://github.com/tanaken0515/docker-compose-rails-sample/pull/1 にまとまっています。
では、やっていきましょう。
リポジトリを作る
まずはリポジトリを作りましょう。
$ mkdir docker-compose-rails-sample
$ cd docker-compose-rails-sample
$ git init
$ touch README.md
$ git add .
$ git commit -m "initial commit"
ここではdocker-compose-rails-sampleという名前でリポジトリを作りました。
空のREADME.mdを作ってコミットしています。
プロジェクトを定義する
ここから環境構築です。
まずは https://docs.docker.com/compose/rails/#define-the-project をまるっと書き写しながらファイルを作っていきます。
このドキュメントは解説も交えて書かれているので、詳しくはドキュメントを参照してください。
(英語のドキュメントが苦手な方は @daichi41 さんが書かれた DockerでのRuby on Rails環境構築を一つずつ詳解する - Qiita と照らし合わせながら読むと理解が進むかもしれません)
一つ目はDockerfileです。FROM ruby:2.5となってますがこれは後で書き換えるのでいったんそのままで。
FROM ruby:2.5
RUN apt-get update -qq && apt-get install -y nodejs postgresql-client
RUN mkdir /myapp
WORKDIR /myapp
COPY Gemfile /myapp/Gemfile
COPY Gemfile.lock /myapp/Gemfile.lock
RUN bundle install
COPY . /myapp

# Add a script to be executed every time the container starts.
COPY entrypoint.sh /usr/bin/
RUN chmod +x /usr/bin/entrypoint.sh
ENTRYPOINT ["entrypoint.sh"]
EXPOSE 3000

# Start the main process.
CMD ["rails", "server", "-b", "0.0.0.0"]
次にGemfileです。gem 'rails', '~>5'となってますがこれもあとで書き換えます。このままで。
source 'https://rubygems.org'
gem 'rails', '~>5'
Gemfile.lockは空のファイルを作っておきます。これはあとでrails newするときに上書きされます。
$ touch Gemfile.lock
続いてentrypoint.shです。これもそのまま。
# !/bin/bash
set -e

# Remove a potentially pre-existing server.pid for Rails.
rm -f /myapp/tmp/pids/server.pid

# Then exec the container's main process (what's set as CMD in the Dockerfile).
exec "$@"
version: '3'
services:
  db:
    image: postgres
    volumes:
      - ./tmp/db:/var/lib/postgresql/data
  web:
    build: .
    command: bash -c "rm -f tmp/pids/server.pid && bundle exec rails s -p 3000 -b '0.0.0.0'"
    volumes:
      - .:/myapp
    ports:
      - "3000:3000"
    depends_on:
      - db
説明の都合上、ここまでいったんコミットしました。
さて、Ruby2.7とRails6を使うために少し手を加えます。
DockerfileのベースイメージをRuby2.7にします。また、Rails6のデフォルトではWebpackerを使うのでyarnpkgもインストールするようにしておきます。
-FROM ruby:2.5
-RUN apt-get update -qq && apt-get install -y nodejs postgresql-client
+FROM ruby:2.7
+RUN apt-get update -qq && apt-get install -y nodejs postgresql-client yarnpkg
+RUN ln -s /usr/bin/yarnpkg /usr/bin/yarn
 RUN mkdir /myapp
 WORKDIR /myapp
 COPY Gemfile /myapp/Gemfile
Gemfileのrailsを~>6に書き換えます。
 source 'https://rubygems.org'
-gem 'rails', '~>5'
+gem 'rails', '~>6'
プロジェクトの定義はこれで完了です。
プロジェクトをビルドする
https://docs.docker.com/compose/rails/#build-the-project の通りに進めます。
まずはrails newします。少々時間がかかりますので休憩しつつ待ちましょう。(僕の環境では15分くらい待ちました)
docker-compose run web rails new . --force --no-deps --database=postgresql
rails newしたことで、たくさんのファイルが生成されているはずです。
(この段階でコミットしておくと良いでしょう)
続いてビルドしましょう。これも少々時間がかかります。(僕の環境では10分くらいでした)
docker-compose build
プロジェクトのビルドはこれで完了です。
データベースに接続する
https://docs.docker.com/compose/rails/#connect-the-database に沿って進めます。
rails newしたときにconfig/database.ymlが生成されています。これを書き換えます。
 default: &default
   adapter: postgresql
   encoding: unicode
-  # For details on connection pooling, see Rails configuration guide
-  # https://guides.rubyonrails.org/configuring.html#database-pooling
-  pool: <%= ENV.fetch("RAILS_MAX_THREADS") { 5 } %>
+  host: db
+  username: postgres
+  password:
+  pool: 5

 development:
   <<: *default
アプリケーションを起動します。
$ docker-compose up
おっと、ここでエラーに遭遇しました。
db_1   | Error: Database is uninitialized and superuser password is not specified.
db_1   |        You must specify POSTGRES_PASSWORD to a non-empty value for the
db_1   |        superuser. For example, "-e POSTGRES_PASSWORD=password" on "docker run".
db_1   |
db_1   |        You may also use "POSTGRES_HOST_AUTH_METHOD=trust" to allow all
db_1   |        connections without a password. This is *not* recommended.
db_1   |
db_1   |        See PostgreSQL documentation about "trust":
db_1   |        https://www.postgresql.org/docs/current/auth-trust.html
docker-compose-rails-sample_db_1 exited with code 1
一旦別のターミナルで以下を実行して、アプリケーションを停止しましょう。
$ docker-compose down
さて、先ほどのエラーは割と最近の変更によってPostgreSQLにパスワードなしでアクセスできなくなったからのようです。
ref: https://github.com/docker-library/postgres/issues/681
ここまでの手順でインストールされたPostgreSQLのバージョンはdocker-compose.ymlで指定されたimage: postgresに依存していますが、そもそもここでバージョンを指定していないので、どのバージョンがインストールされるのかが自明ではないですね(最新の安定版がインストールされそう)
docker-compose.ymlでPostgreSQLのバージョンを指定し、環境変数にPOSTGRES_HOST_AUTH_METHOD=trustを設定しましょう。
バージョンは https://hub.docker.com/_/postgres をみて現時点(2020-05-28)で最新安定版の12.3を指定します。
 version: '3'
 services:
   db:
-    image: postgres
+    image: postgres:12.3
     volumes:
       - ./tmp/db:/var/lib/postgresql/data
+    environment:
+      POSTGRES_HOST_AUTH_METHOD: trust
   web:
     build: .
     command: bash -c "rm -f tmp/pids/server.pid && bundle exec rails s -p 3000 -b '0.0.0.0'"
改めてアプリケーションを起動します。
$ docker-compose up
warningが出ますが、無事にデータベースと接続することができました。
db_1   | ********************************************************************************
db_1   | WARNING: POSTGRES_HOST_AUTH_METHOD has been set to "trust". This will allow
db_1   |          anyone with access to the Postgres port to access your database without
db_1   |          a password, even if POSTGRES_PASSWORD is set. See PostgreSQL
db_1   |          documentation about "trust":
db_1   |          https://www.postgresql.org/docs/current/auth-trust.html
db_1   |          In Docker's default configuration, this is effectively any other
db_1   |          container on the same system.
db_1   |
db_1   |          It is not recommended to use POSTGRES_HOST_AUTH_METHOD=trust. Replace
db_1   |          it with "-e POSTGRES_PASSWORD=password" instead to set a password in
db_1   |          "docker run".
db_1   | ********************************************************************************
(中略)
db_1   | PostgreSQL init process complete; ready for start up.
db_1   |
db_1   | 2020-05-28 01:21:45.583 UTC [1] LOG:  starting PostgreSQL 12.3 (Debian 12.3-1.pgdg100+1) on x86_64-pc-linux-gnu, compiled by gcc (Debian 8.3.0-6) 8.3.0, 64-bit
db_1   | 2020-05-28 01:21:45.583 UTC [1] LOG:  listening on IPv4 address "0.0.0.0", port 5432
db_1   | 2020-05-28 01:21:45.584 UTC [1] LOG:  listening on IPv6 address "::", port 5432
db_1   | 2020-05-28 01:21:45.588 UTC [1] LOG:  listening on Unix socket "/var/run/postgresql/.s.PGSQL.5432"
db_1   | 2020-05-28 01:21:45.694 UTC [58] LOG:  database system was shut down at 2020-05-28 01:21:45 UTC
db_1   | 2020-05-28 01:21:45.735 UTC [1] LOG:  database system is ready to accept connections
データベースへの接続はこれで完了です。
アプリケーションの動作確認
ここまでの状態で localhost:3000 にアクセスするとActiveRecord::NoDatabaseErrorになります。データベースの環境に接続できる状態ではあるものの、このアプリケーション用のデータベースを作っていないからですね。
ドキュメントに従って以下を実行しましょう(アプリケーションを起動したターミナルとは別のターミナルで実行して下さい)。
データベースが作成されます。
$ docker-compose run web rake db:create
Starting docker-compose-rails-sample_db_1 ... done
Created database 'myapp_development'
Created database 'myapp_test'
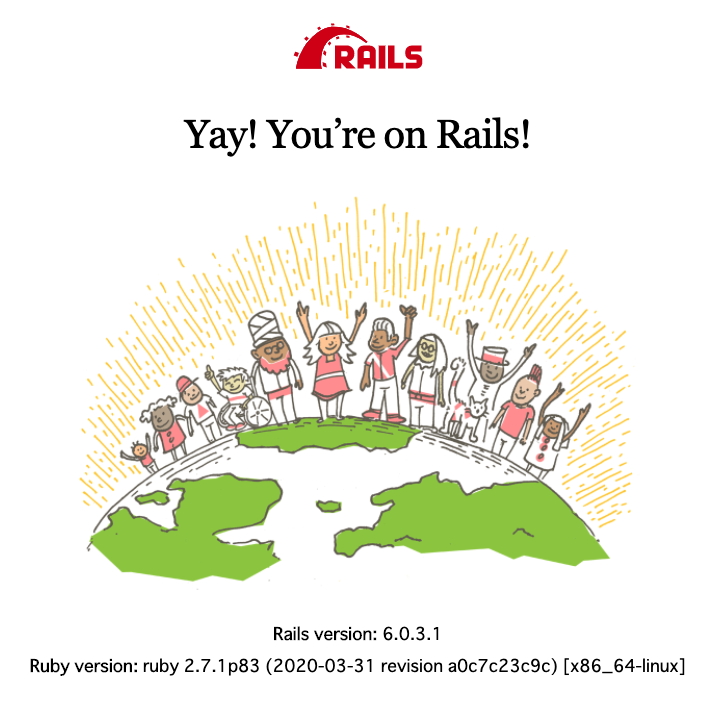
改めて localhost:3000 にアクセスするとお馴染みのこの画面が出るはずです。
環境構築は以上です! ![]()
![]()
![]()
まとめ
今回はQuickstart: Compose and Rails | Docker Documentationに沿ってRuby2.7とRails6の環境を作る方法についてまとめました。参考になれば幸いです。
なお、この記事の続編として以下のような記事を書いていこうかなと思っています。
- Docker Composeのvolumesを使ってもっと効率的に - Qiita <- 書きました(2020-06-08)
- Docker Composeで作った初期装備なRails6にVue.jsを導入する - Qiita <- 書きました(2020-06-18)
- Docker Composeでwebpack-dev-serverを動かしてもっと快適に
(予定は未定です)
ではまた〜
