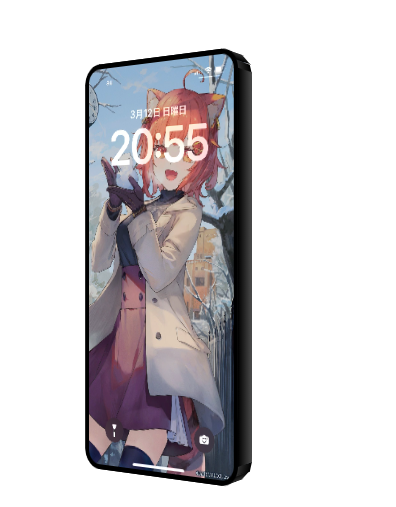
いろいろがばいですが調べたりほかのサイトを参考にしながらcssでiphoneを作ったのでまとめようと思います
まずhtmlから書いていきます
index.html
    <section>
        <div class="phone">
          <div class="phone_face phone_face-screen"></div>
          <div class="phone_face-back"></div>
          <div class="phone_face phone_face-top"></div>
          <div class="phone_face phone_face-bottom"></div>
          <div class="phone_face phone_face-right"></div>
          <div class="phone_face phone_face-left"></div>
          <div class="phone_face corner_top-left"></div>
          <div class="phone_face corner_top-right"></div>
          <div class="phone_face corner_bottom-left"></div>
          <div class="phone_face corner_bottom-right"></div>
        </div>
    </section>
ここからcss
style.css
  .phone {
    position: relative;
    width: 280px;
    transform-style: preserve-3d;
  }
positionを使うのでposition: relative;
次から出てくる子要素にはposition: absolute;
今回x軸y軸z軸を使うので親クラスである.phoneに
transform-style: preserve-3d;
を書きます
つぎに共通のクラス
style.css
  .phone_face {
    position: absolute;
    background: linear-gradient(to left, #000, #303030);
    background-size: cover;
    box-sizing: border-box;
  }
ここから正面、背面
style.scss
  // 正面
  .phone_face-screen {
    width: 100%;
    height: 420px;
    border: solid 5px;
    border-radius: 20px;
    background-image: url("/screen.jpg");
    background-repeat: no-repeat;
    background-size: cover;
    background-position: center;
  }
  // 背面
  .phone_face-back {
    top: 0;
    right: 0;
    width: 200px;
    height: 420px;
    border-radius: 20px;
    background-repeat: no-repeat;
    background-size: cover;
    background-position: center;
  // 後ろにずらす
    transform: translateZ(-20px);
  }
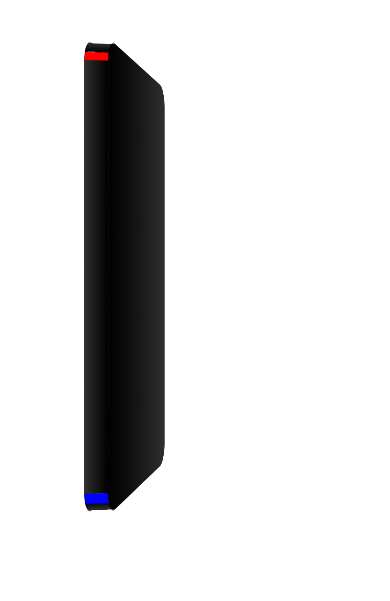
上下左右の枠
角を丸くするために20%短くし中央に配置しています
before,afterで角を作ります
最終的に角は「before・別のクラス・after」の3つで作ります
色分けして見やすくします
style.scss
 .phone_face-right {
    transform: rotateY(-270deg) translateX(20px) translateZ(180px) translateY(-20px);
    transform-origin: top right;
    width: 20px;
    height: 380px;
    position: relative;
    transform-style: preserve-3d;
    &::before{
        content: "";
        position: absolute;
        width: 20px;
        height: 10px;
        background: red;
        transform-origin: bottom;
        transform: translate3d(0px, -8px, 0px) rotateX(15deg) rotateY(0deg) ;
    }
    &::after{
        content: "";
        position: absolute;
        width: 20px;
        height: 10px;
        background: blue;
        transform-origin: top;
        transform: translate3d(0px, 380px, 0px) rotateX(-15deg) rotateY(0deg) ;
    }

  }
こんなかんじ
注意が必要なのはtransformは書く順番で変わること
なので先にtranslate3dで位置を移動してからrotateで斜めにしている
(調整しながら書いてるのでおかしいかもしれないです)
次にleft
style.scss
.phone_face-left {
    transform: rotateY(270deg) translateX(-20px) translateY(-400px);
    transform-origin: top left;
    width: 20px;
    height: 380px;
    position: relative;
    transform-style: preserve-3d;
    &::before{
        content: "";
        position: absolute;
        width: 20px;
        height: 10px;
        background: red;
        transform-origin: bottom;
        transform: translate3d(0px, -10px, 0px) rotateX(15deg) rotateY(0deg) ;
    }
    &::after{
        content: "";
        position: absolute;
        width: 20px;
        height: 10px;
        background: blue;
        transform-origin: top;
        transform: translate3d(0px, 380px, 0px) rotateX(-15deg) rotateY(0deg) ;
    }

  }
上下
style.scss
 .phone_face-top {
    transform: rotateX(-90deg) translateX(20px);
    transform-origin: top center;
    width: 80%;
    height: 20px;
    position: relative;
    transform-style: preserve-3d;
    &::before{
      content: "";
      position: absolute;
      width: 10px;
      height: 20px;
      background: $bg;
      transform-origin: right;
      transform: translate3d(-10px, 0px, 0px) rotateX(0deg) rotateY(15deg) ;
  }
  &::after{
      content: "";
      position: absolute;
      width: 10px;
      height: 20px;
      background: $bg;
      transform-origin: left;
      transform: translate3d(160px, 0px, 0px) rotateX(0deg) rotateY(-15deg) ;
  }
  }

  .phone_face-bottom {
    transform: rotateX(90deg) translateZ(-380px) translateX(20px) translateY(0px);
    transform-origin: bottom center;
    width: 80%;
    height: 20px;
    position: relative;
    transform-style: preserve-3d;
    &::before{
      content: "";
      position: absolute;
      width: 10px;
      height: 20px;
      background: red;
      transform-origin: right;
      transform: translate3d(-10px, 0px, 0px) rotateX(0deg) rotateY(15deg) ;
  }
  &::after{
      content: "";
      position: absolute;
      width: 10px;
      height: 20px;
      background: blue;
      transform-origin: left;
      transform: translate3d(160px, 0px, 0px) rotateX(0deg) rotateY(-15deg);
  }
  }
次にクラスを作り角を作ります
style.scss
 .corner_top-left{
    width: 14px;
    height: 20px;
    position: absolute;
    top: 0;
    left: 0;
    transform-origin: top left;
    transform: translateX(2px) translateY(12px) translateZ(-0px) rotateX(-90deg) rotateY(45deg);
  }
  .corner_top-right{
    width: 14px;
    height: 20px;
    position: absolute;
    top: 0;
    right: 0;
    transform-origin: top right;
    transform: translateX(-2px) translateY(12px) translateZ(0px) rotateX(-90deg) rotateY(-45deg) ;
  }
  .corner_bottom-left{
    width: 14px;
    height: 20px;
    position: absolute;
    top: 0;
    left: 0;
    transform-origin: top left;
    transform: translateX(2px) translateY(408px) translateZ(0px) rotateX(-90deg) rotateY(-45deg) ;
  }
  .corner_bottom-right{
    width: 14px;
    height: 20px;
    position: absolute;
    top: 0;
    right: 0;
    transform-origin: top right;
    transform: translateX(-2px) translateY(408px) translateZ(0px) rotateX(-90deg) rotateY(45deg) ;
  }
それぞれtransform-originで軸を決めてtransformで移動しているだけです
しっかり計算しているわけではないので大体で調整してます
色で分けるとこんな感じで完成です


