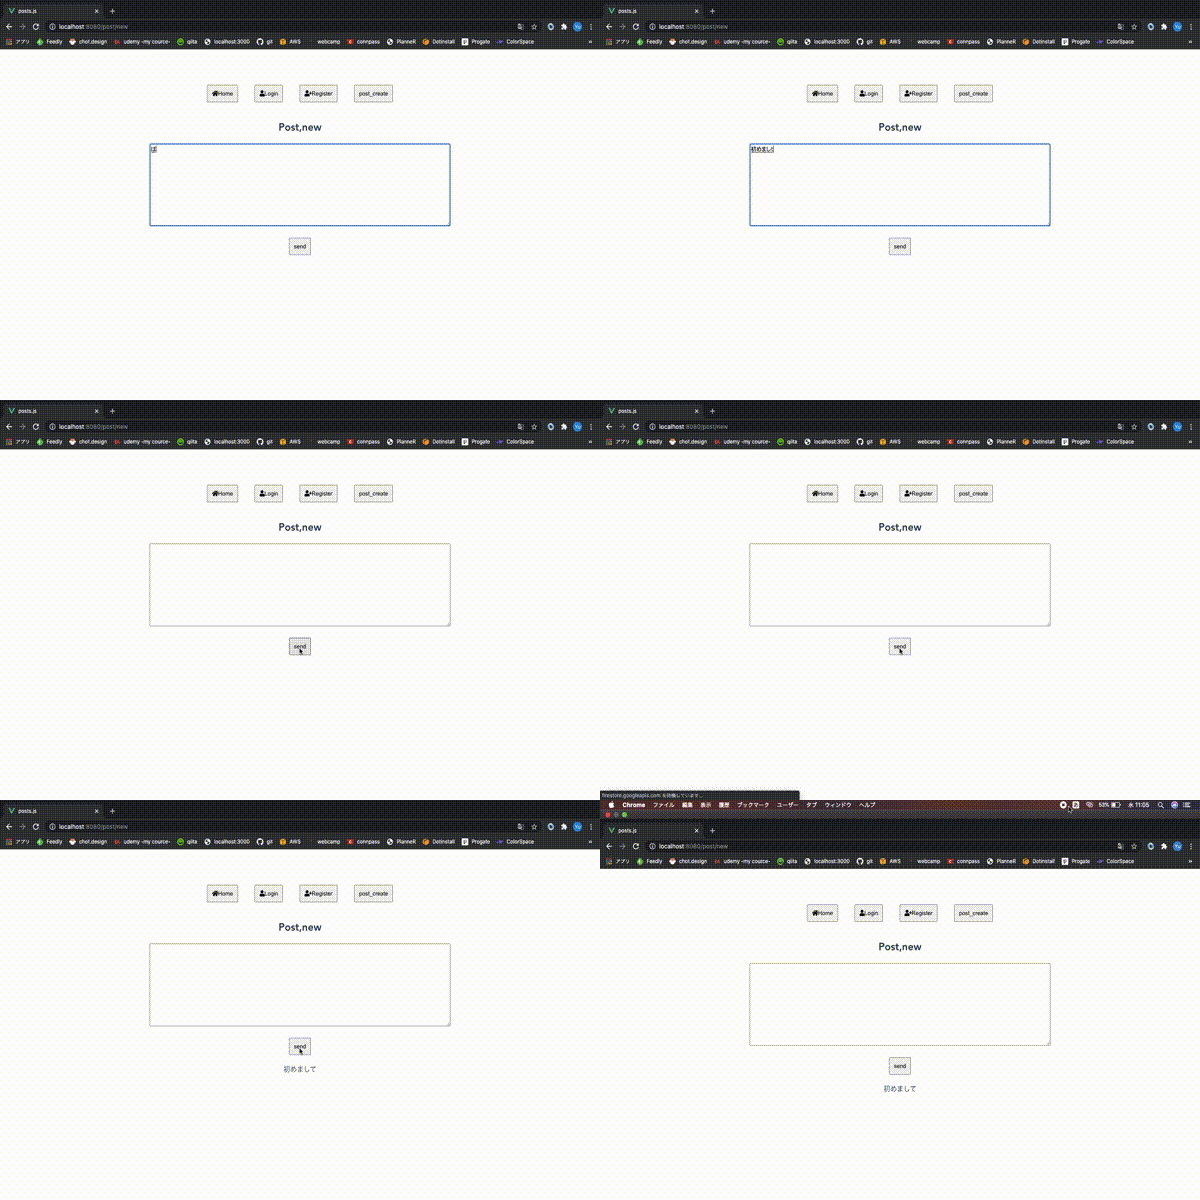
【ゴール】
axios / firebaseを利用して、データのやり取り
【環境】
mac catarina 10.156
Vue.js v2.6.12
【実装】
firebaseのセットアップ
下記URLにアクセス、googleアカウントの登録、作成
https://firebase.google.com/
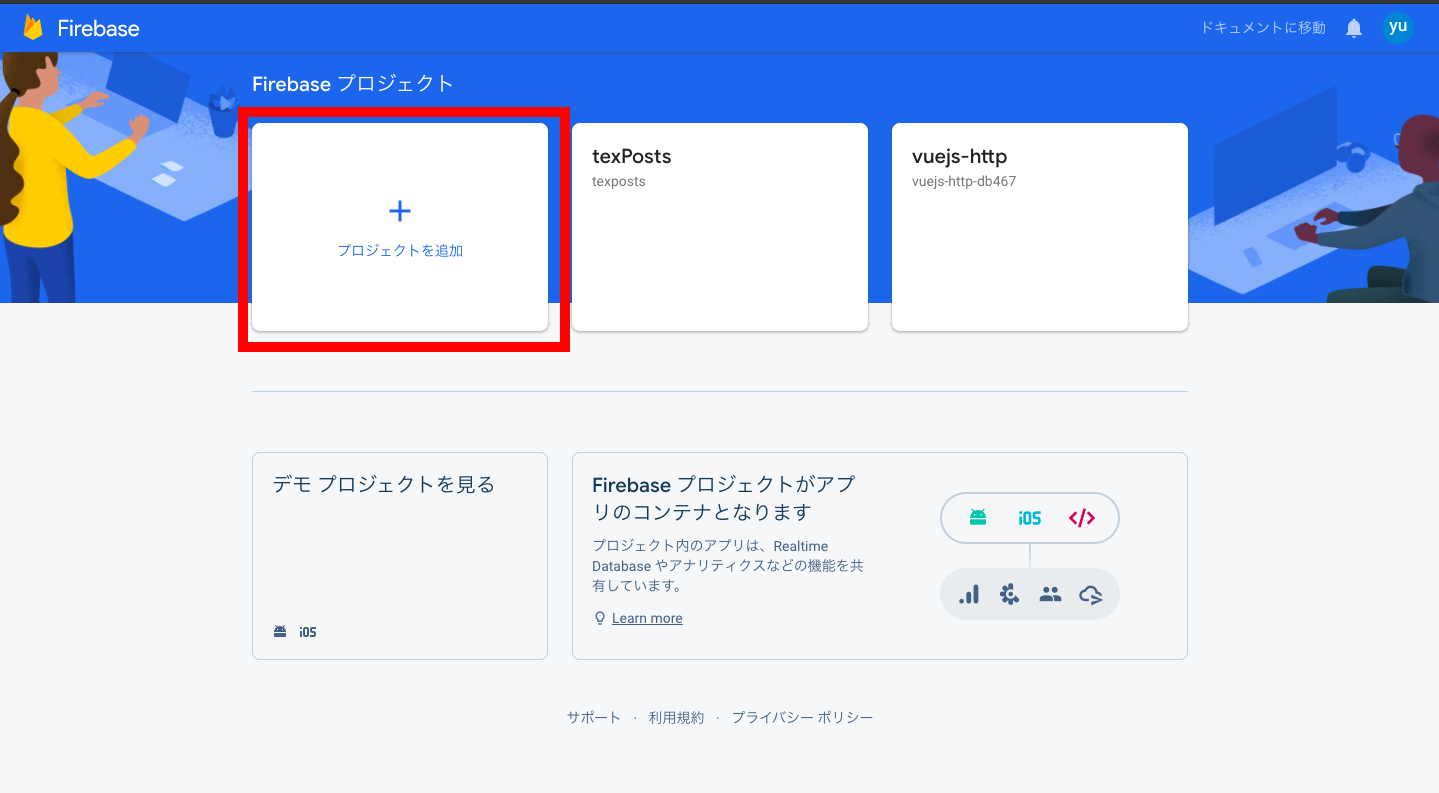
1 プロジェクト作成
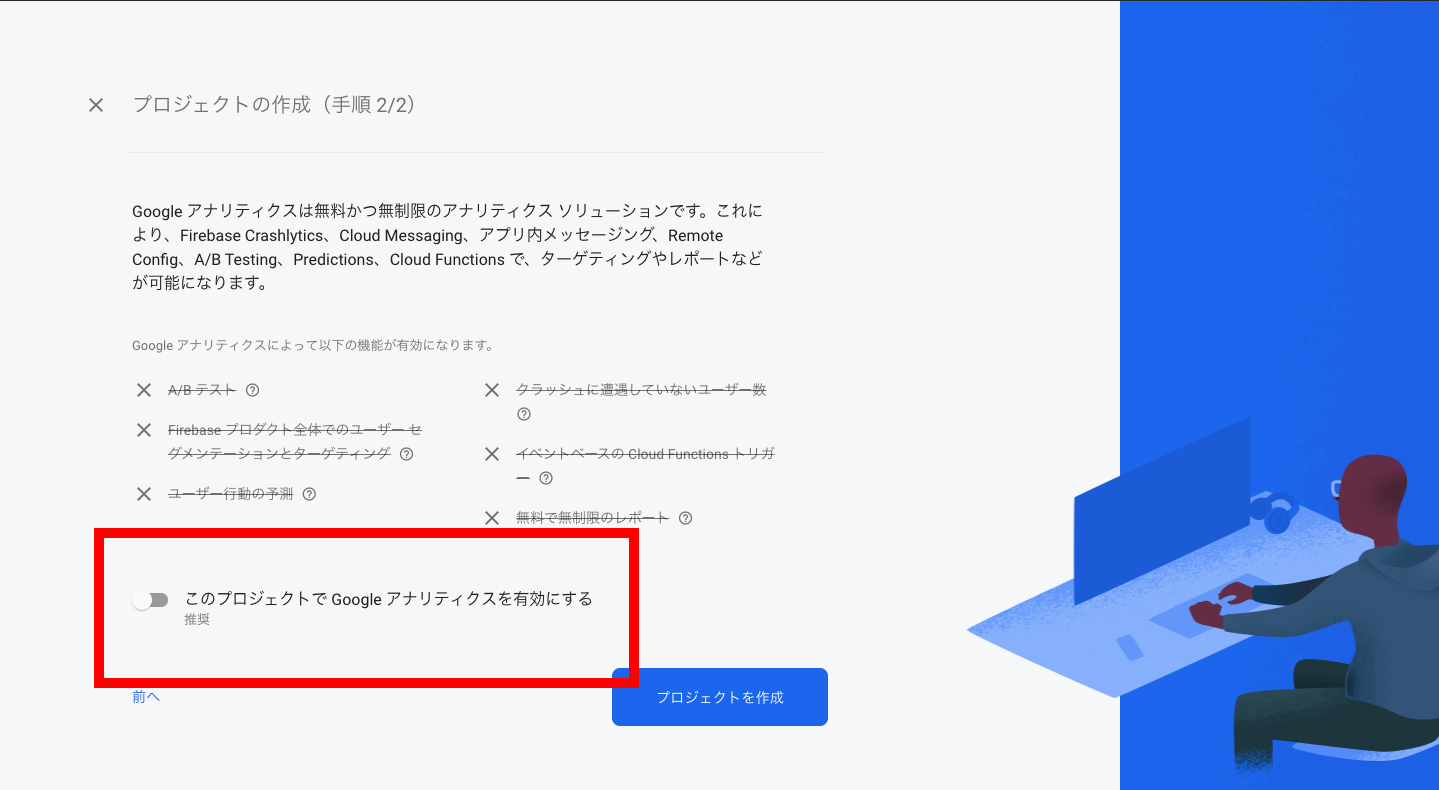
2 アナリティクスはOFFで構いません。
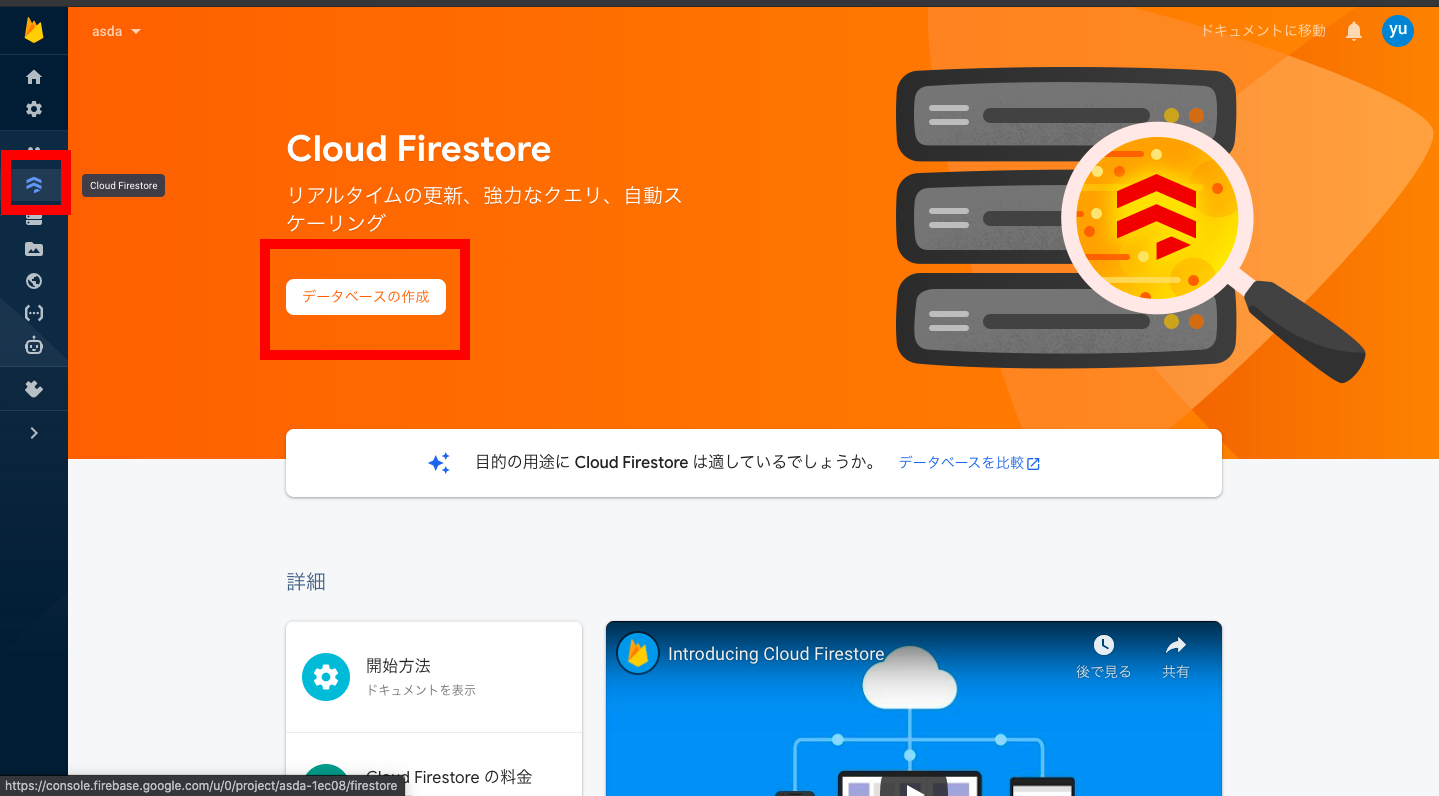
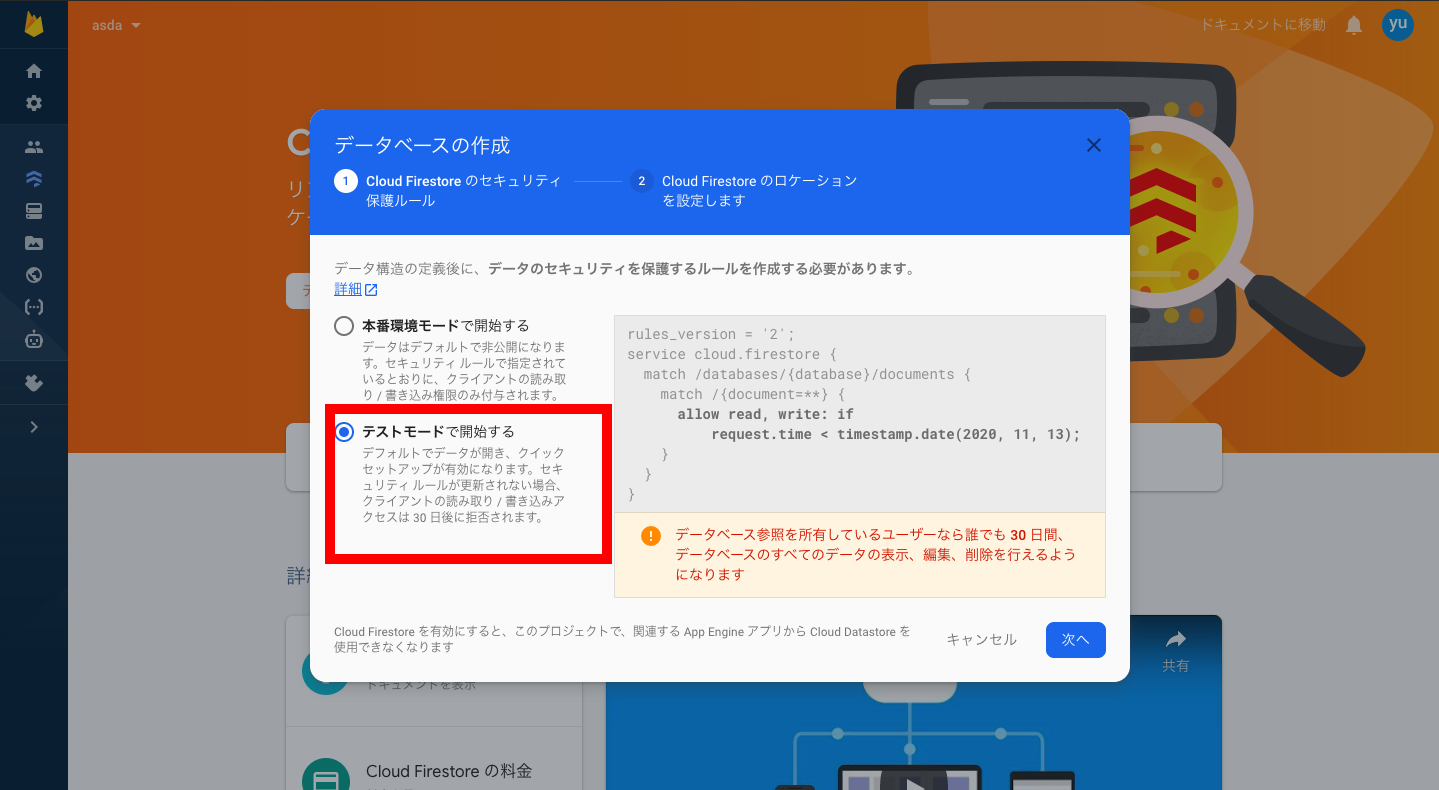
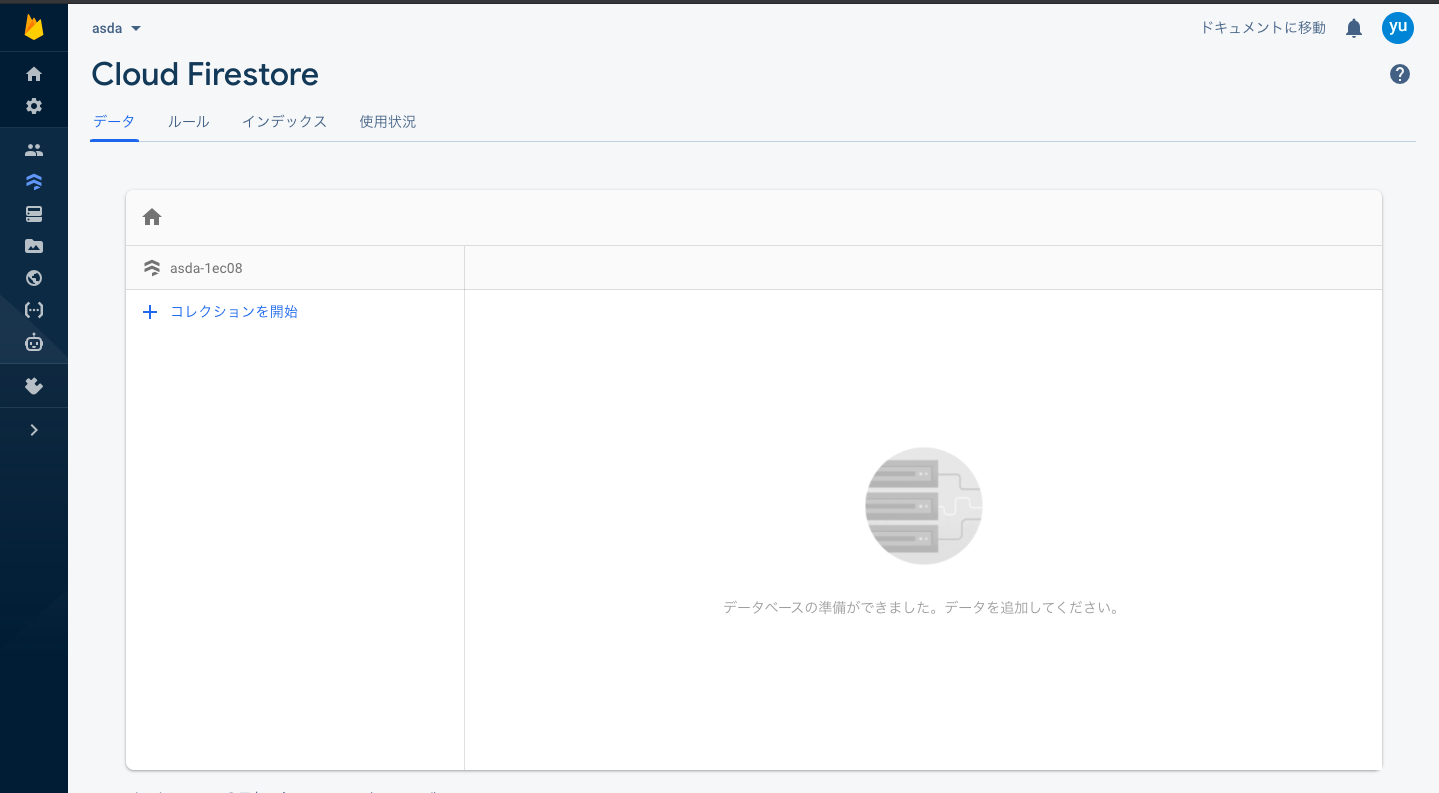
3 cloud firestroeにてdatabaseの作成
4 テストモードで構いません
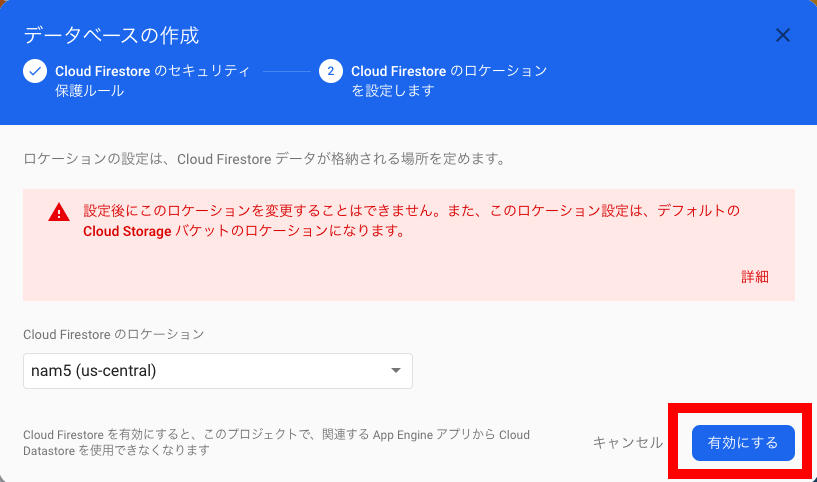
5 ロケーションはデフォルトのままで構いません
6 作成完了
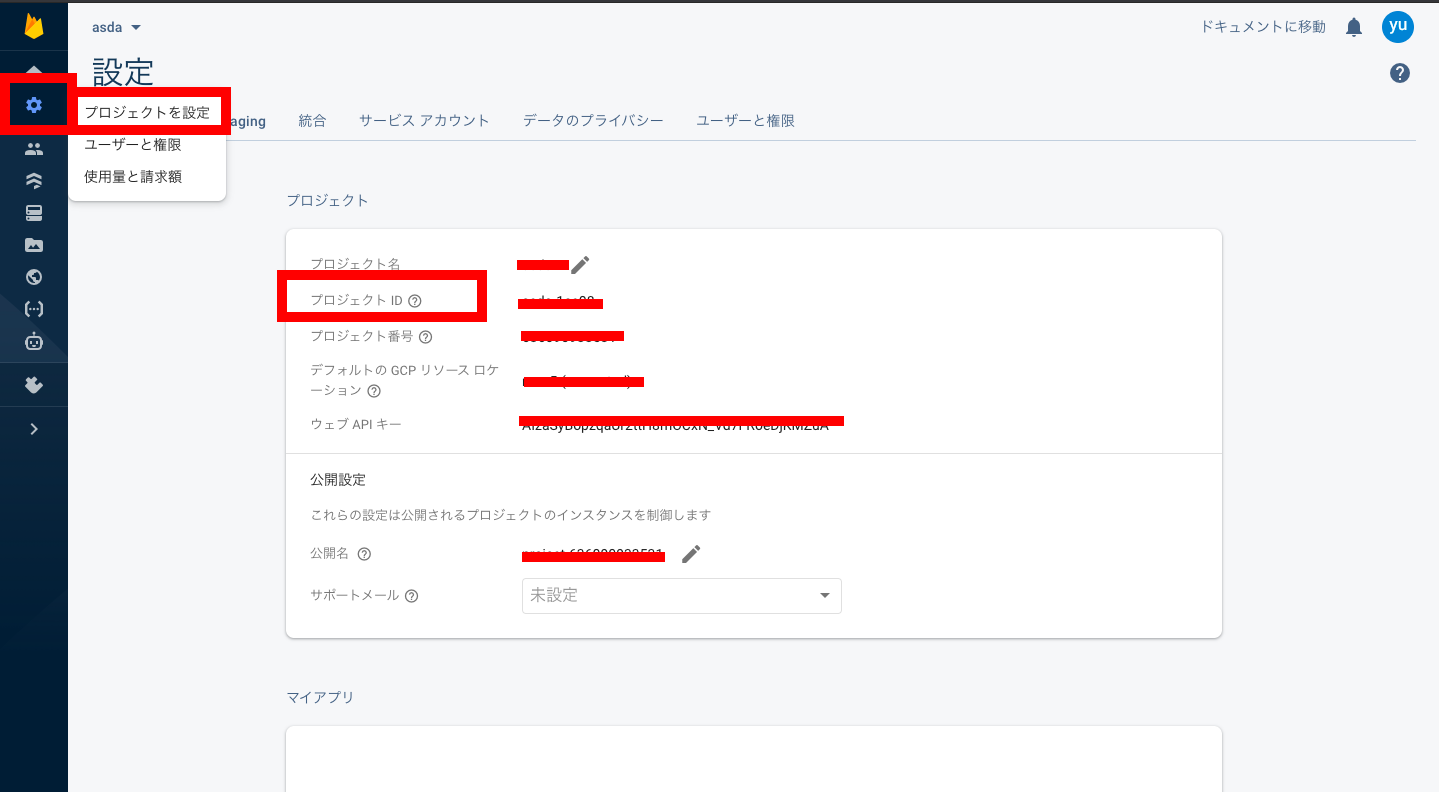
7 左のメニューバーの設定→プロジェクトの設定→プロジェクトIDを確認
axiosのインストール
※ワークスペース作成は割愛
$ npm install axios
コード
<template>内
※「@click="textSend"」でaxiosが発火**(下記に詳細ページ貼ってます)**
※「v-for」で繰り返し処理で表示
<template>
  <div>
    <h2>Post,new</h2>
    <div>
      <div class="form">
        <textarea name="text" cols="100" rows="10" v-model="text"></textarea
        ><br />
        <button @click="textSend">send</button>
      </div>
    </div>
    <div v-for="post in posts" :key="post.text">
      {{ post.fields.text.stringValue }}
    </div>
  </div>
</template>
<script>内
※「import axios from "axios";」でaxioをインポート
※「created」でページ読み込みじにデータベースから情報を取得
※「posts」に取得したデータを配列として渡す
※「stringValue」はデータ型、指定してあげる
※「this.text = '';」でtextarea内を空にする
import axios from "axios";

export default {
  data() {
    return {
      text: "",
      posts: [],
    };
  },
  created() {
    axios
      .get(
        "https://firestore.googleapis.com/v1/projects/texposts/databases/(default)/documents/text"
      )
      .then((res) => {
        this.posts = res.data.documents;
        console.log(res);
      });
  },
  methods: {
    textSend() {
      axios
        .post(
          "https://firestore.googleapis.com/v1/projects/7番のプロジェクトID/databases/(default)/documents/text",
          {
            fields: {
              text: {
                stringValue: this.text,
              },
            },
          }
        )
        .then((res) => {
          console.log(res);
        });
      this.text = "";
    },
  },
};
</script>
【まとめ】
■firebaseをセットアップ
■axiosをインストールしてhttp通信を可能に
■記述。URL等のタイポに気を付ける
【オススメ記事】
■ 【Vue.js】 IF文・For文 条件分岐、繰り返し処理
https://qiita.com/tanaka-yu3/items/0ccf9a11525331b764de
■【Vue.js】クリック処理 @click
https://qiita.com/tanaka-yu3/items/e578cadf35a7bc024770
■ 【Vue.js】Vue.jsでfontawsome(Free版)を使用する方法
https://qiita.com/tanaka-yu3/items/86d05241f72674d186f6
