概要
Telegramでは簡単にBotを作成でき、それを外部からあれこれ動かすためのAPIが提供されています。
いくつかのGemがこのAPIをラップしてくれていますが、今回はtelegram-bot-rbというGemでメッセージを返すBotを動かしてみます。
リンク
環境
MacBook Pro(M3 Pro)
docker desktop: 4.34.3
Ruby 3.3.5
rails ~> 7.2.2
チュートリアル
1. Railsプロジェクトを用意する
以下の記事っぽく構築
自分がいつも参考にさせていただいている記事
細かい部分まで解説されている上に、内容がわかりやすく頭が上がらない
2. Gemを追加
Gemfileの末尾に以下を追加
gem 'telegram-bot'
gem 'telegram-bot-types'
追加したら反映するために再度 build & up
docker-compose build
docker-compose up -d
telegram-bot-typesを有効にするために、以下を適当な場所に追加する
# ひとまずapplication.rbに追記
Telegram::Bot::Client.typed_response!
3. TelegramBotの作成
BotFatherとのチャットを開く
以下BotFatherへ送信する
# ボット作成開始コマンド
/newbot

# 任意のbotの名前(末尾がbotでないといけない 例: TetrisBot or tetris_bot)
test_231512_bot
そうするとアクセストークンをもらえるのでメモしておく
この記事では 123456:ABCDEFGHIJKLMN だったということにする
4. Credentialsを設定
コンテナ内に入る
docker-compose exec -it web bash
Credentialsファイルを開く
EDITOR="vi" bin/rails credentials:edit
Botのアクセストークンを追記する
telegram:
  bot: 123456:ABCDEFGHIJKLMN
正しく設定できたかはrailsコンソールで確認できる
root@5112704f29eb:/app# rails c
app(dev)> Telegram.bot.get_me
=> #<Telegram::Bot::Types::User id=7652787638 is_bot=true first_name="bot_test_43824" last_name=nil username="test_231512_bot" language_code=nil can_join_groups=true can_read_all_group_messages=false supports_inline_queries=false>
Bot情報を取得できている
5. Webhookの用意
Webhook用のコントローラーを用意する
class WebhookController < Telegram::Bot::UpdatesController
  include Telegram::Bot::UpdatesController::TypedUpdate

  def start!(word = nil, *words)
    respond_with :message, text: (word || "") + "hello!"
  end
end
ルーティングの設定
Rails.application.routes.draw do
  telegram_webhook WebhookController
end
development.rbとproduction.rbに、パス生成用の設定を追加
# 必ずhttpsじゃないといけない
# yourdomain.comは自分のホスト名に書き換える
routes.default_url_options = {host: 'yourdomain.com', protocol: 'https'}
以下を実行することで、Botにwebhookのリンクを設定できる (便利で嬉しい)
rake telegram:bot:set_webhook RAILS_ENV=production
6. Poller起動
ローカル環境で実際にWebhook用のAPIを叩かせるのは少しめんどくさいので、サーバーにデプロイされた時にwebhookが叩かれることを確認すればいい
ローカル環境ではpollerモードで動作確認する
# コンテナの中に入って...
docker-compose exec -it web bash

# Poller起動
rake telegram:bot:poller
7. 動作確認
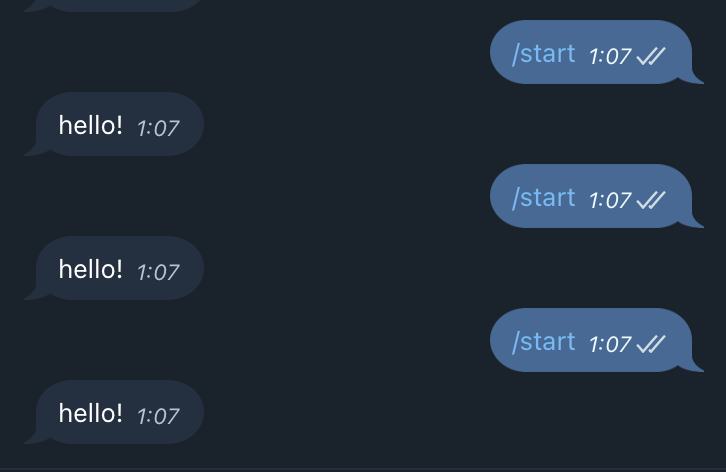
Telegram Botに /start と送ってメッセージが返ってくることを確認する

完了!
作ったもの
補足
-
telegram-bot-typesは導入必須ではない
開発支援用なので、何か不都合があれば入れなくて大丈夫 - 基本的にWebhook推奨
- テスト用に代替のクライアントを用意できる
https://github.com/telegram-bot-rb/telegram-bot?tab=readme-ov-file#testing