##目的
Fioriの代表的なレイアウトの1つである、Flexible Column Layoutを実装します。
Web IDEでMaster Detailのテンプレートを選ぶと自動的にFlexible Column Layoutになってくれますが、裏の仕組みがどうなっているか気になったので、SDKのドキュメントを参考に一から実装してみました。
この記事では、Flexible Column Layoutを実装する上で、どういったオブジェクトがどんな働きをしているか、段階を追って理解していくことを目的とします。
###ステップ
- RoutingなしのFlexible ColumnLayoutを作成
- layoutプロパティを動的に変更してみる
- Routingでレイアウトを動的に変更する
- Routingで遷移先の画面にパラメータを渡す
- カラムのサイズを切り替えるボタンを追加する
##1. RoutingなしのFlexible ColumnLayoutを作成
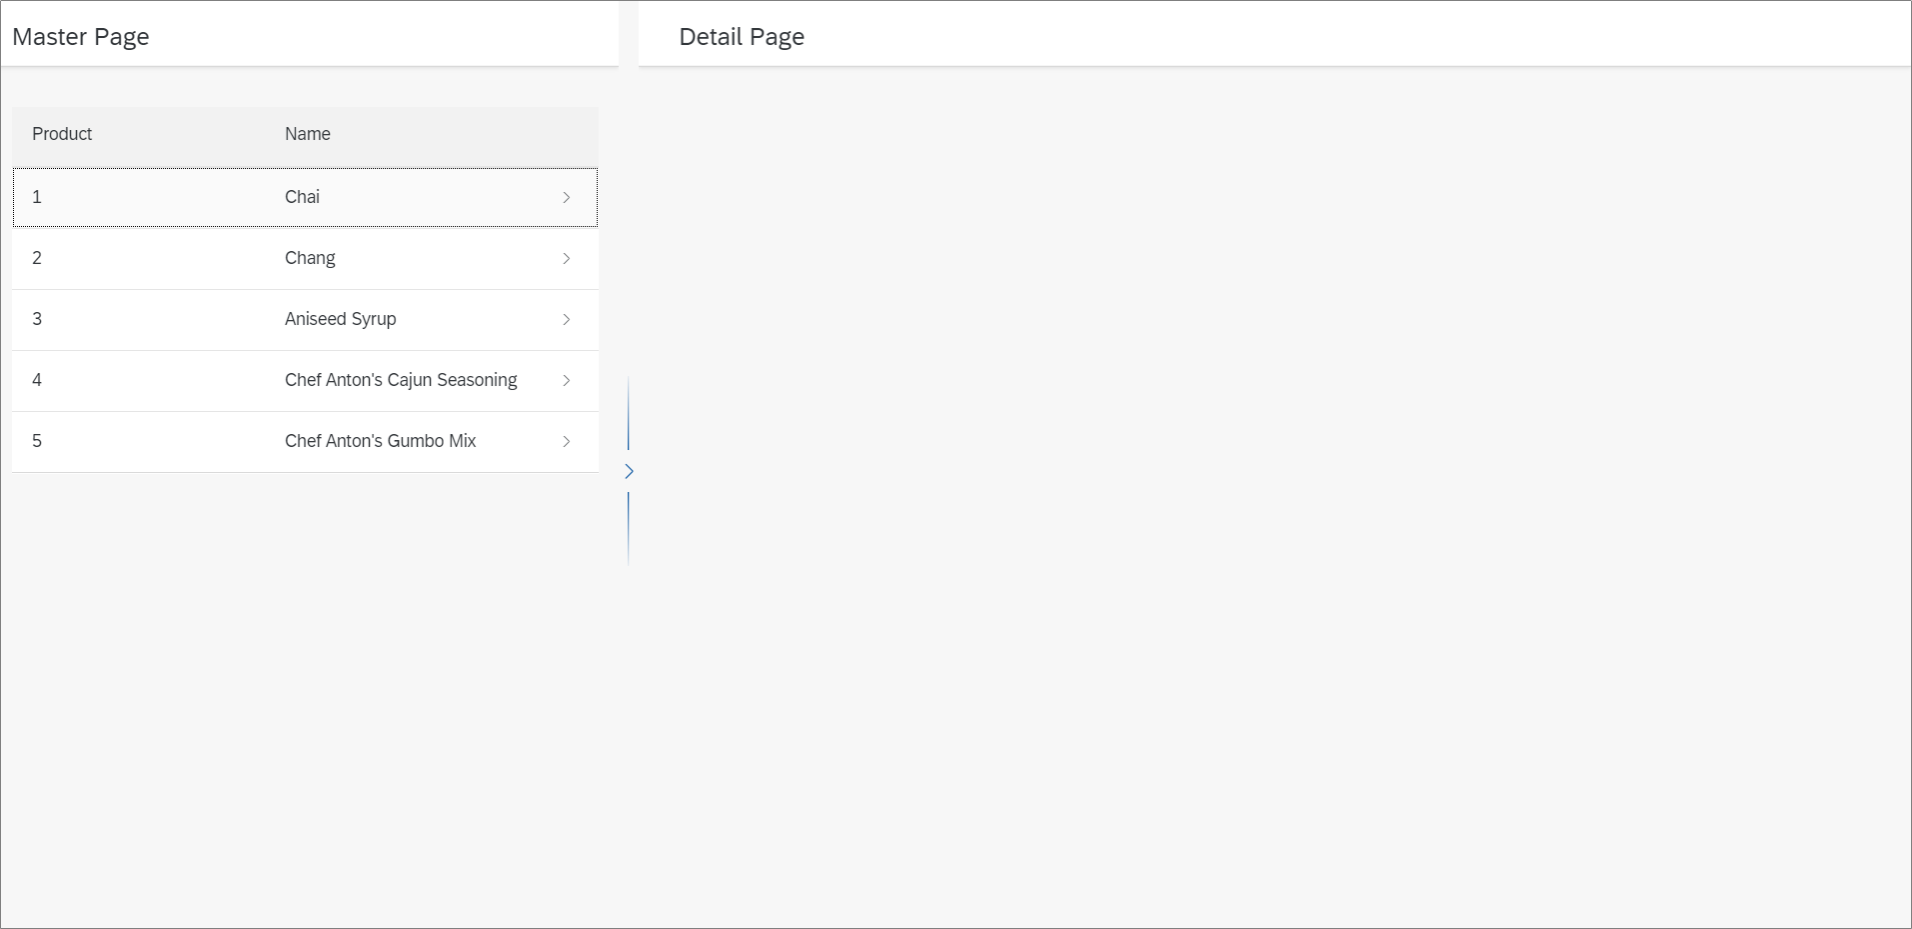
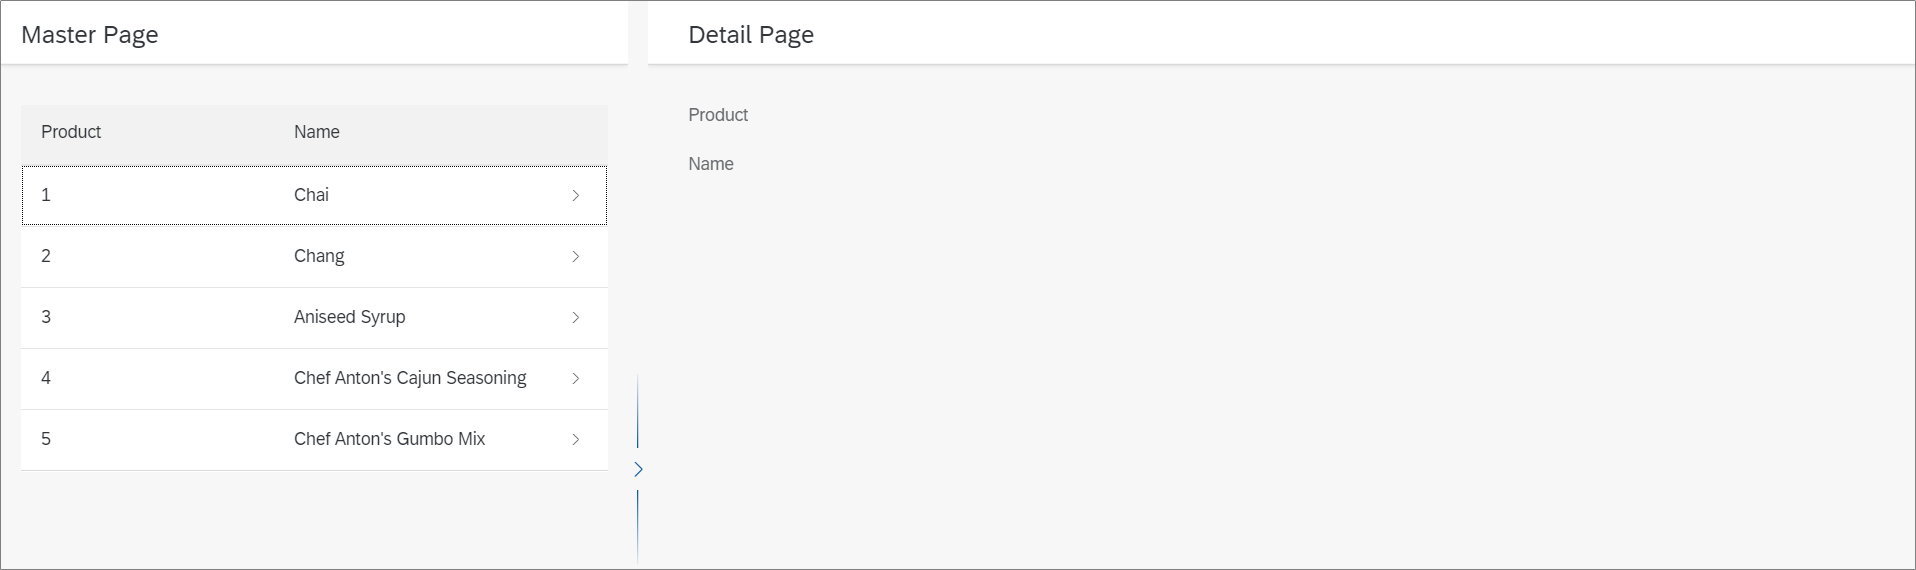
まずは、以下のような静的な画面をFlexible ColumnLayoutで作ってみます。
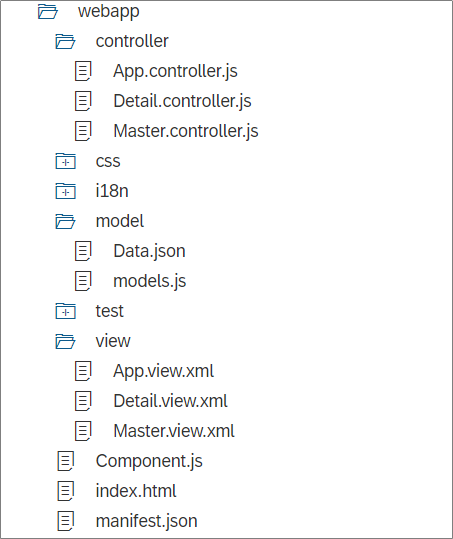
webappフォルダの中は以下のようになります。
###ビュー
Appビューは、Master、Detailなど他のビューを載せるための土台になるビューです。ここでFlexibleColumnLayoutを使用します。beginColumnPages(左端の枠)にMasterビュー、midColumnPages(真ん中の枠)にDetailビューを配置します。
<mvc:View controllerName="demo.Train_23_FlexibleColumnLayout.controller.App" xmlns:mvc="sap.ui.core.mvc"
	xmlns:f="sap.f" xmlns="sap.m"
	displayBlock="true">
	<App id="app">
		<f:FlexibleColumnLayout layout="TwoColumnsMidExpanded">
			<f:beginColumnPages>
				<mvc:XMLView viewName="demo.Train_23_FlexibleColumnLayout.view.Master"/>
			</f:beginColumnPages>

			<f:midColumnPages>
				<mvc:XMLView viewName="demo.Train_23_FlexibleColumnLayout.view.Detail"/>
			</f:midColumnPages>

		</f:FlexibleColumnLayout>
	</App>
</mvc:View>
<mvc:View xmlns:core="sap.ui.core" xmlns:mvc="sap.ui.core.mvc" xmlns="sap.m"
	xmlns:f="sap.f"
	controllerName="demo.Train_23_FlexibleColumnLayout.controller.Master" xmlns:html="http://www.w3.org/1999/xhtml">

	<f:DynamicPage>
		<f:title>
			<f:DynamicPageTitle>
				<f:heading>
					<Title text="Master Page"/>
				</f:heading>
			</f:DynamicPageTitle>
		</f:title>

		<f:content>
			<Table width="auto"
				items="{
					path: 'products>/Products'
				}">
				<columns>
					<Column>
						<Text text="Product"/>
					</Column>
					<Column>
						<Text text="Name"/>
					</Column>
				</columns>
				<items>
					<ColumnListItem type="Navigation">
						<cells>
							<Text text="{products>ProductID}"/>
							<Text text="{products>ProductName}"/>
						</cells>
					</ColumnListItem>
				</items>
			</Table>
		</f:content>
	</f:DynamicPage>

</mvc:View>
<mvc:View xmlns:core="sap.ui.core" xmlns:mvc="sap.ui.core.mvc" xmlns="sap.m"
	xmlns:f="sap.f"
	controllerName="demo.Train_23_FlexibleColumnLayout.controller.Detail" xmlns:html="http://www.w3.org/1999/xhtml">

	<f:DynamicPage>
		<f:title>
			<f:DynamicPageTitle>
				<f:heading>
					<Title text="Detail Page"/>
				</f:heading>
			</f:DynamicPageTitle>
		</f:title>

		<f:content>
		</f:content>
	</f:DynamicPage>

</mvc:View>
###モックデータ
Masterビューに表示するためのデータです。
{
	"Products": [
		{
			"ProductID": 1,
			"ProductName": "Chai"
		},
		{
			"ProductID": 2,
			"ProductName": "Chang"
		},
		{
			"ProductID": 3,
			"ProductName": "Aniseed Syrup"
		},
		{
			"ProductID": 4,
			"ProductName": "Chef Anton's Cajun Seasoning"
		},
		{
			"ProductID": 5,
			"ProductName": "Chef Anton's Gumbo Mix"
		}
	]

}
###manifest
上記のモックデータをproductsという名前で登録します。
		"models": {
			"i18n": {
				"type": "sap.ui.model.resource.ResourceModel",
				"settings": {
					"bundleName": "demo.Train_23_FlexibleColumnLayout.i18n.i18n"
				}
			},
			"products": {
				"type": "sap.ui.model.json.JSONModel",
				"uri": "model/Data.json"
			}
		}
##2. layoutプロパティを動的に変更してみる
ステップ1では、以下のようにFlexibleColumnLayoutのlayoutプロパティをビューで直接指定していました。
<f:FlexibleColumnLayout layout="TwoColumnsMidExpanded">
layoutプロパティの初期値はOneColumnなので、指定しない場合はMasterビューのみ表示されます。
次に、初期画面ではMasterのみ表示し、明細が選択されたらDetailビューを表示するようにしてみます。
###ビュー
FlexibleColumnLayoutからlayoutプロパティを削除します。これはあとで動的に設定します。
<f:FlexibleColumnLayout>
明細がクリックされたときのイベント(press)ハンドラを追加します。
<ColumnListItem type="Navigation" press="onItemPress">
###コントローラー
明細がクリックされたときのイベントハンドラを実装します。
Masterビューの直接の親はFlexibleColumnLayoutのbeginColumnPagesというaggregationです。そのさらに親を取得することで、FlexibleColumnLayoutのコントロールが取れます。
onItemPress: function () {
	var oFCL = this.getView().getParent().getParent();
	oFCL.setLayout(fioriLibrary.LayoutType.TwoColumnsMidExpanded);
}
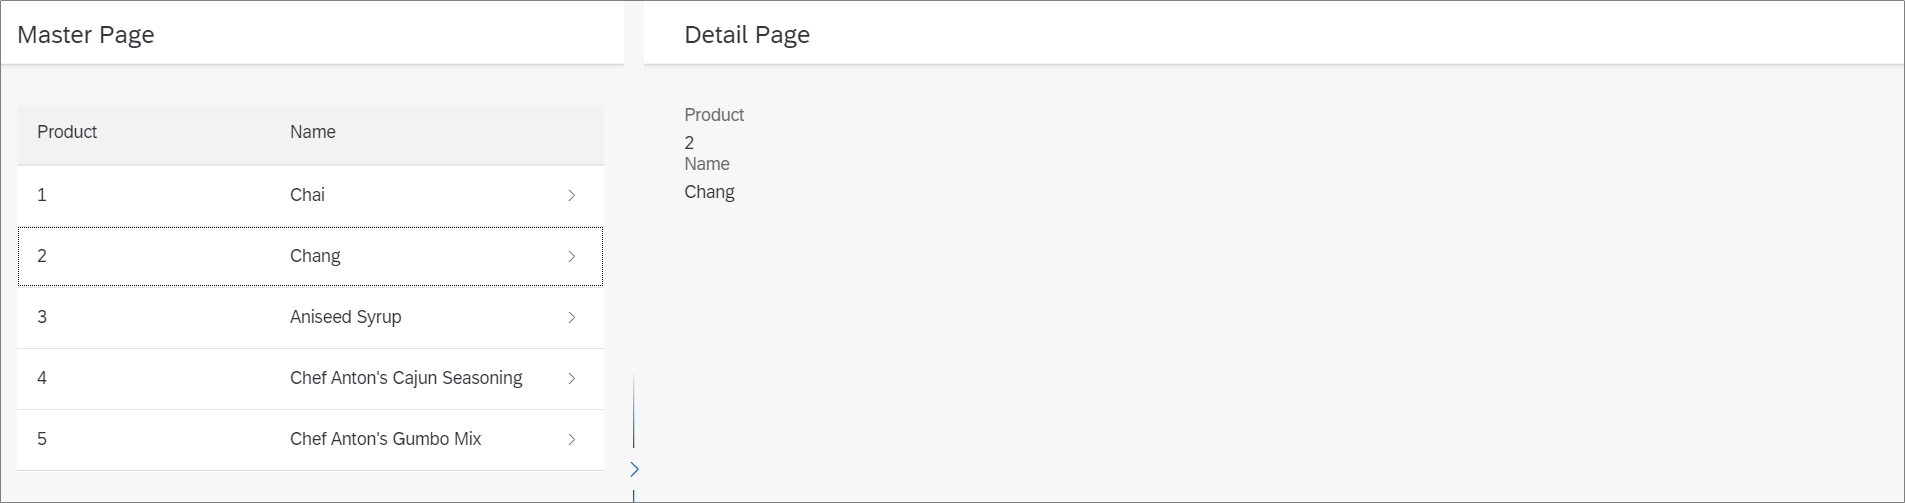
この結果、最初はMasterビューが表示され、行を選択するとDetailビューが表示されるようになりました。Routingっぽい動きですが、まだRoutingは使っていません。
##3. Routingでレイアウトを動的に変更する
いよいよRoutingを実装します。その前に、Detail画面にProduct IDとNameを表示させるようにしておきます。
<f:content>
	<VBox>
		<Label text="Product" />
		<Text text="{products>ProductID}" />
		<Label text="Name" />
		<Text text="{products>ProductName}" />
	</VBox>
</f:content>
###manifest
manifestにRoutingの設定を追加します。1つ目のルート"master"のpatternが":layout:"となっていて、何のことかと思った方もいると思いますが、コロンで囲むことでそのパラメータは任意となります。これの意味するところは、パターンが何も指定されない場合、あるいはlayoutパラメータのみが指定された場合は"master"のルートが採用されるということです。
以下のURLの末尾に注目してください。
- 何も指定しない場合のURL:
...sap-ui-xx-componentPreload=off - レイアウトのみ指定した場合のURL:
...sap-ui-xx-componentPreload=off#MidColumnFullScreen
		"routing": {
			"config": {
				"routerClass": "sap.m.routing.Router",
				"viewType": "XML",
				"async": true,
				"viewPath": "demo.Train_23_FlexibleColumnLayout.view",
				"controlAggregation": "pages",
				"controlId": "fcl",
				"clearControlAggregation": false
			},
			"routes": [
				{
					"name": "master",
					"pattern": ":layout:",
					"target": [
						"master",
						"detail"
					]
				},
				{
					"name": "detail",
					"pattern": "detail/{productId}/{layout}",
					"target": [
						"master",
						"detail"
					]
				}
			],
			"targets": {
				"master": {
					"viewName": "Master",
					"controlAggregation": "beginColumnPages"
				},
				"detail": {
					"viewName": "Detail",
					"controlAggregation": "midColumnPages"
				}
			}
###ビュー
FlexibleColumnLayoutの中にあったaggregationを削除します。また、layoutプロパティにComponentで登録するモデルをバインドします。layoutプロパティは、1ページに何カラム表示するのか、またどのカラムを大きく表示するのかを決定します(詳細はこちら)。バインドによって、レイアウトを動的に変更できるようになります。
<App id="app">
	<f:FlexibleColumnLayout id="fcl" layout="{/layout}">
	</f:FlexibleColumnLayout>
</App>
###Component
Component.jsに以下のように手を加えます。変更ポイントは次の2点です。
①initファンクションでデフォルトモデルを登録
②_onBeforeRouteMatchedファンクションで、URLにlayoutパラメータが渡されたらビューモデルにその値を設定する(これがApp.viewにバインドされる)
②のイベントは、Routingが発生する都度発火します。Routing元のコントローラーが次の画面のレイアウトを指定するので、次画面に移動する前にlayoutプロパティを書き換えるのです。
sap.ui.define([
	"sap/ui/core/UIComponent",
	"sap/ui/Device",
	"sap/ui/model/json/JSONModel",
	"demo/Train_23_FlexibleColumnLayout/model/models",
	"sap/f/library"
], function (UIComponent, Device, JSONModel, models, fioriLibrary) {
	"use strict";

	return UIComponent.extend("demo.Train_23_FlexibleColumnLayout.Component", {

		metadata: {
			manifest: "json"
		},

		/**
		 * The component is initialized by UI5 automatically during the startup of the app and calls the init method once.
		 * @public
		 * @override
		 */
		init: function () {
			//デフォルトモデルを登録
			var oModel = new JSONModel();
			this.setModel(oModel);

			// call the base component's init function
			UIComponent.prototype.init.apply(this, arguments);

			// enable routing
			var oRouter = this.getRouter();
			oRouter.attachBeforeRouteMatched(this._onBeforeRouteMatched, this);
			oRouter.initialize();

			// set the device model
			this.setModel(models.createDeviceModel(), "device");
		},

		_onBeforeRouteMatched: function(oEvent) {
			var oModel = this.getModel(),
				sLayout = oEvent.getParameters().arguments.layout;

			//Routingで"layout"パラメータが渡されなかったら、OneColumnを設定する
			if(!sLayout) {
				sLayout = fioriLibrary.LayoutType.OneColumn;
			}
			oModel.setProperty("/layout", sLayout);

		}
	});
});
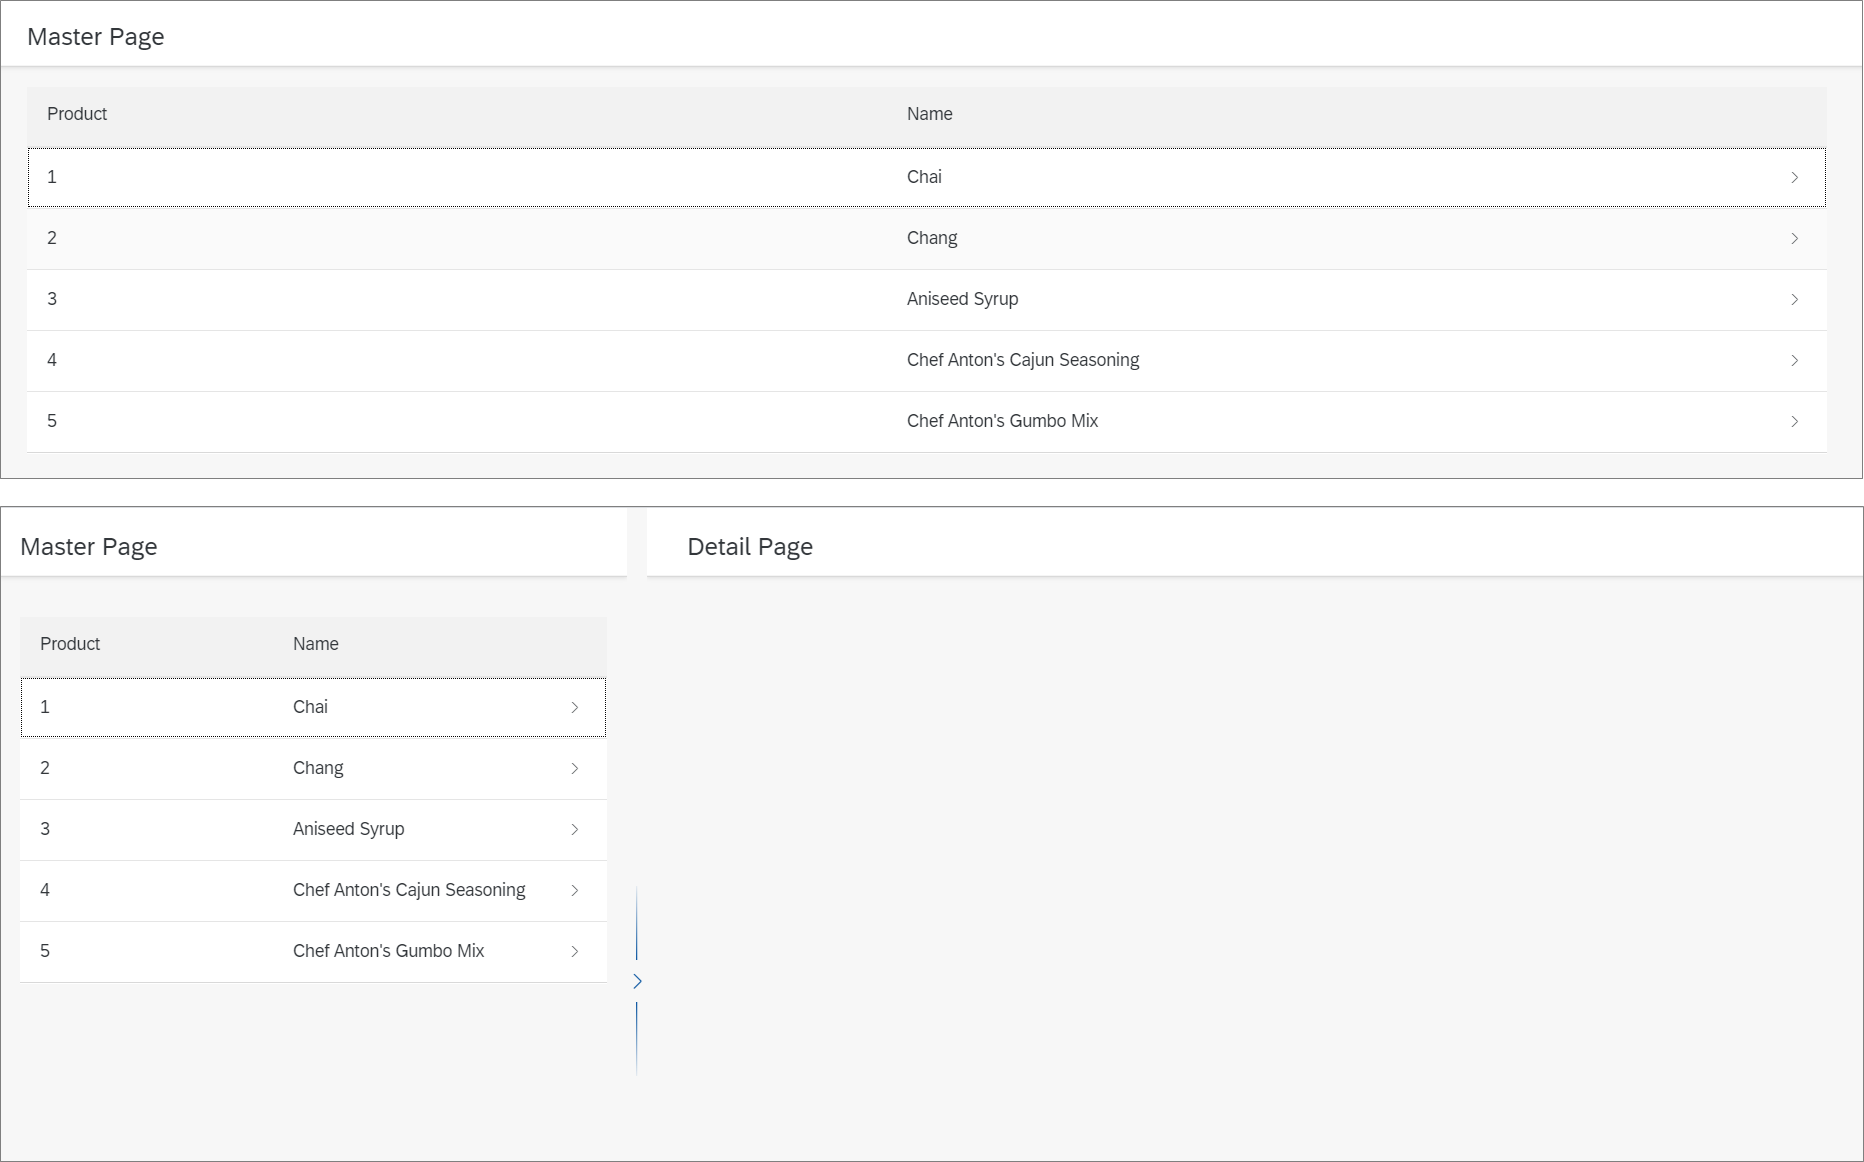
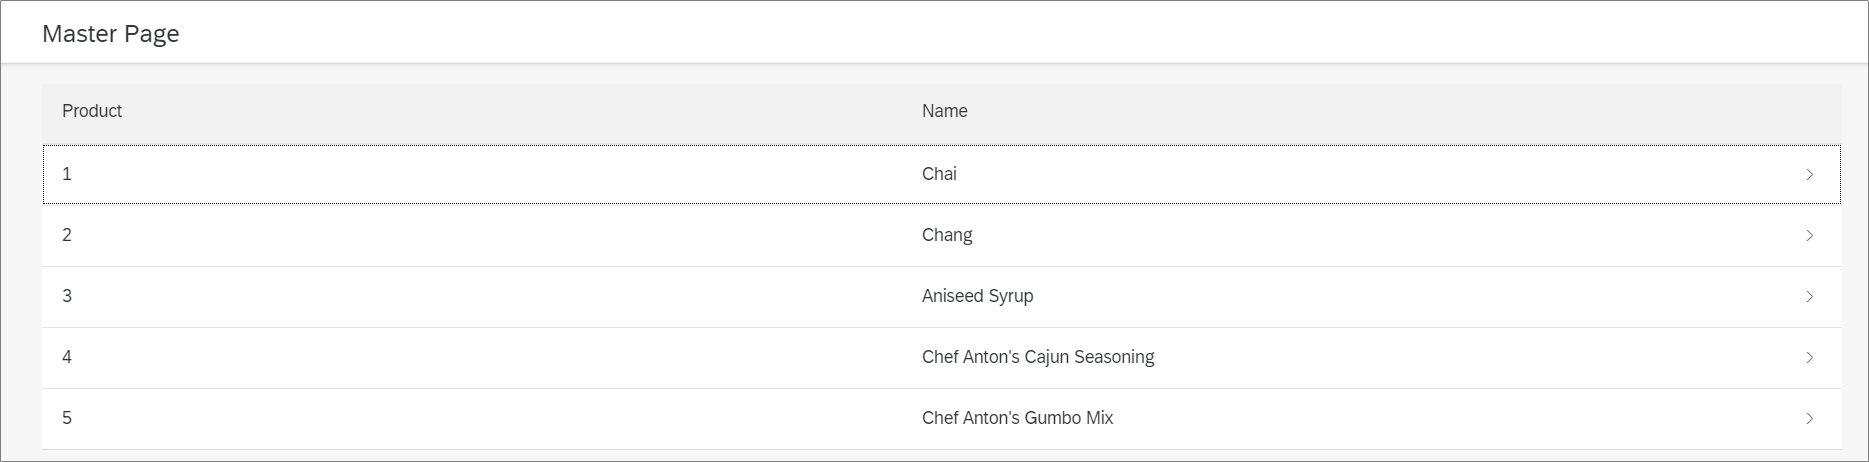
この時点で動作確認してみると、最初はMasterページが1画面に表示されます。
次に、URLの末尾に#TwoColumnsMidExpandedとつけてリフレッシュしてみましょう。すると、Master, Detailページが両方表示されます。
##4. Routingで遷移先の画面にパラメータを渡す
Masterビューでクリックした行のデータを遷移先の画面に渡せるようにしましょう。
###manifest.json
3. ですでにRoutingの設定は済んでいますが、改めて見てみましょう。
"detail"のルートは、2つの引数productId, layoutを受け取るようになっています。
			"routes": [
				{
					"name": "master",
					"pattern": ":layout:",
					"target": [
						"master",
						"detail"
					]
				},
				{
					"name": "detail",
					"pattern": "detail/{productId}/{layout}",
					"target": [
						"master",
						"detail"
					]
				}
###コントローラー
まずは送信元の画面です。Routingを使ってDetailビューに遷移します。このときに、layoutとproductIdのパラメータを渡します。
Detailビューに遷移する前にRouterのBeforeRouteMatchedイベントが動いて、layoutがFlexibleColumnLayoutにセットされるのでした。
		onInit: function () {
			this.oRouter = this.getOwnerComponent().getRouter();
		},

		onItemPress: function (oEvent) {
			//var oFCL = this.getView().getParent().getParent();
			//oFCL.setLayout(fioriLibrary.LayoutType.TwoColumnsMidExpanded);

			var sPath = oEvent.getSource().getBindingContext("products").getPath(), //"/Products/2"
				sProduct = sPath.split("/").slice(-1).pop(); //2

				this.oRouter.navTo("detail", {layout: fioriLibrary.LayoutType.TwoColumnsMidExpanded, productId: sProduct});
		}
つづいて、遷移先の画面のコントローラーです。"detail"のパターンにマッチしたら、Routingで渡された引数からproductIdを取得してパスを作り、画面にバインドします。
bindElementでmodelを指定していますが、これは名前付きのモックデータを使っているからです。通常のOData(かつ、デフォルトモデル)を使っている場合はmodelを指定する必要はありません。
		onInit: function () {
			this.oRouter = this.getOwnerComponent().getRouter();
			this.oRouter.getRoute("detail").attachPatternMatched(this._onProductMatched, this);
		},

		_onProductMatched: function (oEvent) {
			this._product = oEvent.getParameter("arguments").productId;
			this.getView().bindElement({
				path: "/Products/" + this._product,
				model: "products"
			});
		}
この結果、Masterで指定した製品の情報がDetailページにも反映されるようになりました。これでRoutingは完成です。
##5. カラムのサイズを切り替えるボタンを追加する
###やりたいこと
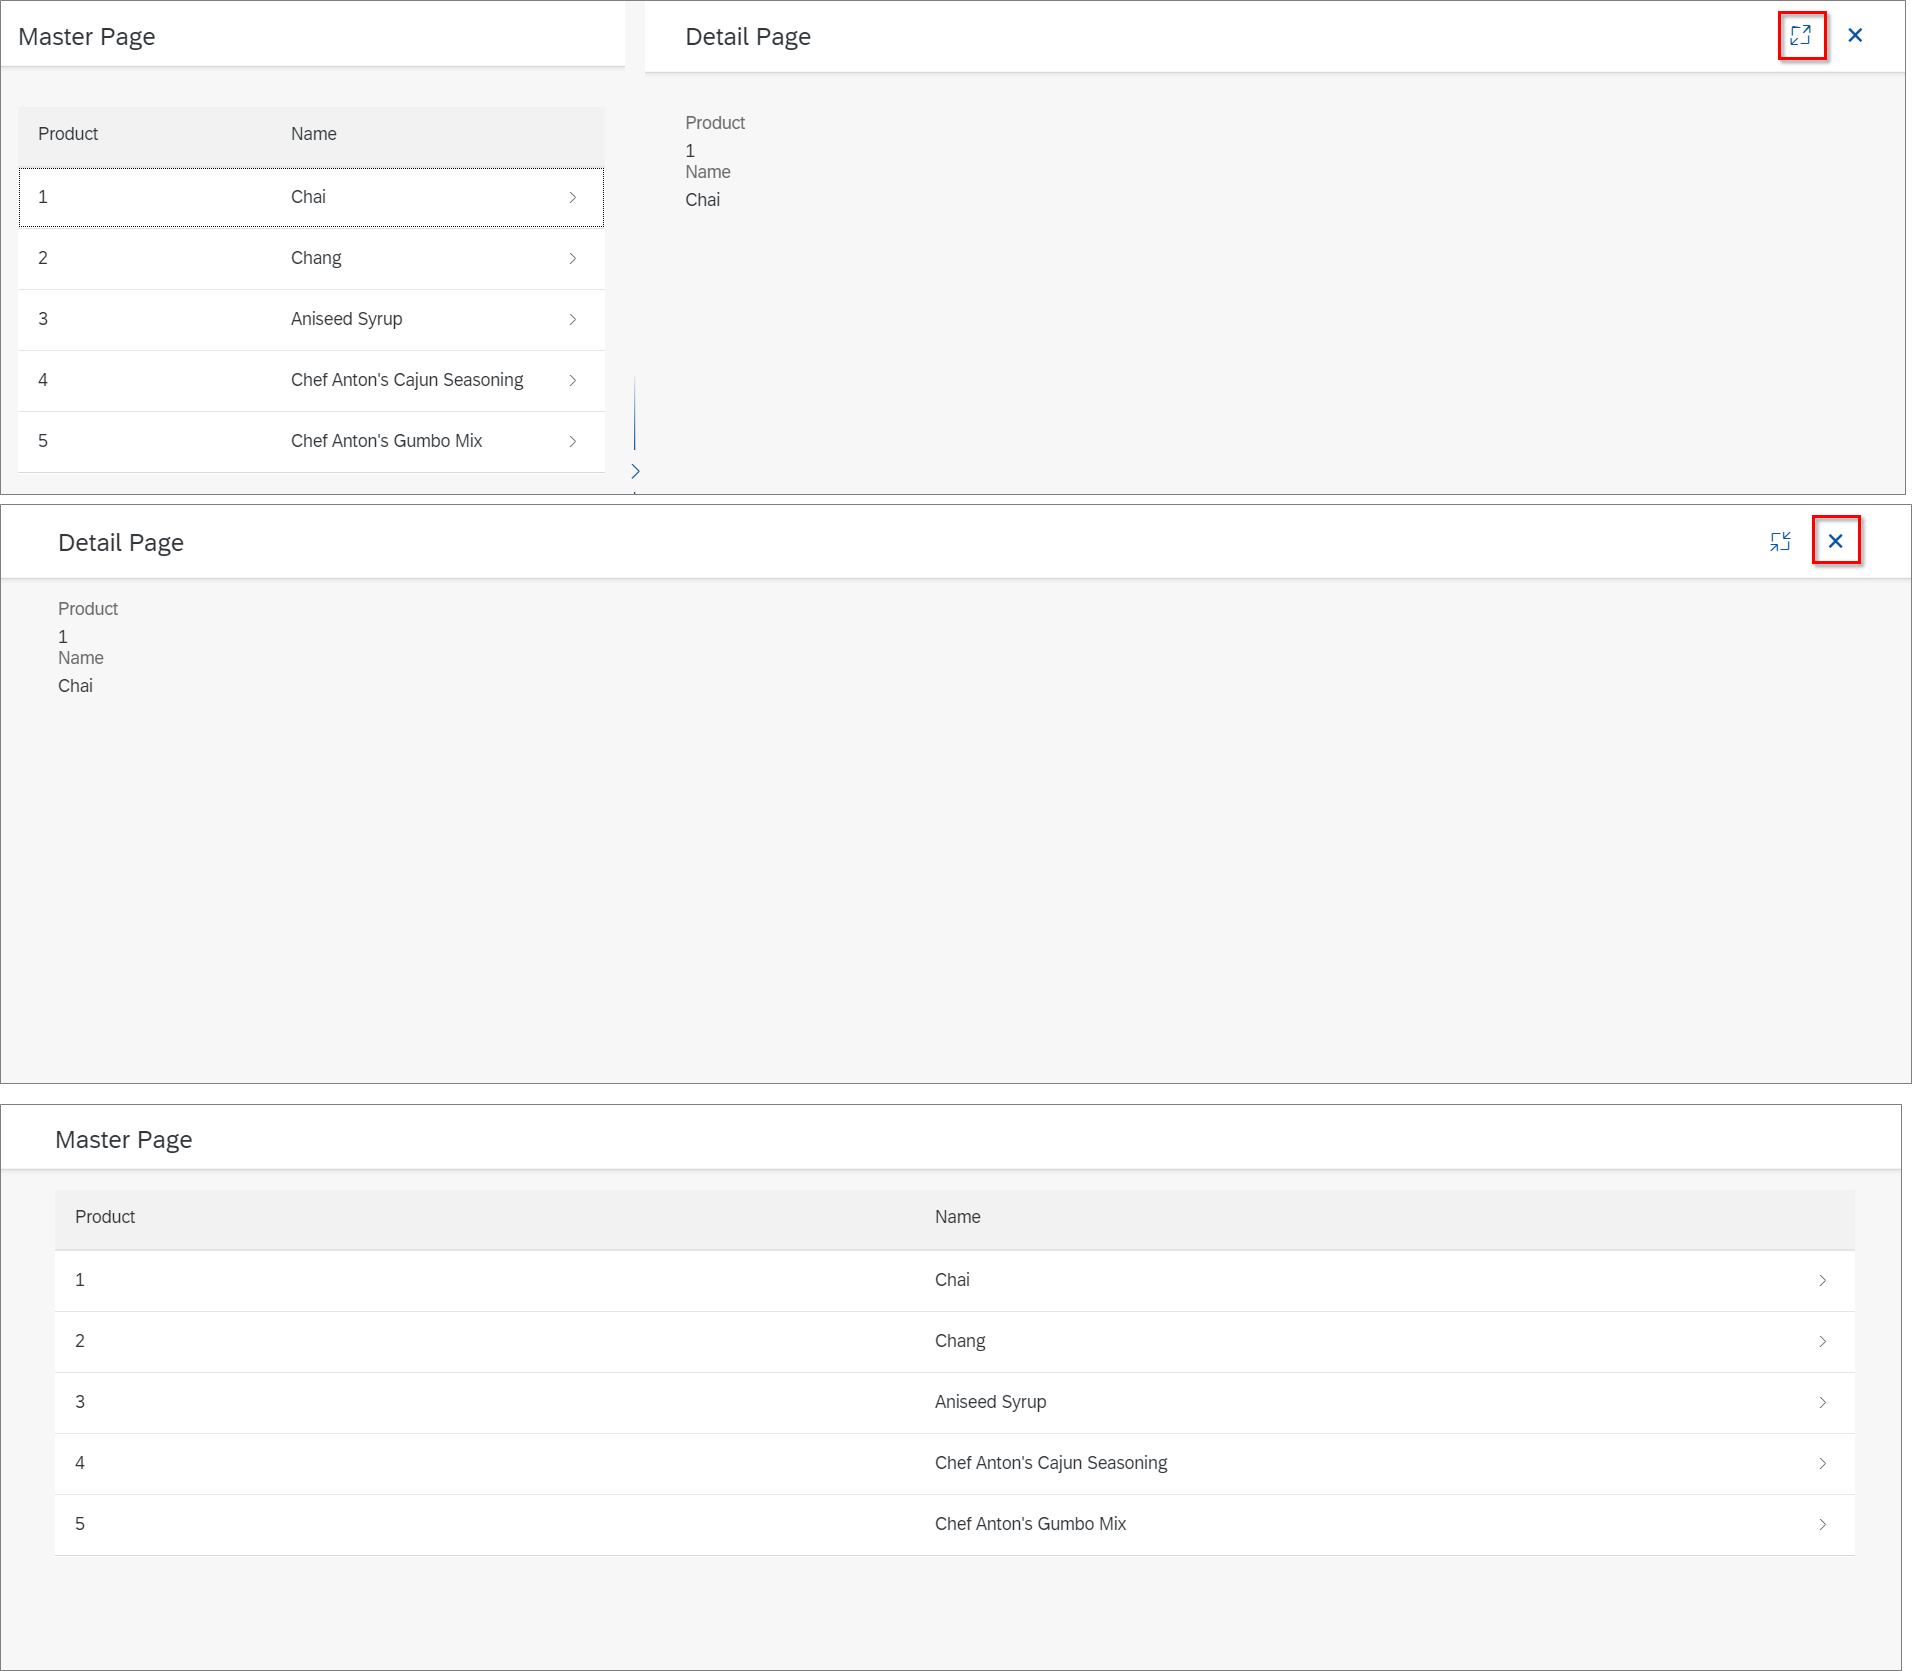
Detailページの右隅に、最大化/元に戻す/閉じるボタンを追加します。
ボタンに応じてDetail画面のサイズが変わります。また、画面の状態によって押せるボタンをコントロールします。(最大化しているときは最大化ボタンは出ない、など)
###Semantic Helperを使わずにやってみる
Semantic Helperという便利な部品があるのですが、それが何のためのものなのか理解するために、まずは使わずに実装してみます。やることは、ステップ2でもやったように「押されたボタンに応じてFlexibleColumnLayoutのlayoutプロパティを切り替える」ことです。
####ビュー
ヘッダにnavigationActionsを追加します。3つのボタン(Full Screen, Exit Full Screen Mode, Close)を追加します。ボタンの表示/非表示は、ビューモデルによってコントロールします。
			<f:DynamicPageTitle>
				<f:heading>
					<Title text="Detail Page"/>
				</f:heading>
				<f:navigationActions>
					<OverflowToolbarButton type="Transparent" icon="sap-icon://full-screen"
						tooltip="Full Screen" press="onFullScreen"
						visible="{buttons>/fullScreen}" />
					<OverflowToolbarButton type="Transparent" icon="sap-icon://exit-full-screen"
						tooltip="Exit Full Screen Mode" press="onExitFullScreen"
						visible="{buttons>/exitFullScreen}" />
					<OverflowToolbarButton type="Transparent" icon="sap-icon://decline"
						tooltip="Close" press="onClose"
						visible="{buttons>/close}" />
				</f:navigationActions>
			</f:DynamicPageTitle>
####コントローラー
onInitでビューモデルを作ります。これがボタンにバインドされます。
		onInit: function () {
			var oModel = new JSONModel({
				fullScreen: true,
				exitFullScreen: false,
				close: true
			});
			this.getView().setModel(oModel, "buttons");
			//以下省略
		}
つづいて、ボタンが押されたときのイベントハンドラを実装します。押されたボタンに応じてlayoutプロパティとボタンの表示/非表示を切り替えています。
		onFullScreen: function () {
			var oFCL = this.getView().getParent().getParent();
    		oFCL.setLayout(fioriLibrary.LayoutType.MidColumnFullScreen);

    		var oButtons = this.getView().getModel("buttons");
    		oButtons.setProperty("/fullScreen", false);
    		oButtons.setProperty("/exitFullScreen", true);
		},

		onExitFullScreen: function () {
			var oFCL = this.getView().getParent().getParent();
    		oFCL.setLayout(fioriLibrary.LayoutType.TwoColumnsMidExpanded);

    		var oButtons = this.getView().getModel("buttons");
    		oButtons.setProperty("/fullScreen", true);
    		oButtons.setProperty("/exitFullScreen", false);
		},

		onClose: function () {
			var oFCL = this.getView().getParent().getParent();
    		oFCL.setLayout(fioriLibrary.LayoutType.OneColumn);

    		//初期状態に戻す
    		var oButtons = this.getView().getModel("buttons");
    		oButtons.setProperty("/fullScreen", true);
    		oButtons.setProperty("/exitFullScreen", false);
		}
Semantic Helperを使わないと
以上の実装で一応、求める動きにはなってくれます。しかし、この方法には以下の欠点があります。
- 押されたボタンに応じてどのレイアウトを設定するか考える必要がある
- ボタンの表示属性も同様に自分でコントロールする必要がある
この不便を解消してくれるのがSemantic Helperです。
Semantic Helperの役割
- ナビゲーションによって別のビューに移動するとき、どのlayoutを使えばいいか提案してくれる
- 最大化/元に戻す/閉じるなどのアクションボタンの表示制御をしてくれる
Semantic Helperの実装方法はこちらのドキュメントに書かれていますが、ヘルパーという割には実装時にやらなければならないことが多く、理解しづらかったです。この記事は長くなってしまったので一旦切り上げて、次回Semantic Helperの使い方について整理したいと思います。
##Flexible Column Layoutの実装方法まとめ
- 土台となるビューにFlexibleColumnLayoutコントロールを置く
- 表示するビューは、aggregaion:begin/mid/endColumnPagesのいずれかに配置する
- layoutプロパティは、1ページに何カラム表示するのか、またどのカラムを大きく表示するのかを決定を制御する