はじめに
SAP Cloud Application Programming Model (CAP)はTypeScriptの使用をサポートしています。CAPでTypeScriptを使用する方法については、以下のブログおよびGitリポジトリが参考になります。
①Typeの定義を自分で行う方法
- ブログ | Full Stack TypeScript App for Cloud Foundry – Sample Repository
- Gitリポジトリ | SAP-samples/btp-full-stack-typescript-app
②Typeの定義をcds2tpesにより行う方法
cds2typesはcdsで定義したスキーマやサービスをもとに、自動的にTypeの定義を生成してくれるツールです。
やってみること
このブログでは以下のことを行います。
- SAP-samples/cloud-cap-samples/bookshopで定義されているスキーマおよびサービスをもとに、②の方法で型の定義を生成
- イベントハンドラをTypeScriptで実装
- 作成したプロジェクトのビルド&デプロイを実施
環境について
始めはローカルのVS Codeを使用していましたが、TypeScriptのCAPサービスを起動するためのcds-tsコマンドがWindowsでは動かなかったため、途中からBusiness Application Studioに切り替えました。
ステップ
- 事前準備
- ベースとなるプロジェクトを作成
- tsconfig.jsonを追加
- cds2typesでinterfaceとenumを生成
- イベントハンドラをtsで作成
- ビルド、デプロイ
1. 事前準備
capireの指示に従い、typescriptとts-nodeをインストールします。
npm i -g typescript ts-node
2. ベースとなるプロジェクトを作成
以下のコマンドで通常通りCAPプロジェクトを作成します。
cds init bookshop-ts
参考のリポジトリからcdsおよびcsvファイルをコピーして作成します。最終的に以下のような形になります。元のリポジトリにはサービスが複数ありますが、ここではcat-service.cdsのみ使用します。

上記の状態のプロジェクトをGitリポジトリのmainブランチに置いています。
https://github.com/miyasuta/bookshop-ts
3. tsconfig.jsonを追加
プロジェクトのルートにtsconfig.jsonファイルを追加します。設定内容は以下のGitリポジトリを参考にしました。
SAP-samples/btp-full-stack-typescript-app
{
    "compilerOptions": {
        "target": "es6",
        "module": "commonjs",
        "outDir": "./gen/srv/srv",
        "rootDir": "./srv",
        "baseUrl": "./",
        "moduleResolution": "node",
        "skipLibCheck": true,
        "preserveConstEnums": true,
        "sourceMap": false,
        "allowJs": true,
        "strict": true,
        "strictNullChecks": false,
        "strictPropertyInitialization": false,
        "esModuleInterop": true
    },
    "include": [
        "./srv/**/*"
    ]
}
4. cds2typesでinterfaceとenumを生成
cds2typesをdevdependencyに追加します。
npm install --save-dev cds2types
cds2typesコマンドの実行でエラーになったため、npm install -g cds2typesでcds2typesをグローバルにもインストールしました。

.tsファイル格納用のディレクトリを用意します。どこに作ってもよいのですが、ここではsrv/typesとしました。

以下のコマンドを実行して、.cdsファイルからインターフェースおよびenumの定義を作成します。
cds2types --cds srv/cat-service.cds --output srv/types/ --prefix I
4つのファイルが生成されました。
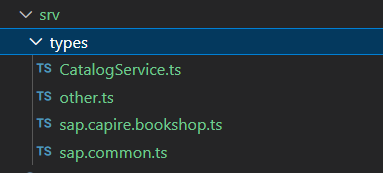
- CatalogService.ts: サービスで定義したエンティティに対応するインターフェース、およびエンティティを列挙したenum
- other.ts: User, Entity, SanitizedEntityを定義(中はほぼ空)
- sap.capire.bookshop.ts: DBのスキーマで定義したエンティティに対応するインターフェース、およびエンティティを列挙したenum
-
sap.common.ts:
@sap/cds/commonで提供される事前定義エンティティ(Languages, Countries, Currencies等)に対応するインターフェース、およびenum
5. イベントハンドラをtsで作成
ステップ4で作成したインターフェースを使用してTypeScriptでイベントハンドラを作成していきます。まずは、こちらのリポジトリにあるjsのソースをコピーしてtsとして保存してみます。

貼り付けた時点では色々なエラーが出ています。
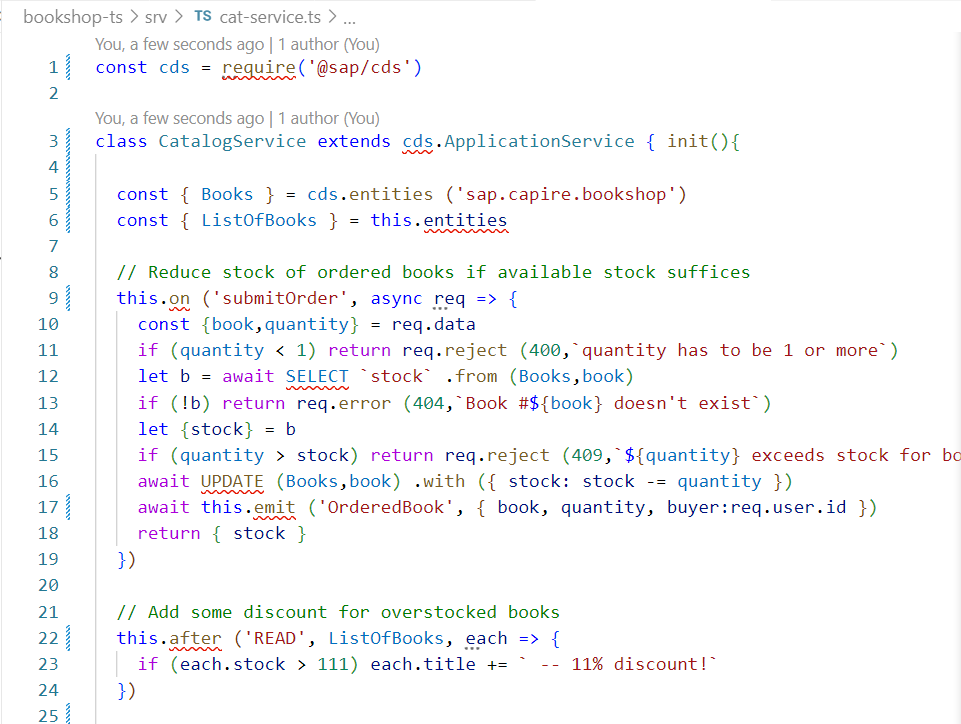
以下のようにソースを変更しました。このあとTypeSceiptにするにあたって変更したポイントを説明します。
import { ApplicationService } from '@sap/cds'
import { IListOfBooks, IBooks, IActionSubmitOrderParams } from './types/CatalogService'

export class CatalogService extends ApplicationService { async init(){
  const db = await cds.connect.to('db')
  const { Books } = db.entities
  const { ListOfBooks } = this.entities

  // Reduce stock of ordered books if available stock suffices
  this.on ('submitOrder', async req => {
    const params = req.data as IActionSubmitOrderParams
    const {book,quantity} = params
    if (quantity < 1) return req.reject (400,`quantity has to be 1 or more`)
    let b = await SELECT `stock` .from (Books,book) as IBooks
    if (!b) return req.error (404,`Book #${book} doesn't exist`)
    let {stock} = b
    if (quantity > stock) return req.reject (409,`${quantity} exceeds stock for book #${book}`)
    await UPDATE (Books,book) .with ({ stock: stock -= quantity })
    await this.emit ('OrderedBook', { book, quantity, buyer:req.user.id })
    return { stock }
  })

  // Add some discount for overstocked books
  this.after ('READ', ListOfBooks, each => {
    const listOfBooks = each as IListOfBooks
    if (listOfBooks.stock > 111) listOfBooks.title += ` -- 11% discount!`
  })

  return super.init()
}}
5.1. ソースの変更箇所
①ApplicationServiceをインポートする
TypeScriptではrequireが使えないのと、import cds from...としてもcds.ApplicationServiceという書き方ができなかったため、以下のように変えました。
const cds = require('@sap/cds')

class CatalogService extends cds.ApplicationService { init(){
 import { ApplicationService } from '@sap/cds'

 export class CatalogService extends ApplicationService { async init(){
②cds.entitesの代わりにdb.entitiesを使う
"entites"というプロパティがcds_facadeに存在しないというエラーになったため、まずdbに接続し、db.entitesによってBooksを取得してくるようにしました。
const { Books } = cds.entities ('sap.capire.bookshop')
   const db = await cds.connect.to('db')
   const { Books } = db.entities
③cds2typesで定義したインターフェースを使う
①②でエラーは消えますが、せっかくステップ4.でインターフェースを作成したのでそれらを使ってみます。
まず先頭でインターフェースの定義をインポートします。
import { IListOfBooks, IBooks, IActionSubmitOrderParams } from './types/CatalogService'
- submitOrderのイベントハンドラでは、パラメータ
req.dataをIActionSubmitOrderParamsの型にキャストします。
  this.on ('submitOrder', async req => {
    const {book,quantity} = req.data
  this.on ('submitOrder', async req => {
    const params = req.data as IActionSubmitOrderParams
    const {book,quantity} = params
これにより、インターフェースに定義されていない項目を受け取ろうとするとエラーになります。

- データベースからSELECTする箇所では、結果を
IBooksの型にキャストします。
let b = await SELECT `stock` .from (Books,book)
let b = await SELECT `stock` .from (Books,book) as IBooks
- READのイベントハンドラでは、パラメータ
eachをIListOfBooksの型にキャストします。
  this.after ('READ', ListOfBooks, each => {
    if (each.stock > 111) each.title += ` -- 11% discount!`
  })
  this.after ('READ', ListOfBooks, each => {
    const listOfBooks = each as IListOfBooks
    if (listOfBooks.stock > 111) listOfBooks.title += ` -- 11% discount!`
  })
5.2. ローカルで実行
ローカルで実行するには、以下のコマンドを実行します。
cds-ts watch
※WindowsのPowerShellで実行すると、エラーが出ました。以下のスレッドにワークアラウンドが載っていますが、今回はBASでの実行に切り替えました。
https://answers.sap.com/questions/13560254/cap-cds-ts-powershell-bug.html
https://answers.sap.com/questions/13431720/capcds-ts-powershell-the-term-ts-nodeexe-is-not-re.html

6. ビルド、デプロイ
6.1. スクリプトを追加
- こちらのブログを参考に以下のスクリプトをpackage.jsonに追加します。
  "scripts": {
    ...
    "build:cf": "npm run build:cds && npm run cleanup:ts && npm run build:ts",
    "build:ts": "tsc",
    "build:cds": "cds build --production",
    "cleanup:ts": "npx rimraf gen/srv/srv/**/*.ts"
  }
6.2. HANA Cloudを使用する設定を追加
cds add hana
6.3. mta.yamlを追加
cds add mta
mta.yamlのbuild-parametersのコマンドを以下のように変更します。
※参考にしたリポジトリではnpm install --productionコマンドを使っていましたが、devDependencyとしてインストールした@types/node(後述)が使えなくなってしまうため、devDependencyも含めてインストールするようにしています。
build-parameters:
  before-all:
    - builder: custom
      commands:
        - npm install
        - npm run build:cf
6.4. ビルド
mbt build
ビルドの中で実行されるtscコマンドで以下のエラーが発生しました。
①Bufferが見つからない

対応:npm i --save-dev @types/nodeを実行
②Currenciesが見つからない

対応:ICurrenciesをインポートして、Currenciesの代わりにICurrenciesを使用する
import { Locale, ICurrencies } from "./sap.common";

export interface IBooks {
    ...
    currency: ICurrencies;
※この事象はcds2typesのGitリポジトリにissueとして上がっています。
https://github.com/mrbandler/cds2types/issues/52
6.5. デプロイ
cf deploy mta_archives/bookshop-ts_1.0.0.mtar
動作確認
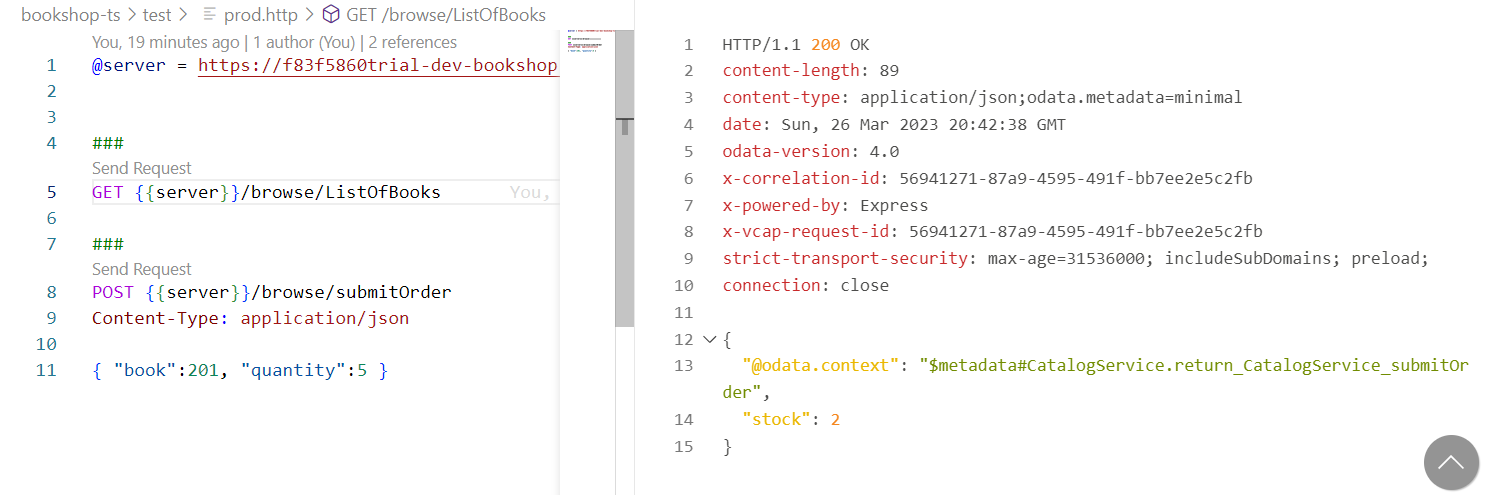
.httpファイルを作成してテストを行うと、デプロイしたイベントハンドラが正しく動いていることが確認できます。
@server = https://...trial-dev-bookshop-ts-srv.cfapps.us10-001.hana.ondemand.com


###
GET {{server}}/browse/ListOfBooks

###
POST {{server}}/browse/submitOrder
Content-Type: application/json

{ "book":201, "quantity":5 }
感想
正直なところ私はそれほどメリット(TypeScriptを使わないときと比べてよくなった!)を感じませんでした。UI5でType Scriptを使ったときは、従来だとできなかったES6に対応した書き方ができるため良さを感じたのですが、CAPの場合はTypeScriptを使わなくてもそれができる、ということが主な理由です。
今回使用したサービスはエンティティや項目数も限られたものでしたが、もっと大きいプロジェクトでは型の定義をちゃんとしておくことで開発時のミスを減らせる(気づける)、というTypeScript本来の利点を感じられるのだろうと思います。