OPA5でナビゲーションのテスト
リストの行を選択したときに詳細画面に遷移するナビゲーションを作ってテストします。
参考にするチュートリアル
Step 8: Testing Navigation
Step 9: Adding the Post Page
「チュートリアルを見ながらTest Driven Developmentを体験する」シリーズの目次はこちら
User Journey
OPA5テストでは、最初にUser Journeyを考えるのが定石でした。以下が今回のUser Journeyです。
- リストの行を選択して詳細を見る
- 詳細画面から「戻る」ボタンを押してリストに戻る
- リスト画面から「進む」ボタンを押して詳細画面を再表示する
テスト用の構成
新規にPostJourney.jsとPost.jsというファイルを作ってナビゲーションをテストします。PostJourney.jsと、テスト用jsファイルの関係は以下のようになります。このように一つのJourneyから複数のpage objectを使うこともできます。
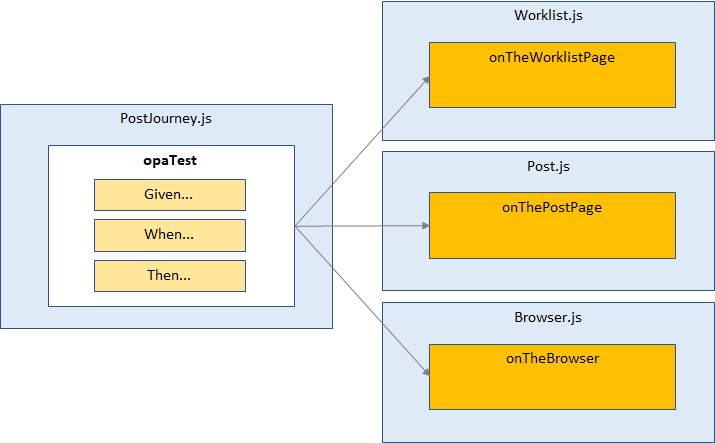
webapp/test/integration/PostJourney.js
User Journeyをベースにテストを配置します。
sap.ui.define([
	"sap/ui/test/opaQunit",
	"./pages/Worklist",
	"./pages/Browser",
	"./pages/Post"
], function (opaTest) {
	"use strict";

	QUnit.module("Post");

	//1. 行選択して詳細画面に移動
	opaTest("Should see the post page when a user clicks on an entry of the list", function (Given, When, Then) {
		// Arrangements
		Given.iStartMyApp();

		// Actions
		When.onTheWorklistPage.iPressOnTheItemWithTheID("PostID_15");

		// Assertions
		Then.onThePostPage.theTitleShouldDisplayTheName("Jeans");
	});

	//2. 「戻る」を押して一覧画面に戻る
	opaTest("Should go back to the TablePage", function (Given, When, Then) {
		// Actions
		When.onThePostPage.iPressTheBackButton();

		// Assertions
		Then.onTheWorklistPage.iShouldSeeTheTable();
	});

	//3. 「進む」を押して詳細画面を再表示
	opaTest("Should be on the post page again when the browser's forward button is pressed", function (Given, When, Then) {
		// Actions
		When.onTheBrowser.iPressOnTheForwardButton();

		// Assertions
		Then.onThePostPage.theTitleShouldDisplayTheName("Jeans");

		// Cleanup
		Then.iTeardownMyApp();
	});

});
webapp/test/integration/pages/Worklist.js
リストの行をクリックするアクションをWorklistに追加します。BindingPathというタイプのmatcherを使って、指定したIDを持つbinding pathがリストに存在するかどうかをチェックし、存在したらその行をクリックします。
①dependencyを追加
sap.ui.define([
		'sap/ui/test/Opa5',
		'sap/ui/test/matchers/AggregationLengthEquals',
		'sap/ui/test/matchers/I18NText',
		'sap/ui/test/matchers/BindingPath', ←追加
		'sap/ui/test/actions/Press'
	],
②actionを実装
				actions: {
					//・・・
					iPressOnTheItemWithTheID: function (sId) {
						return this.waitFor({
							controlType: "sap.m.ColumnListItem",
							viewName: sViewName,
							matchers: new BindingPath({
								path: "/Posts('" + sId + "')"
							}),
							actions: new Press(),
							errorMessage: "No list itme with the id" + sId + " was found."
						});
					}
③assertionを追加
「戻る」ボタンを押た後、一覧に戻ったことを確認するためのassertionを追加します。テーブルが見えているかどうかで判定します。
					iShouldSeeTheTable: function () {
						return this.waitFor({
							id: sTableId,
							viewName: sViewName,
							success: function() {
								Opa5.assert.ok(true, "The table is visible");
							},
							errorMessage: "Was not able to see the table"
						});
					}
webapp/test/integration/pages/Post.js
詳細画面での操作に関するテスト用jsファイルを新規に作成します。
sap.ui.define([
'sap/ui/test/Opa5',
'sap/ui/test/matchers/Properties',
'sap/ui/test/actions/Press'
], function(Opa5, Properties, Press){
"use strict";
var sViewName = "Post";
Opa5.createPageObjects({
onThePostPage: {
//baseClass: Common,
actions: {
//詳細画面で戻るボタンを押す
iPressTheBackButton: function (){
return this.waitFor({
id: "page",
viewName: sViewName,
actions: new Press(),
errorMessage: "Did not find the nav button on object page"
});
}
},
assertions: {
//詳細画面が表示されることを確認
theTitleShouldDisplayTheName: function (sName){
return this.waitFor({
success: function () {
return this.waitFor({
id: "objectHeader",
viewName: sViewName,
matchers: new Properties({
title: sName
}),
success: function (oPage) {
Opa5.assert.ok(true, "was on the remembered detail page");
},
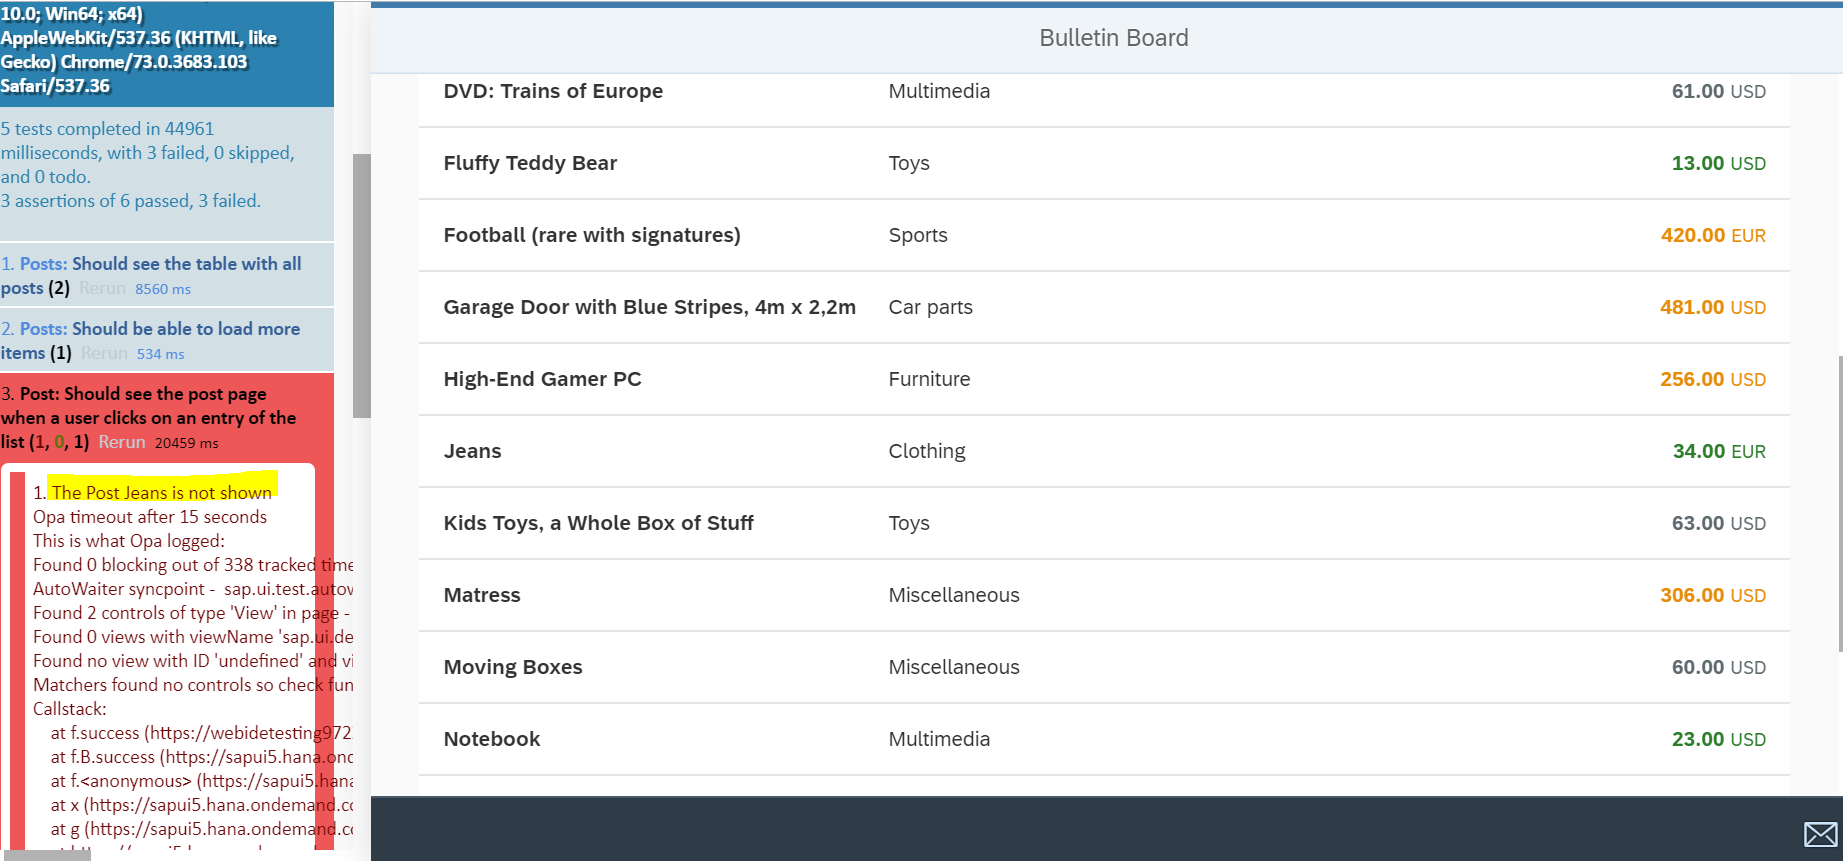
errorMessage: "The Post " + sName + " is not shown"
});
}
});
}
}
}
});
});
上記のソースは冒頭に記載したチュートリアルからのコピーですが、ここで気になったのは、theTitleShouldDisplayTheNameメソッドです。
waitForが入れ子になっていますが、何のためなのでしょうか?現時点では理由はわかりません。試しに外側のwaitForをコメントアウトしてみましたが、結果は同じでした。
webapp/test/integration/pages/Browser.js
ブラウザの「進む」ボタンを押すアクションを追加します。ブラウザ関係の操作は共通で使うものなので、独立したファイルにします。
sap.ui.define([
	'sap/ui/test/Opa5'
], function(Opa5){
	"use strict";
		Opa5.createPageObjects({
			onTheBrowser: {
				//baseClass: Common,
				actions: {
					iPressOnTheForwardButton: function () {
						return this.waitFor({
							success: function () {
								Opa5.getWindow().history.forward();
							}
						});
					}
				},
				assertions: {}
			}
		});
});
webapp/test/integration/AllJourneys.js
最後に、AllJourneys.jsに新しく追加したPostJourneyを追加します。
sap.ui.define([
	"sap/ui/test/Opa5",
	"./arrangements/Startup",
	"./WorklistJourney",
	"./PostJourney" ←追加
実行してみる
一つ目のテストでエラーになりました。エラーメッセージから、詳細画面が表示されないためエラーになったことがわかります。
Routingを実装する
ナビゲーションができるように詳細画面用のビュー(Post.view.xml)とRoutingを実装します。
※Routingの仕組みについては以下の記事をご参照ください。
【SAPUI5】Routingでナビゲーション
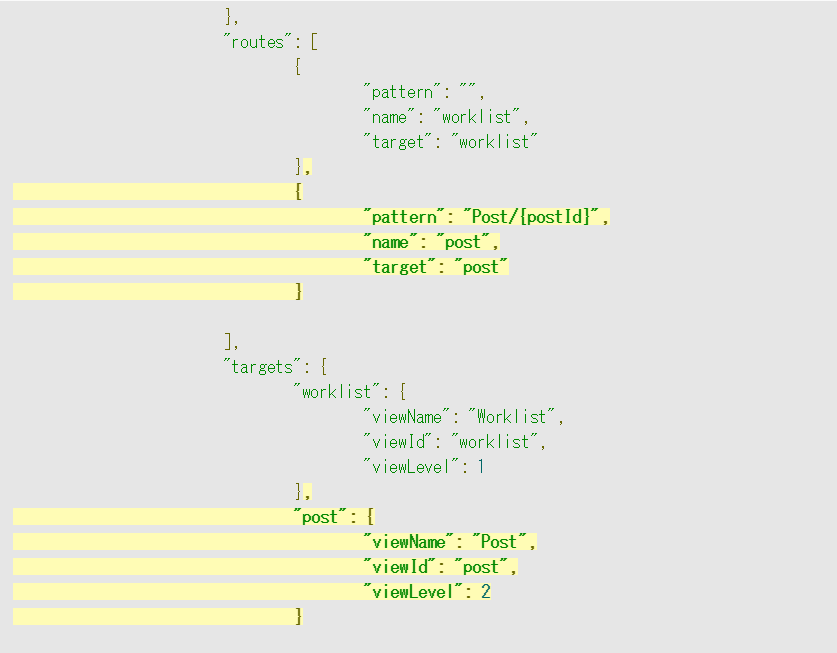
webapp/manifest.json
Routingの設定を追加します。
webapp/view/Worklist.view.xml
リストの行を選択したときのアクションを追加します。
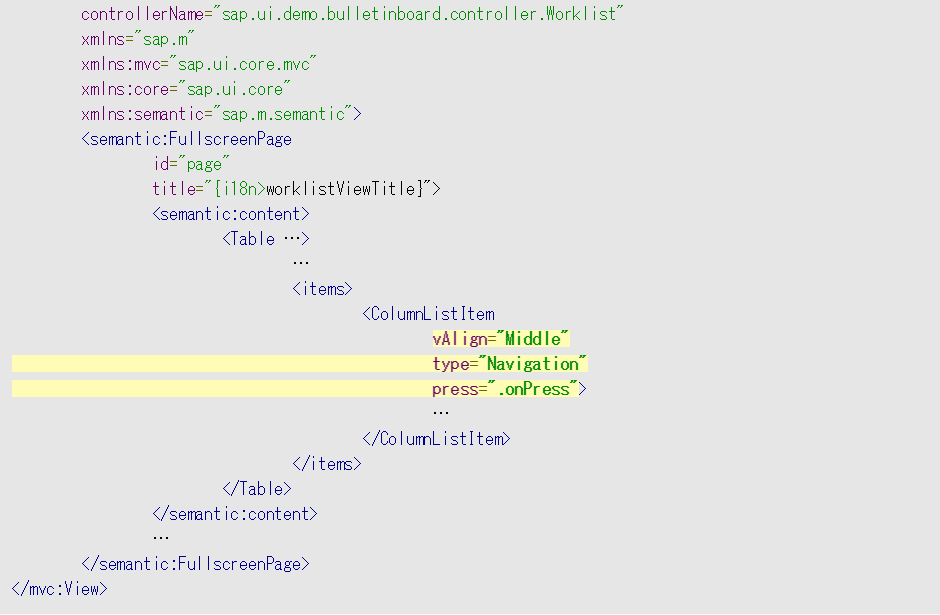
この時点では行選択しても何も起きませんが、矢印が表示されるようになります。
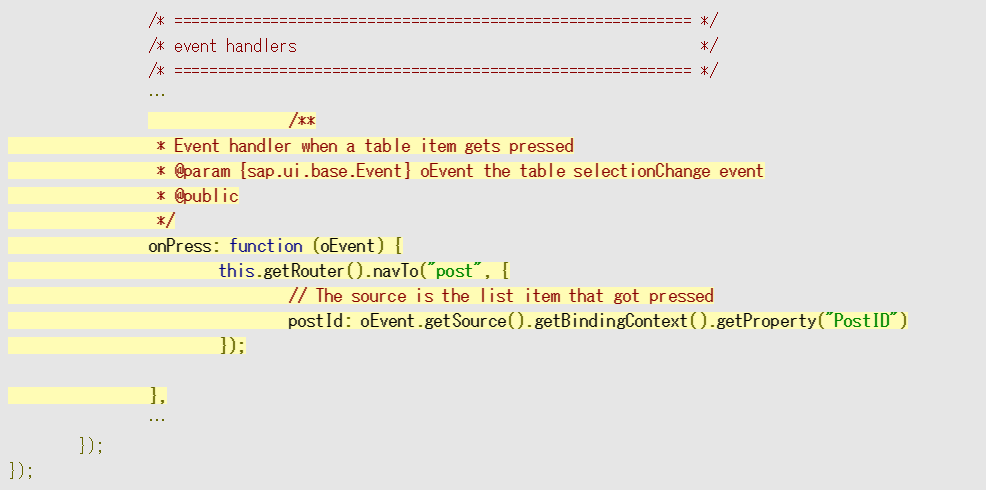
webapp/controller/Worklist.controller.js
行選択したときに呼ばれるメソッドを実装します。
webapp/view/Post.view.xml
詳細画面用のビューを新規に作成します。
<mvc:View
	controllerName="sap.ui.demo.bulletinboard.controller.Post"
	xmlns="sap.m"
	xmlns:mvc="sap.ui.core.mvc"
	xmlns:semantic="sap.m.semantic">
	<semantic:FullscreenPage
		id="page"
		busy="{postView/busy}"
		busyIndicatorDelay="0"
		navButtonPress=".onNavBack"
		showNavButton="true"
		title="{i18n>objectTitle}">
		<semantic:content>
			<ObjectHeader
				id="objectHeader"
				title="{Title}"
				number="{
					path: 'Price',
					formatter: '.formatter.numberUnit'
				}"
				numberUnit="{Currency}"
				backgroundDesign="Translucent"
				>
			</ObjectHeader>
		</semantic:content>
	</semantic:FullscreenPage>
</mvc:View>
webapp/controller/Post.controller.js
詳細画面用のコントローラーを実装します。
sap.ui.define([
    './BaseController',
    'sap/ui/model/json/JSONModel',
    '../model/formatter'
], function(BaseController, JSONModel, formatter) {
    "use strict";

	return BaseController.extend("sap.ui.demo.bulletinboard.controller.Post", {

		formatter: formatter,

		/* =========================================================== */
		/* lifecycle methods                                           */
		/* =========================================================== */

		/**
		 * Called when the worklist controller is instantiated.
		 * @public
		 */
		onInit: function () {
			// ビューのbusyプロパティに設定する値
			var oViewModel = new JSONModel({
				busy: false
			});
			this.getRouter().getRoute("post").attachPatternMatched(this._onPostMatched, this);
			this.setModel(oViewModel, "postView");
		},

		/* =========================================================== */
		/* event handlers                                              */
		/* =========================================================== */
		onNavBack: function () {
			//BaseControllerのメソッド
			this.myNavBack("worklist");
		},

		/* =========================================================== */
		/* internal methods                                            */
		/* =========================================================== */
		/**
		 * Binds the view to the post path.
		 *
		 * @function
		 * @param {sap.ui.base.Event} oEvent pattern match event in route 'object'
		 * @private
		 */
		 _onPostMatched: function (oEvent) {
		 	var oViewModel = this.getModel("postView"),
		 		oDataModel = this.getModel();
			this.getView().bindElement({
				path: "/Posts('" + oEvent.getParameter("arguments").postId + "')",
				events: {
					dataRequested: function () {
						oDataModel.metadataLoaded().then(function () {
							// metadataがロードされてからbusy属性をセットしないと、
							// busy indicatorが2つ表示されてしまう
							oViewModel.setProperty("/busy", true);
						});
					},
					dataRecieved: function () {
						oViewModel.setProperty("/busy", false);
					}
				}
			});
		 }
	});
});
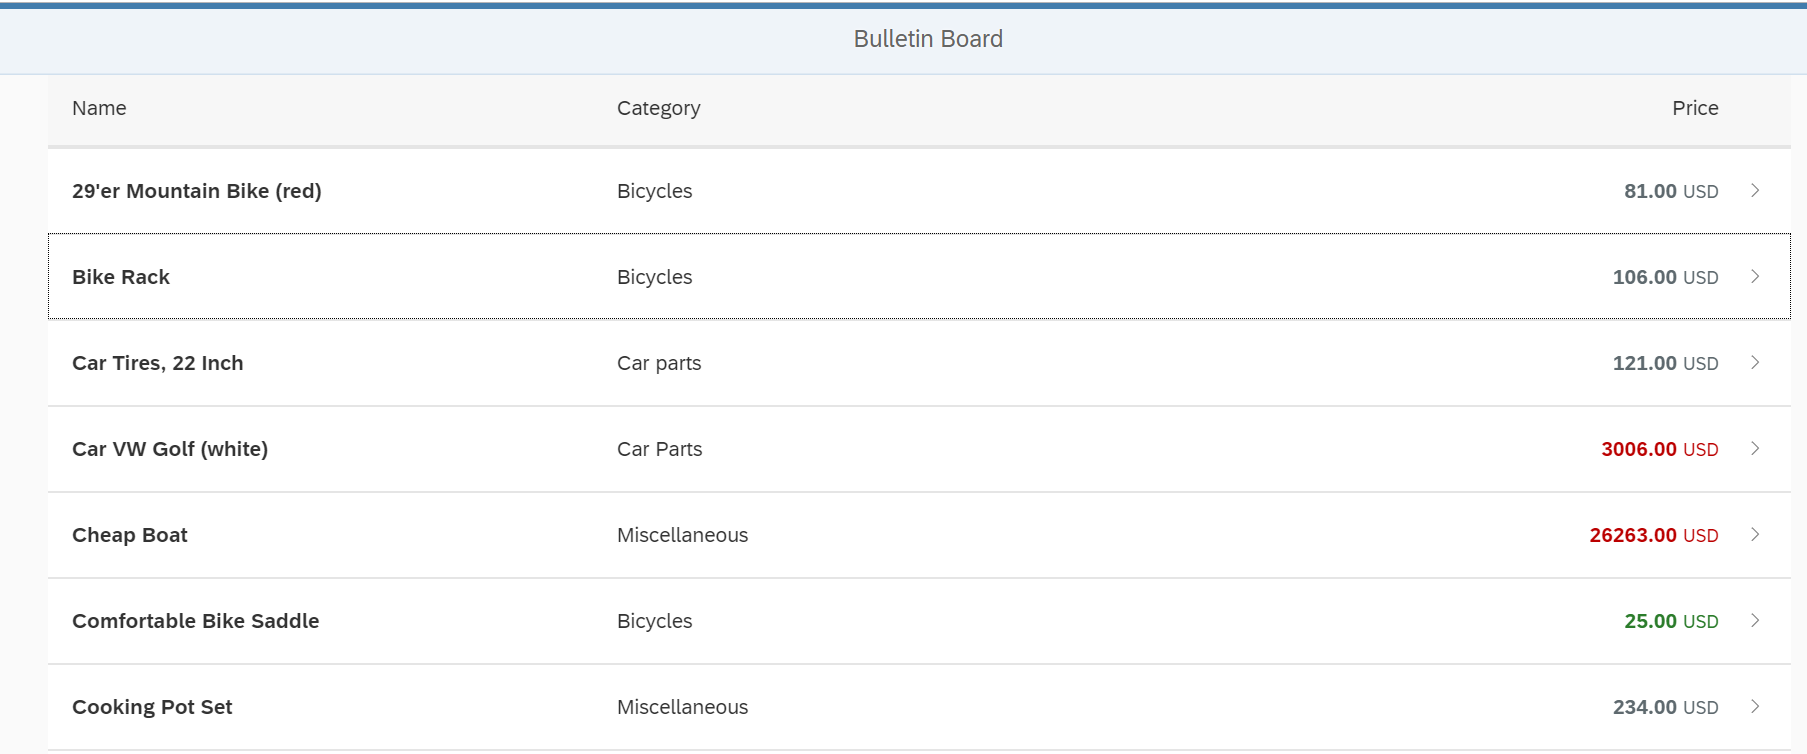
動作確認
一覧画面

行を選択すると、詳細画面に移動します。
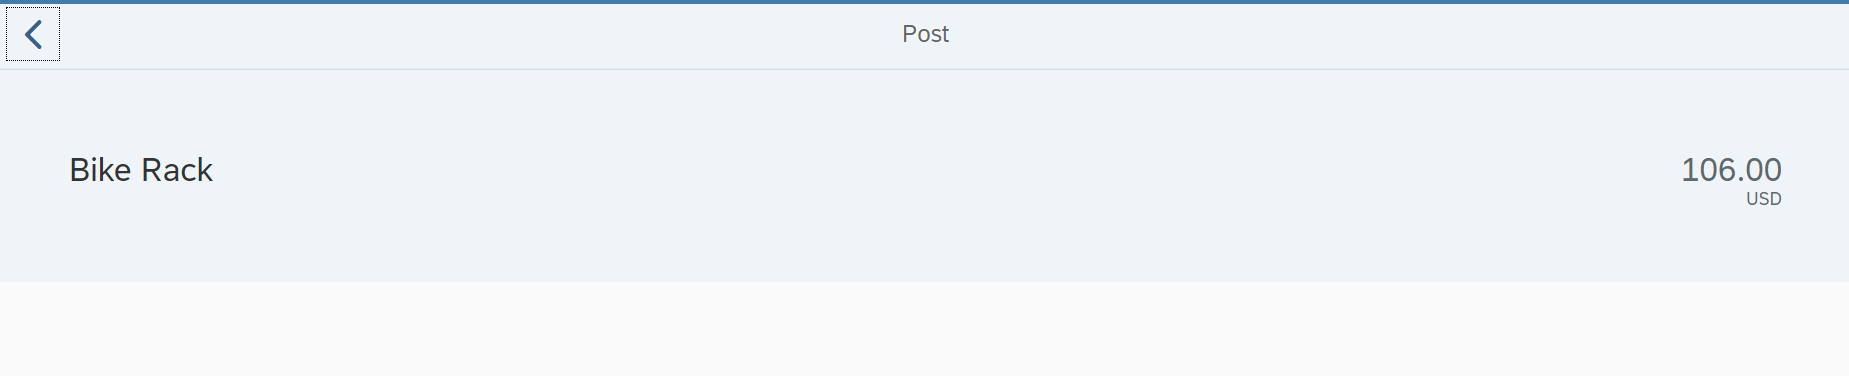
戻るボタン(左上の矢印)を押すと、前の画面に戻ります。
ブラウザの「進む」ボタンを押すと、直前に見ていた詳細画面に戻ります。
これで動作確認OKな気もしますが、今回の目的はテストなので、OPAテストを実行します。
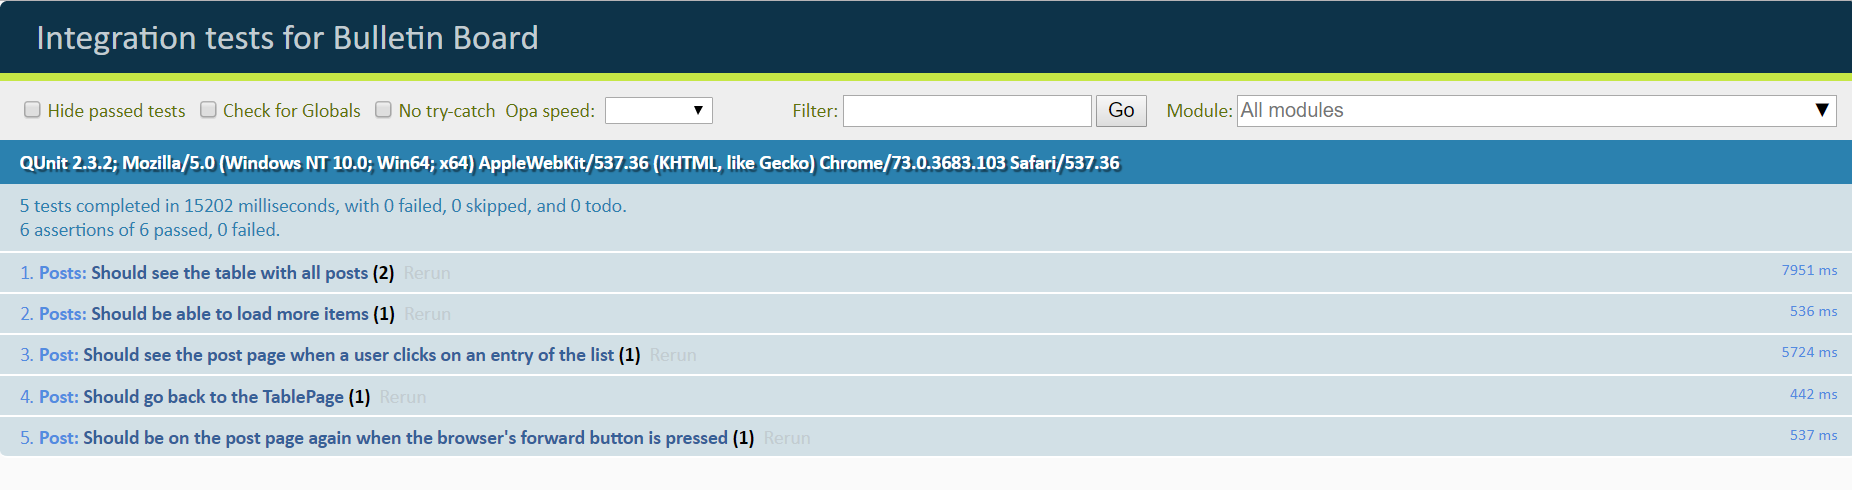
テストを実行
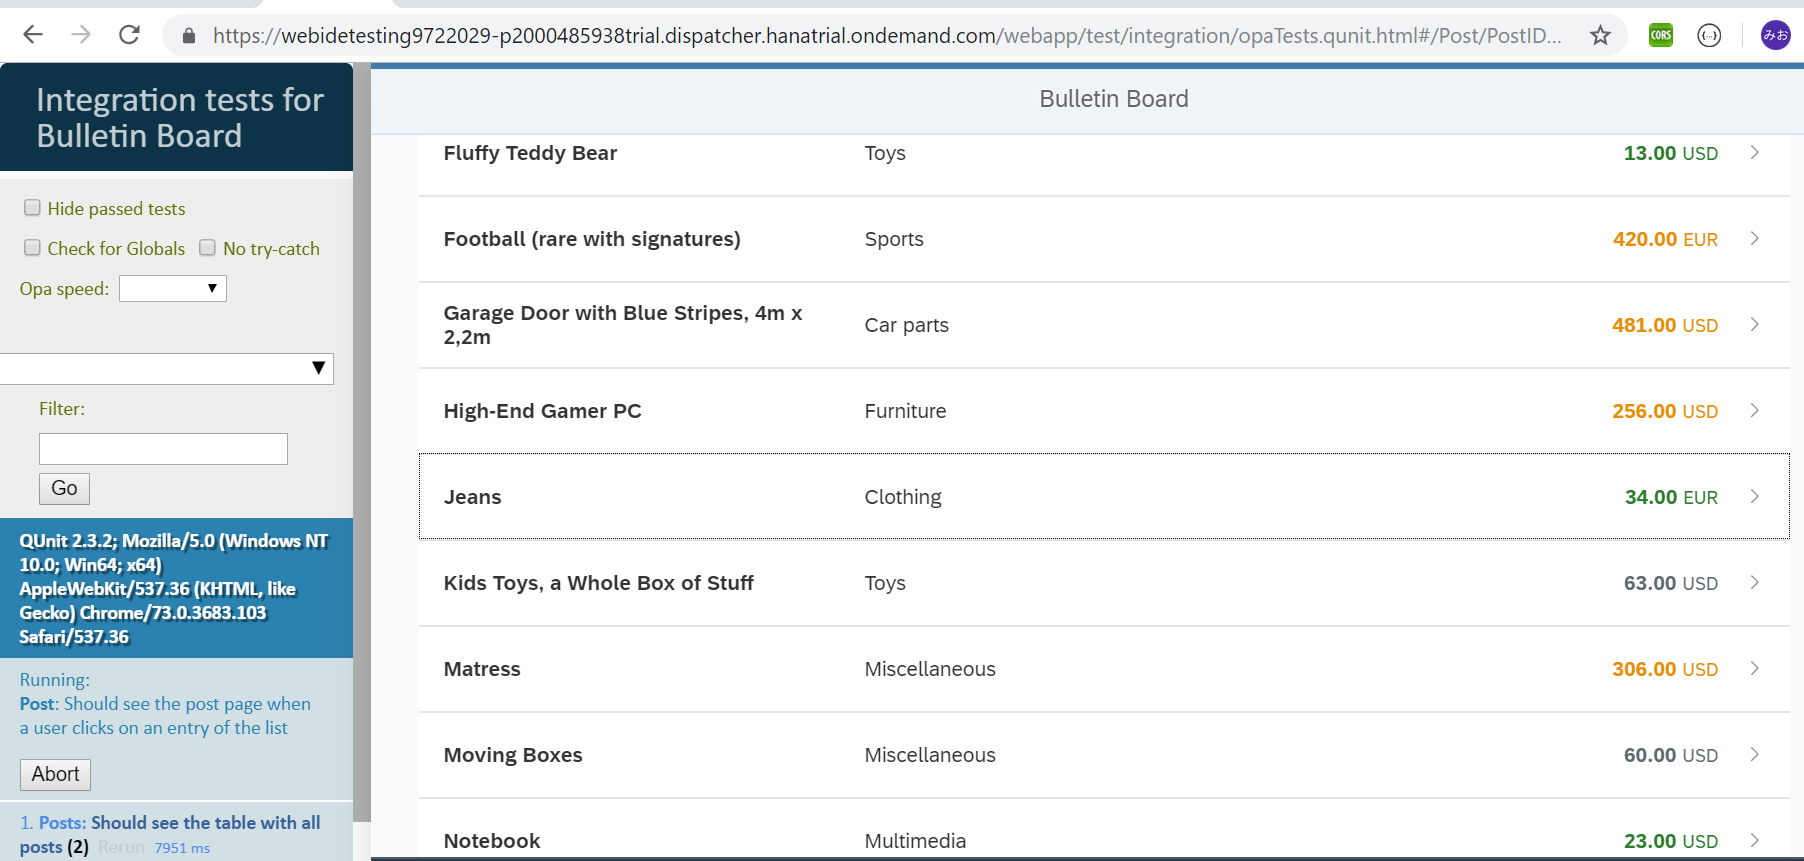
正常終了しました。
関連記事
チュートリアルを見ながらTest Driven Developmentを体験する (3) OPA5
チュートリアルを見ながらTest Driven Developmentを体験する (5) 検索機能