はじめに
この記事は、SAP Cloud SDK for JavaScriptを使ってみるシリーズの4回目です。
今回は、Project "Piper"のライブラリを使って(1)~(3)で作ったプロジェクトをJenkinsのパイプラインでビルド、テスト、デプロイします。
SAP Cloud SDKで生成されるCI/CDのためのファイル
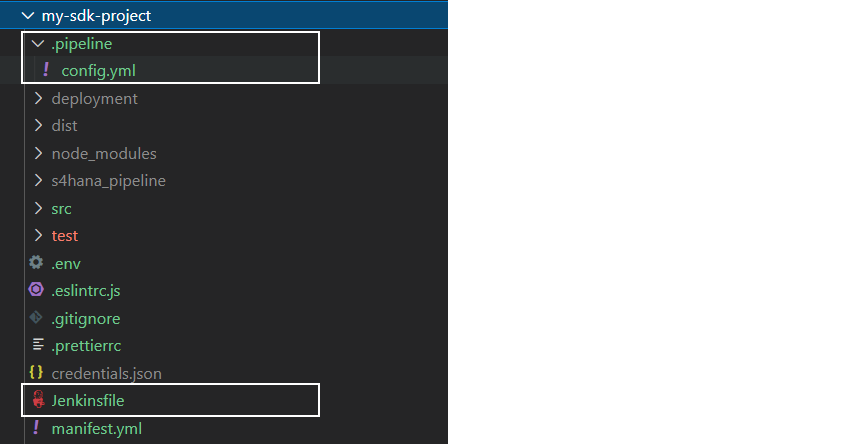
CLIでプロジェクトを生成すると、Jenkinsfileと/.pipeline/config.ymlというファイルが作られます。これらがCI/CDのための設定ファイルです。

【注意】デフォルトの設定は古い!
デフォルトのJenkinsfileはSAP Cloud SDK Pipelineを使う設定になっています。しかし、こちらのドキュメントによると、今後はSAP Cloud SDK Pipelineは使わずにProject "Piper"のGeneral Purpose Pipelineを使うことが推奨されています。
# !/usr/bin/env groovy

/*
 * This file bootstraps the codified Continuous Delivery pipeline for extensions of SAP solutions such as SAP S/4HANA.
 * The pipeline helps you to deliver software changes quickly and in a reliable manner.
 * A suitable Jenkins instance is required to run the pipeline.
 * The Jenkins can easily be bootstraped using the life-cycle script located inside the 'cx-server' directory.
 *
 * More information on getting started with Continuous Delivery can be found in the following places:
 *   - GitHub repository: https://github.com/SAP/cloud-s4-sdk-pipeline
 *   - Blog Post: https://blogs.sap.com/2017/09/20/continuous-integration-and-delivery
 */

/*
 * Set pipelineVersion to a fixed released version (e.g. "v15") when running in a productive environment.
 * To find out about available versions and release notes, visit: https://github.com/SAP/cloud-s4-sdk-pipeline/releases
 */
String pipelineVersion = "master"

library "s4sdk-pipeline-library@${pipelineVersion}"
cloudSdkPipeline(script: this)
Project "Piper"について
Project "Piper"には、パイプラインのステップで使うためのライブラリが用意されています。使い方としては、Jenkinsfileで実行するステップを定義し、.pipeline/config.yamlで全ステップに共通の設定("general" configuration)や、各ステップに渡すパラメータなどの細かい設定("step" configuration)をします。ステップの設定については、Jenkinsfileで設定したものが.pipeline/config.yamlよりも優先されます。

図:https://www.project-piper.io/configuration/より引用
さらに、2つの代表的なパイプラインとしてGeneral Purpose PipelineとABAP Environment Pipelineが用意されています。これらはどのようなステージ、ステップを使用するかを指南するベストプラクティスのようなものと私は理解しています。そのまま使えるわけではなく実行したいステップや環境に合わせたパラメータ設定が必要です。
CI/CDパイプラインの設定
今回は、Prepare、Build、Integration、Deployの4つのステップを設定します。

.pipeline/config.yamlの一般設定
ここでは、buildToolにnpmを使うという設定をしています。buildToolは以下で出てくるステップのbuildExecuteやcloudFoundryDeployで使われます。generalセクションで設定しておくと、すべてのステップで有効になります。
### General project setup
general:
  buildTool: 'npm'
ステージの設定
Jenkinsfileは以下のようになっています。
@Library('piper-lib-os') _

node(){
  stage('Prepare')   {
      deleteDir()
      checkout scm
      setupCommonPipelineEnvironment script:this
  }

  stage('Build')   {
    buildExecute script:this, npmRunScripts:['ci-build', 'ci-package']
  }

  stage('Integration') {
    npmExecuteScripts script:this, runScripts:['ci-integration-test']
    testsPublishResults script: this, junit:[pattern: '**/backend-integration/*.xml', updateResults: true, archive: true]
  }

  stage('Deploy')   {
      cloudFoundryDeploy script:this, deployTool: 'cf_native'
  }
}
Prepareステージ
  stage('Prepare')   {
      deleteDir()
      checkout scm
      setupCommonPipelineEnvironment script:this
  }
最初の二つのステップはJenkinsのプラグインです。
- deleteDir(): カレントディレクトリを再帰的に削除する
- checkout scm: バージョンコントロールからチェックアウトする
三つ目のステップはProject "Piper"のライブラリステップsetupCommonPipelineEnvironmentを使用します。このステップは、パイプラインで使われる設定(パラメータ)を初期化します。
Buildステージ
  stage('Build')   {
    buildExecute script:this, npmRunScripts:['ci-build', 'ci-package']
  }
ライブラリステップのbuildExecuteを使用します。buildExecuteではビルドで実行するスクリプトを複数指定できます。SAP Cloud SDKのプロジェクトの場合、buildとpackageという2つのステップが必要です。必要なスクリプトはpackage.jsonに以下のように定義されているので、それらを指定します。
  "scripts": {
    ...
    "ci-build": "npm run build",
    "ci-package": "sap-cloud-sdk package --ci",
    "ci-integration-test": "jest --ci --config ./test/jest-e2e.json",
    "ci-backend-unit-test": "jest --ci"
  }
Integrationステージ
  stage('Integration') {
    npmExecuteScripts script:this, runScripts:['ci-integration-test']
    testsPublishResults script: this, junit:[pattern: '**/backend-integration/*.xml', updateResults: true, archive: true]
  }
一つ目のステップnpmExecuteScriptsでは、テストで実行するnpmのスクリプトを複数指定することができます。ここでは、e2eテストを実行するためのスクリプトを設定しました。
二つ目のステップtestsPublishResultsは、テスト結果をわかりやすい形で表示するためのステップです。表示する対象は、パターン**/backend-integration/*.xmlにマッチするファイル(=backend-integrationフォルダの下にある.xmlとつくファイル)です。
※この設定だとテストが失敗したときは二つ目のステップが実行されず、テスト結果が表示されません。失敗した場合もステップを実行する方法がわからなかったため今はこうしています。
Deployステージ
  stage('Deploy')   {
      cloudFoundryDeploy script:this, deployTool: 'cf_native'
  }
ライブラリステップのcloudFoundryDeployを使用します。今回はcf pushコマンドを使ったデプロイのためdeployToolにcf_nativeを指定しています。
さらに、.pipeline/config.yamlに以下の設定をしています。設定内容は、Cloud Foundryの認証情報、およびデプロイ先のAPIエンドポイント、組織、スペース情報です。また、manifest.ymlの内容を見てデプロイするので、manifestにmanifest.ymlを指定しています。
### General project setup
general:
  ...
### Step-specific configuration
steps:
  cloudFoundryDeploy:
    cloudFoundry:
      credentialsId: 'CF_CREDENTIALS'
      apiEndpoint: 'https://api.cf.eu10.hana.ondemand.com'
      org: 'b736177ctrial'
      space: 'dev'
      manifest: 'manifest.yml'
※credentialsIdに指定した'CF_CREDENTIALS'は、JenkinsのCredentialsに登録が必要です。

CI/CDパイプラインを実行
プロジェクトをGitに格納し、Jenkinsでパイプラインを設定します。
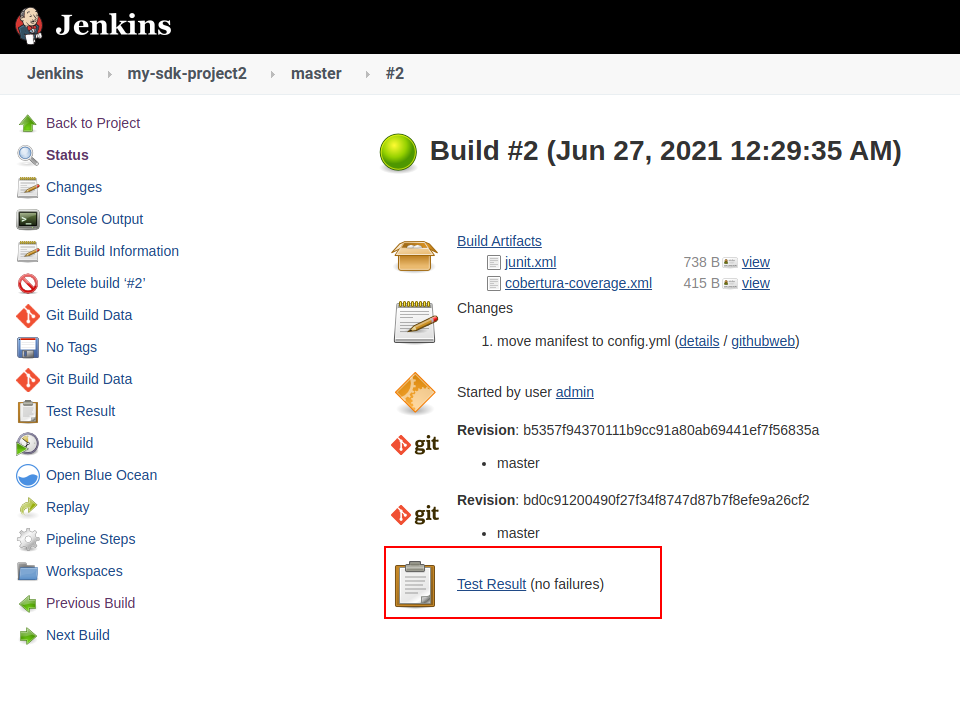
以下はパイプラインの実行結果です。

Integrationステージで作成したテストの結果が表示されます。

Cloud Foundryにアプリケーションがデプロイされたことが確認できました。

おまけ:テストがエラーの場合もテスト結果を表示する
上記で紹介した設定だと、テストがエラーのときは二つ目のステップが実行されず、テスト結果が表示されません。テスト結果を常に表示するためには、Jenkinsfileの設定を以下のようにします。
参考:Running multiple steps/Finishing up
@Library('piper-lib-os') _

pipeline {
    agent any

    stages {
        stage('Prepare')   {
            steps {
                deleteDir()
                checkout scm
                setupCommonPipelineEnvironment script:this
            }
        }

        stage('Build')   {
            steps {
                buildExecute script:this, npmRunScripts:['ci-build', 'ci-package']
            }
        }

        stage('Integration') {
            steps {
                npmExecuteScripts script:this, runScripts:['ci-integration-test']
            }
        }

        stage('Deploy')   {
            steps {
                cloudFoundryDeploy script:this, deployTool: 'cf_native', manifest: 'manifest.yml'
            }
        }
    }
    post {
        always {
            testsPublishResults script: this, junit:[pattern: '**/backend-integration/*.xml', updateResults: true, archive: true]
        }
    }
}


