はじめに
この記事は chillSAP 夏の自由研究2021 の記事として執筆しています。
前回の記事で、Event Meshの概要とAPIの使い方について紹介しました。今回はCAPを使ってメッセージを送受信してみたいと思います。
CAPを使うとEvent Meshとの統合が簡単にできます。今回は以下のようなシナリオを実装します。
- CAPからEvent Meshのトピックにメッセージを送信する
- 送信したメッセージをCAPのイベントハンドラで受け取る

自分で送信して自分で受信とは変な感じですが、簡単にするために1つのサービスにしています。
前提
Event Meshはトライアル版(dev)を使い、サービスインスタンスの作成まで完了させておきます。
サービスインスタンスの作成方法については、前回の記事をご参照ください。
ステップ
- CAPのプロジェクトを作成
- Event Meshを使うための設定
- 送信用のイベントハンドラを作成
- 受信用のイベントハンドラを作成
- デプロイ
1. CAPのプロジェクトを作成
以下のコマンドでCAPのプロジェクトを作成します。プロジェクト名はcap-emとしました。
cds init cap-em
必要なモジュールをインストールします。
npm install
2. Event Meshを使うための設定
以下のモジュールをインストールします。
npm i @sap/xb-msg-amqp-v100
package.jsonに以下の設定を追加します。
  "cds": {
    "requires": {
      "messaging": {
        "kind": "enterprise-messaging-shared"
      }
    }
  }
ローカル実行用の設定として、プロジェクトのルートにdefault-env.jsonファイルを作成します。まず、以下のような構造を作ります。
{
	"VCAP_SERVICES": {
		"enterprise-messaging": [
			{
				"label": "enterprise-messaging",
				"credentials": {}
			}
		]
	}
}
次に、credentialsの中にEvent Meshのサービスキーの中身をコピーして貼り付けます。最終的に以下の形になります。
{
	"VCAP_SERVICES": {
		"enterprise-messaging": [
			{
				"label": "enterprise-messaging",
				"credentials": {
					"xsappname": "clone-xbem-service-broker-3b8f5738face419d89ace9a895e2e28e-clone!b54386|xbem-service-broker-!b2436",
					"management": [
						{
							"oa2": {
								"clientid": "xxxx",
								"clientsecret": "xxxx",
								"tokenendpoint": "https://b736177ctrial.authentication.eu10.hana.ondemand.com/oauth/token",
								"granttype": "client_credentials"
							},
							"uri": "https://enterprise-messaging-hub-backend.cfapps.eu10.hana.ondemand.com"
						}
					],
					"serviceinstanceid": "3b8f5738-face-419d-89ac-e9a895e2e28e",
					"messaging": [
						{
							"oa2": {
								"clientid": "xxxx",
								"clientsecret": "xxxx",
								"tokenendpoint": "https://b736177ctrial.authentication.eu10.hana.ondemand.com/oauth/token",
								"granttype": "client_credentials"
							},
							"protocol": [
								"amqp10ws"
							],
							"broker": {
								"type": "sapmgw"
							},
							"uri": "wss://enterprise-messaging-messaging-gateway.cfapps.eu10.hana.ondemand.com/protocols/amqp10ws"
						},
						{
							"oa2": {
								"clientid": "xxxx",
								"clientsecret": "xxxx",
								"tokenendpoint": "https://b736177ctrial.authentication.eu10.hana.ondemand.com/oauth/token",
								"granttype": "client_credentials"
							},
							"protocol": [
								"mqtt311ws"
							],
							"broker": {
								"type": "sapmgw"
							},
							"uri": "wss://enterprise-messaging-messaging-gateway.cfapps.eu10.hana.ondemand.com/protocols/mqtt311ws"
						},
						{
							"oa2": {
								"clientid": "xxxx",
								"clientsecret": "xxxx",
								"tokenendpoint": "https://b736177ctrial.authentication.eu10.hana.ondemand.com/oauth/token",
								"granttype": "client_credentials"
							},
							"protocol": [
								"httprest"
							],
							"broker": {
								"type": "saprestmgw"
							},
							"uri": "https://enterprise-messaging-pubsub.cfapps.eu10.hana.ondemand.com"
						}
					]
				}
			}
		]
	}
}
3. 送信用のイベントハンドラを作成
srvフォルダ配下にcatalog-service.cdsファイルを作成します。
service CatalogService {
    type Message {
        id: Integer;
        message: String;
    }
    action send(message: Message)
}
srvフォルダ配下にcatalog-service.jsファイルを作成し、sendアクションが呼ばれたときのイベントハンドラを実装します。ここでは"topic1"というトピックに対してメッセージを送信しています。
module.exports = async function () {
    const messaging = await cds.connect.to("messaging")
    this.on('send', async (req) => {
        console.log(JSON.stringify(req.data))
        messaging.emit("topic1", req.data.message)
    })
}
テスト実行
cds watchコマンドでサービスを起動します。
コマンドラインに以下のように表示されれば、Event Meshに接続できています。

VS Codeの拡張であるREST Clientを使ってテストをしてみます。以下のようにテスト用のファイルを作成します。
POST http://localhost:4004/catalog/send
Content-Type: application/json

{
	"message": {
		"id": 100,
		"message": "hello"
	}
}
"Send Request"の文字をクリックしてリクエストを送信します。右側が結果です。

コンソールには以下のように、送信したメッセージの内容が表示されます。

4. 受信用のイベントハンドラを作成
メッセージを受信したときに動くイベントハンドラを作成します。catalog-service.jsに以下のコードを追加します。"topic1"に受信したメッセージを表示するだけのシンプルな処理です。
module.exports = async function () {
    const messaging = await cds.connect.to("messaging")
    this.on('send', async (req) => {
        console.log(JSON.stringify(req.data))
        messaging.emit("topic1", req.data.message)
    })

    //add
    messaging.on('topic1', async(msg)=> {
        const messagePayload = JSON.stringify(msg.data)
        console.log('===> Received message : ' + messagePayload)
    })
}
cds watchを実行すると、コンソールに以下のように表示されます。これは、"CAP/0000"というキューと、"topic1"に対するキューサブスクリプションが登録されたことを表しています。
そして、さきほどsendアクションで送信したメッセージを受信しています。

メッセージの内容を少し変えて送信してみます。
{
    "message": {
        "id": 101,
        "message": "hello"
    }
}

Event MeshのAPIを使ってメッセージを送信
前回の記事でやったように、APIを使ってメッセージを送ってみます。

受信したメッセージがundefinedになってしまいました。

そこで、イベントハンドラを以下のように変えてみます。
    messaging.on('topic1', async(msg)=> {
        const messagePayload = JSON.stringify(msg.data)
        console.log('===> Received message (body) : ' + messagePayload)

        const messageHeader = JSON.stringify(msg.headers)
        console.log('===> Received message (header) : ' + messageHeader)

    })
ヘッダにメッセージを受信していました。

sendアクションでCAPからメッセージを送った場合は以下のようになります。なぜこのような違いがあるのかはわかりませんが、ヘッダ、ボディ両方にメッセージが来るケースを想定しておいたほうがよさそうです。

CAPで使用するキューについて
受信用ハンドラを定義した場合、キューはデプロイ時に自動で登録されます。よって、キューをマニュアルで登録する必要はありません。"CAP/0000"というキューはローカル実行用のキューで、デプロイすると本番用のキューが別途登録されます。
※自動登録されたキューではなく独自のキューを使いたい場合は、以下のブログが参考になります。
CAP – Specifying the queues to be consumed from SAP Event Mesh
5. デプロイ
以下のコマンドでmta.yamlファイルを生成します。
cds add mta
resourcesセクションにEvent Meshのサービスインスタンス(登録済のもの)を指定し、サービスのrequiresセクションにも同じものを追加します。
_schema-version: '3.1'
ID: cap-em
version: 1.0.0
description: "A simple CAP project."
parameters:
  enable-parallel-deployments: true

build-parameters:
  before-all:
   - builder: custom
     commands:
      - npm install --production
      - npx -p @sap/cds-dk cds build --production

modules:
 # --------------------- SERVER MODULE ------------------------
 - name: cap-em-srv
 # ------------------------------------------------------------
   type: nodejs
   path: gen/srv
   parameters:
     buildpack: nodejs_buildpack
   provides:
    - name: srv-api      # required by consumers of CAP services (e.g. approuter)
      properties:
        srv-url: ${default-url}
   requires:
    - name: em-test #add

resources:
 - name: em-test #add
   type: org.cloudfoundry.existing-service
以下のコマンドでビルド、デプロイします。
mbt build
cf deploy mta_archives/cap-em_1.0.0.mtar
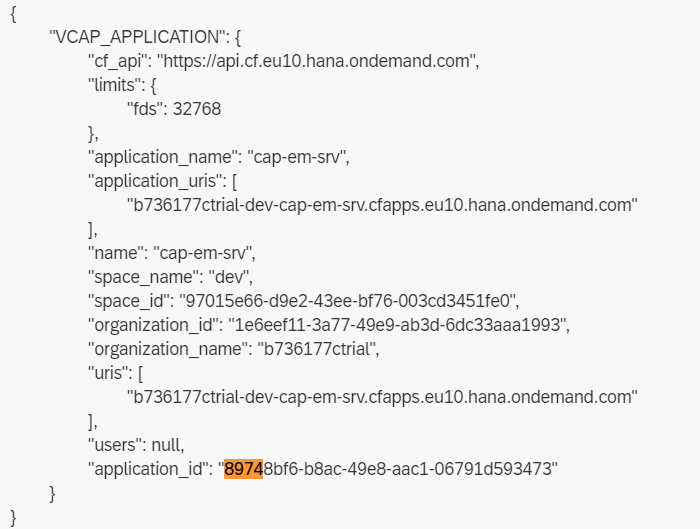
デプロイ後、cf logs cap-em-srv --recentでサービスのログを表示すると、登録されたキュー名を見ることができます。

キュー名はcap-em-srv/8974となり、8974の部分は何かといえば、登録されたアプリケーションIDの先頭4桁のようです。