はじめに
ODataにまつわる操作をするときにリファレンスとなるようなものが欲しかったのでこの記事を作成しました。
内容
- 登録系のOData操作
- 更新系のOData操作
合わせて読んでいただきたい記事
【SAPUI5】ODataV2ModelのContext、Bindingをイメージで理解する
前提
- Binding ModeはTwo-way Binidng
- OData V2
使用したODataサービス
CDS+BOPFで簡単なODataサービスを作成しました。
インターフェースビュー
@AbapCatalog.sqlViewName: 'ZMOB49IPRODTR2'
@AbapCatalog.compiler.compareFilter: true
@AbapCatalog.preserveKey: true
@AccessControl.authorizationCheck: #NOT_REQUIRED
@EndUserText.label: 'Products table transactional'

@ObjectModel:{
    modelCategory: #BUSINESS_OBJECT,
    alternativeKey: [{element: ['product_id']}],
    semanticKey: ['product_id'],
    compositionRoot: true,
    writeActivePersistence: 'ZMOB49_PRODUCT',
    createEnabled: true,
    updateEnabled: true,
    deleteEnabled: true,
    transactionalProcessingEnabled: true
}

define view ZMOB49_I_Products_TR2 as select from zmob49_product {
    //ZMOB49_PRODUCT
    key product_uuid,
    @EndUserText.label: 'Product ID'
    product_id,
    @EndUserText.label: 'Name'
    product_name,
    @EndUserText.label: 'Price'
    @Semantics.amount.currencyCode: 'currency'
    price,
    @Semantics.currencyCode: true
    currency
}
コンサンプションビュー
@AbapCatalog.sqlViewName: 'ZMOB49CPROD2'
@AbapCatalog.compiler.compareFilter: true
@AbapCatalog.preserveKey: true
@AccessControl.authorizationCheck: #CHECK
@EndUserText.label: 'Products table consumption2'
@ObjectModel:{
    modelCategory: #BUSINESS_OBJECT,
    alternativeKey: [{element: ['product_id']}],
    semanticKey: ['product_id'],
    compositionRoot: true,
    createEnabled: true,
    updateEnabled: true,
    deleteEnabled: true,
    transactionalProcessingDelegated: true
}

@OData.publish: true
define view ZMOB49_C_Products2 as select from ZMOB49_I_Products_TR2 {
    //ZMOB49_I_Products_TR2
    @UI.hidden: true
    key product_uuid,
    @UI.selectionField: [{position: 10 }]
    @UI.lineItem: [{position: 10 }]
    @UI.identification: [{position: 10 }]
    product_id,
    @UI.selectionField: [{position: 20 }]
    @UI.lineItem: [{position: 20 }]
    @UI.identification: [{position: 20 }]
    product_name,
    @UI.lineItem: [{position: 30 }]
    @UI.identification: [{position: 30 }]
    price,
    @UI.lineItem: [{position: 40 }]
    @UI.identification: [{position: 40 }]
    currency
}
manifest.jsonの設定
ポイントは、Two-Way Binding(ODataへ書き込み可能)にしているところです。
	"sap.app": {
                ・・・
		"dataSources": {
			"ZMOB49_C_PRODUCTS2_CDS": {
				"uri": "/sap/opu/odata/sap/ZMOB49_C_PRODUCTS2_CDS/",
				"type": "OData",
				"settings": {
					"localUri": "localService/metadata.xml",
					"annotations": [
						"ZMOB49_C_PRODUCTS2_CDS_VAN"
					]
				}
			},
			"ZMOB49_C_PRODUCTS2_CDS_VAN": {
				"uri": "annotations/ZMOB49_C_PRODUCTS2_CDS_VAN.xml",
				"type": "ODataAnnotation",
				"settings": {
					"localUri": "annotations/ZMOB49_C_PRODUCTS2_CDS_VAN.xml"
				}
			}
		}
	},

	"sap.ui5": {
		・・・
		"models": {
			・・・
			"": {
				"type": "sap.ui.model.odata.v2.ODataModel",
				"settings": {
					"defaultOperationMode": "Server",
					"defaultBindingMode": "TwoWay",
					"defaultCountMode": "Request"
				},
				"dataSource": "ZMOB49_C_PRODUCTS2_CDS",
				"preload": true
			}
		}
	}
登録系のOData操作
1. 新規エンティティを登録して画面にバインド
登録画面を用意しました。第一画面で「登録」ボタンを押すとこの画面に遷移するイメージです。
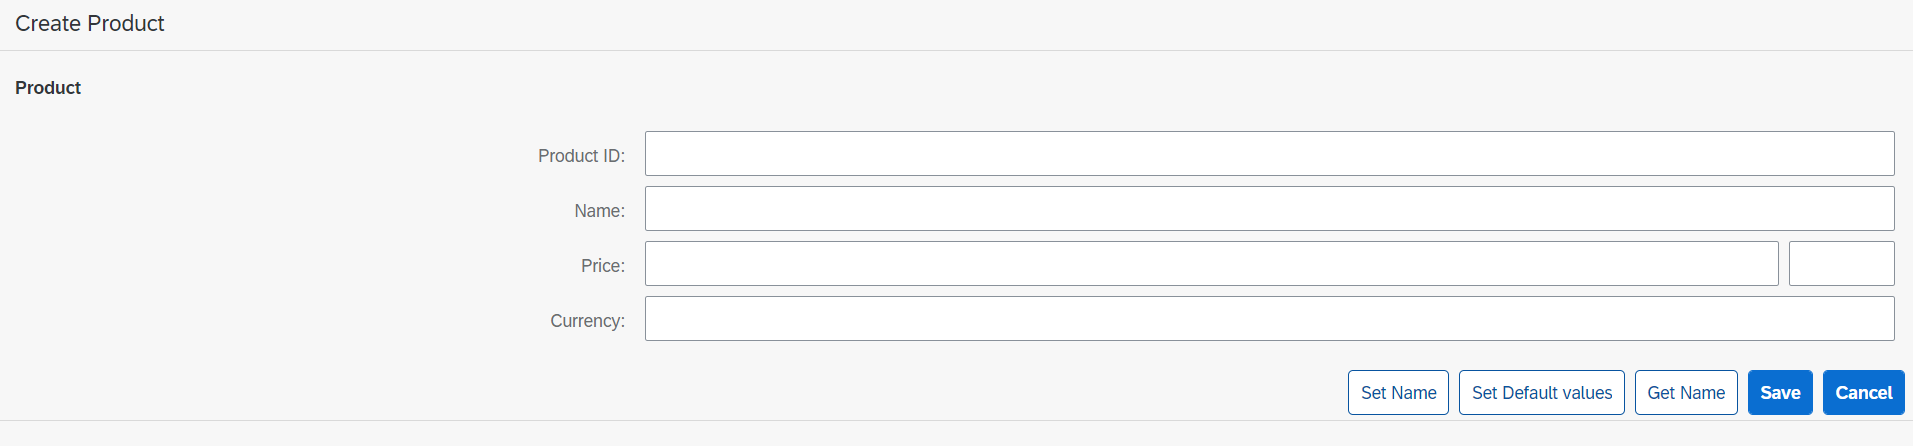
ルーターのpatternMatchedイベントが発生したタイミングでODataエンティティを登録します。
propertiesで初期値を入れることができます。
		onInit: function () {
			var oRouter = this.getOwnerComponent().getRouter();
			oRouter.getRoute("create").attachPatternMatched(this._onObjectMatched, this);
		},

		//画面遷移後、ルートがマッチしたら動くファンクション
		_onObjectMatched: function (oEvent) {
			var oModel = this.getView().getModel();
			var oContext = oModel.createEntry("/ZMOB49_C_Products2", {
				properties: {
					product_name: "Sample" //初期値設定
				}
			});
			this.getView().byId("productForm").setBindingContext(oContext);
		}
onInitの中で直接エンティティを作らないのはなぜ?
onInitはアプリケーションの起動時に1回しか呼ばれません。もしonInitの中でエンティティを登録した場合、最初に登録画面を開いたときだけエンティティが登録され、以降はされません。前の画面に戻ってもう一度登録ボタンを押すと、エンティティが登録されないということになってしまいます。
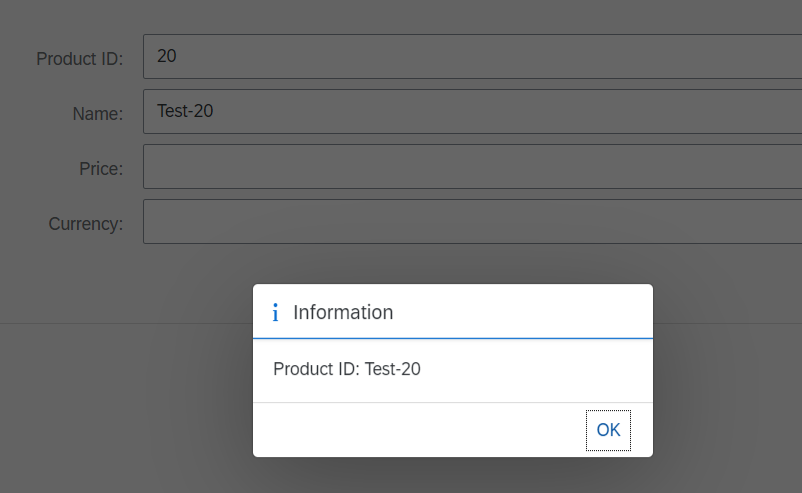
2. プロパティの値を取得
画面に入力した名称を取得するファンクションを作ります。名称(Name)はODataエンティティのプロパティです。プロパティはODataモデルのgetPropertyというメソッドで取得できます。
		onGetName: function () {
			//パスを取得
			var sPath = this.getView().byId("productForm").getBindingContext().getPath();
			//パスを指定してプロパティを取得
			var sProduct = this.getView().getModel().getProperty(sPath + "/product_name");

			MessageBox.information("Product ID: " + sProduct);

		},
getPropertyは、getProperty(/Products('123')/Name)のようにエンティティのキーを指定するのですが、まだ本登録されていないのでキーがわかりません。そこで、1行目の方法でキーを含んだパスを取得します。デバッグしてみると以下のような値が入ってきます。

なお、本登録されている場合もこの方法が使えます。
3. プロパティに値を設定
Price, Currencyに初期値を設定するファンクションを作ります。
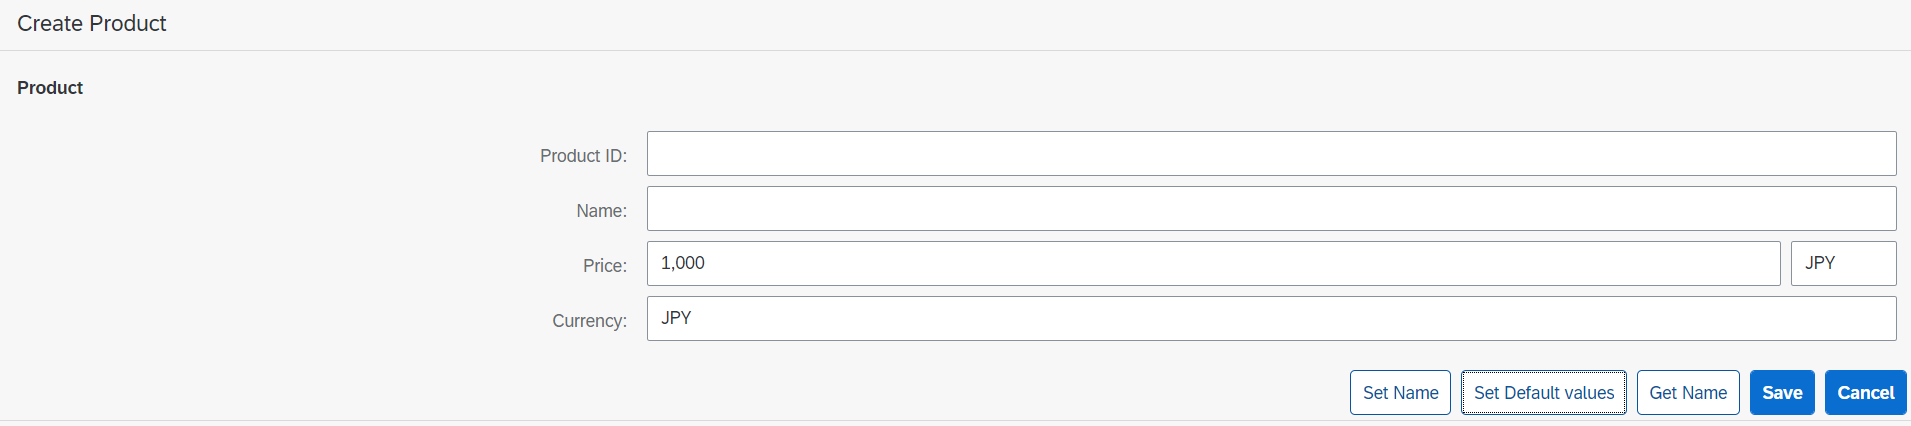
getPropertyとよく似たsetPropertyというメソッドを使ってプロパティを設定できます。
		onSetDefault: function () {
			//デフォルト値
			var sCurrency = "JPY";
			var sPrice = "1000";

			var sPath = this.getView().byId("productForm").getBindingContext().getPath();
			this.getView().getModel().setProperty(sPath + "/price", sPrice);
			this.getView().getModel().setProperty(sPath + "/currency", sCurrency);
		}
4. 登録したエンティティを削除
Two-Way Bindingでも、submitChangesを実行するまでデータはバックエンドに送信されません。送信する前にキャンセルする(createEntryをなかったことにする)場合は、deleteCreatedEntryを使用します。
		onCancel: function () {
			var oModel = this.getView().getModel();
			var oContext = this.getView().byId("productForm").getBindingContext();
			oModel.deleteCreatedEntry(oContext);
		}
5. バックエンドに送信
入力した値(または変更内容)をバックエンドに送信するには、submitChangesというメソッドを使用します。
		onSave: function () {
			var oModel = this.getView().getModel();
			oModel.submitChanges({
				success: function(oRes) {
					MessageToast.show("Product has been saved!");
				},
				error: function(oErr) {
					MessageBox.error(oErr);
				}
			});
		}
submitChangesのエラー捕捉
submitChangesでは、バックエンド側でバリデーションエラーなどが発生しても、successコールバックに入ってしまいます。エラーがあったかどうか確認するにはODataモデルのhasPendingChangesメソッドを使うとよいと思います。hasPendingChangesは、バックエンドへ送信していない変更がある場合にtrueを返します。
エラーハンドリングを追加したコード
			oModel.submitChanges({
				success: function(oRes) {
					//successでもエラーがある場合があるのでチェック
					if(!oModel.hasPendingChanges()){
						MessageToast.show("Product has been saved!");
						that.onNavBack();
					}else{
						MessageBox.error(oRes.__batchResponses[0].__changeResponses[0].response.body);
					}
				},
				error: function(oErr) {
					MessageBox.error(oErr);
				}
			});
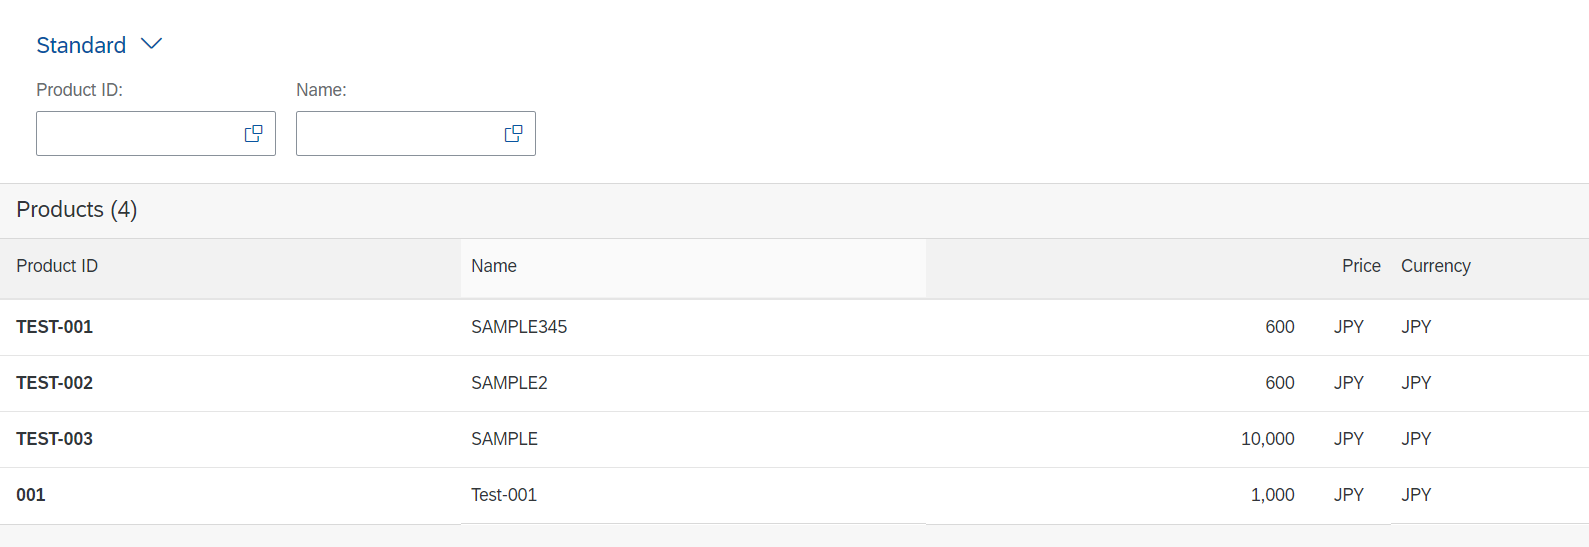
更新系のOData操作
一覧で行を指定して、詳細画面に遷移するアプリを作成します。
イメージ
画面遷移後
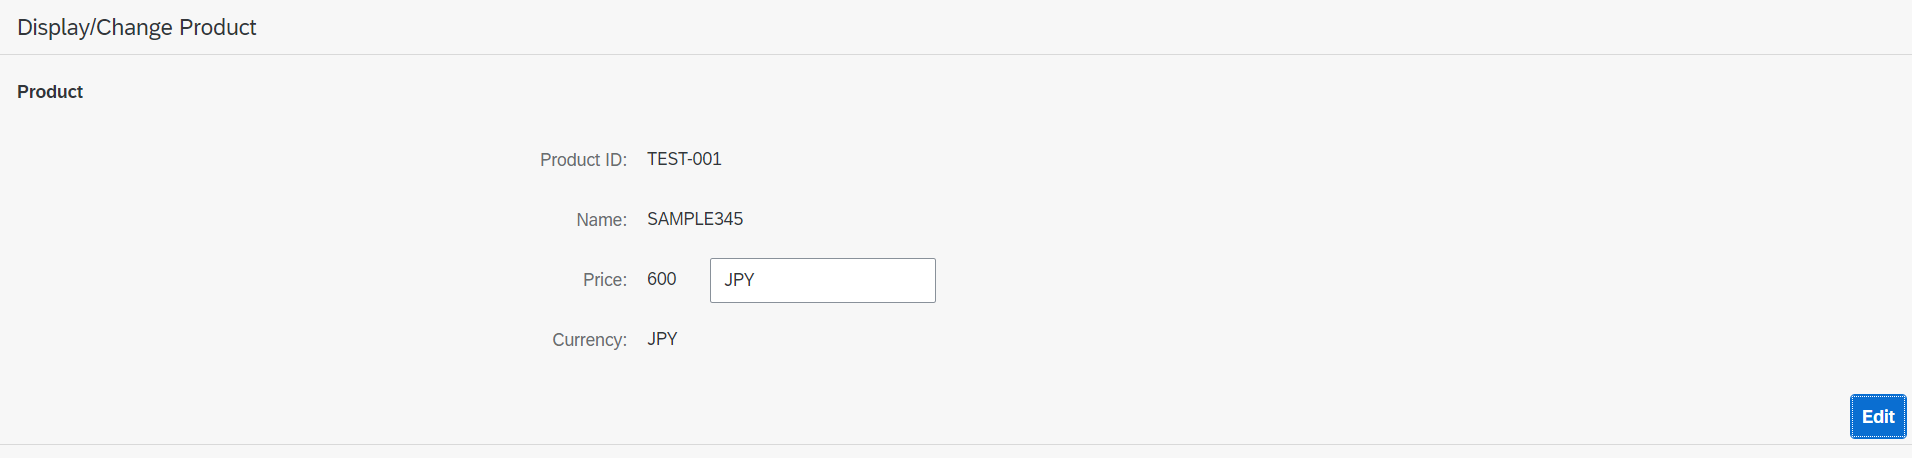
1. エンティティを取得して画面にバインド
遷移元画面では選択された行のキーを取得してRouterに渡します。今回、送信側の一覧はSmartTableを使っています。行が選択されたときにキーのみ取得するうまい方法がわからなかったので、以下のようにしました。
画面
	<smartTable:SmartTable entitySet="ZMOB49_C_Products2" smartFilterId="smartFilterBar"
		tableType="ResponsiveTable" useExportToExcel="true" beforeExport="onBeforeExport"
		useVariantManagement="false" useTablePersonalisation="true" header="Products"
		showRowCount="true" persistencyKey="SmartTableAnalytical_Explored" enableAutoBinding="true"
		demandPopin="true" class="sapUiResponsiveContentPadding">
		<smartTable:customToolbar>
			<OverflowToolbar design="Transparent">
				<ToolbarSpacer/>
				<OverflowToolbarButton icon="sap-icon://add" text="Sort" press="onCreate"/>
			</OverflowToolbar>
		</smartTable:customToolbar>
		<Table selectionChange="onSelectionChangeChange" mode="SingleSelect">
		</Table>
	</smartTable:SmartTable>
Routingの処理
		onSelectionChangeChange: function (oEvent) {
			var sPath = oEvent.getSource().getSelectedContextPaths()[0];
			var sUUID = sPath.split("/")[1];
			this.getOwnerComponent().getRouter().navTo("display", {
				product_uuid: sUUID
			});
		}
sPath, sUUIDには以下のように入ってきます。スラッシュがついているとRoutingのパラメータとして不可のようなので、スラッシュを取ったものをパラメータに設定しました。
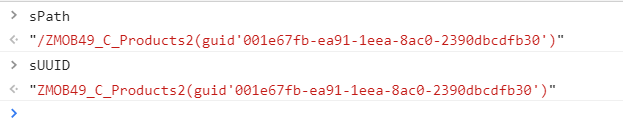
遷移先画面では、受け取ったキーをもとにパスを編集して画面にバインドします。
		onInit: function () {
			var oRouter = this.getOwnerComponent().getRouter();
			oRouter.getRoute("display").attachPatternMatched(this._onObjectMatched, this);
		},

		_onObjectMatched: function (oEvent) {
			//Routingで渡されたパラメータを取得
			var sPath = oEvent.getParameter("arguments").product_uuid;
			//パスを編集してバインド
			this.getView().byId("productForm").bindElement("/" + sPath);
		}
バインドするパスは/ZMOB49_C_Products2(guid'001e67fb-ea91-1eea-8ac0-2390dbcdfb30')のように、/<EntitySet>(<key>)の形を取ります。
ところで、ここでModelが登場しないのが不思議ですね。デフォルトモデルに対しては、パスの指定だけでアクセスできるということでしょうか。では、複数のOData(名前つきモデル)を使っている場合はどうしたらよいのでしょうか。機会があったら調べてみたいです。
2. 変更をリセット
変更を送信せずにリセットする場合は、ODataモデルのresetChangesを使います。
		onCancel: function () {
			var that = this;
			MessageBox.confirm("Are you sure to reset changes?", {
				onClose: function () {
					var oModel = that.getView().getModel();
					oModel.resetChanges();
				}
			});
		}
3. 変更をバックエンドに送信
変更を送信する方法は登録時と同じです。
		onSave: function () {
			oModel.submitChanges({
				success: function (oRes) {
					if(!oModel.hasPendingChanges()){
						MessageToast.show("Changes has been saved!");
					}else{
						MessageBox.error(oRes.__batchResponses[0].__changeResponses[0].response.body);
					}
				},
				error: function (oErr){
					MessageBox.error(oErr);
				}
			});
		}
関連記事
【OData】Batch Processの実装:ODataからSAPUI5アプリまで
【SAPUI5】コントローラーでよく使うメソッド