はじめに
CDSビューでFiori Appを作るシリーズの2回目で、今回はUIアノテーションを使って検索条件、リスト項目を定義します。
前回の記事はこちら
【Fiori】CDSビューでFiori Appを作る
今回のゴール
- CDSビューに直接アノテーションを追加し、検索条件、リスト項目が表示されるようにします。
- Metadata extensionでアノテーションを外出しにして、同じ出力結果になるようにします。
ステップ
- UIアノテーションを追加
- Metadata extensionでアノテーションを作成
1. UIアノテーションを追加
検索条件のアノテーション
@UI.selectionField を使います。positionという属性で表示する位置を指定し、数字が小さいものが左に表示されます。
    @UI.selectionField: [{position: 10 }]
    first_name,
    @UI.selectionField: [{position: 20 }]
    last_name,
    birthday,
    region,
    city,
    street,
    location,
    created_at,
    changed_at
アノテーションはJSON形式で記述します。書き方は色々あり、以下はいずれも同じ結果になります。
@UI: {
    selectionField: [{position: 10 }]
}
@UI.selectionField: [{position: 10 }]
@UI.selectionField.position: 10
リスト項目のアノテーション
@UI.lineItem を使います。検索条件と同じく、positionという属性で表示する位置を指定します。
    key student_id,
    @UI.selectionField: [{position: 10 }]
    @UI.lineItem: [{position: 10 }]
    first_name,
    @UI.selectionField: [{position: 20 }]
    @UI.lineItem: [{position: 20 }]
    last_name,
    @UI.lineItem: [{position: 30 }]
    birthday,
    @UI.lineItem: [{position: 40 }]
    region,
    city,
    street,
    location,
    created_at,
    changed_at
実行してみる
CDSビューを有効化してからFiori Appをリフレッシュします。
検索条件とリスト項目が最初から出てきます。

行を選択すると何もない画面に遷移しますが、アノテーションで簡単に詳細画面を作ることができます。

詳細画面のアノテーション
@UI.identification を使います。
リストの項目に加えて、住所情報を表示させます。
    key student_id,
    @UI.selectionField: [{position: 10 }]
    @UI.lineItem: [{position: 10 }]
    @UI.identification: [{position: 10}]
    first_name,
    @UI.selectionField: [{position: 20 }]
    @UI.lineItem: [{position: 20 }]
    @UI.identification: [{position: 20}]
    last_name,
    @UI.lineItem: [{position: 30 }]
    @UI.identification: [{position: 30}]
    birthday,
    @UI.lineItem: [{position: 40 }]
    @UI.identification: [{position: 40}]
    region,
    @UI.identification: [{position: 50}]
    city,
    @UI.identification: [{position: 60}]
    street,
    @UI.identification: [{position: 70}]
    location,
    created_at,
    changed_at
ラベルをつけてみる
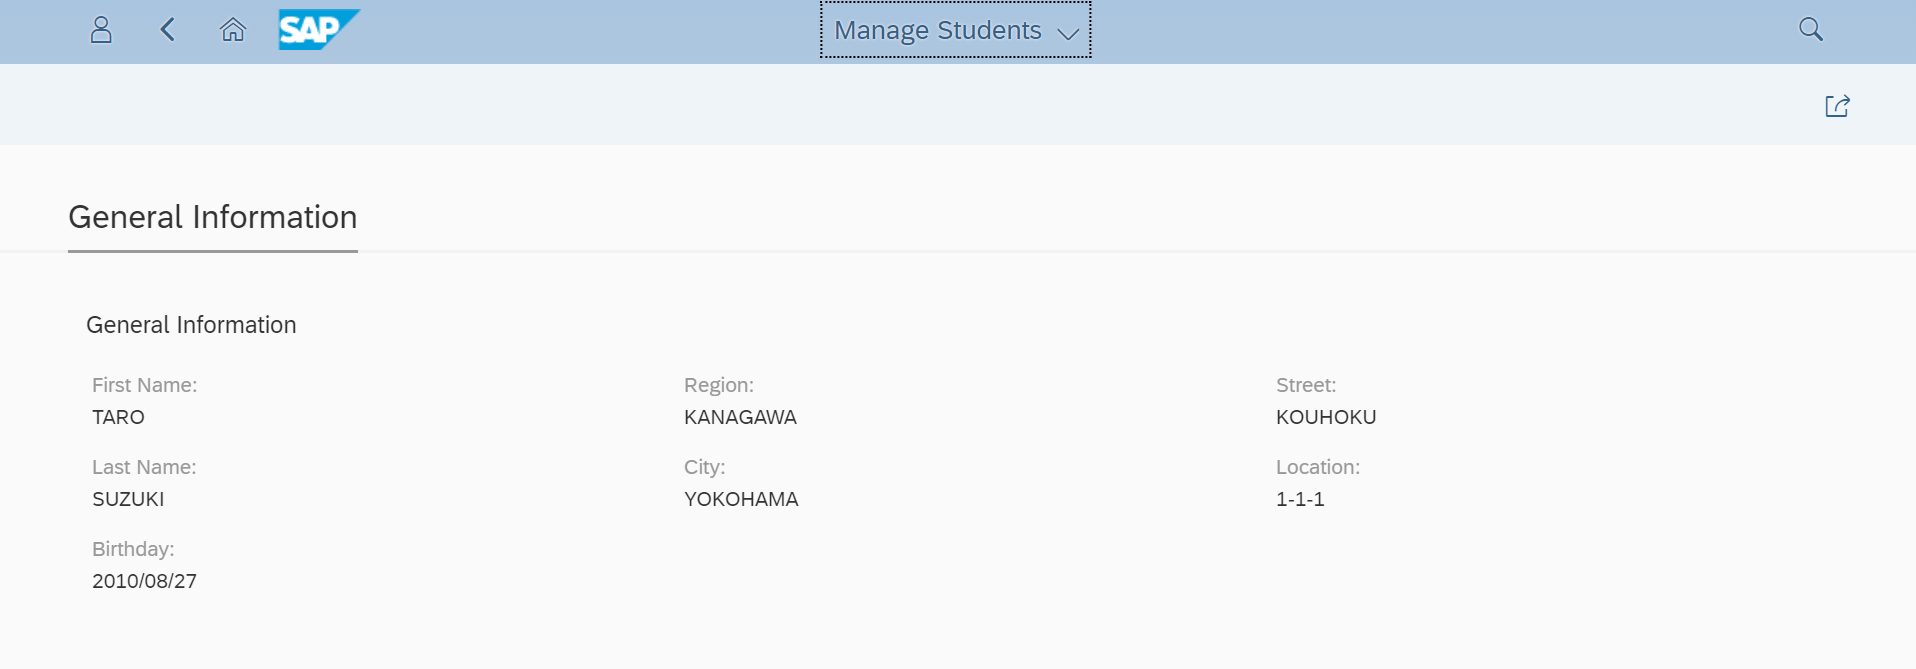
identificationの属性でlabelがあるので設定してみます。
    @UI.selectionField: [{position: 10 }]
    @UI.lineItem: [{position: 10 }]
    @UI.identification: [{position: 10, label: 'First Name'}]
    first_name,
ラベルが表示されました。翻訳はどうするんだろう?
こちらの記事によると、SE63で翻訳できるそうです。
2. Metadata extensionでアノテーションを作成
Metadata extensionとは
CDSのソースからアノテーションを切り出したものをMetadata extensionといいます。これによってビューの定義とUIの定義を分離でき、ソースのモジュール化や見やすさの向上といったメリットがあります。
参考:Modularizing CDS Annotations
Metadata extensionを登録する
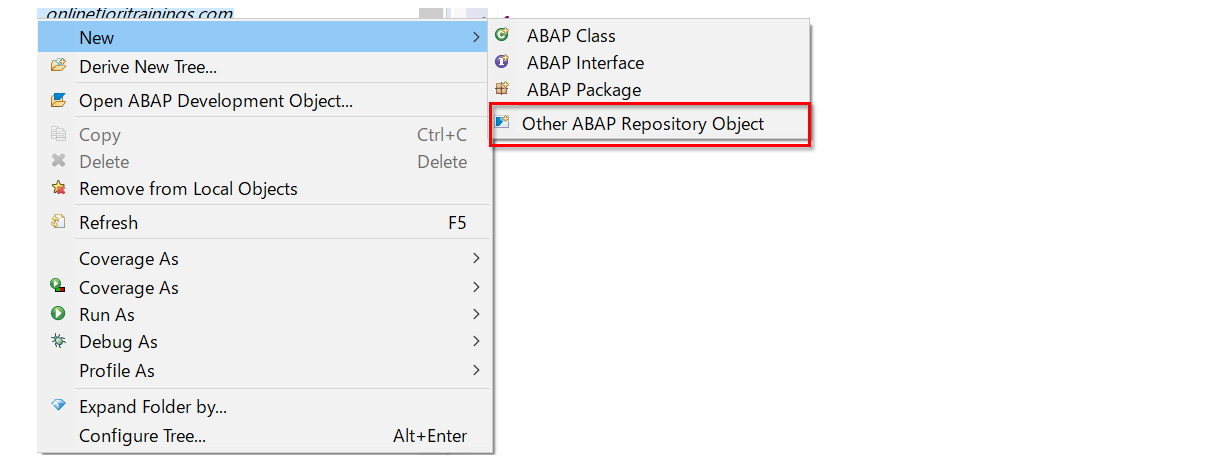
Projectフォルダー上で右クリックし、New>Other ABAP Repository Objectを選択します。
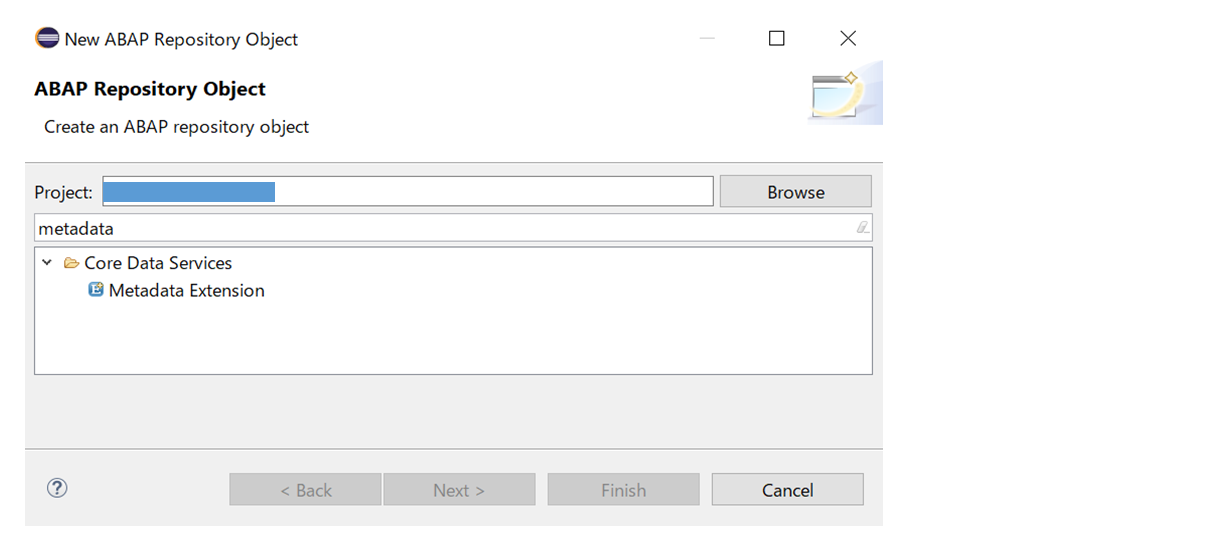
Metadata Extensionを検索し、次に進みます。
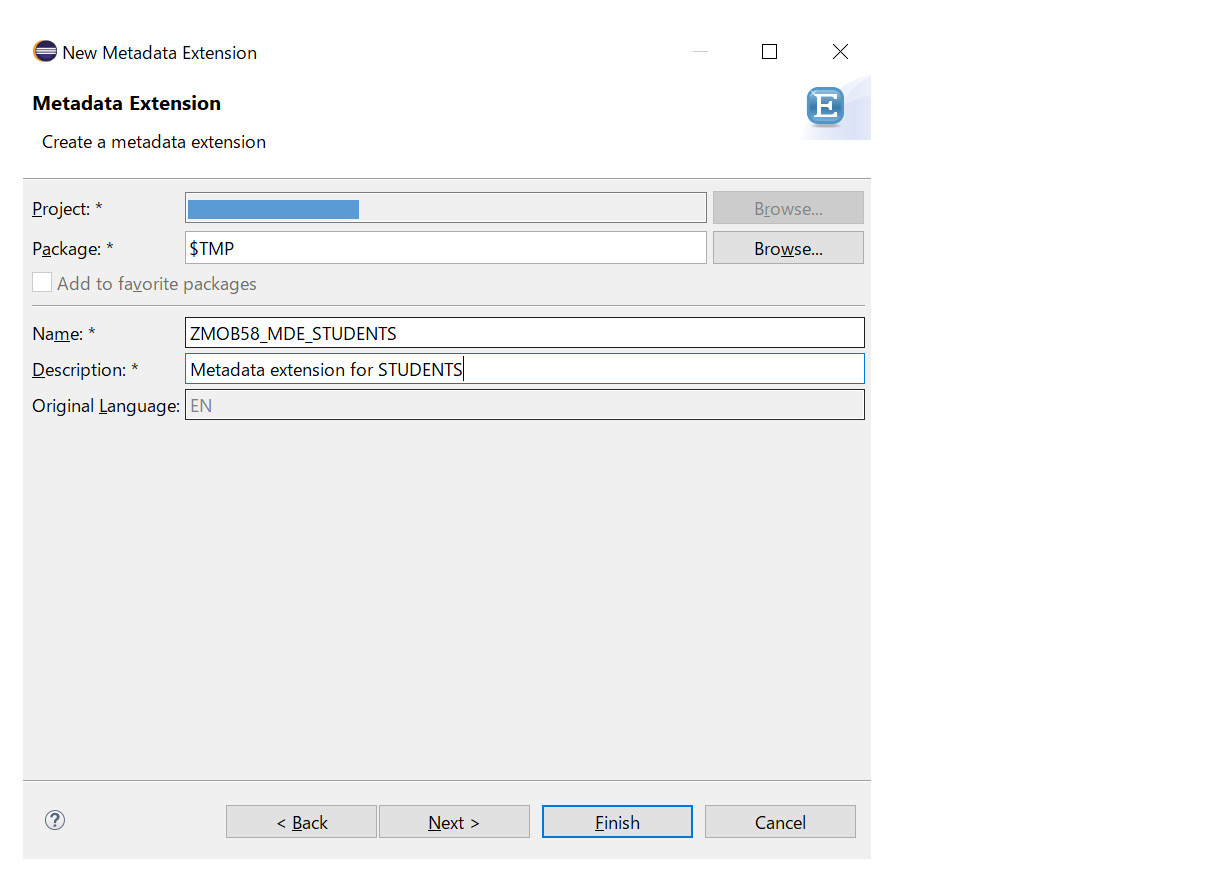
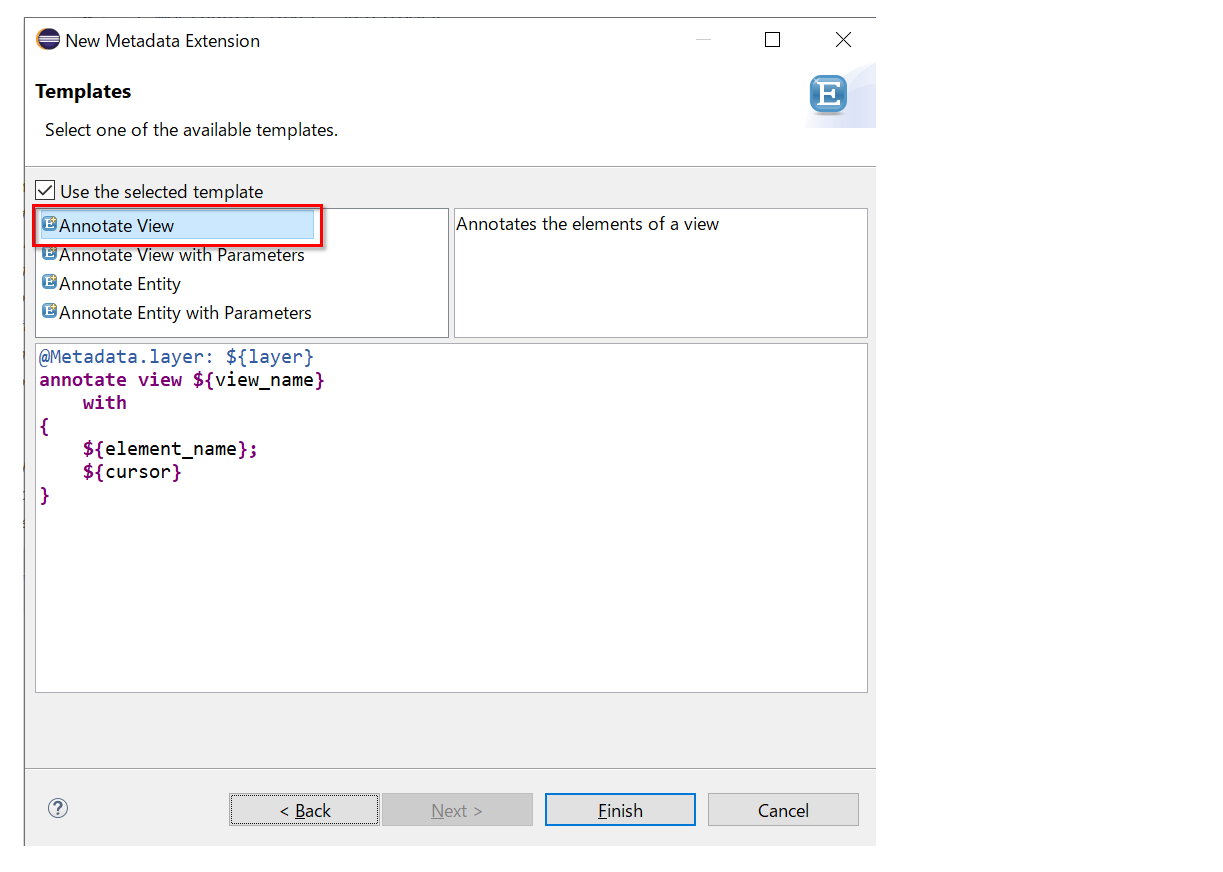
以下のようなソースが作成されます。

layerの指定
layerの文字を消してCtrl+Spaceを押すと、設定可能な候補が表示されます。
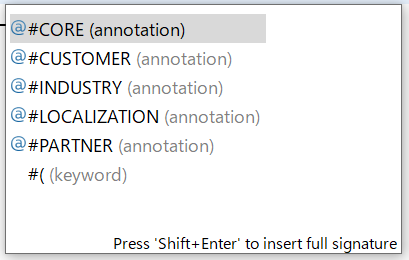
ひとつのCDSビューに複数のMetadata Extensionがある場合にどれが採用されるかというと、#CORE ,#LOCALIZATION, #INDUSTRY, #PARTNER, #CUSTOMERの順に優先度が高くなります。(右に行くほど優先度が高い)
今回は#COREを選択します。
UIアノテーションを移植
元のビューからUIアノテーションの部分をコピーして移植します。この際、項目の区切りはカンマではなくセミコロンになります。
@Metadata.layer: #CORE
annotate view ZMOB58_C_STUDENTS
    with
{
    @UI.selectionField: [{position: 10 }]
    @UI.lineItem: [{position: 10 }]
    @UI.identification: [{position: 10, label: 'First Name'}]
    first_name;
    @UI.selectionField: [{position: 20 }]
    @UI.lineItem: [{position: 20 }]
    @UI.identification: [{position: 20, label: 'Last Name'}]
    last_name;
    @UI.lineItem: [{position: 30 }]
    @UI.identification: [{position: 30, label: 'Birthday'}]
    birthday;
    @UI.lineItem: [{position: 40 }]
    @UI.identification: [{position: 40, label: 'Region'}]
    region;
    @UI.identification: [{position: 50, label: 'City'}]
    city;
    @UI.identification: [{position: 60, label: 'Street'}]
    street;
    @UI.identification: [{position: 70, label: 'Location'}]
    location;
}
2020/11/13追加
Business Application Studio (Fiori Tools)でアプリを作成する場合、先頭に@UI.facetアノテーションを追加してください。こうしないとObject PageにIdentificationの情報が表示されません。
annotate view ZMOB58_C_STUDENTS
    with
{
    @UI.facet: [{
      id: 'general',
      type: #IDENTIFICATION_REFERENCE,
      purpose: #STANDARD,
      label: 'General Information',
      targetQualifier: 'generalGroup'
    }]
    ...
元のビューの修正
元のビューには以下の変更を加えます。
- @Metadata.allowExtensions: trueを設定する
- UIアノテーションを削除する
@AbapCatalog.sqlViewName: 'ZMOB58_V_STUDENT'
@AbapCatalog.compiler.compareFilter: true
@AbapCatalog.preserveKey: true
@AccessControl.authorizationCheck: #NOT_REQUIRED
@EndUserText.label: 'Students CDS for Fiori'
@OData.publish: true
@Metadata.allowExtensions: true
define view ZMOB58_C_STUDENTS as select from zstudents {

    //zstudents
    key student_id,
    first_name,
    last_name,
    birthday,
    region,
    city,
    street,
    location,
    created_at,
    changed_at
}
以上の変更を行った後、元のビューとMetadata Extensionを有効化します。
実行結果
Metadata Extensionに検索項目を追加してみます。
    @UI.selectionField: [{position: 30 }]
    @UI.lineItem: [{position: 40 }]
    @UI.identification: [{position: 40, label: 'Region'}]
    region;
検索条件が追加されました。Metadata Extensionがちゃんと動いていることが確認できました。

今回のまとめ
- UIアノテーションで画面項目を定義することができる
- Metadata Extensionを使ってUIアノテーションをCDSのソースから分離することができる
参考
Modularizing CDS Annotations
ABAP News for Release 7.51 – Meta Data Extensions in ABAP CDS
CDS Part 14. ABAP Annotations fo


