はじめに
ミニマップ的なものを作成してみます。以下の一連ツイートを参考に少し手を加えたのものの導入手順になります。
BPの中身はこんな感じで、今の所Tickで回してます…処理負荷見てみよっと… #UE4Study pic.twitter.com/XfjJNXSaqh
— のん @ UE4勉強中 (@non_ue4) 2016年8月6日
前提
バージョン:UE4.14.1
ThirdPersonテンプレートを使います
ミニマップ作成
UMGを作成して表示
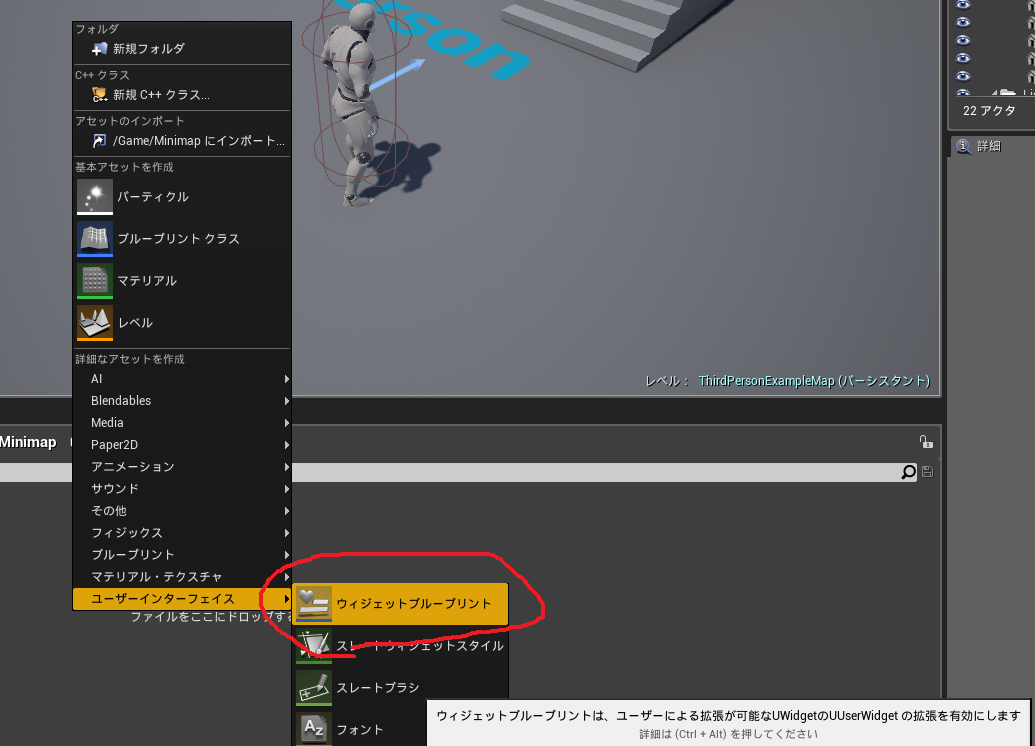
UMGを作成します(名前はUMG_MiniMapにしました)
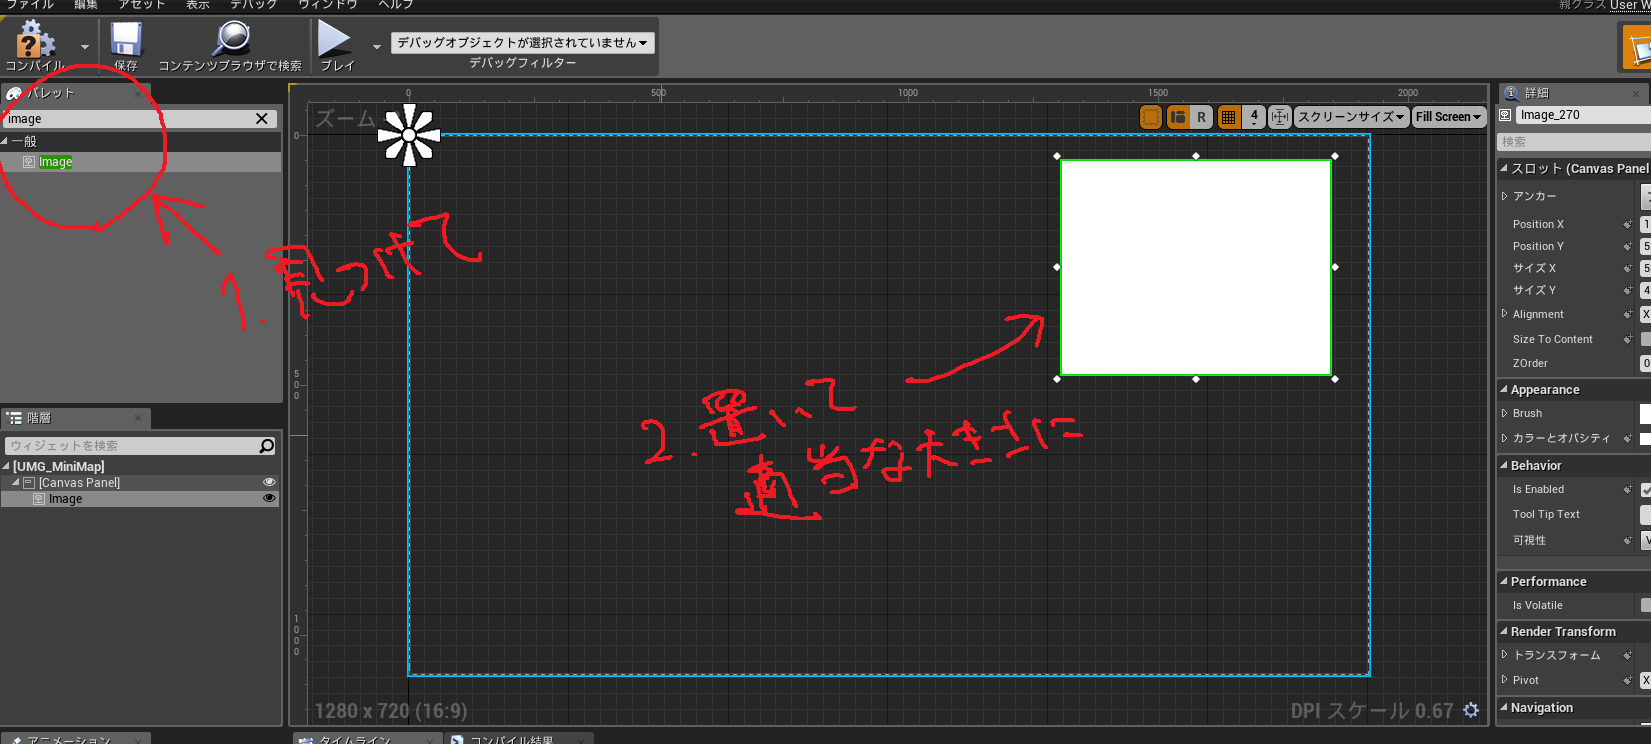
作成したUMGを開いてパレットでImage見つけて配置、適当なサイズにしてください
ThirdPersonCharacterを開き以下のようにBPを組んでUMGを表示するようにします
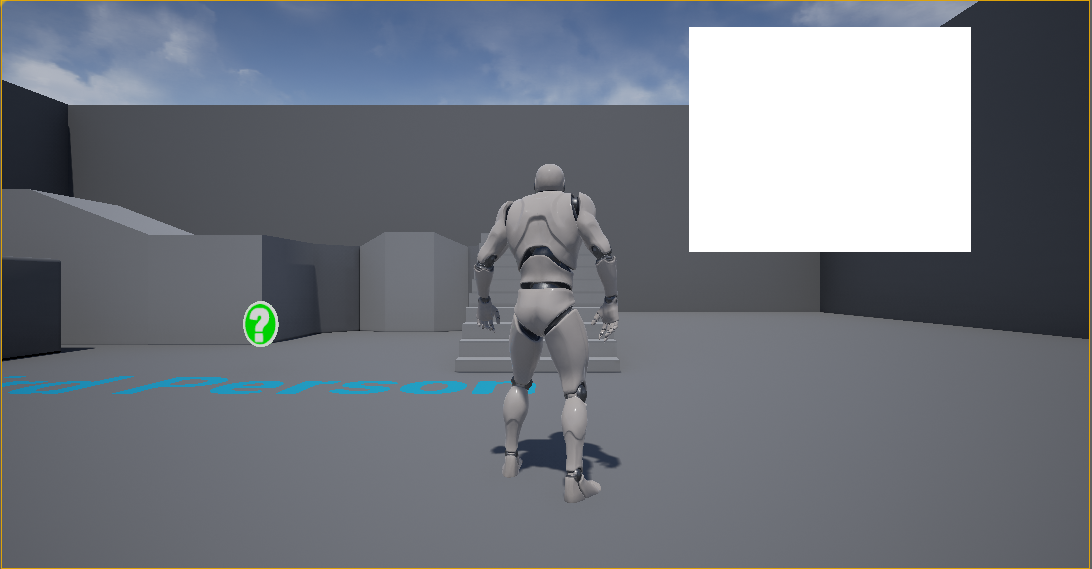
下のようになったらOKです
CanvasRenderTargetとマテリアルを作ってUMGにセット
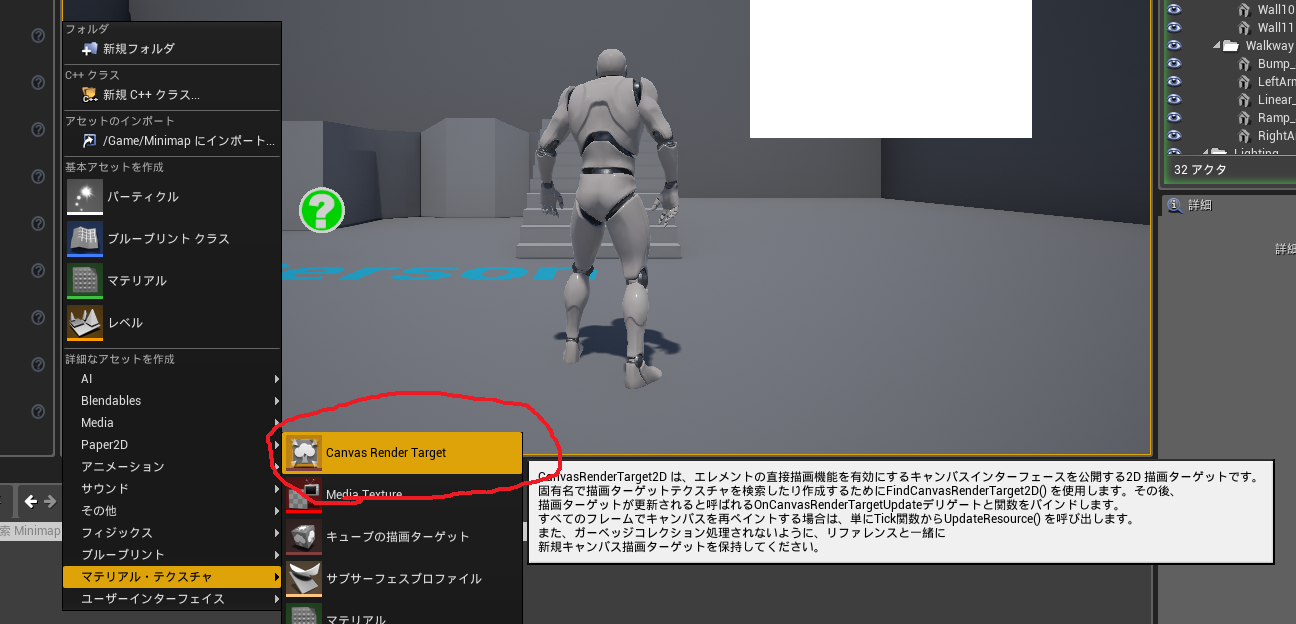
CanvasRenderTargetを作成します(名前はT_MiniMapにしました)
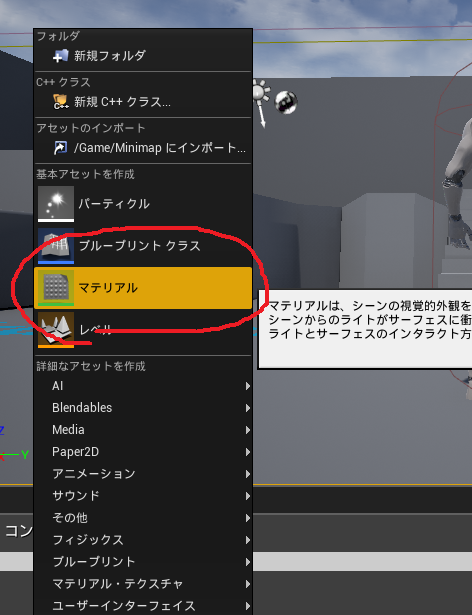
マテリアルを作成します(名前はM_MiniMapにしました)
マテリアルを開いてMaterialDomainをUserInterfaceに、TextureSampleを出してT_MiniMapを設定FinalColorに繋ぐ
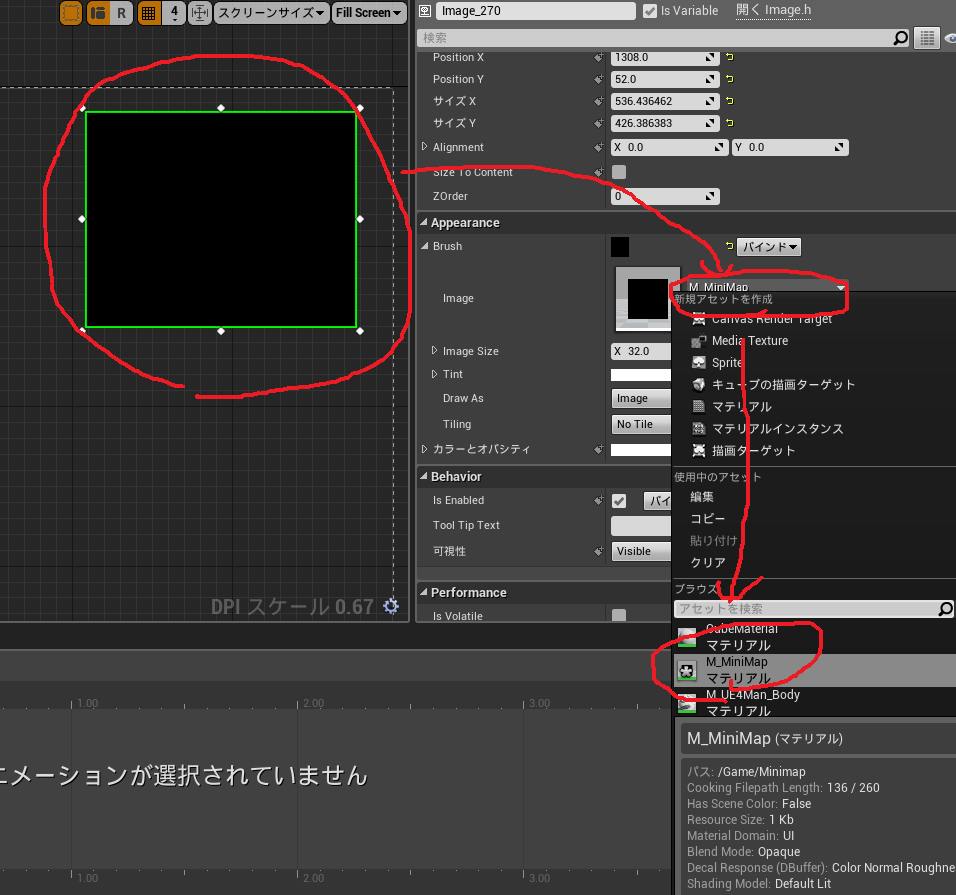
UMG_MiniMapを開いて置いたImageを選択Appearance→Brush→Image→M_MiniMapを設定
ActorにTagを設定してレベルに配置する
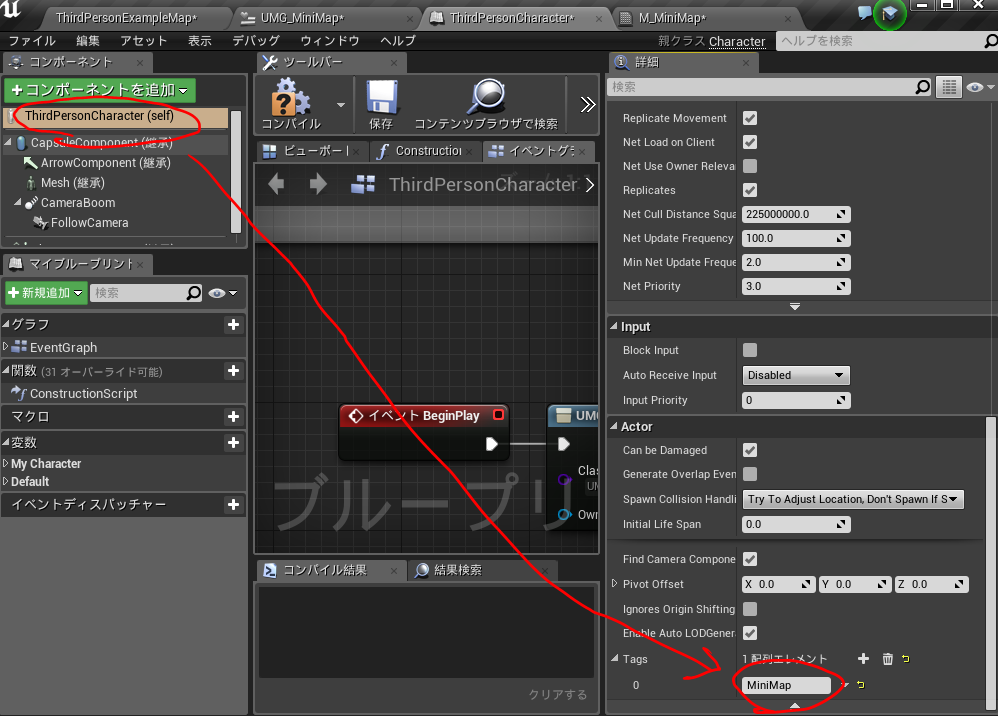
今回はThirdPersonCharacterにTagを設定します(名前はMiniMapにしました)
適当にレベルにキャラを置きまくってください
CanvasRenderTarget(T_MiniMap)に書き込む
作るものが増えると混乱しそうなので今回はUMG_MiniMapのグラフにロジックを組みます(実際にはActorComponentやActorに組むと良いでしょう)
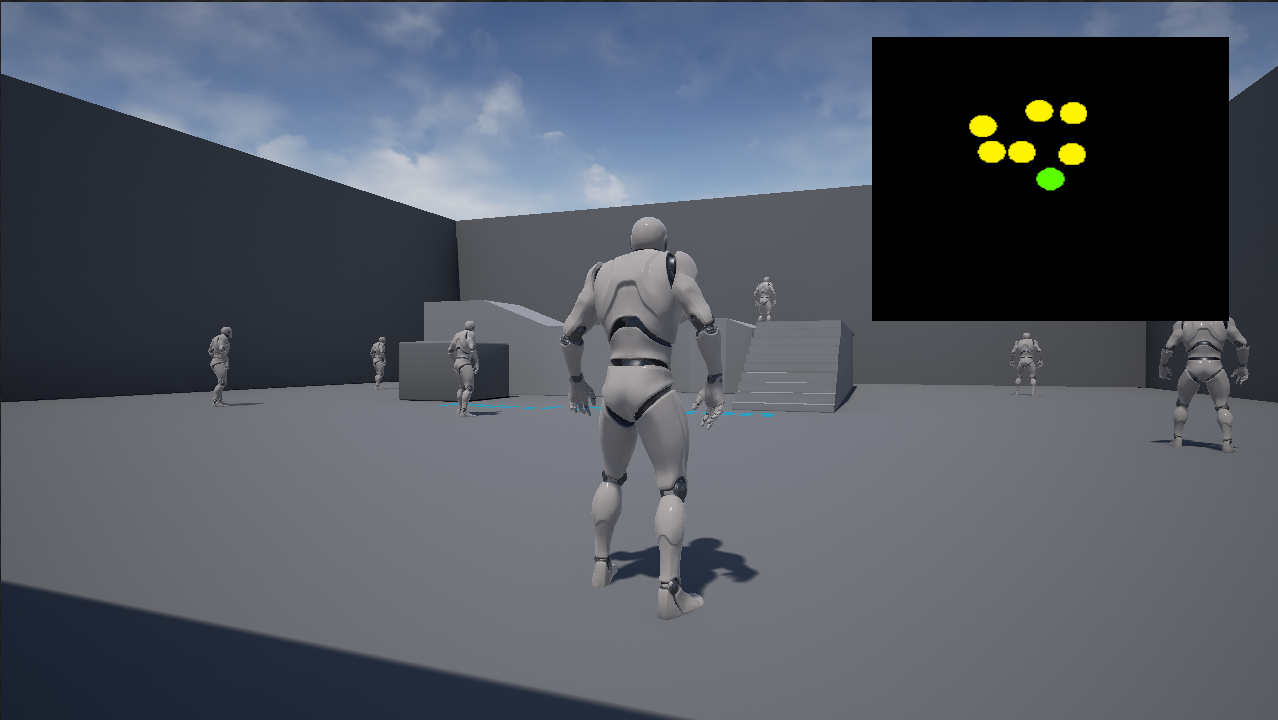
こんな感じになりました
おわりに
あとは改造あるのみ。特にGetAllActorswithTagをTickで使うのはよくないかもしれません。
下は改造例です
ふと思い立ってミニマップを作り始めましたの巻#UE4 #UE4Study pic.twitter.com/le7uJ3QqKZ
— tamfoi (@tamfoi) December 22, 2016
引き続きミニマップ実装、自機は固定で周りが回転するタイプのも作ってみた#UE4 #UE4Study pic.twitter.com/DVvsflSBFR
— tamfoi (@tamfoi) December 23, 2016
ミニマップ進捗、高さもとれるようになった! #UE4 pic.twitter.com/rf5CtivPvw
— tamfoi (@tamfoi) December 23, 2016
