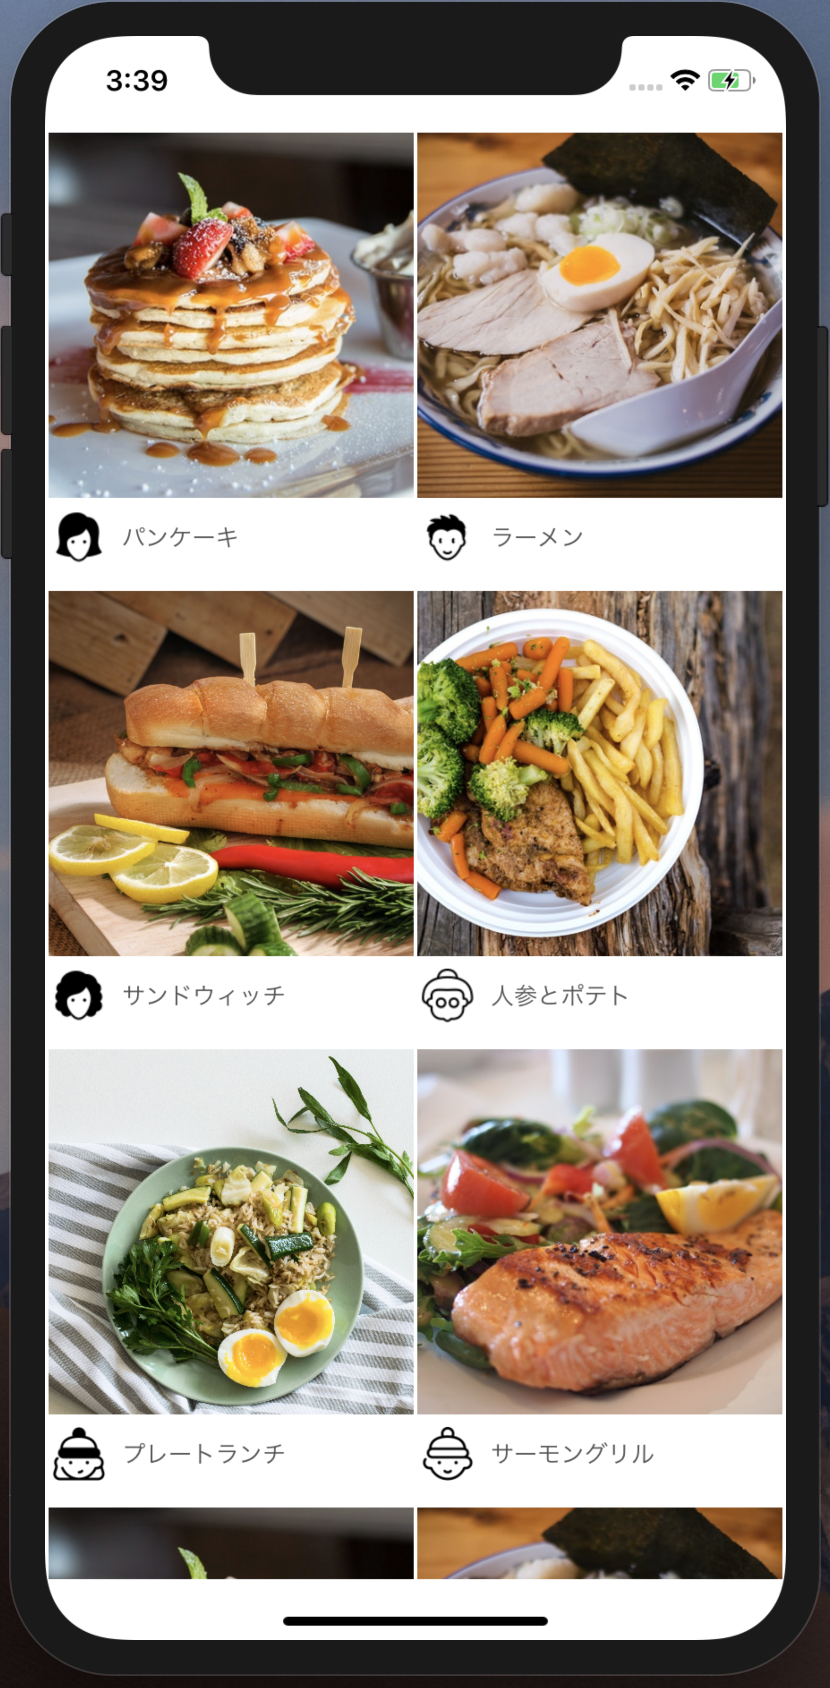
完成イメージ

実現したいこと
- 1行に表示するアイテムを2個(つまり2列)とする。
- 1つのセルに複数のアイテムを入れる。
- セクションの左右、セル間の余白は 2.0 とする。
(メモ)cellのクラスを作成する方法もありますが、今回はTagを使った方法で実装しています。
手順
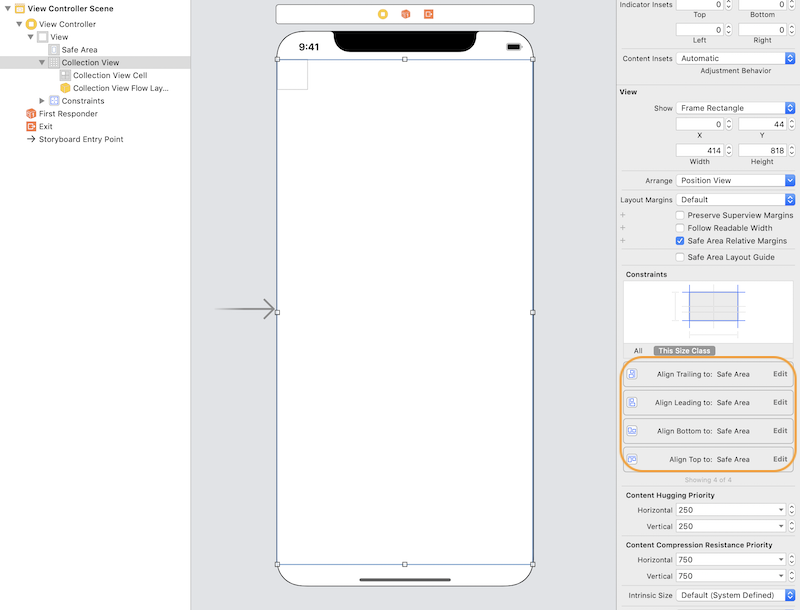
1. StoryboardのView上に Library(Cmd + Shift + L)からCollectionVIew を持ってくる。
SafeAreaに対する制約をつけておく。
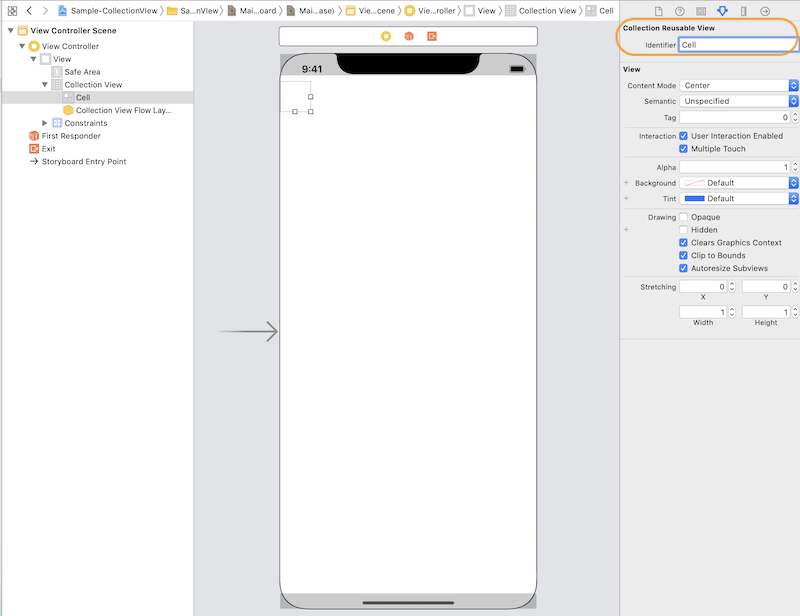
2. Storyboard上の cellを選択して、Collection Reusable View の Identifier を "Cell" とする。
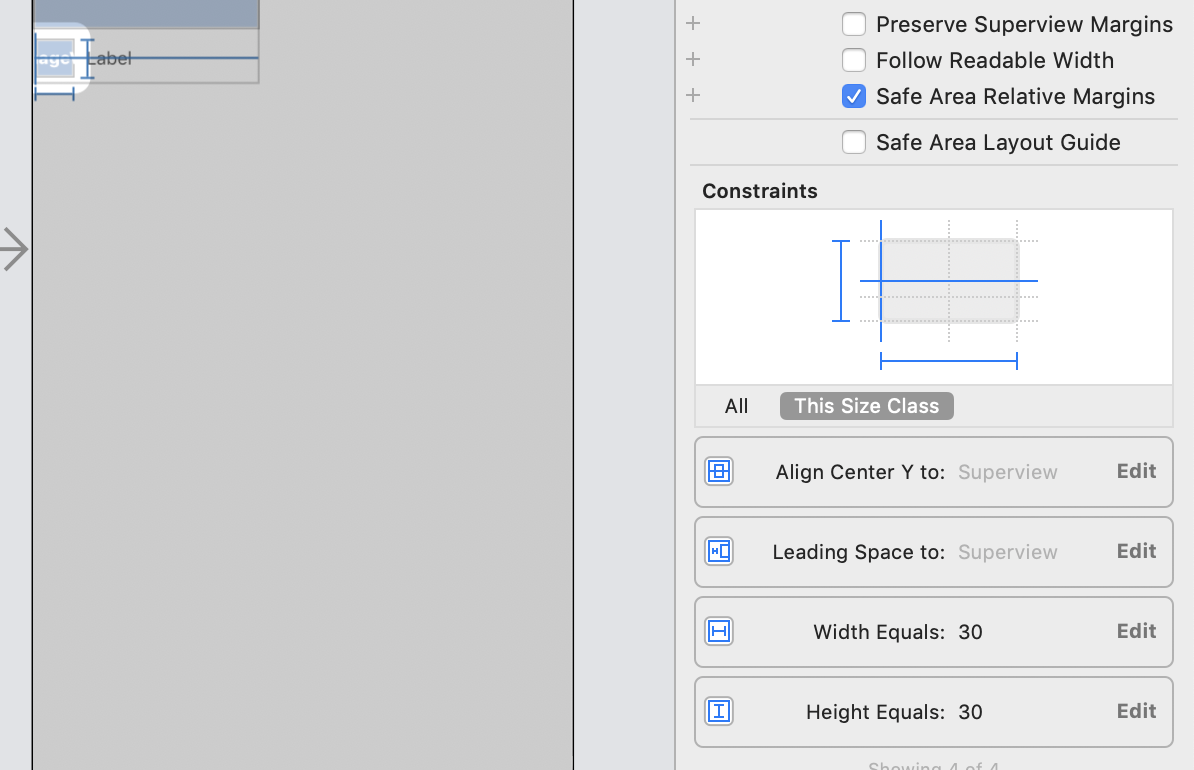
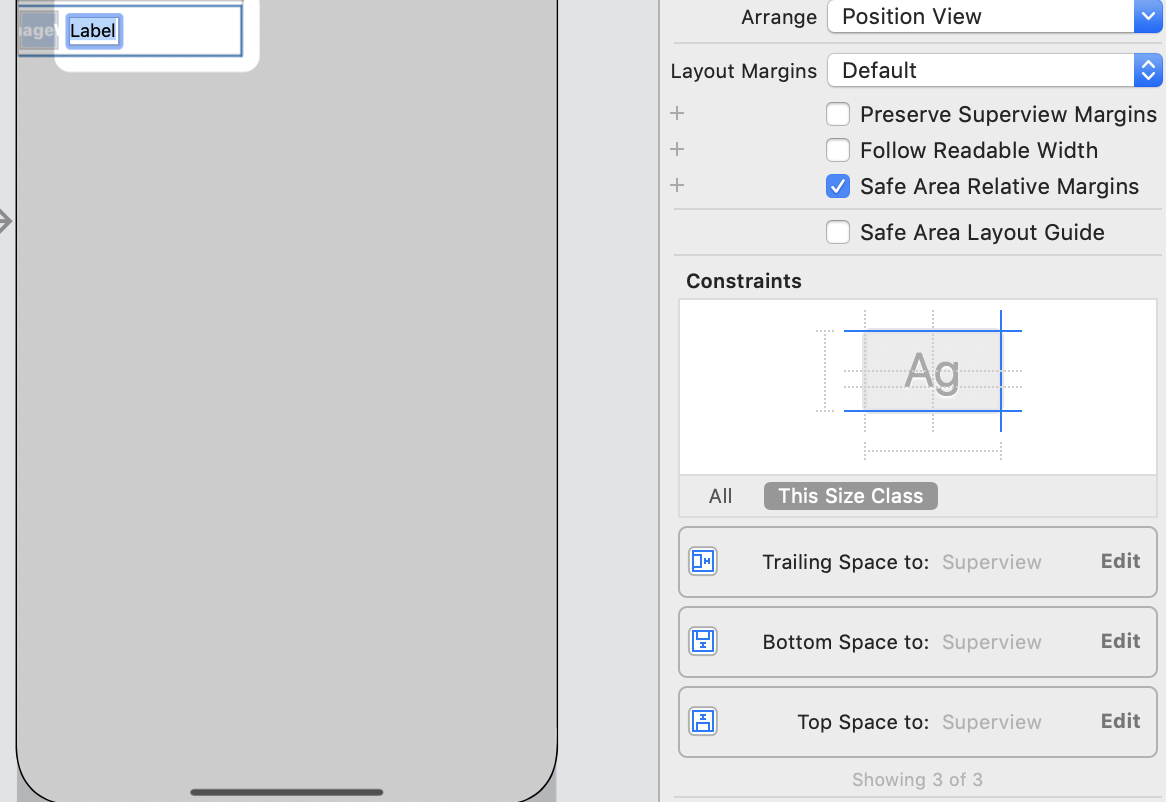
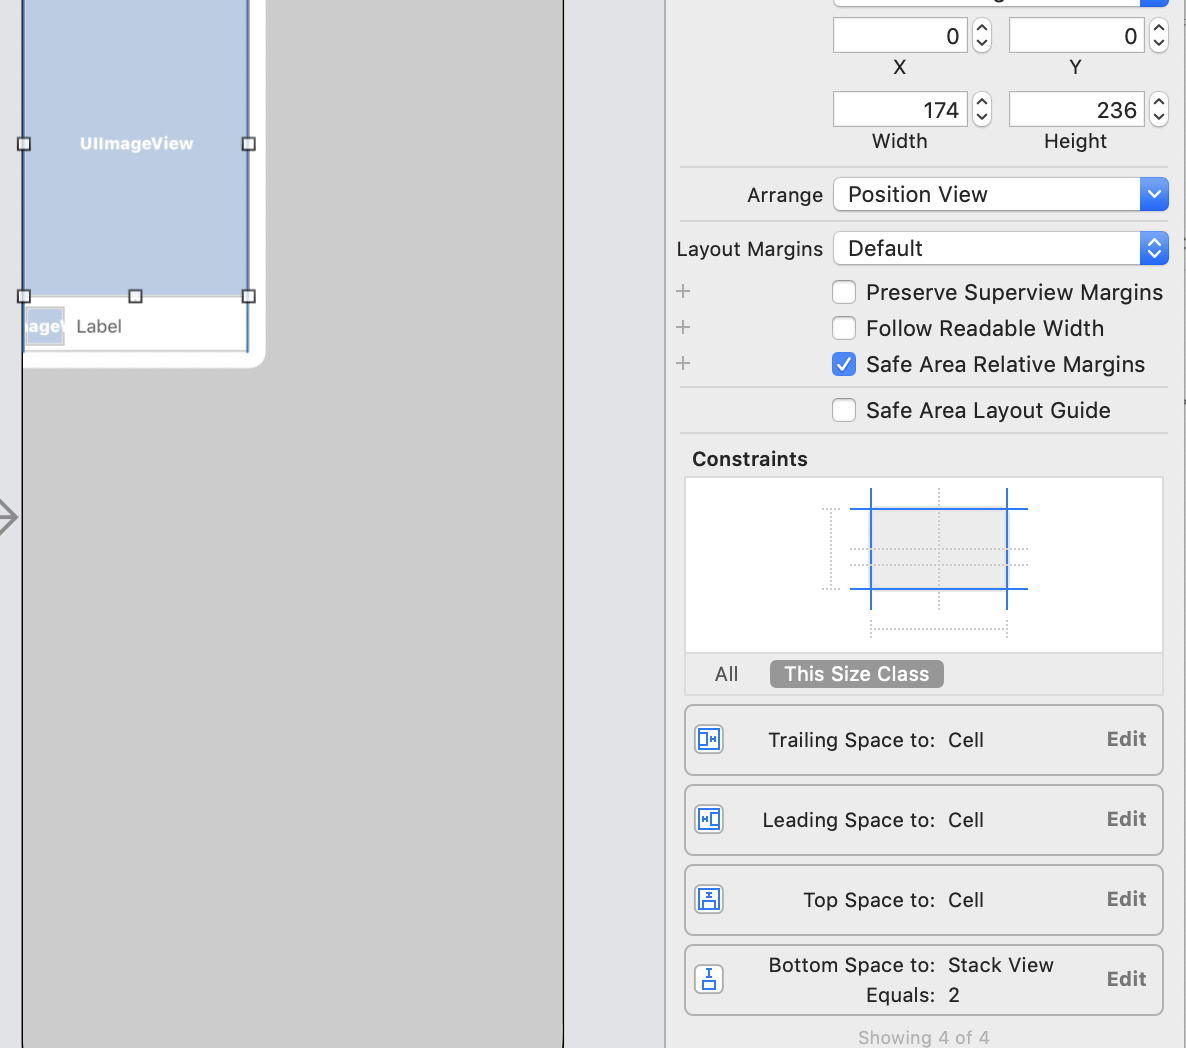
3. cellにLibraryよりImageVIewを2つと、Labelを置き、それぞれに制約をつける。

(参考)制約の付け方
「下部の小さいImageView」
「ラベル」
「下部の小さいImageView」と「ラベル」をStackViewに組み込む

「上部の大きいImageView」
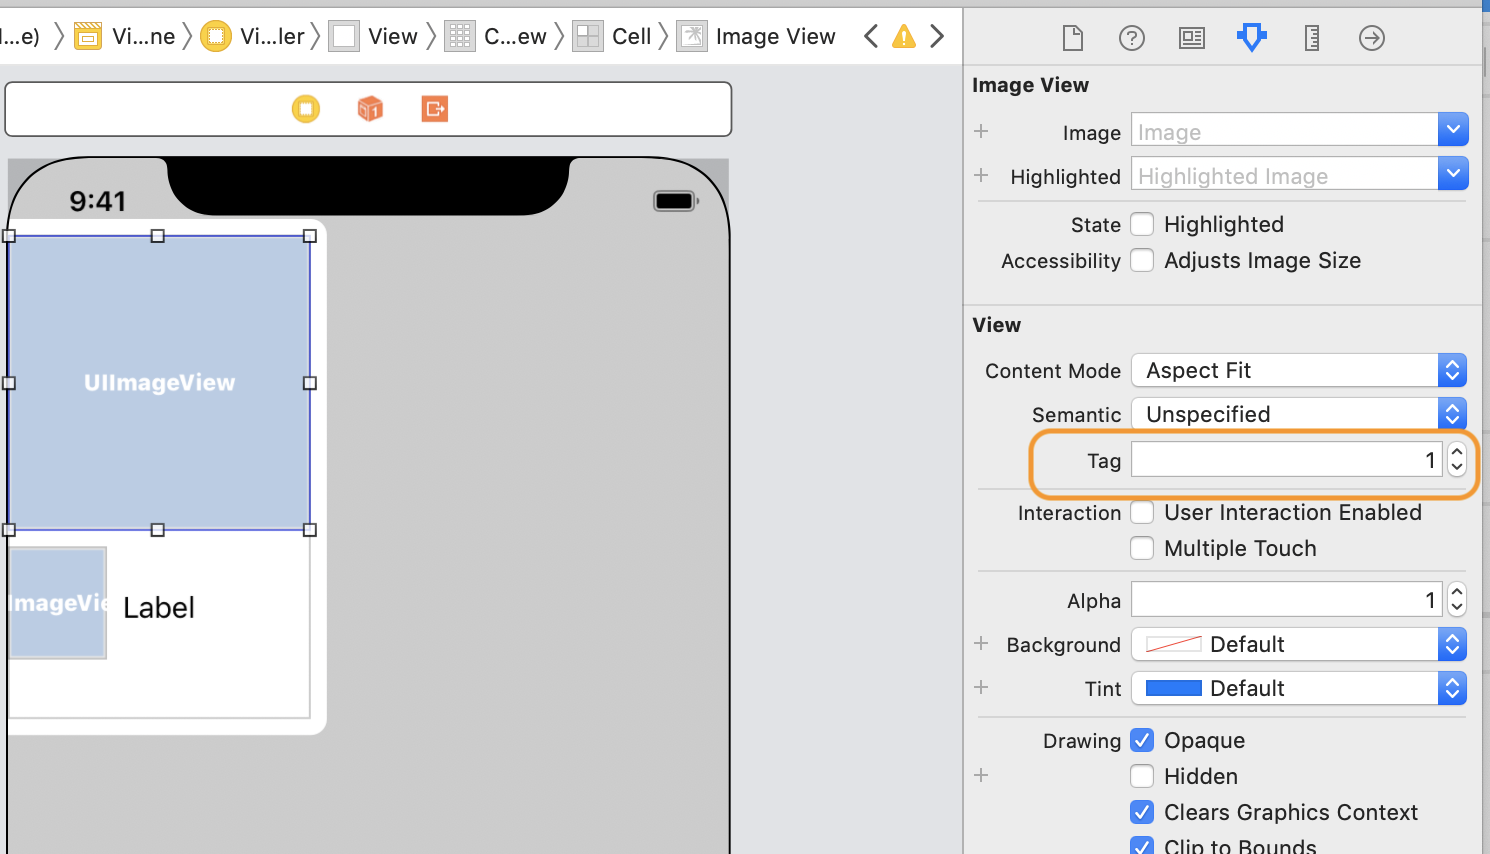
4. 3.で作った2つのImageViewと、Label それぞれのtagに番号を振る。
大きいImageView ... tag 1
小さいImageView ... tag 2
Label ... tag 3
大きいImageView↓
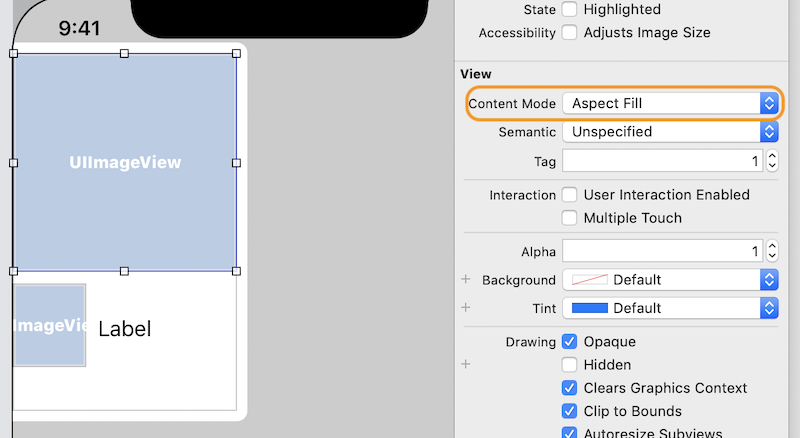
ImageView の ContentMode を AspectFill に変更する。
5. ViewController.swift のclassに、UICollectionViewDelegate, UICollectionViewDataSource を追加する。
エラーが出るので、不足しているコードを追記する。
class ViewController: UIViewController, UICollectionViewDelegate, UICollectionViewDataSource {

    private let photos = ["photo0", "photo1", "photo2", "photo3", "photo4", "photo5","photo0", "photo1", "photo2", "photo3", "photo4", "photo5"]
    private let userImages = ["userImage0", "userImage1", "userImage2", "userImage3", "userImage4", "userImage5","userImage0", "userImage1", "userImage2", "userImage3", "userImage4", "userImage5"]
    private let titles = ["パンケーキ", "ラーメン", "サンドウィッチ", "人参とポテト", "プレートランチ", "サーモングリル", "パンケーキ", "ラーメン", "サンドウィッチ", "人参とポテト", "プレートランチ", "サーモングリル"]

    override func viewDidLoad() {
        super.viewDidLoad()
        // Do any additional setup after loading the view.
    }


    // 1つのセクションの中に表示するセル(要素)の数。
    func collectionView(_ collectionView: UICollectionView, numberOfItemsInSection section: Int) -> Int {
        return photos.count
    }

   // セル(要素)に表示する内容
    func collectionView(_ collectionView: UICollectionView, cellForItemAt indexPath: IndexPath) -> UICollectionViewCell {
        // "Cell" の部分は Storyboard でつけた cell の identifier。
        let cell: UICollectionViewCell = collectionView.dequeueReusableCell(withReuseIdentifier: "Cell", for: indexPath)

        // Tag番号を使ってインスタンスをつくる
        let photoImageView = cell.contentView.viewWithTag(1)  as! UIImageView
        let photoImage = UIImage(named: photos[indexPath.row])
        photoImageView.image = photoImage

        let userImageView = cell.contentView.viewWithTag(2)  as! UIImageView
        let userImage = UIImage(named: userImages[indexPath.row])
        userImageView.image = userImage

        let titleLabel = cell.contentView.viewWithTag(3) as! UILabel
        titleLabel.text = titles[indexPath.row]

        return cell
    }
6. Storyboard に戻り、CollectionView と View Controller を紐づけする。
CollectionView を選択して cintrol を押しながら、ViewControllerにドラッグする。
dataSource、delegate
とそれぞれ結び紐付けします。


7. photo0...と、userImage0...用に、適当な画像をAssets.xcassets に保存しておく。
8. 実行

とりあえず表示することころまではできたので、レイアウトを整えていく。
9. レイアウトを整える。
ViewController.swift のclassに、UICollectionViewDelegateFlowLayout を追加する。
以下をViewController.swift に追記する。
    // レイアウト設定 UIEdgeInsets については下記の参考図を参照。
    private let sectionInsets = UIEdgeInsets(top: 10.0, left: 2.0, bottom: 2.0, right: 2.0)
    // 1行あたりのアイテム数
    private let itemsPerRow: CGFloat = 2
    // Screenサイズに応じたセルサイズを返す
    func collectionView(_ collectionView: UICollectionView, layout collectionViewLayout: UICollectionViewLayout, sizeForItemAt indexPath: IndexPath) -> CGSize {

        let paddingSpace = sectionInsets.left * (itemsPerRow + 1)
        let availableWidth = view.frame.width - paddingSpace
        let widthPerItem = availableWidth / itemsPerRow
        return CGSize(width: widthPerItem, height: widthPerItem + 42)
    }

    func collectionView(_ collectionView: UICollectionView, layout collectionViewLayout: UICollectionViewLayout, insetForSectionAt section: Int) -> UIEdgeInsets {
        return sectionInsets
    }

    // セルの行間の設定
    func collectionView(_ collectionView: UICollectionView, layout collectionViewLayout: UICollectionViewLayout, minimumLineSpacingForSectionAt section: Int) -> CGFloat {
        return 10.0
    }
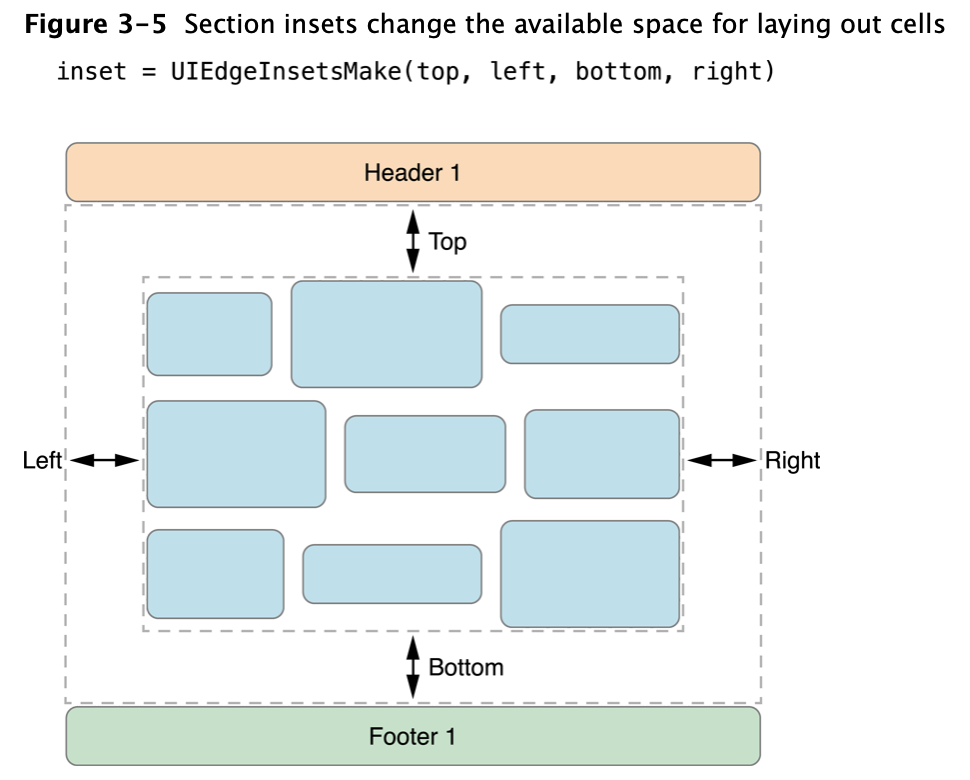 参考図:[Apple公式リファレンス Collection View Programming Guide for iOS](https://developer.apple.com/library/archive/documentation/WindowsViews/Conceptual/CollectionViewPGforIOS/UsingtheFlowLayout/UsingtheFlowLayout.html)より
(メモ) 実行してみて、1列の表示なったら下記を確認
collectionView のMin Spacing に値が入っていたら 0 にする。

10. セルがタップされたときの処理
    // セルが選択されたときの処理
    func collectionView(_ collectionView: UICollectionView, didSelectItemAt indexPath: IndexPath) {
        print("\(titles[indexPath.row])がtapされたよ")
    }
11. 完成!
おまけ...
3列表示にしてみるとこんな感じに。いろいろ応用できそうです。
    // 1行あたりのアイテム数を3にする
    private let itemsPerRow: CGFloat = 3

コード全体
import UIKit

class ViewController: UIViewController, UICollectionViewDelegate, UICollectionViewDataSource, UICollectionViewDelegateFlowLayout {

    private let photos = ["photo0", "photo1", "photo2", "photo3", "photo4", "photo5","photo0", "photo1", "photo2", "photo3", "photo4", "photo5"]
    private let userImages = ["userImage0", "userImage1", "userImage2", "userImage3", "userImage4", "userImage5","userImage0", "userImage1", "userImage2", "userImage3", "userImage4", "userImage5"]
    private let titles = ["パンケーキ", "ラーメン", "サンドウィッチ", "人参とポテト", "プレートランチ", "サーモングリル", "パンケーキ", "ラーメン", "サンドウィッチ", "人参とポテト", "プレートランチ", "サーモングリル"]

    // レイアウト設定
    private let sectionInsets = UIEdgeInsets(top: 10.0, left: 2.0, bottom: 2.0, right: 2.0)

    // 1行あたりのアイテム数
    private let itemsPerRow: CGFloat = 2

    override func viewDidLoad() {
        super.viewDidLoad()
        // Do any additional setup after loading the view.
    }


    // 要素の数。
    func collectionView(_ collectionView: UICollectionView, numberOfItemsInSection section: Int) -> Int {
        return photos.count
    }
    // セル(要素)に表示する内容
    func collectionView(_ collectionView: UICollectionView, cellForItemAt indexPath: IndexPath) -> UICollectionViewCell {
        // "Cell" の部分は Storyboard でつけた cell の identifier。
        let cell: UICollectionViewCell = collectionView.dequeueReusableCell(withReuseIdentifier: "Cell", for: indexPath)

        // Tag番号を使ってImageViewののインスタンスをつくる
        let photoImageView = cell.contentView.viewWithTag(1)  as! UIImageView
        let photoImage = UIImage(named: photos[indexPath.row])
        photoImageView.image = photoImage


        let userImageView = cell.contentView.viewWithTag(2)  as! UIImageView
        let userImage = UIImage(named: userImages[indexPath.row])
        userImageView.image = userImage

        let titleLabel = cell.contentView.viewWithTag(3) as! UILabel
        titleLabel.text = titles[indexPath.row]

        return cell

    }

    // Screenサイズに応じたセルサイズを返す
    func collectionView(_ collectionView: UICollectionView, layout collectionViewLayout: UICollectionViewLayout, sizeForItemAt indexPath: IndexPath) -> CGSize {

        let paddingSpace = sectionInsets.left * (itemsPerRow + 1)
        let availableWidth = view.frame.width - paddingSpace
        let widthPerItem = availableWidth / itemsPerRow
        return CGSize(width: widthPerItem , height: widthPerItem + 42)
    }

    func collectionView(_ collectionView: UICollectionView, layout collectionViewLayout: UICollectionViewLayout, insetForSectionAt section: Int) -> UIEdgeInsets {
        return sectionInsets
    }
    // セルの行間の設定
    func collectionView(_ collectionView: UICollectionView, layout collectionViewLayout: UICollectionViewLayout, minimumLineSpacingForSectionAt section: Int) -> CGFloat {
        return 10.0
    }

    // セルが選択されたときの処理
    func collectionView(_ collectionView: UICollectionView, didSelectItemAt indexPath: IndexPath) {
        print("\(titles[indexPath.row])がtapされたよ")
    }

}
(参考)
-
[UICollectionView Tutorial: Getting Started] (https://www.raywenderlich.com/9334-uicollectionview-tutorial-getting-started
) -
App icon by icons8
-
App photo by pexels