前回はRubyを入れてWebSocketの環境を作るまででした。
今回は簡単な実装テストもかねてデモを作ります。
サーバ側はem-websocketで検索して教えてくれたGoogle先生のサイトを参考にサンプルを生成。
参考までにGitにあるem-websoketも書いておきます。
require 'em-websocket'
require 'pp'

connnections = []

EM::WebSocket.start({:host => "0.0.0.0", :port => 8888}) do |ws_conn|
    ws_conn.onopen do
        connnections << ws_conn
    end

    ws_conn.onmessage do |message|
        pp message
        connnections.each{|conn| conn.send(message) }
    end
end
これを実行します。
ruby websocket.rb
ClientはJQueryで簡単に書けるということでコレもサンプルをコピらせてもらいました。
単純にチャットするコードです。
<html>
<head><meta charset="UTF-8" />
<title>websocket ruby test</title>
<script type="text/javascript" src="http://code.jquery.com/jquery-2.1.3.min.js"></script>
<script type="text/javascript">
$(function(){
    var ws = new WebSocket('ws://10.32.14.18:8888/');
    $("#send").on('click', function(){
        ws.send($('#message').val());
    });

    ws.onmessage = function(event){
        var message_li = $('<li>').text(event.data);
        $("#msg-area").append(message_li);
    };
});
</script>
</head>
<body>
<input type="text" id="message" />
<input type="button" id="send" value="send"/>
<ul id="msg-area" />
</body>
</html>
んで、起動。
サーバにあげなくとも、普通に.htmlで保存してダブルクリックしてブラウザで開けば動きます。
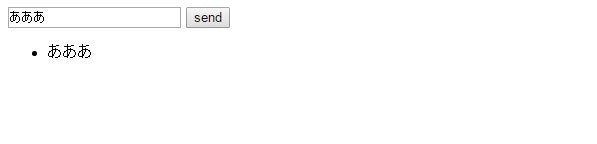
2つhtml立ち上げて、片方で打てばもう片方に届いていることが確認できます。
↓こんな感じ
あとは、現在接続している人数や、新しい人が入ってきたら通知したい。あるいは人数を更新したい。と普通に思うので接続数を取れるか試してみる。
さあ、ここからが試行錯誤の開始です。
まずは、新規でコネクションが張られたら今部屋に何人いるかを新規接続者に返してみます。
またついでに既存の接続者には新規接続を通知して、接続者数を通知してみます。
Client側は特に何も弄らなくとも問題なし。
require 'em-websocket'
require 'pp'

connnections = []

EM::WebSocket.start({:host => "0.0.0.0", :port => 8888}) do |ws_conn|
    ws_conn.onopen do
        connnections.each{|conn| conn.send("Connect New Client : #{connnections.length+1}") }   //既存の接続者に通知
        connnections << ws_conn
        ws_conn.send "Welcome! Now Reader is #{connnections.length}"   //新規の接続者に通知
    end

    ws_conn.onclose do
        connnections.each{|conn| conn.send("Reconnect Client : #{connnections.length}") } //既存の接続者に通知
    end

    ws_conn.onmessage do |message|
        pp message
        connnections.each{|conn| conn.send(message) }
    end
end
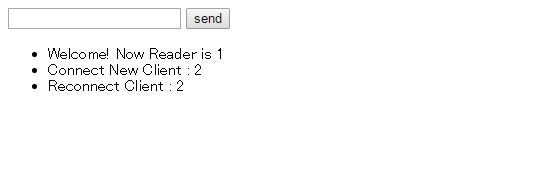
まずは、最初に接続

クライアント側には接続メッセージとともに現在の接続者数が表示されます。
当然、まだ一人なので1です。
次にもう一つブラウザを立ち上げてクライアント起動
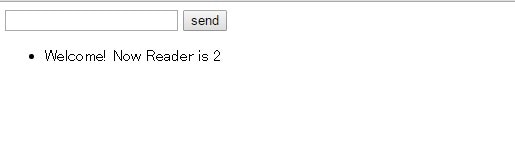
クライアントには接続者数が2でメッセージが表示されます。
一方で、最初に立ち上げたほうには

新しいクライアントが来たことを通知するメッセージと現在の数が出ました。
では、2つ目のブラウザを閉じてみましょう。ws_conn.oncloseがcallされるはずです。
Callされたのが確認できます。
ただし、数が合わないです。1でないとおかしい。
コレはソース見れば一目瞭然なのですが、collectionのサイズを単純にlengthしているからで。
collectionの中身を見てconnectionの状況を見ないといけない。
正直、この方法が正しいのかは分からないけど、まずは分かりやすいので試してみます。
ということで、テスト
まずはoncloseの処理でconnectionがどういう状況になるのかを確認する必要がある。
nullになるのかならないのか。
なんか違う状況になるのか。
コレを見ると、どうやらstateというのがあるらしい。これを取得して表示してみる。
とりあえずは、onopenに直書きで。
require 'em-websocket'
require 'pp'

connnections = []

EM::WebSocket.start({:host => "0.0.0.0", :port => 8888}) do |ws_conn|
    ws_conn.onopen do
        i=0
        connnections.each {|conn|
                i=i+1
                pp "Index : #{i} state ? #{conn.state}"  #ここに書いてみる。
        }
        connnections.each{|conn| conn.send("Connect New Client : #{i+1}") }
        connnections << ws_conn
        ws_conn.send "Welcome! Now Reader is #{connnections.length}"
    end

    ws_conn.onclose do
        i=0
        connnections.each {|conn|
                if !conn.nil? then
                        i=i+1
                end
        }
        connnections.each{|conn| conn.send("Reconnect Client : #{i}") }
    end

    ws_conn.onmessage do |message|
        pp message
        connnections.each{|conn| conn.send(message) }
    end
end
で結果。
テストとしては4つのブラウザで接続して、3つ目を閉じて5つめを開いて接続した。
"Index : 1 state ? connected"
"Index : 1 state ? connected"
"Index : 2 state ? connected"
"Index : 1 state ? connected"
"Index : 2 state ? connected"
"Index : 3 state ? connected"
"Index : 1 state ? connected"
"Index : 2 state ? connected"
"Index : 3 state ? closed"
"Index : 4 state ? connected"
どうやら、この方法だと、connectionはnullにならずにcloseした状態のものをずっと保持しているらしい。
毎回ループさせるこの方法がいいのかどうかハナハナ疑問だけど、サンプルプログラムを弄っている状態では
とりあえずコレで何とかなりそうだ。
次はもう少しいい方法がないかを調べてみたい。