はじめに
今回、この記事を作成した意図は、『初学者こそ初学者の気持ちが理解できる』 と思い
業界1年目である私がWEBサーバーの構築手順を噛み砕いて説明しようと思い立ちました。
環境
今回、使用する環境は以下の通りになります。
- VirtualBox
- CentOS7
- Apache(インストールするアプリケーション)
構築手順
*はじめに、今回はrootユーザーにて構築作業を行います。
1.SELinuxの無効化
いきなりSELinux....??となっている方も多いかと思います。
SELinuxとは簡単に説明すると、Linuxのセキュリティ機能になります。
ざっくりな説明なので気になる方は調べてみましょう!
セキュリティ機能なら無効化しない方がいいのでは....??
と、貴方と同じ様にはじめは私も思いました。
何故、無効化にするかかというと
root権限であっても行えない作業などの制限が起きる可能性がある
という理由があります。
では、説明ここまでにしてSELinuxの無効化をしてみましょう!!
まず、以下のコマンドを入力しviエディタを開きSELinuxのコンフィグを書き換えます。
# vi /etc/selinux/config
viが開いたら以下を参考に書き換え
# This file controls the state of SELinux on the system.
# SELINUX= can take one of these three values:
#     enforcing - SELinux security policy is enforced.
#     permissive - SELinux prints warnings instead of enforcing.
#     disabled - No SELinux policy is loaded.
#SELINUX=enforcing ←行頭に#をつけコメントアウト
SELINUX=disabled  ←この行を書き足す
# SELINUXTYPE= can take one of three values:
#     targeted - Targeted processes are protected,
#     minimum - Modification of targeted policy. Only selected processes are protected.
#     mls - Multi Level Security protection.
SELINUXTYPE=targeted
書き換えが完了したら保存しましょう。
設定を反映させる為、再起動します
# shutdown -r now
再起動後に設定が反映されているかコマンドで確認します。
# getenforce
Disabled
Disabledが返ってくれば設定完了です!
2.Apacheのインストール
以下、コマンドでインストールを行います。
# yum install -y httpd
-y: 全ての問い合わせにyesで答える
次にApacheの起動コマンドの投入&状態確認
# systemctl start httpd
# systemctl status httpd
● httpd.service - The Apache HTTP Server
   Loaded: loaded (/usr/lib/systemd/system/httpd.service; disabled; vendor preset: disabled)
   Active: active (running) since 金 2023-11-03 21:39:00 JST; 2min 24s ago
     Docs: man:httpd(8)
           man:apachectl(8)
 Main PID: 1733 (httpd)
   Status: "Total requests: 0; Current requests/sec: 0; Current traffic:   0 B/sec"
    Tasks: 6
   Memory: 2.8M
   CGroup: /system.slice/httpd.service
           tq1733 /usr/sbin/httpd -DFOREGROUND
           tq1734 /usr/sbin/httpd -DFOREGROUND
           tq1735 /usr/sbin/httpd -DFOREGROUND
           tq1736 /usr/sbin/httpd -DFOREGROUND
           tq1737 /usr/sbin/httpd -DFOREGROUND
           mq1738 /usr/sbin/httpd -DFOREGROUND

11月 03 21:39:00 localhost.localdomain systemd[1]: Starting The Apache HTTP Server...
11月 03 21:39:00 localhost.localdomain httpd[1733]: AH00558: httpd: Could not reliably...e
11月 03 21:39:00 localhost.localdomain systemd[1]: Started The Apache HTTP Server.
Hint: Some lines were ellipsized, use -l to show in full.
Active: active(running)
となっていれば起動完了です!!
次に、自動起動設定をします。
これをやらないと再起動するたびに停止状態となってしまいます。
以下変更コマンドと自動起動設定確認コマンドの投入
# systemctl enable httpd
Created symlink from /etc/systemd/system/multi-user.target.wants/httpd.service to /usr/lib/systemd/system/httpd.service.
# systemctl is-enabled httpd
enabled
enabledが返ってくれば自動起動設定の完了!!
3.Firewalldの設定
*こちらの作業は必要ない場合がございますが、学習の為やりましょう!!
続いてFirewallの穴あけ作業となります。
httpの80番ポートの開放を行います。
以下のコマンドを投入し80番ポートの開放
# firewall-cmd --add-service=http --zone=public --permanent
次に設定を反映させる為、firewalldの再起動
# firewall-cmd --reload
設定が正しく反映されているかの確認
# firewall-cmd --list-all
services: の欄にhttpがあれば設定完了!!
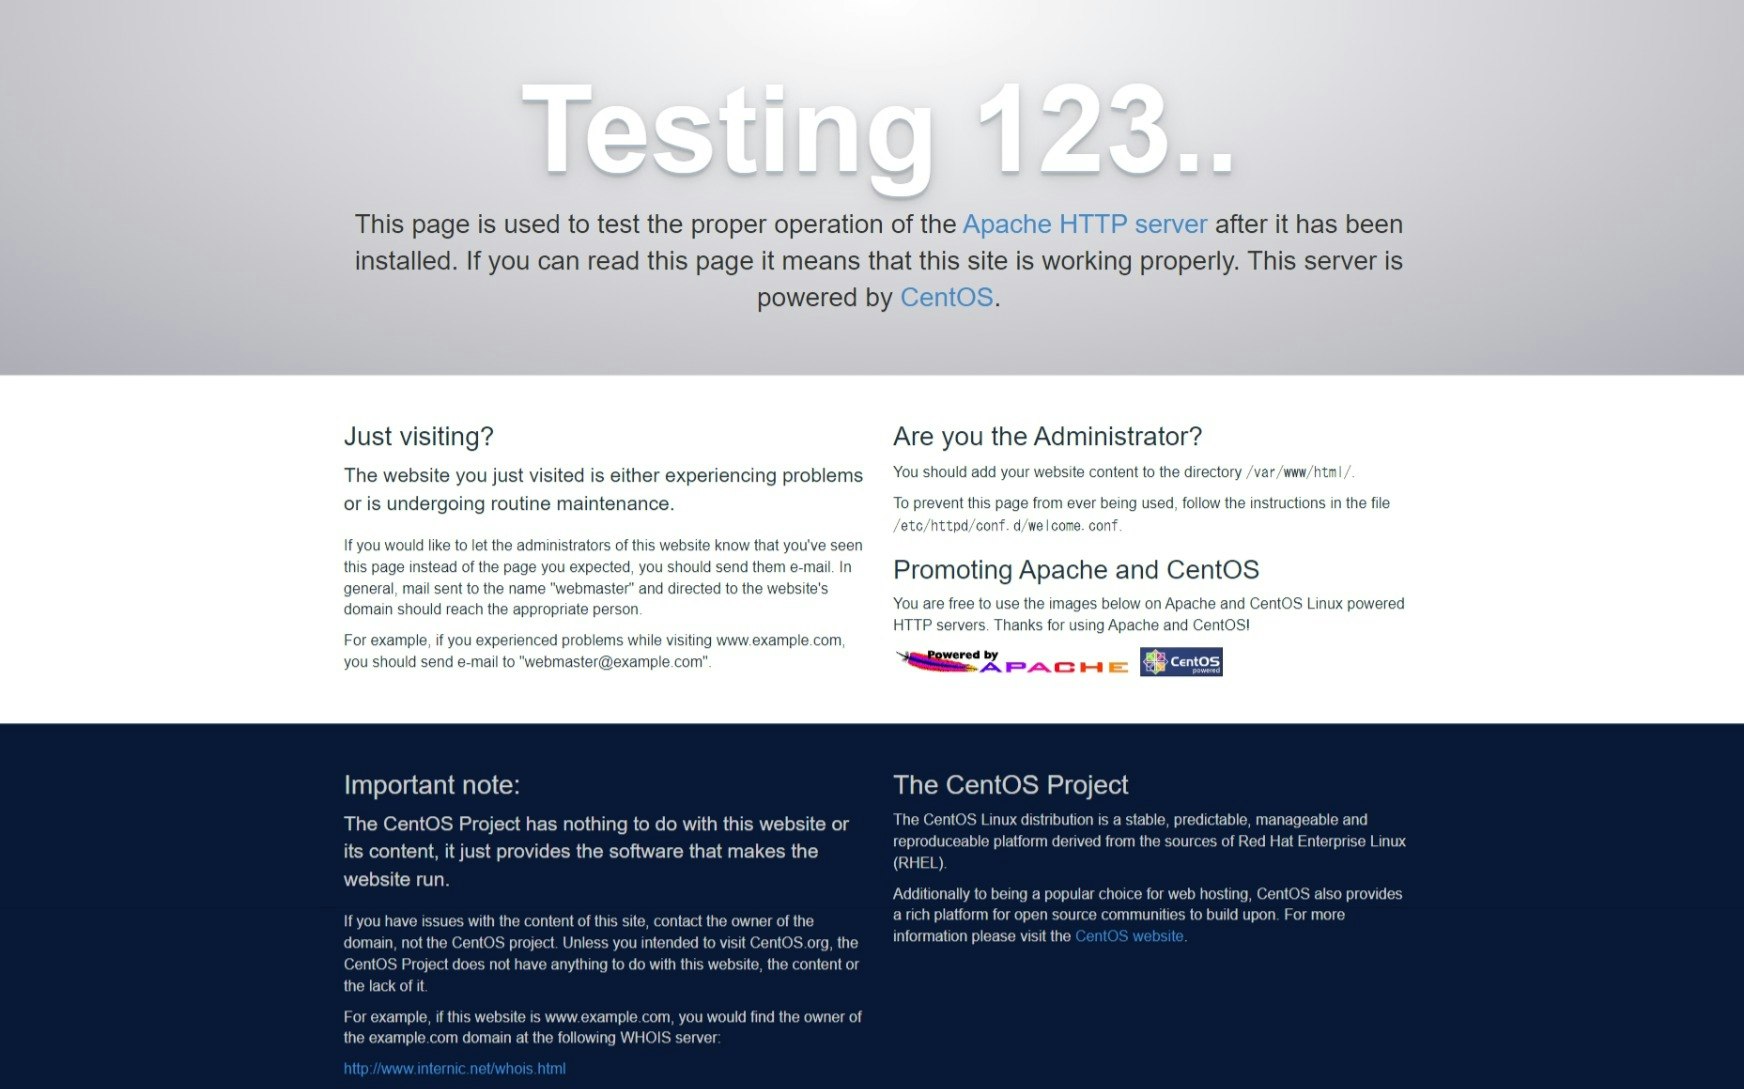
4.実際にアクセスしてみよう
ブラウザのアドレスバーに構築したサーバーのipを入力してみよう!!

上記のようなページが表示されれば構築完了です!!
5.おまけ
せっかくここまで構築したので少し遊んでみましょう!!
まずはディレクトリの移動
# cd /var/www/html
こちらで下記のファイルを作成し
vi index.html
以下の文言を記載し保存(文言はなんでもOK!!)
syosinsya infra
そしてブラウザを更新してみると....!!!
このようにページの変更ができました!!
さいごに
今回の構築作業は本当に基本的な部分のみとなります。
作って壊してを繰り返すのもよし。
自分なりにカスタマイズしてみるのもよし。
我々、初学者の勉強はまだまだこれからです!!
共に立派なエンジニアとなれるよう頑張りましょう
