はじめに
herokuにデプロイしたアプリを個人のリポジトリからチームアカウントリポジトリに移動しました。
コードを修繕し、ローカルからherokuのリモートURLにpushした際、エラーに遭遇しましたのでその解決策をここで共有します。
解決までの流れ
これまで通り、herokuにpushしようとしました。。
$ git push heroku master
fatal: 'heroku' does not appear to be a git repository
fatal: Could not read from remote repository.

Please make sure you have the correct access rights
and the repository exists.
リモートにherokuが登録されていないと怒られています。
(というのも、別のPCからpushしたため、herokuがリモートに登録すらされていない状況でした。
herokuリポジトリが既に存在し、変更する場合は、下記の補足にまとめてますのでご参考ください。)
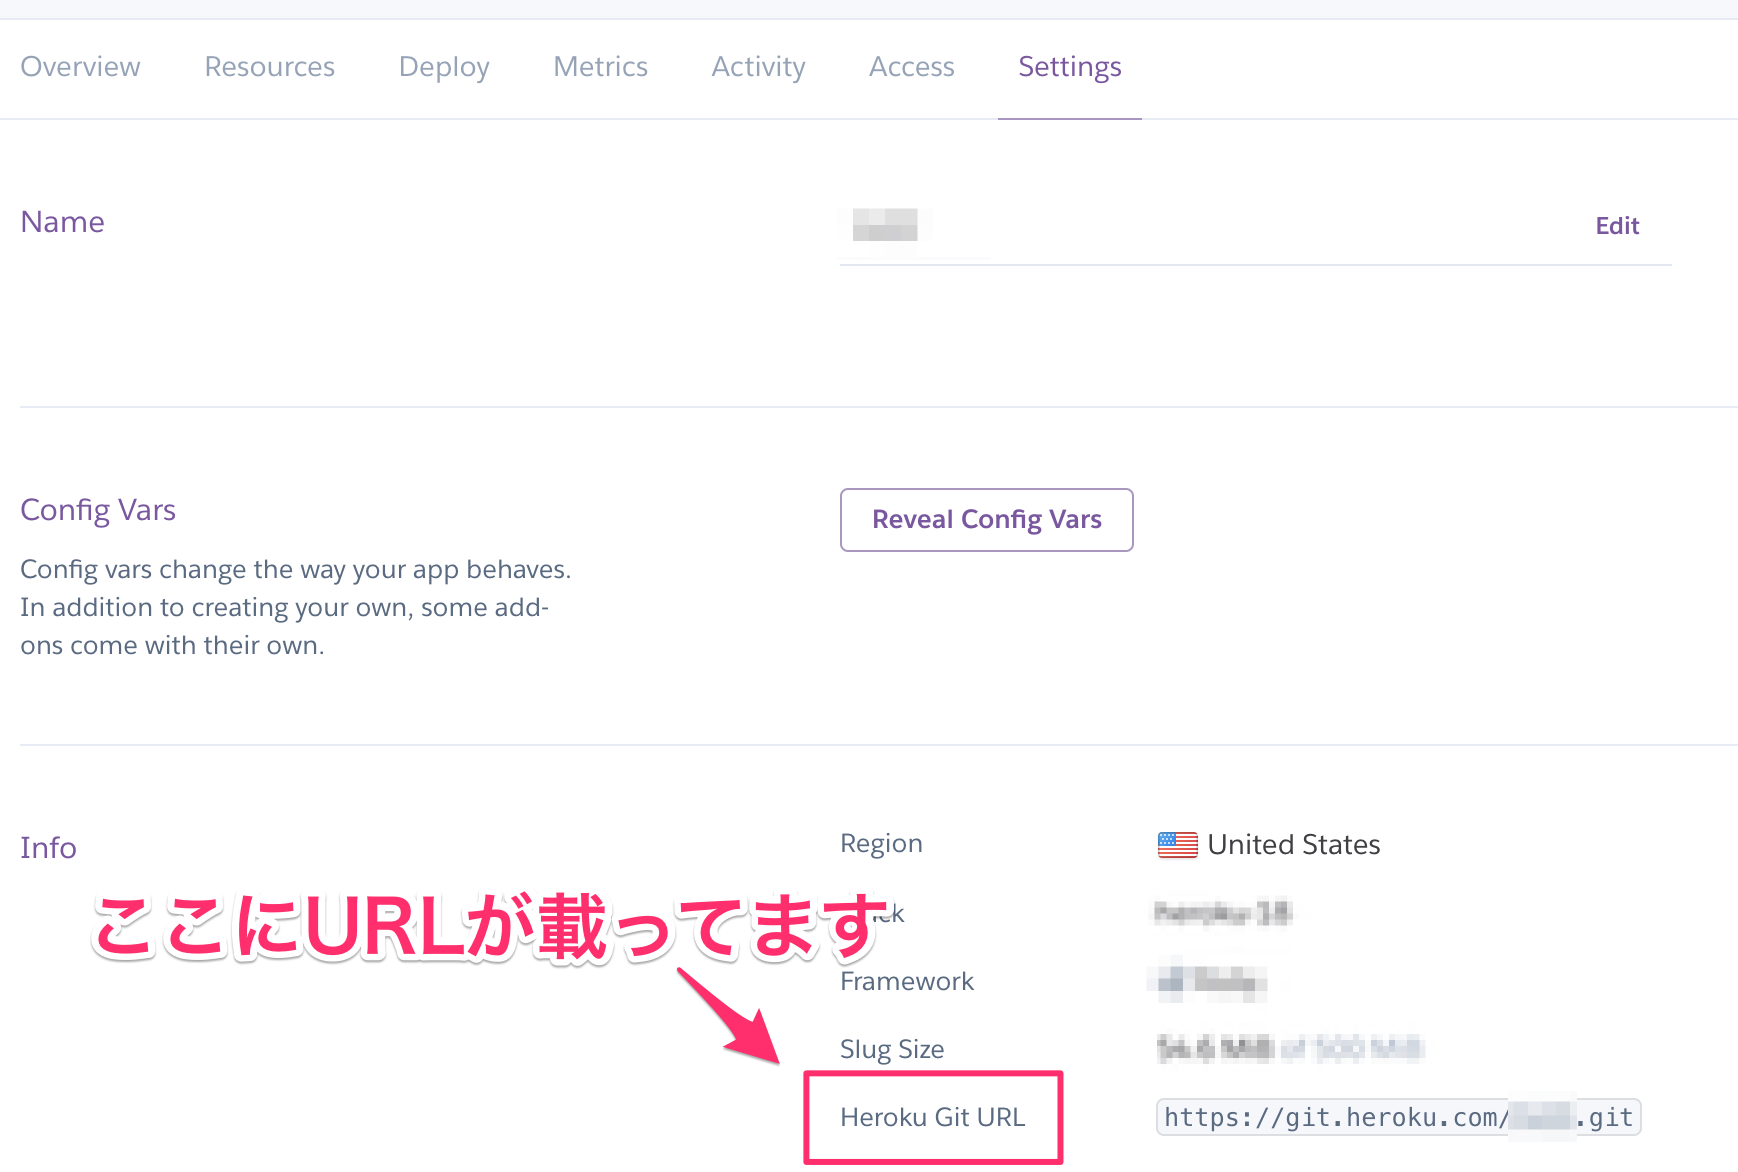
git remote addコマンドで、リポジトリ名(heroku)とリポジトリURL (https://git.heroku.com/アプリ名.git) を登録しましょう。
リポジトリURLは下記画像記載箇所で確認できます。

$ git remote add heroku https://git.heroku.com/アプリ名.git
登録できたかはgit remote -vで確認できます。
$ git remote -v
heroku	https://git.heroku.com/アプリ名.git (fetch)
heroku	https://git.heroku.com/アプリ名.git (push)
origin	https://github.com/チームアカウント/アプリ名.git (fetch)
origin	https://github.com/チームアカウント/アプリ名.git (push)
herokuのURLが登録されていたら無事登録完了してます。
登録できたのでpushしましょう。
$ git push heroku master
To https://git.heroku.com/アプリ名.git
 ! [rejected]        master -> master (fetch first)
error: failed to push some refs to 'https://git.heroku.com/アプリ名.git'
hint: Updates were rejected because the remote contains work that you do
hint: not have locally. This is usually caused by another repository pushing
hint: to the same ref. You may want to first integrate the remote changes
hint: (e.g., 'git pull ...') before pushing again.
hint: See the 'Note about fast-forwards' in 'git push --help' for details.
pushの前にpullしなさいと指示されてますね。
pullしましょう。
$ git pull heroku master
remote: Counting objects: 23, done.
remote: Compressing objects: 100% (14/14), done.
remote: Total 16 (delta 11), reused 0 (delta 0)
Unpacking objects: 100% (16/16), done.
From https://git.heroku.com/アプリ名
 * branch            master     -> FETCH_HEAD
 * [new branch]      master     -> heroku/master
Auto-merging app/views/top/index.html.erb
Merge made by the 'recursive' strategy.
 Gemfile                      | 1 +
 Gemfile.lock                 | 2 ++
 app/views/top/index.html.erb | 4 ++--
 3 files changed, 5 insertions(+), 2 deletions(-)
いよいよherokuにpushできるようになりました。
pushしましょう。
$ git push heroku master
Counting objects: 14, done.
Delta compression using up to 4 threads.
Compressing objects: 100% (12/12), done.
Writing objects: 100% (14/14), 1.29 KiB | 442.00 KiB/s, done.
Total 14 (delta 9), reused 0 (delta 0)
remote: Compressing source files... done.
remote: Building source:
remote:
remote: -----> Ruby app detected
remote: -----> Compiling Ruby/Rails
.
.
.
これで完了です。
アプリにアクセスし、変更分が確認できたら成功ですね。
補足
登録先を変更した時(個人からチームアカウントに変更した時など)の流れは次の通りです。
まずは、登録されているリポジトリを確認します。
$ git remote -v
次に、下の、1、2のどちらか片方を行います。どちらでも構いません。
- リモートURL変更
- リモートURL削除し、リモートURL追加
1. リモートURL変更
$ git remote set-url heroku https://git.heroku.com/アプリ名.git
2. リモートURL削除し、リモートURL追加
$ git remote rm heroku

$ git remote add heroku https://git.heroku.com/アプリ名.git
以上になります。
おわりに
少しでも参考なったという方は、いいね、お願いします。(^^)
git、Githubに関しては別の記事にもまとめてますのでよければご参考ください。
git, Github関連記事
GitHubとgitの関わり[初学者向け] + gitでGithubと連携する
コミットは怖くない![取り消し、打ち消し、上書き]