はじめに
8月末にOCI Service Operator for Kubernetes(OSOK)というサービスがリリースされました。
本記事では、このサービスについて書いていきたいと思います。
OCI Service Operator for Kubernetes (OSOK)とは
OCI Service Operator for Kubernetes(以下、OSOK)はKubernetes API(Operator)を利用して、OCI(Oracle Cloud Infrastructure)上のリソースのプロビジョニング、OKEからサービスへの接続、管理を行うことができるサービスです。
オープンソースで開発されており、GitHubで公開されています。
現時点でOSOKに対応しているサービスは以下の通りです。
-
Autonomous Database:パッチ適用、アップグレード、およびチューニングを自動的に行い、運用コストを極限まで抑えたデータベースサービスです。複数の種類がありますが、OSOKがサポートしているのは、トランザクション・ワークロード用のAutonomous Transaction Processingとデータウェアハウス・ワークロード用のAutonomous Data Warehouseの2種類です。
-
MySQL Database:OCIのサービスとして、OracleのMySQLチームによって開発されているマネージドのMySQLサービスです。
-
OCI Streaming:リアルタイムで大量のデータ・ストリームを収集および消費するためのスケーラブルでマネージドなパブサブモデルのメッセージングサービスです。
今後も様々なサービスをサポート予定になっています。
本記事では、Autonomous Transaction Processingをプロビジョニングしてみようと思います。
事前準備
事前準備としては以下の2ステップあります。
- operator-sdkとOperator Lifecycle Manager(OLM)のインストール:OSOKは、KubernetesのOperator管理に利用されるオープンソースツールキットであるOperatorFrameworkに基づいているため、operator-sdkとOperator Lifecycle Manager(OLM)をインストールしていきます。
- 動的グループとポリシーの設定:Kubernetes API(Operator)からOCI上のリソースを操作できるように設定を行います。(インスタンス・プリンシパルを利用可能にする設定を行います)
operator-sdkとOperator Lifecycle Manager(OLM)のインストール
こちらのページに沿ってインストールしていきます。
まずは環境変数を設定していきます。
export ARCH=$(case $(uname -m) in x86_64) echo -n amd64 ;; aarch64) echo -n arm64 ;; *) echo -n $(uname -m) ;; esac)
export OS=$(uname | awk '{print tolower($0)}')
次にoperator-sdkのバイナリをダウンロードします。
export OPERATOR_SDK_DL_URL=https://github.com/operator-framework/operator-sdk/releases/download/v1.13.0
curl -LO ${OPERATOR_SDK_DL_URL}/operator-sdk_${OS}_${ARCH}
次にバイナリの検証を行います。
gpg --keyserver keyserver.ubuntu.com --recv-keys 052996E2A20B5C7E
curl -LO ${OPERATOR_SDK_DL_URL}/checksums.txt
curl -LO ${OPERATOR_SDK_DL_URL}/checksums.txt.asc
gpg -u "Operator SDK (release) <cncf-operator-sdk@cncf.io>" --verify checksums.txt.asc
以下のような結果が表示されます。
gpg: Signature made Thu 09 Sep 2021 04:59:50 PM UTC using RSA key ID BF9886DB
gpg: Good signature from "Operator SDK (release) <cncf-operator-sdk@cncf.io>"
gpg: WARNING: This key is not certified with a trusted signature!
gpg:          There is no indication that the signature belongs to the owner.
Primary key fingerprint: xxxx xxxx xxxx xxxx xxxx  xxxx xxxx xxxx xxxx xxxx
     Subkey fingerprint: xxxx xxxx xxxx xxxx xxxx  xxxx xxxx xxxx xxxx xxxx
検証結果を確認します。
grep operator-sdk_${OS}_${ARCH} checksums.txt | sha256sum -c -
以下のように出力されれば、検証は問題ありません。(linux_amd64環境の場合)
operator-sdk_linux_amd64: OK
最後に実行権限を付与します。
chmod +x operator-sdk_${OS}_${ARCH} && mv operator-sdk_${OS}_${ARCH} operator-sdk
続いて、Operator Lifecycle Manager(OLM)のインストールを行います。
以下のコマンドを実行します。
./operator-sdk olm install
以下のように出力されれば問題ありません。
~
NAME                                            NAMESPACE    KIND                        STATUS
catalogsources.operators.coreos.com                          CustomResourceDefinition    Installed
clusterserviceversions.operators.coreos.com                  CustomResourceDefinition    Installed
installplans.operators.coreos.com                            CustomResourceDefinition    Installed
operatorconditions.operators.coreos.com                      CustomResourceDefinition    Installed
operatorgroups.operators.coreos.com                          CustomResourceDefinition    Installed
operators.operators.coreos.com                               CustomResourceDefinition    Installed
subscriptions.operators.coreos.com                           CustomResourceDefinition    Installed
olm                                                          Namespace                   Installed
operators                                                    Namespace                   Installed
olm-operator-serviceaccount                     olm          ServiceAccount              Installed
system:controller:operator-lifecycle-manager                 ClusterRole                 Installed
olm-operator-binding-olm                                     ClusterRoleBinding          Installed
olm-operator                                    olm          Deployment                  Installed
catalog-operator                                olm          Deployment                  Installed
aggregate-olm-edit                                           ClusterRole                 Installed
aggregate-olm-view                                           ClusterRole                 Installed
global-operators                                operators    OperatorGroup               Installed
olm-operators                                   olm          OperatorGroup               Installed
packageserver                                   olm          ClusterServiceVersion       Installed
operatorhubio-catalog                           olm          CatalogSource               Installed
以上で、Operator Lifecycle Manager(OLM)のインストールは完了です。
動的グループとポリシーの設定
動的グループについてはこちらをご確認ください。
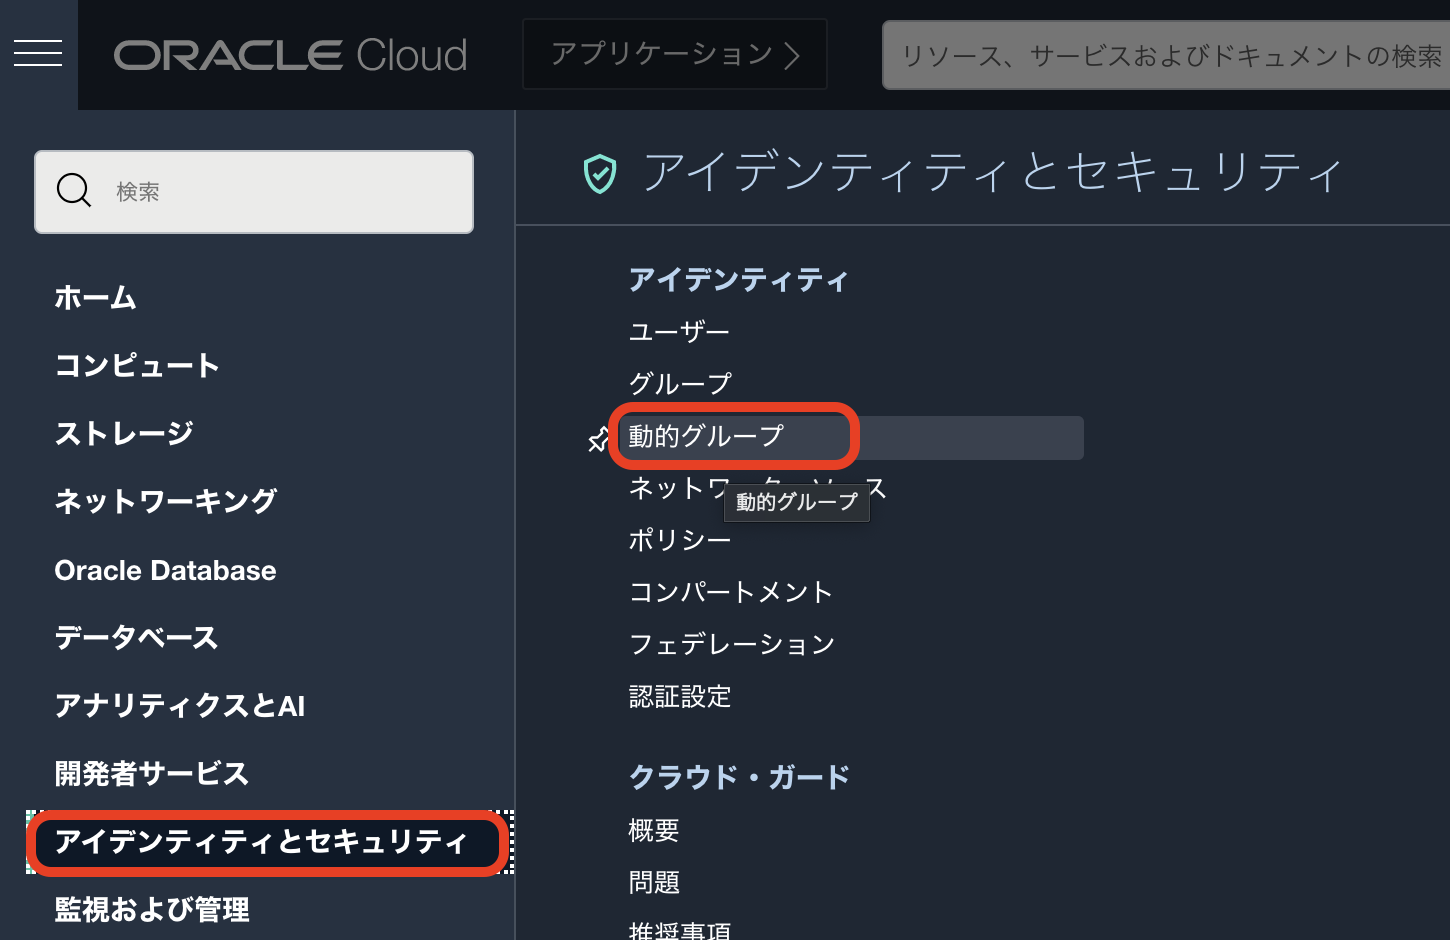
まず、OCIのコンソールにログインし、「アイデンティティとセキュリティ」から「動的グループ」を選択します。
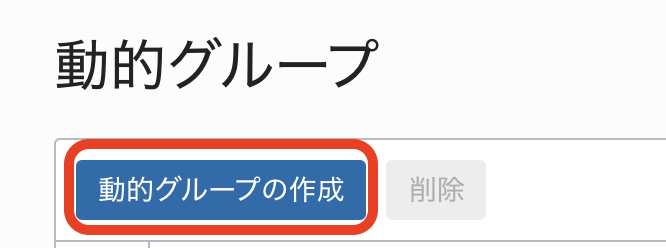
「動的グループの作成」をクリックします。
以下のように入力します。
| key | value |
|---|---|
| 名前 | osok_dynamic_group |
| 説明 | osok_dynamic_group |
| 一致ルール - ルール1 | instance.compartment.id = '<ご自身のコンパートメントOCID>' |
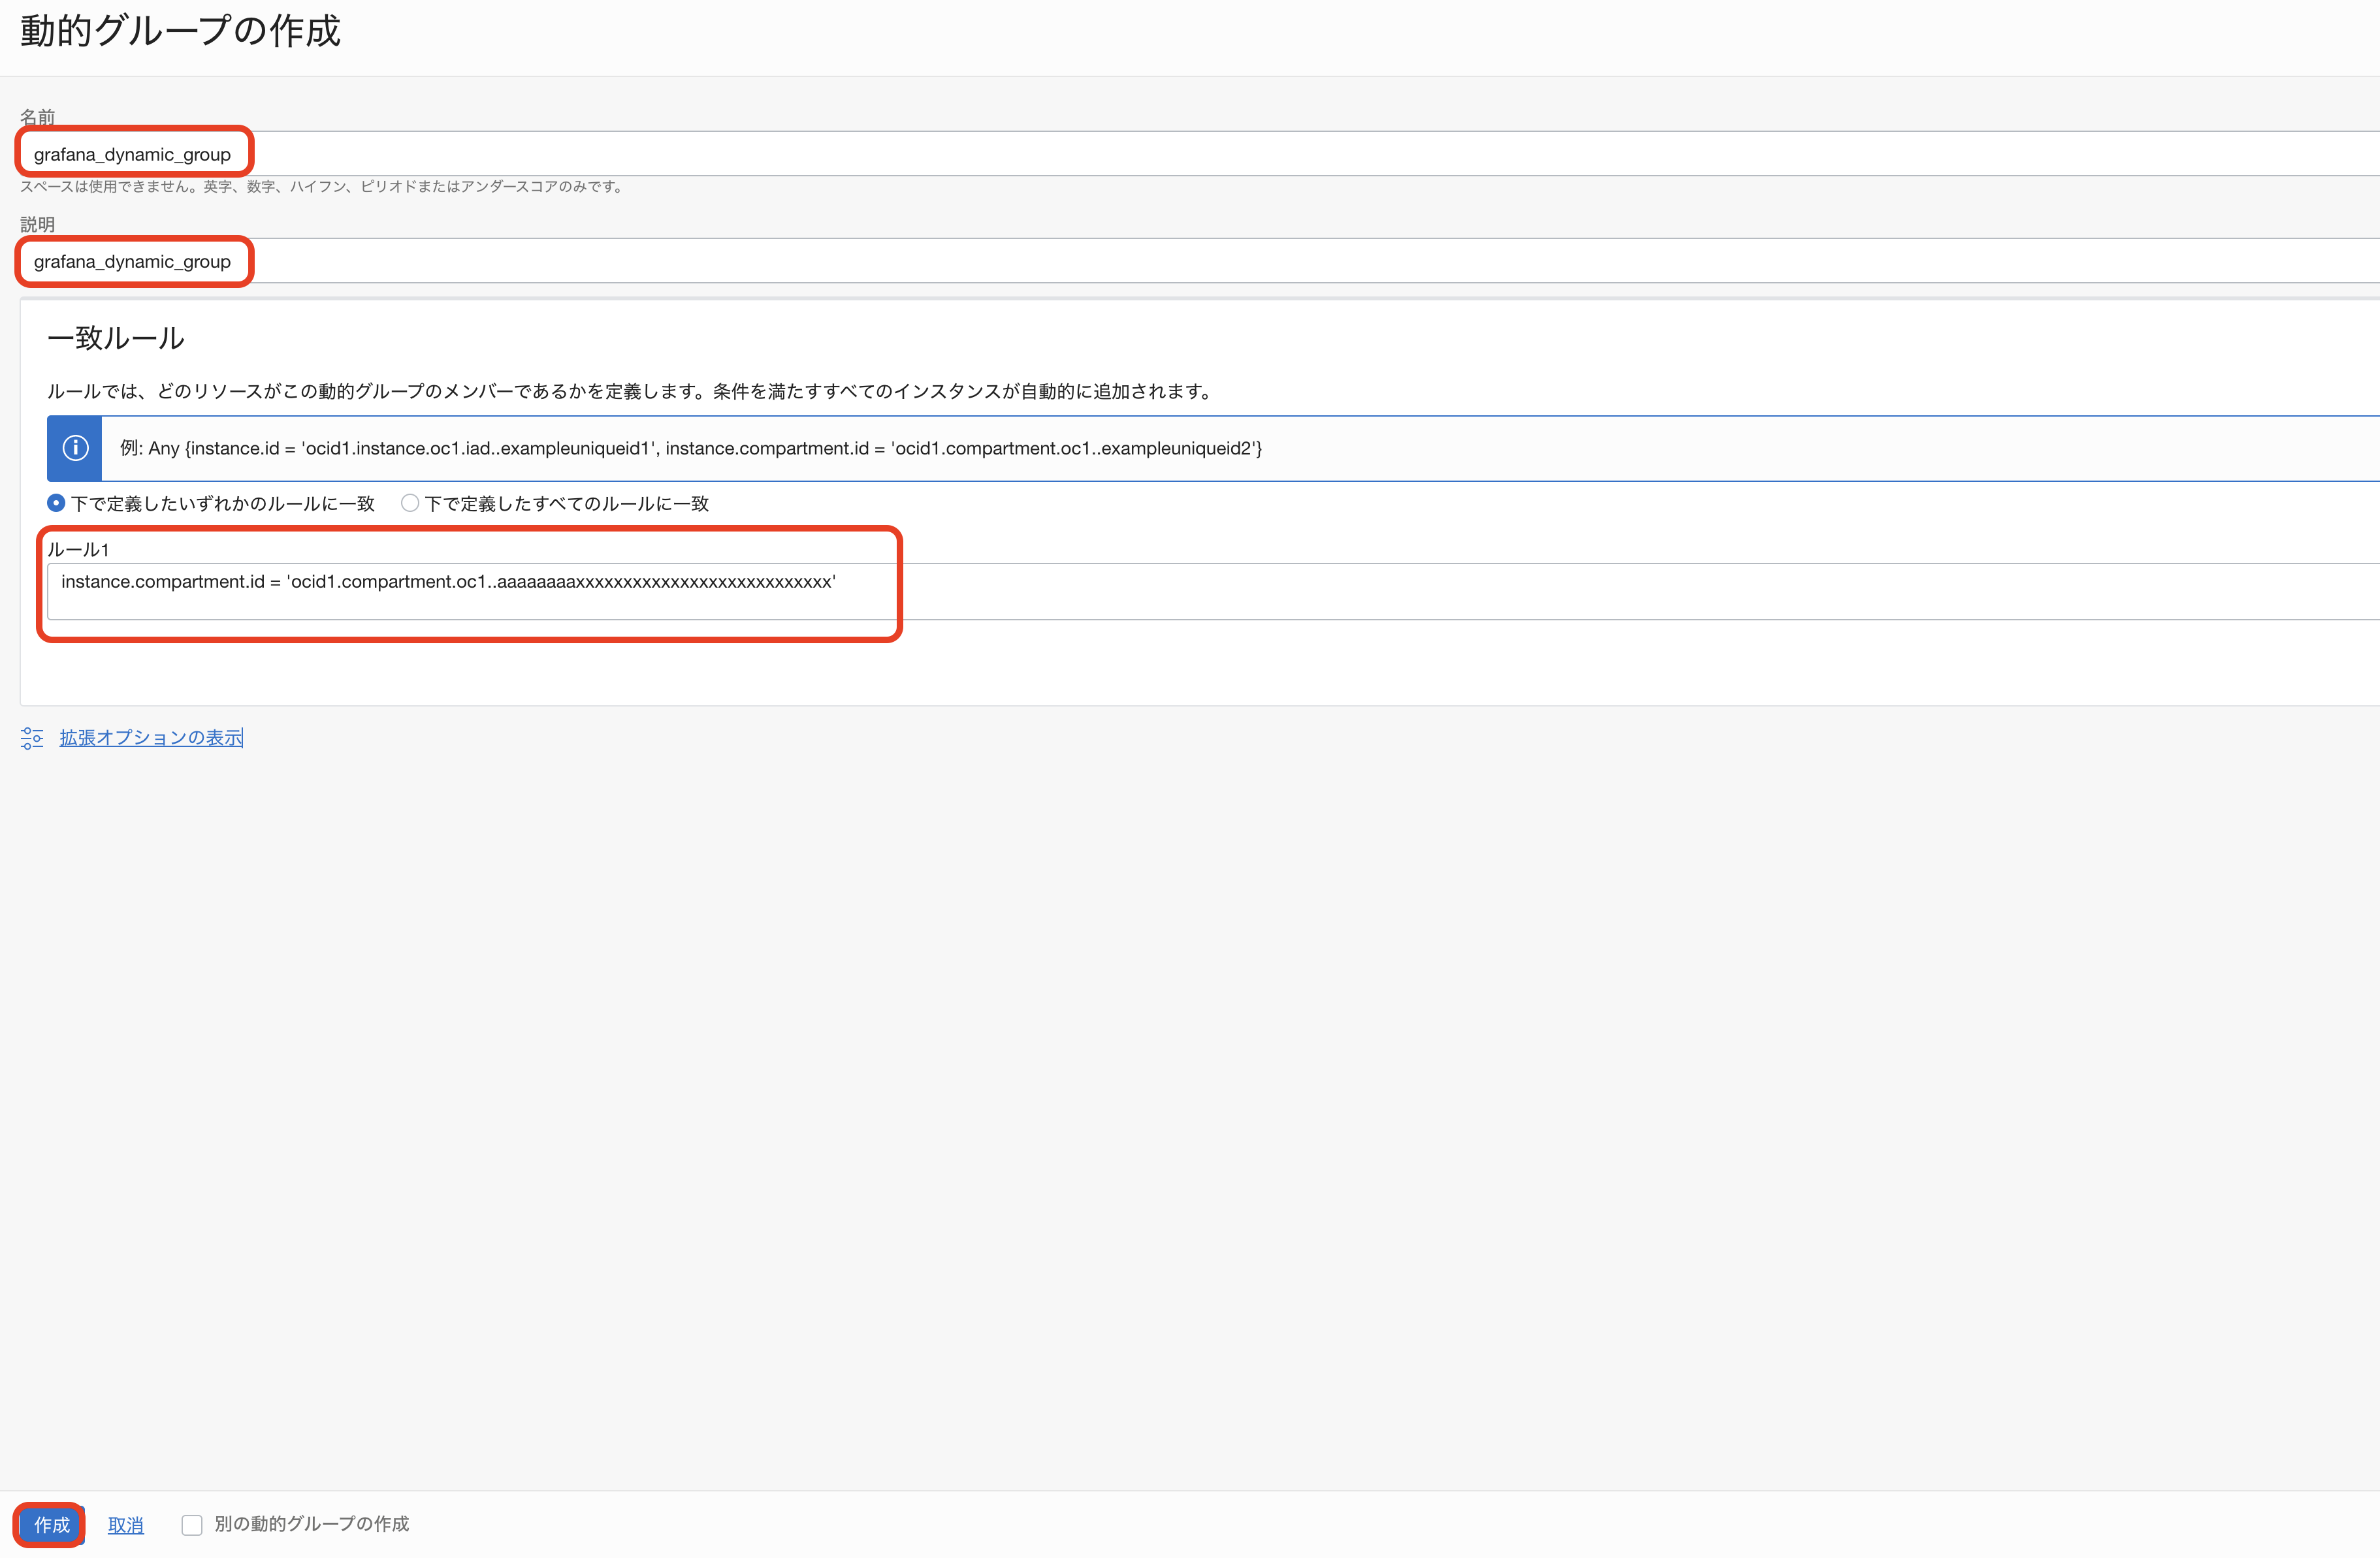
画像はイメージですので、コンパートメントOCIDはご自身の環境に合わせて読み替えてください。
「作成」をクリックします。
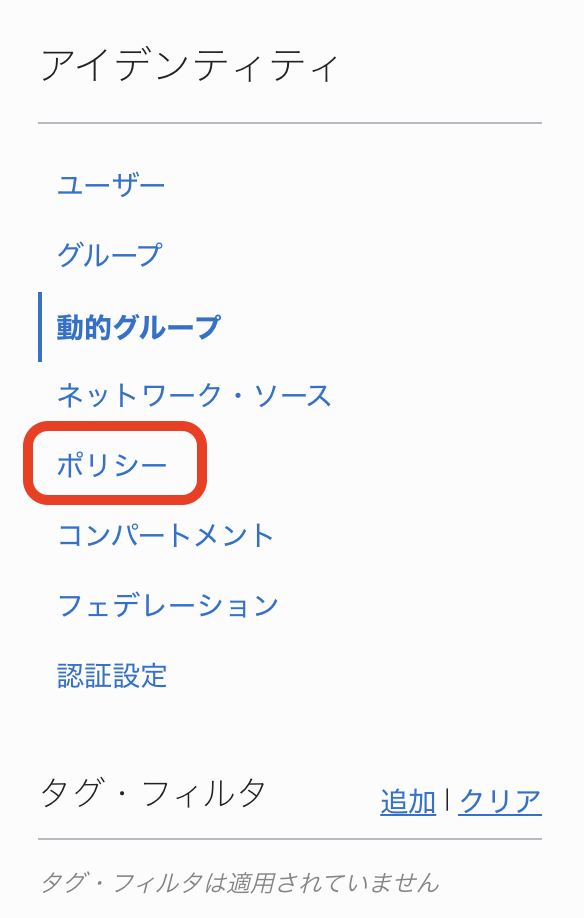
次に画面左側にあるメニューから「ポリシー」をクリックします。
「ポリシーの作成」をクリックします。
以下の情報を入力します。
また、「手動エディタの表示」にチェックを入れます。
| key | value |
|---|---|
| 名前 | osok_policy |
| 説明 | osok_policy |
| コンパートメント | ご自身のコンパートメント名 |
| ポリシー | Allow dynamic-group osok_dynamic_group to manage autonomous-database in compartment id <ご自身のコンパートメントOCID> |
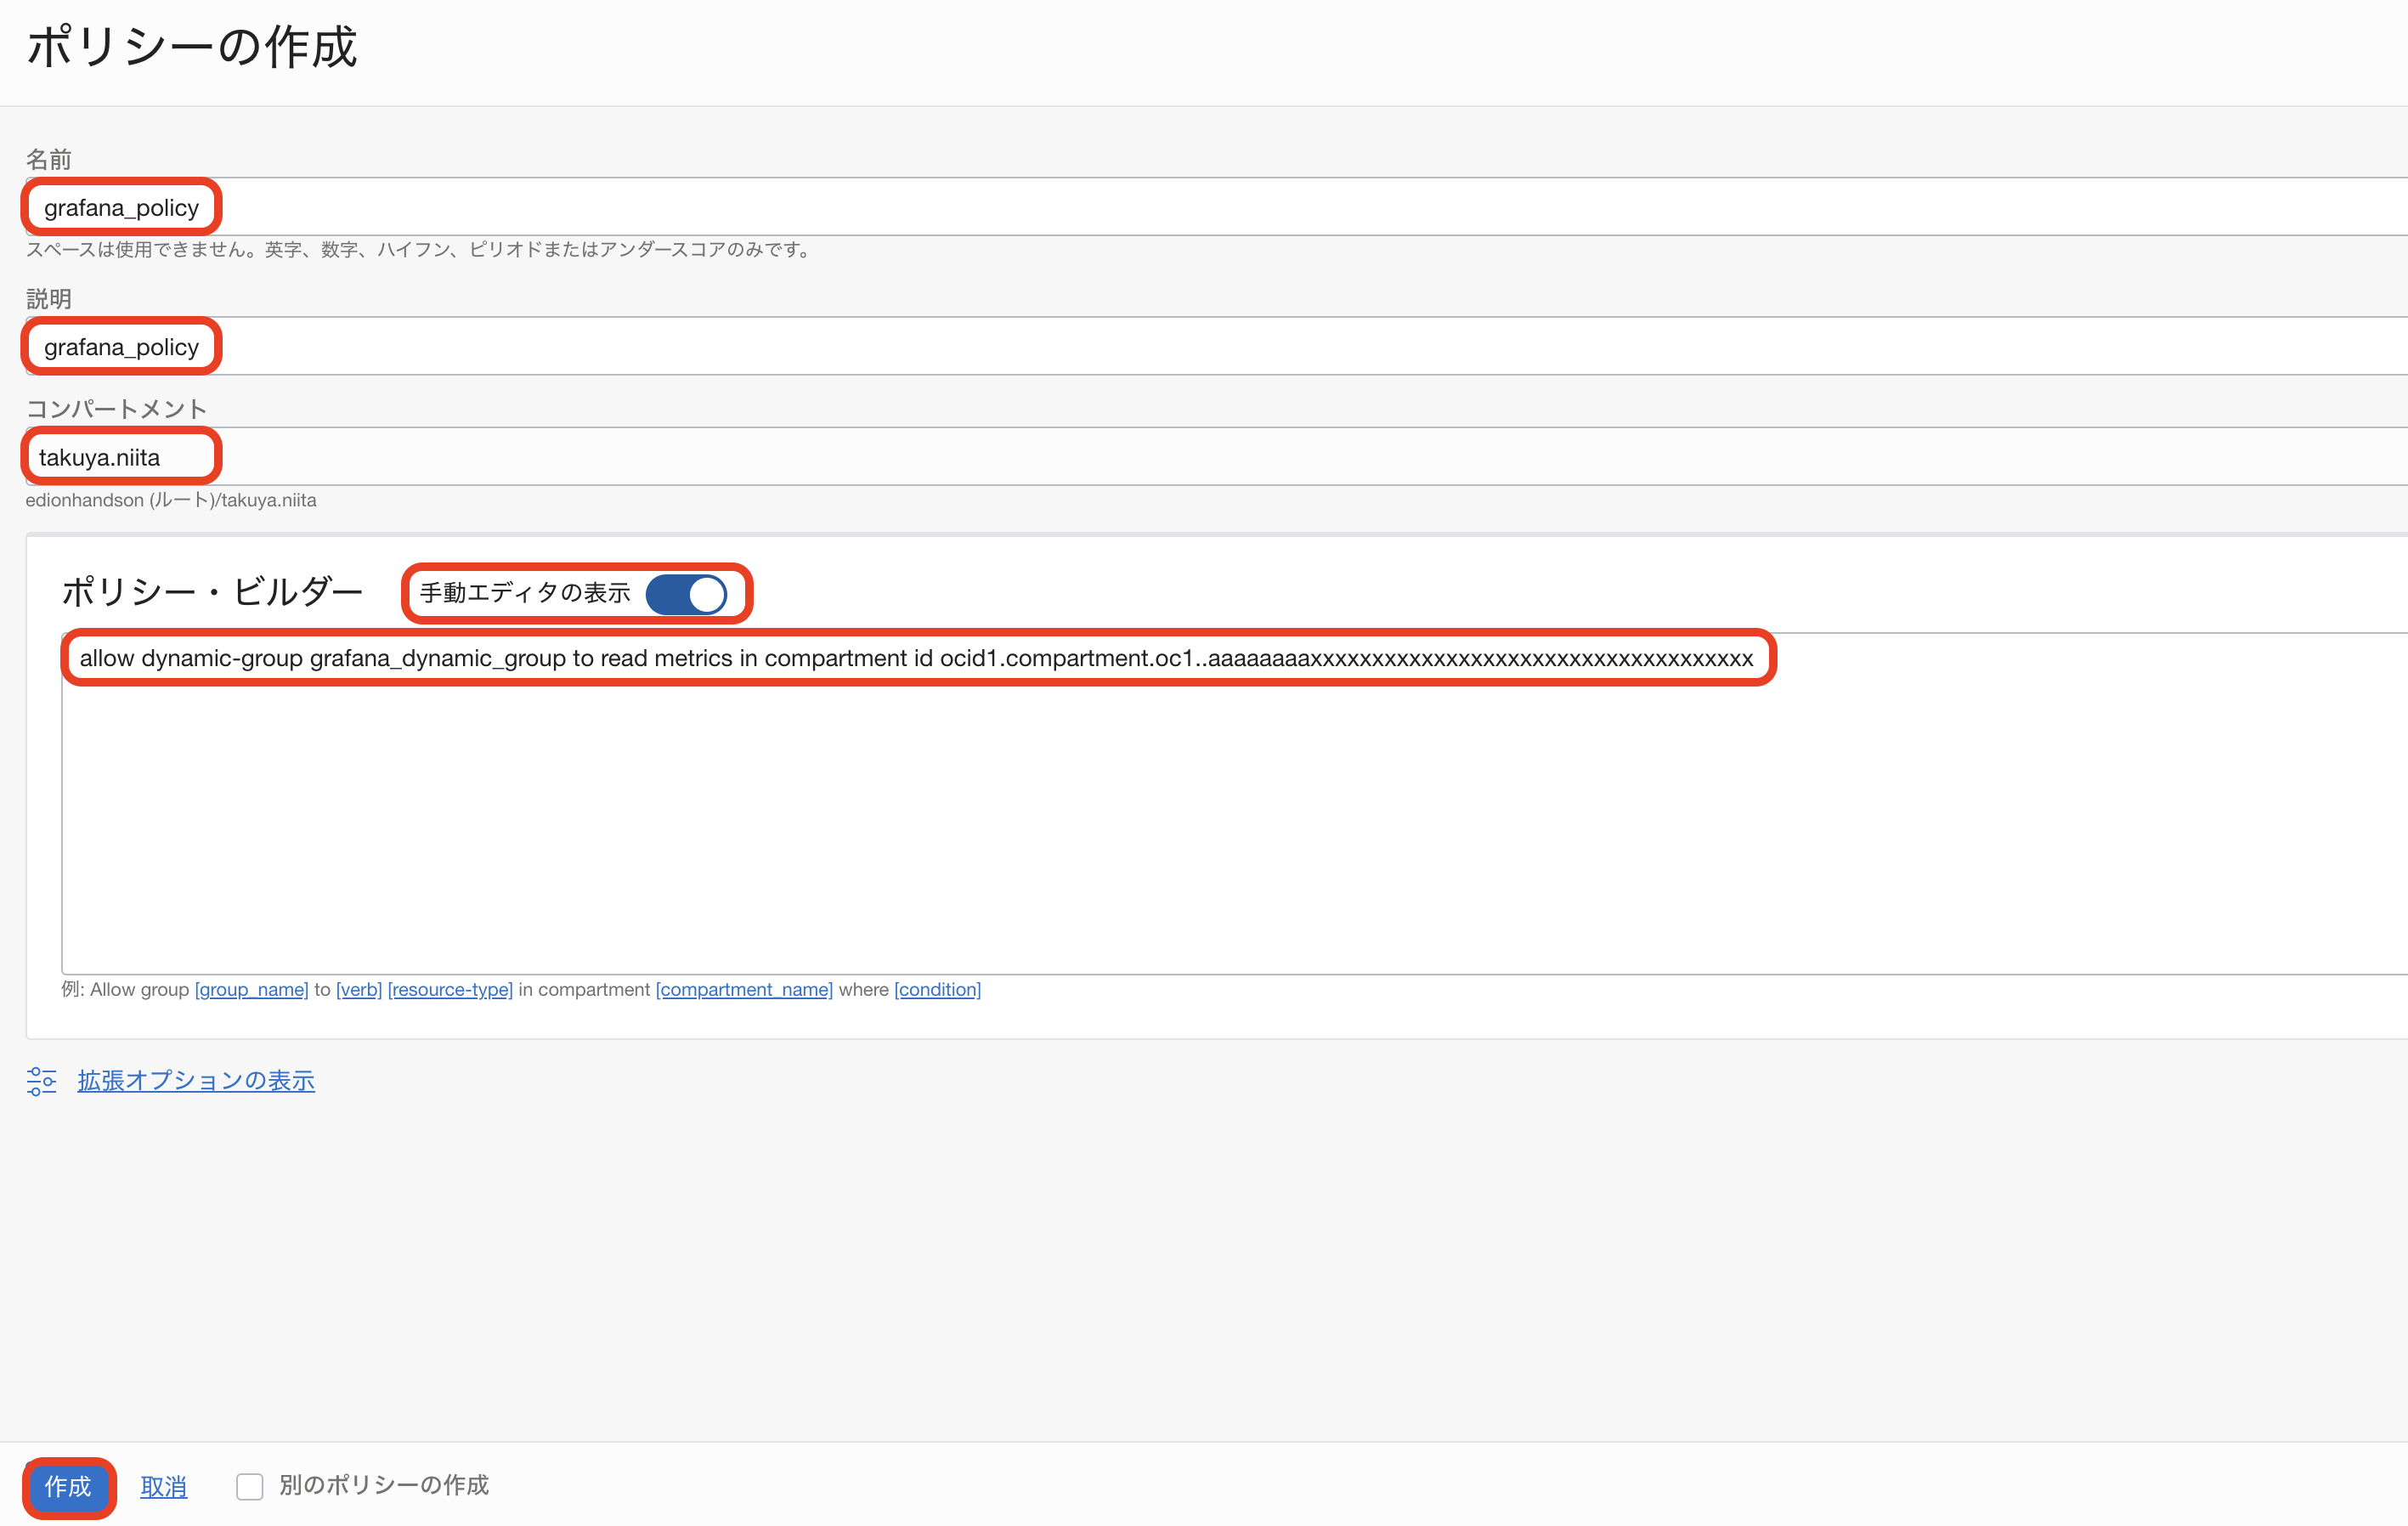
画像はイメージですので、コンパートメントOCIDはご自身の環境に合わせて読み替えてください。
「作成」をクリックします。
これで、動的グループとポリシーの設定は完了です。
ATPのプロビジョニング
いよいよ、ATPをプロビジョニングしていきます。
まずは、以下のコマンドを実行してOKEに対してOSOK Operatorのインストールを行います。
./operator-sdk run bundle iad.ocir.io/oracle/oci-service-operator-bundle:1.0.0
以下のように出力されれば問題ありません。
INFO[0016] Successfully created registry pod: iad-ocir-io-oracle-oci-service-operator-bundle-1-0-0
INFO[0017] Created CatalogSource: oci-service-operator-catalog
INFO[0018] OperatorGroup "operator-sdk-og" created
INFO[0019] Created Subscription: oci-service-operator-v1-0-0-sub
INFO[0023] Approved InstallPlan install-bgmnh for the Subscription: oci-service-operator-v1-0-0-sub
INFO[0023] Waiting for ClusterServiceVersion "default/oci-service-operator.v1.0.0" to reach 'Succeeded' phase
INFO[0024]   Waiting for ClusterServiceVersion "default/oci-service-operator.v1.0.0" to appear
INFO[0045]   Found ClusterServiceVersion "default/oci-service-operator.v1.0.0" phase: InstallReady
INFO[0046]   Found ClusterServiceVersion "default/oci-service-operator.v1.0.0" phase: Installing
INFO[0070]   Found ClusterServiceVersion "default/oci-service-operator.v1.0.0" phase: Succeeded
INFO[0070] OLM has successfully installed "oci-service-operator.v1.0.0"
次に、ATPの管理者パスワードをSecretリソースとして作成します。
今回は"osok__sample12345"としてパスワードを作成します。
kubectl create secret generic admin-passwd --from-literal=password=osok__sample12345
次にWalletファイルのパスワードをSecretリソースとして作成します。
今回は管理者パスワードと同じ"osok__sample12345"としてパスワードを作成します。
kubectl create secret generic wallet-passwd --from-literal=walletpassword=osok__sample12345
次にATPをプロビジョニングするためのManifestを作成します。
今回は以下のようなManifestを用意しました。
各フィールドはOCIコンソールで指定できるパラメータとほとんど同じです。
もちろん、これはユースケースに応じて柔軟に変更することができます。
apiVersion: oci.oracle.com/v1beta1
kind: AutonomousDatabases
metadata:
  name: oke-atp-handson
spec:
  compartmentId: <ご自身のコンパートメントOCID>
  displayName: oke-atp-handson-db
  dbName: oke-atp-handson-db
  dbWorkload: OLTP
  isDedicated: false
  dbVersion: 19c
  dataStorageSizeInTBs: 1
  cpuCoreCount: 1
  adminPassword:
    secret:
      secretName: admin-passwd
  isAutoScalingEnabled: true
  isFreeTier: false
  licenseModel: LICENSE_INCLUDED
  wallet:
    walletName: oke-atp-handson-wallet
    walletPassword:
      secret:
        secretName: wallet-passwd
<ご自身のコンパートメントOCID>の部分をご自身のコンパートメントOCIDに置き換えてください。
OKEに対してManifestを適用します。
kubectl apply -f atp.yaml
以下のコマンドを実行すると、状況が確認できます。
statusがActiveになるまでしばらくかかるので待機します。
kubectl get autonomousdatabase
以下のように出力されればプロビジョニングは完了です。
NAME              DBWORKLOAD   STATUS   AGE
oke-atp-handson   OLTP         Active   4m25s
以上で、OSOKを利用したATPのプロビジョニングは完了です!
まとめ
このように、OSOKを利用すると、Kubernetes API(Operator)の仕組みを利用して、OCI上のリソースをManifestベースで操作することができます。
簡単に試せると思うので、皆さんもぜひ使ってみてください!!
参考資料