はじめに
Vuetifyで横にアイテムを並べたい。
並べたアイテムをウィンドウサイズに合わせて、置く個数を調整したい。(置くアイテムが多いので複数行必要)
上記が簡単にできないか調べていたが、見つからなかったので作成した。
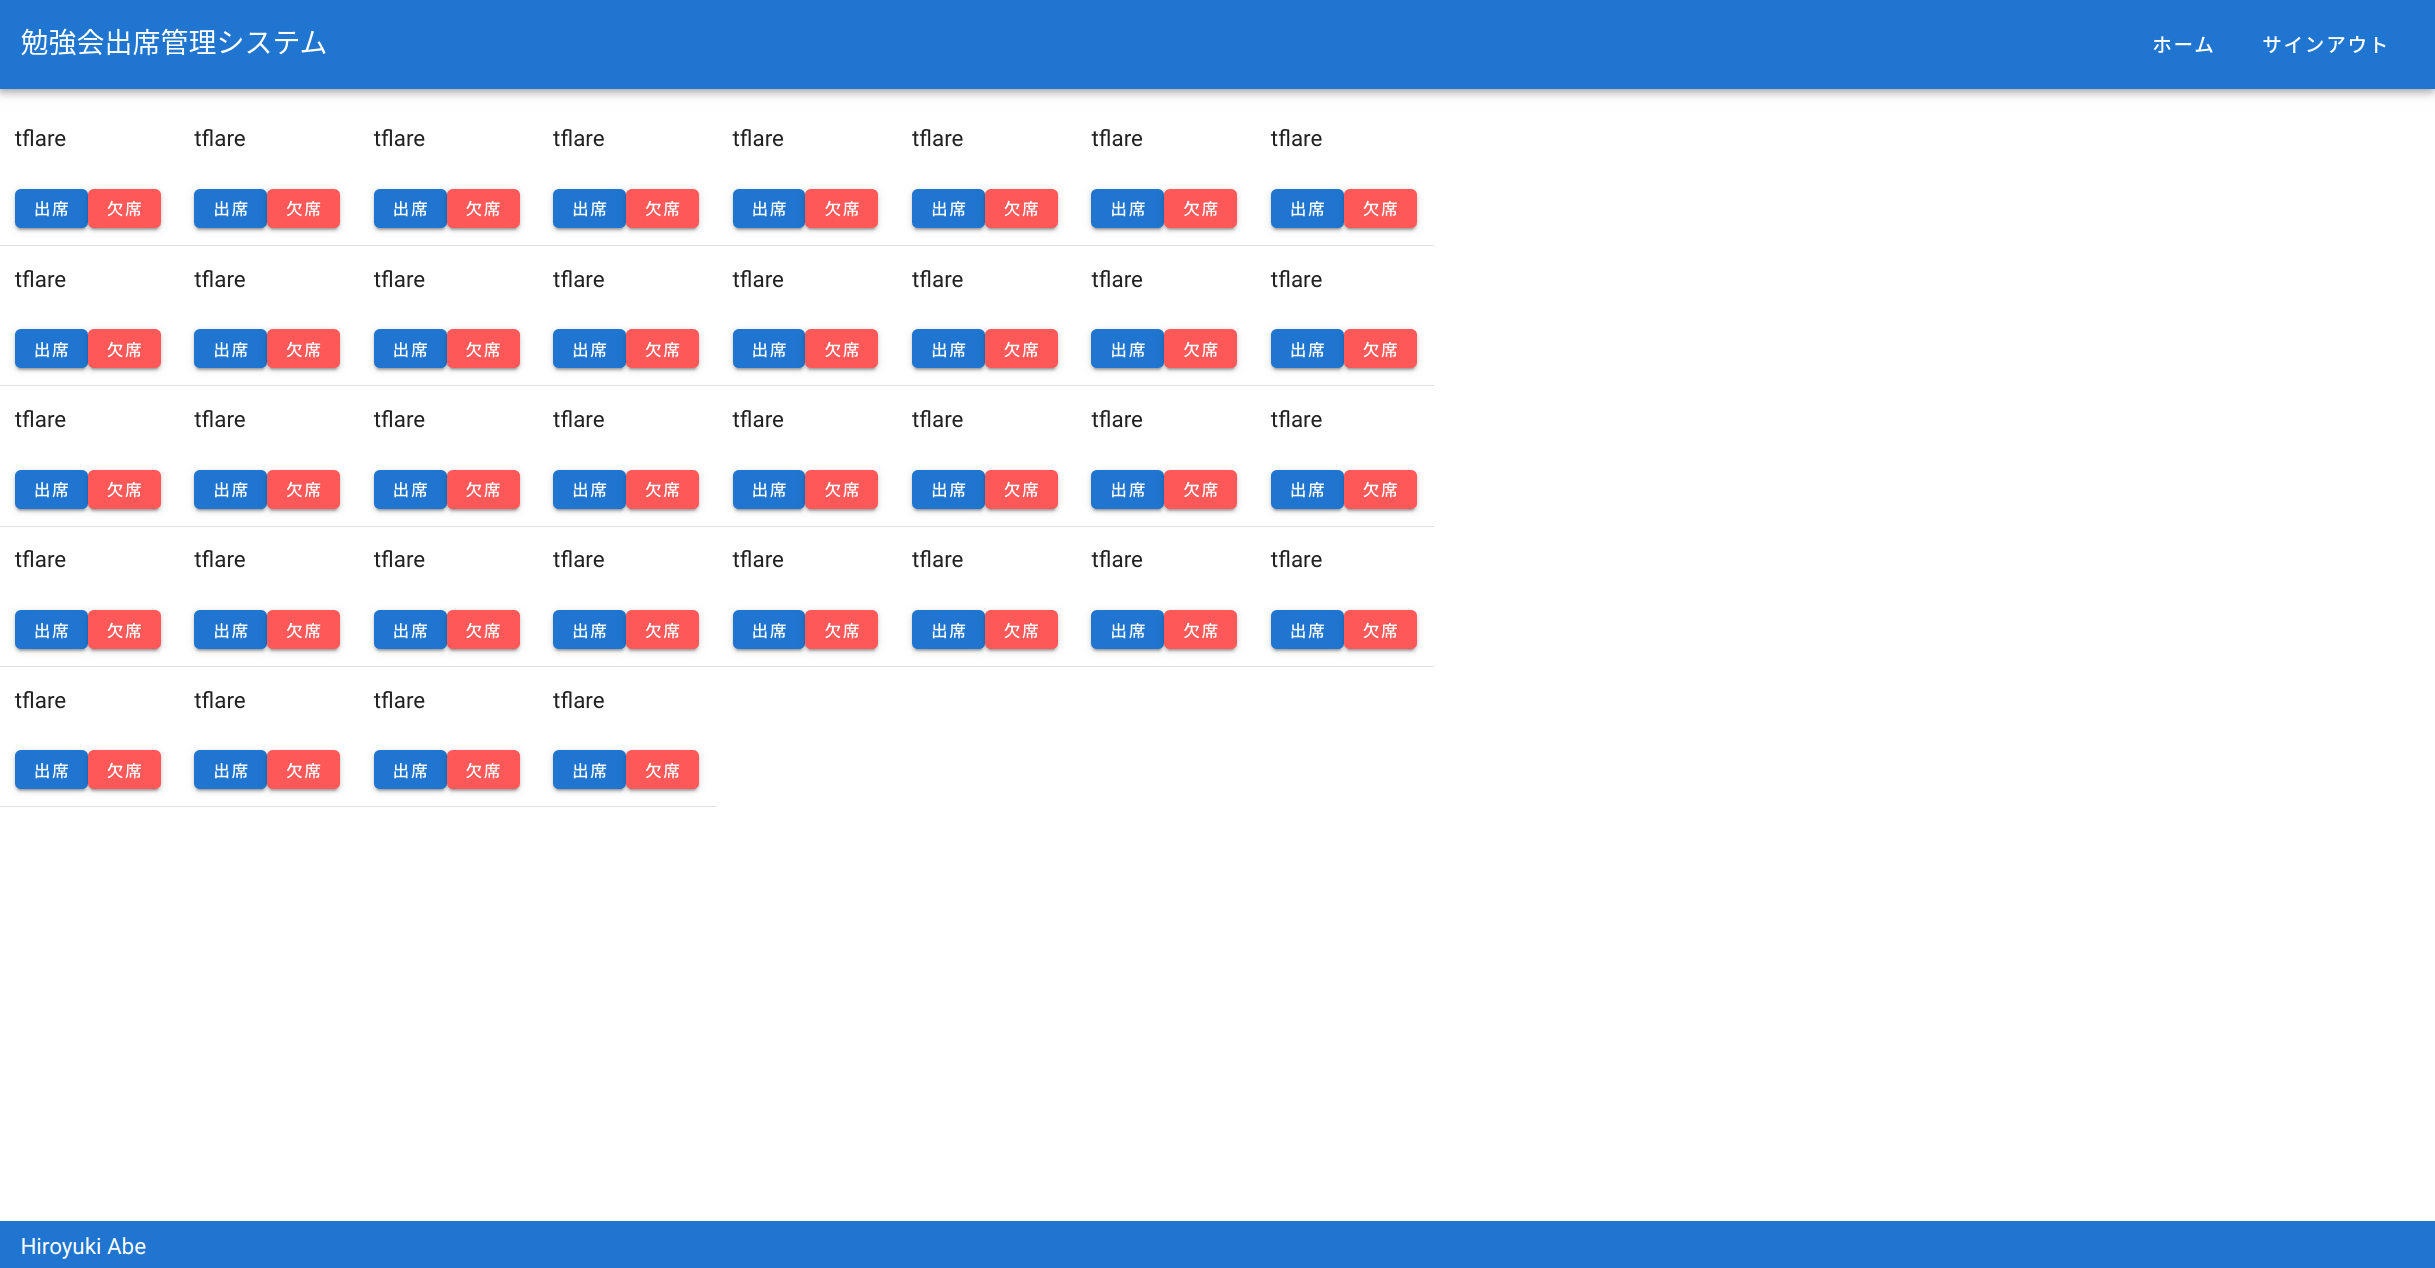
対応後の画面
*本来は色々なIDが表示されますが、サンプルのため私のID(tflare)にしています。
*この画面は作成中で、他の箇所が完成していません。
やったことを一言で言うと
ウインドウサイズを見て(Breakpointを使用)、1行に置くアイテムの数を決め、
グリッドシステムの行定義と列定義の両方でループをうまくやった。
Breakpointsの説明はVuetify.jsの該当ページ参照
環境
"firebase": "^7.8.1",
"vue": "^2.6.10",
"vue-router": "^3.1.3",
"vuefire": "^2.2.1",
"vuetify": "^2.1.0"
全コードはこちら
コードの全体を見たい方はGithubか当ページの一番下を参照ください。
以下では分割して説明いたします。
Vueテンプレート部分
<template>
  <v-container fluid>
    <v-row v-for="(row, key) in rowCount" :key="key">
      <div v-for="(attendance, key2) in itemCountInRow(row)" :key="key2">
        <v-col>{{attendance.userID}}</v-col>
        <v-col><v-btn small color="primary">出席</v-btn><v-btn small color="error">欠席</v-btn></v-col>
        <v-divider/>
      </div>
    </v-row>
  </v-container>
</template>
以下からコードを分割して説明していきます。
v-container
グリッドシステムの全体定義
これから出てくるv-row(行定義)、v-col(列定義)の関係は以下の図の通りです。

fluidなしだと、中央に配置されますが、fluidありだと、それがなくなります。
v-row
グリッドシステムの行定義
レイアウトを定義する都合上、行数を計算します。
例を出すと、20個表示するアイテムがあり、1行10列の場合、2行になります。
20個表示するアイテムがあり、1行9列の場合、3行になります。
つまり、以下で行数が定義できます。
表示するアイテムの全体数 ÷ 1行に表示するアイテム = 行数(小数点以下があった場合は繰り上げ)
コードの該当箇所は以下
      rowCount:function(){
        return Math.ceil(this.attendances.length / this.colNumber);
      },
    },
v-col
グリッドシステムの列(カラム)定義
レイアウトを定義する都合上、アイテムのどこからどこまでを表示するのか計算します。
例を出すと、20個表示するアイテムがあり、1行10列の場合、
1列目は1個目から10個目まで表示すればよい
2列目は11個目から20個目まで表示すればよい
1行目は0から始まる(Array.prototype.slice([begin[, end]])のbeginは0 から始まるインデックス0)
2行目は列数から始まる 3行目は列数×2から始まる
これを数式にすると以下になる。
(行数-1) × 列数
列定義(終了)は単純に行数×列数で定義できます。
Array.prototype.slice([begin[, end]])にendが指定されたときは、slice は end 自体は含めず、その直前まで取り出すためです。
行数×列数
列定義(開始)と列定義(終了)をコードにすると
    methods:{
      itemCountInRow:function(row){
        return this.attendances.slice((row - 1) * this.colNumber, row * this.colNumber)
      }
    }
  }
ウィンドウサイズ毎の列数設定(Breakpointsを使用)
    computed: {
      colNumber: function() {
        let number;
        switch (this.$vuetify.breakpoint.name) {
          case 'xs': number = 2; break;
          case 'sm': number = 4; break;
          case 'md': number = 6; break;
          case 'lg': number = 8; break;
          case 'xl': number = 10; break;
        }
        return number;
      },
Breakpointsを利用して、ウィンドウサイズごとに1行に表示する列の数を決める。
Breakpointsを使用するとレスポンシブデザイン(PC、スマートフォンなど、異なるウインドウサイズでも表示できるようにするためのデザイン)が実現するのが楽になります。
5つのウインドウサイズが定義されており、またウインドウサイズの定義はカスタマイズもできます。
attendancesの定義
attendancesに表示対象のアイテム(配列)が定義されています。
今回の説明に関係するのはattendancesだけです。
<script>
  import firebase from 'firebase';

  export default {
    name: 'EventUser',
    data () {
      return {
        attendances: []
      }
    },

    firestore() {
      return {
        // firestoreのattendanceコレクションを参照
        attendances: firebase.firestore().collection('attendance').where("eventID", "==", Number(this.$route.params.eventID))

      }
    },
ソースコード全体
<template>
  <v-container fluid>
    <v-row v-for="(row, key) in rowCount" :key="key">
      <div v-for="(attendance, key2) in itemCountInRow(row)" :key="key2">
        <v-col>{{attendance.userID}}</v-col>
        <v-col><v-btn small color="primary">出席</v-btn><v-btn small color="error">欠席</v-btn></v-col>
        <v-divider/>
      </div>
    </v-row>
  </v-container>
</template>

<script>
  import firebase from 'firebase';

  export default {
    name: 'EventUser',

    data () {
      return {
        attendances: []
      }
    },

    firestore() {
      return {
        // firestoreのattendanceコレクションを参照
        attendances: firebase.firestore().collection('attendance').where("eventID", "==", Number(this.$route.params.eventID))

      }
    },

    computed: {
      colNumber: function() {
        let number;
        switch (this.$vuetify.breakpoint.name) {
          case 'xs': number = 2; break;
          case 'sm': number = 4; break;
          case 'md': number = 6; break;
          case 'lg': number = 8; break;
          case 'xl': number = 10; break;
        }
        return number;
      },

      rowCount:function(){
        return Math.ceil(this.attendances.length / this.colNumber);
      },
    },

    methods:{
      itemCountInRow:function(row){
        return this.attendances.slice((row - 1) * this.colNumber, row * this.colNumber)
      }
    }
  }

</script>
参考
https://jsfiddle.net/z11fe07p/421/
rowCountとitemCountInRowは上記を参考にしています。
感想
もっと簡単にできる方法があるのではないかと考えています。
なにかありましたらコメントをお願いいたします。
