目的
- Tensorflow.js の object detection model を試す。
- Three.js を使ってみる。
参照
Three.js のサンプル
index.js
let fs = require('fs')
let express = require('express');
let app = express()

app.use(express.static('public'));

app.get('/', (request, response) => {
    fs.readFile('./index.html', 'UTF-8',
               (error, data) => {
        response.send(data);
    })
})

app.listen(3000, () => {
    console.log('Start server.')
})
index.html
<!DOCTYPE html>
<html>
<head>
  <meta charset="utf-8"/>
  <script src="https://cdnjs.cloudflare.com/ajax/libs/three.js/101/three.min.js"></script>
</head>
<body>
  <h2>AR</h2>
  <button id="camera-button">Camera</button>
  <button id="start-button">Start</button>
  <button id="stop-button">Stop</button><br><br>
  <video id="video" width="360" height="270"></video><br><br>
  <img id="img" src="./img/test1.jpg" width="360", height="270"><br><br>
  <canvas id="canvas" width="360" height="270"></canvas><br>

  <script>
    const cameraButton = document.getElementById('camera-button');
    cameraButton.onclick = () => {
      startWebcam();
    }

    const startButton = document.getElementById('start-button')
    startButton.onclick = () => {
      start();
    }

    const stopButton = document.getElementById('stop-button')
    stopButton.onclick = () => {
      console.log('test');
      location.reload();
    }

    const video = document.getElementById('video');
    function startWebcam() {
      console.log("video streaming start.");

      navigator.mediaDevices.getUserMedia({
        audio: false,
        video: true
      })
      .then((stream) => {
        video.srcObject = stream;
        video.play();
        })
      .catch(err => alert(err));
    }

    const img = document.getElementById('img');
    const canvas = document.getElementById('canvas');
    function start() {
      const scene = new THREE.Scene();

      const width  = 360;
      const height = 270;
      const fov    = 45;
      const aspect = width / height;
      const near   = 0.1;
      const far    = 1000;
      const camera = new THREE.PerspectiveCamera(fov, aspect, near, far);
      camera.position.set(0, 0, 200);

      const renderer = new THREE.WebGLRenderer();
      renderer.setSize(width, height);
      document.body.appendChild(renderer.domElement);

      const directionalLight = new THREE.DirectionalLight('white');
      directionalLight.position.set(1, 1, 1);
      scene.add(directionalLight);

      var geometry = new THREE.PlaneGeometry(width, height);
      //const texture = new THREE.TextureLoader().load( './img/test1.jpg' );
      //const texture = new THREE.TextureLoader().load( img.src );

      //var texture = new THREE.VideoTexture( video );

      const context = canvas.getContext('2d');
      context.width  = 360;
      context.height = 270;
      context.drawImage(video, 0, 0, 360, 270);
      const texture = new THREE.CanvasTexture( canvas );

      var material = new THREE.MeshBasicMaterial( { map: texture } );

      const mesh1 = new THREE.Mesh(geometry, material);
      mesh1.position.set(0, 0, -120)
      scene.add(mesh1);

      var geometry = new THREE.CircleGeometry( 10, 20, 0, Math.PI * 2 );
      var material = new THREE.MeshBasicMaterial( {color: 'gold'} );
      const mesh2 = new THREE.Mesh( geometry, material );
      mesh2.position.set(50, 0, 0)
      scene.add(mesh2);

      function animate() {
        mesh2.rotation.y += 0.08;
        renderer.render(scene, camera);

        requestAnimationFrame(animate);
      }

      animate();
    }

  </script>
</body>
Coco SSD のサンプル
index.html
<!DOCTYPE html>
<html>
<head>
  <meta charset="utf-8"/>
  <script src="https://cdnjs.cloudflare.com/ajax/libs/three.js/101/three.min.js"></script>
  <script src="https://cdn.jsdelivr.net/npm/@tensorflow/tfjs"></script>
  <script src="https://cdn.jsdelivr.net/npm/@tensorflow-models/coco-ssd"> </script>
</head>
<body>
  <h2>AR</h2>
  <button id="camera-button">Camera</button>
  <button id="start-button">Start</button>
  <button id="stop-button">Stop</button><br><br>
  <video id="video" width="360" height="270"></video><br><br>

  <script>
    let modelPromise;
    const baseModel = 'lite_mobilenet_v2';
    window.onload = async () => {
      modelPromise = await cocoSsd.load(baseModel);
      console.log('model loaded.');
    }

    const cameraButton = document.getElementById('camera-button');
    cameraButton.onclick = () => {
      startWebcam();
    }

    let timeStart;
    const startButton = document.getElementById('start-button')
    startButton.onclick = () => {
      timeStart = Date.now();
      setInterval(ar, 1000/4);
      //ar();
    }

    const stopButton = document.getElementById('stop-button')
    stopButton.onclick = () => {
      location.reload();
    }

    const video = document.getElementById('video');
    function startWebcam() {
      console.log("video streaming start.");

      navigator.mediaDevices.getUserMedia({
        audio: false,
        video: true
      })
      .then((stream) => {
        video.srcObject = stream;
        video.play();
        })
      .catch(err => alert(err));
    }

    const canvas = document.createElement('canvas');
    canvas.width = 360;
    canvas.height = 270;

    let isFirst = true;
    async function ar() {
      const scene = new THREE.Scene();

      const width  = 360;
      const height = 270;
      const fov    = 45;
      const aspect = width / height;
      const near   = 0.1;
      const far    = 1000;
      const camera = new THREE.PerspectiveCamera(fov, aspect, near, far);
      camera.position.set(0, 0, 200);

      const directionalLight = new THREE.DirectionalLight('white');
      directionalLight.position.set(1, 1, 1);
      scene.add(directionalLight);

      let geometry = new THREE.PlaneGeometry(width, height);
      const context = canvas.getContext('2d');
      context.width  = 360;
      context.height = 270;
      context.drawImage(video, 0, 0, 360, 270);
      const texture = new THREE.CanvasTexture( canvas );
      let material = new THREE.MeshBasicMaterial( { map: texture } );
      const mesh1 = new THREE.Mesh(geometry, material);
      mesh1.position.set(0, 0, -120)
      scene.add(mesh1);

      const model = await modelPromise;
      console.time('detection');
      const results = await model.detect(video);
      console.timeEnd('detection');
      console.log(results);

      let x, y, area, z;
      for (let i = 0; i < results.length; i++) {
        if (results[i].class == 'cell phone' || results[i].class == 'laptop') {
          console.log('yes');

          x = results[i].bbox[0] + Math.floor(results[i].bbox[2]/2);
          y = results[i].bbox[1] + Math.floor(results[i].bbox[3]/2);
          area = results[i].bbox[2] * results[i].bbox[3]
          z = Math.floor(200 * (area / 40000 - 0.5));

          console.log(x);
          console.log(y);
          console.log(area);
          geometry = new THREE.CubeGeometry(15, 15, 15);
          material = new THREE.MeshPhongMaterial({color: 'gold'});
          const mesh2 = new THREE.Mesh(geometry, material);
          mesh2.position.set(x-180, 120-y, z);
          scene.add(mesh2);

          let timeCurrent = Date.now();
          let increment = timeCurrent - timeStart;

          mesh2.rotation.y += increment / 500;
        }
      }

      const renderer = new THREE.WebGLRenderer();
      renderer.setSize(width, height);

      if (!isFirst) {
        let lastChild = document.body.lastChild;
        lastChild.remove();
      }
      isFirst = false;

      document.body.appendChild(renderer.domElement);
      renderer.render(scene, camera);
    }

  </script>
</body>
</html>
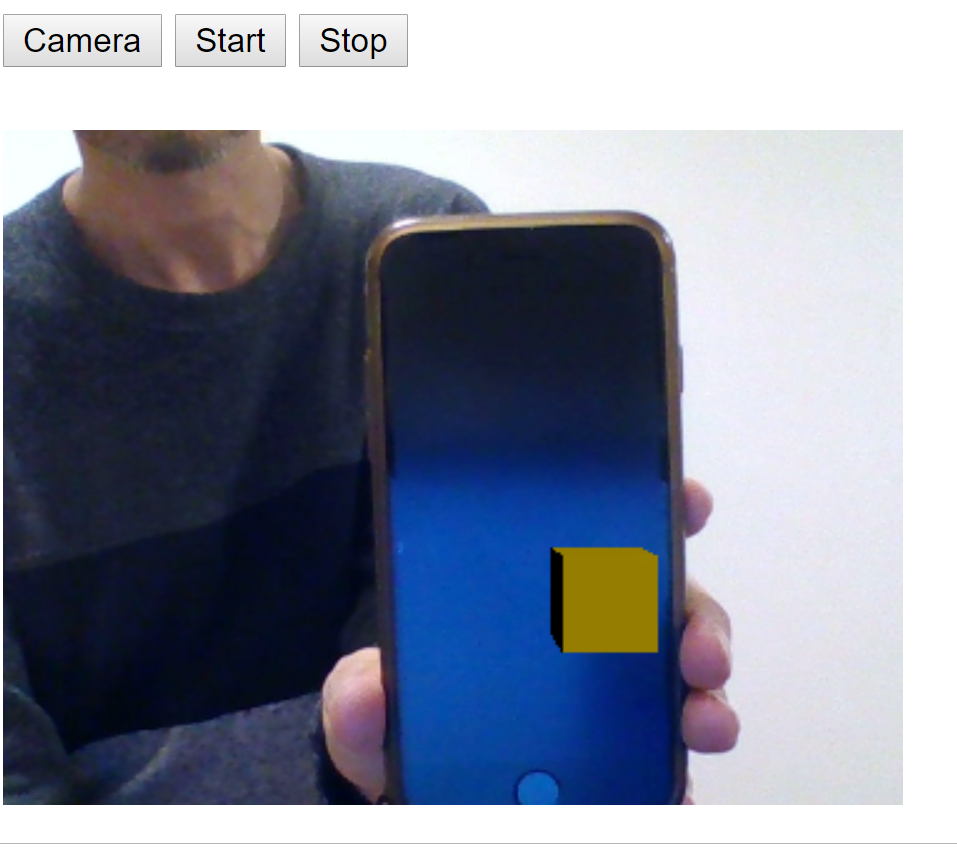
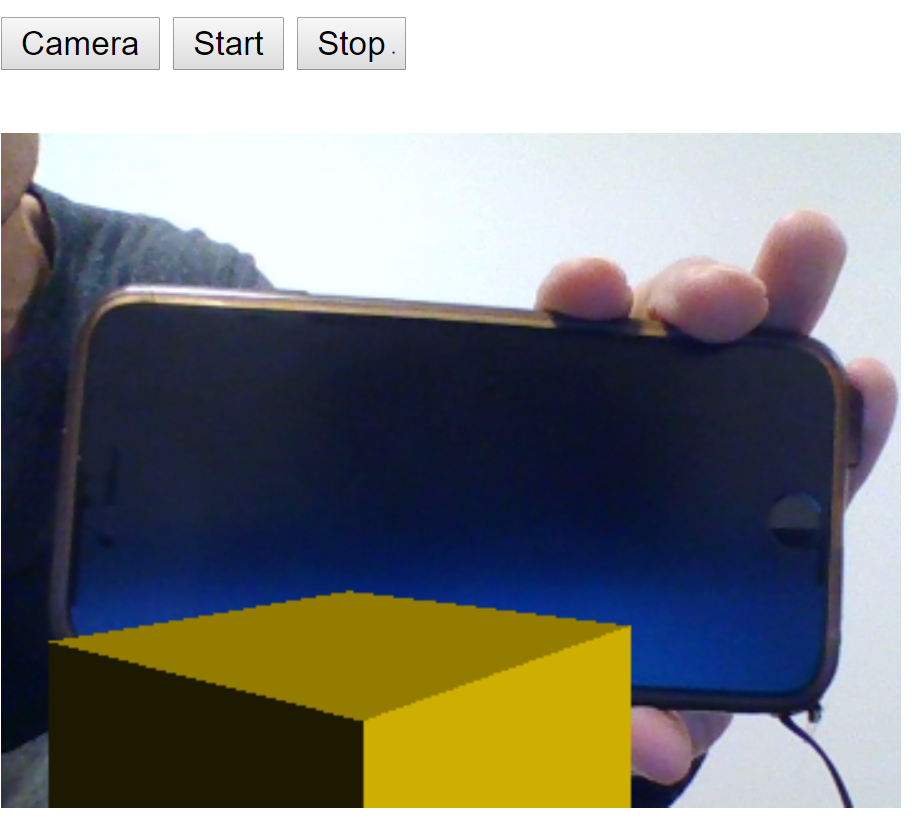
動作確認